background image

16

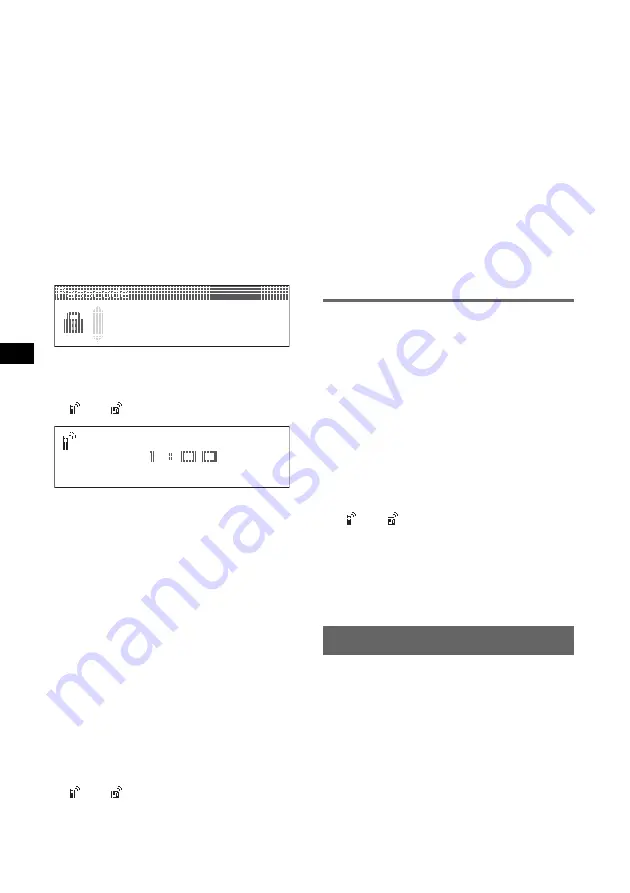
The process of searching for a connectable 
device begins, then the detected device 
name(s) appear in a list. If a device name 
cannot be received, “Unknown” will be 
displayed.
Search time varies depending on the number 
of Bluetooth devices.

3

Select the device to connect.

Pairing starts.

4

Input a passcode

*

.

Input the same passcode for this unit and the 
connecting device using the joystick or card 
remote commander. The passcode can be 
either your own selected number or the 
number determined by the connecting device.
For details, see the manual of the connecting 
device.

5

Press the joystick to confirm.

“Connected” appears and connection is 
complete.

” or “

” appears during connection.

*

Passcode may be called “passkey,” “PIN code,” “PIN 
number” or “Password,” etc., depending on the 
device.

Searching for this unit from a 
Bluetooth device

Check that “Visibility” in the Bluetooth Settings 
menu is set to “Show” (page 15).

1

Set the connecting device to search.

2

When “Allow Connection?” appears 
on this unit, select “yes.”

Connection starts.
Depending on the device, the passcode input 
display appears.

3

Input the passcode of the connecting 
device.

4

Press the joystick to confirm.

“Connected” appears and connection is 
complete.

” or “

” appears during connection.

Tip

The passcode can also be input with the number 
buttons of the card remote commander.

Notes

While connecting to a Bluetooth device, this unit 
cannot be detected from another device. To be 
detected, disconnect the current connection and 
search for this unit from another device.

Depending on the device, searching from this unit 
may not be possible. In this case, search for this unit 
from the connecting device.

If you search for this unit and the connecting device 
mutually at the same time, this unit will not recognize 
the connecting device.

It may take time to search or connect.

Depending on the device, the confirmation display of 
the connection appears before inputting the 
passcode.

The time limit for inputting the passcode differs 
depending on the device.

This unit can register up to 6 devices each for 
handsfree and audio devices.

This unit cannot be connected to a device that 
supports only HSP (Head Set Profile).

Connecting to registered devices

Devices are registered once paired and connected 
with this unit. You can select the registered 
device and connect it.

1

Press 

(Bluetooth)

.

The Bluetooth function menu appears.

2

Select “Connectivity” 

c

 “Handsfree 

Devices” or “Audio Devices.”

The list of registered devices appears.

3

Select the device to connect.

4

Select “Connect.”

“Connected” appears and connection is 
complete.

” or “

” appears during connection.

To stop the connection

Select “Disconnect” 

c

 “yes” in step 4.

Tip

Depending on the device, it may be possible to select 
this unit from the device, and then connect.

Handsfree talking

Check that this unit and the cellular phone are 
connected beforehand (page 15, 16).

Notes

For details on operation when a cellular phone with 
Bluetooth audio streaming function is connected as 
an audio device, see “Listening to music from an 
audio device” on page 18
.

The microphone of this unit is located on the rear of 
the front panel (page 10
). Do not mask the 
microphone with tape, etc.

Even if you activate the ATT function during a call, 
the outgoing sound will not be attenuated.

Содержание BluetoothH MEX-BT5100

Страница 1: ...n FR IT NL To cancel the demonstration Demo display see page 20 Zum Deaktivieren der Demo Anzeige Demo schlagen Sie bitte auf Seite 23 nach Pour annuler la démonstration Demo reportez vous à la page 22 Per annullare la dimostrazione Demo vedere pagina 23 Om de demonstratie Demo te annuleren zie pagina 22 Bluetooth Audio System Bluetooth Audio System ...

Страница 2: ...please contact your local Civic Office your household waste disposal service or the shop where you purchased the product Applicable accessory Remote commander R Manufactured under license from BBE Sound Inc Licensed by BBE Sound Inc under one or more of the following US patents 5510752 5736897 BBE and BBE symbol are registered trademarks of BBE Sound Inc BBE MP Minimized Polynomial Non Linear Satu...

Страница 3: ...tooth function 15 Configuring Bluetooth Settings 15 Pairing and connecting this unit with a Bluetooth device 15 Connecting to registered devices 16 Handsfree talking 16 Making calls 17 Receiving calls 17 Ending calls 17 Using the Phonebook 18 Using the Preset Dial 18 Music streaming 18 Listening to music from an audio device 18 Operating an audio device with this unit 18 Other settings 19 Setting ...

Страница 4: ...S Bluetooth function Handsfree talking with your cellular phone in the car Phonebook transfer from your cellular phone Music streaming from your cellular phone or portable audio device HFP 1 0 A2DP OPP and AVRCP profiles supported Sound adjustment EQ3 parametric You can choose any one of 7 preset equalizer curves and adjust as desired DSO Dynamic Soundstage Organizer creates a more ambient sound f...

Страница 5: ...tems electronic antiskid antilock braking systems electronic speed control systems or air bag systems For installation or service of this device please consult with the manufacturer or its representative of your car Faulty installation or service may be dangerous and may invalidate any warranty that may apply to this device Consult with the manufacturer of your car to ensure that the use of your c...

Страница 6: ...the volume level of each device When connecting to a portable audio device via the BUS AUDIO IN AUX IN terminal we recommend adjusting the volume level of the connected device or adjusting the volume level for the connected device in the Setup menu on this unit See Adjusting the volume level page 22 for a device connected to AUX IN Detaching the front panel You can detach the front panel of this u...

Страница 7: ...URCE on the unit or insert a disc to operate the unit Note Do not put anything on the inner surface of the front panel Inserting the disc in the unit 1 Press OPEN 2 Insert the disc label side up 3 Close the front panel Playback starts automatically Ejecting the disc 1 Press OPEN 2 Press Z The disc is ejected 3 Close the front panel c A B ...

Страница 8: ... Skip groups 3 albums 4 push Skip groups 3 albums 4 continuously push and hold Push left right to Skip tracks push Skip tracks continuously push then push again within about 2 seconds and hold Reverse fast forward a track push and hold Radio Push up down to Receive stored station Push left right to Tune in stations automatically push Find a station manually push and hold Press to Display the list ...

Страница 9: ...6 share the same functions as the number buttons on the unit qk M m buttons The same as pushing the joystick up down ql buttons The same as pushing the joystick left right w SCRL scroll button To scroll display item wa SOUND button To select sound items ws ATT attenuate button To attenuate the sound To cancel press again wd VOL volume buttons To adjust volume 1 When an MD changer is connected 2 If...

Страница 10: ... tracks push Reverse fast forward a track push and hold C Bluetooth button 15 16 17 19 To access the Bluetooth functions receive a call D MENU button 17 To enter menu receive a call E Display window F OFF button 17 To power off stop the source end or reject a call G CALL button 17 To access the telephone functions receive a call H Receptor for the card remote commander I Number buttons To call sto...

Страница 11: ...shing the joystick left right qj VOL volume buttons To adjust volume qk button 17 1 When an MD changer is connected 2 When a Bluetooth audio device supports AVRCP of Bluetooth technology is connected Depending on the device certain operations may not be available Note If the unit is turned off and the display disappears it cannot be operated with the card remote commander unless SOURCE on the unit...

Страница 12: ...ing automatically BTM 1 Press SOURCE repeatedly until TUNER appears To change the band press MODE repeatedly You can select from FM1 FM2 FM3 MW or LW 2 Press MENU 3 Push the joystick up down until Receive Mode appears then push it right 4 Push the joystick up down until BTM appears 5 Press the joystick The unit stores stations in order of frequency on the number buttons A beep sounds when the sett...

Страница 13: ...ions may be available RDS will not work if the signal strength is too weak or if the station you are tuned to is not transmitting RDS data Setting AF and TA 1 Press AF TA repeatedly until the desired setting appears Storing RDS stations with the AF and TA setting You can preset RDS stations along with the AF TA setting If you use the BTM function only RDS stations are stored with the same AF TA se...

Страница 14: ...ocal station is received Selecting PTY 1 Press PTY during FM reception The current programme type name appears if the station is transmitting PTY data 2 Push the joystick up down until the desired programme type appears 3 Press the joystick The unit starts to search for a station broadcasting the selected programme type Type of programmes Note You cannot use this function in countries regions wher...

Страница 15: ...luetooth devices see their respective manuals Pairing and connecting this unit with a Bluetooth device When connecting Bluetooth devices for the first time mutual registration is required This is called pairing This registration pairing is required only for the first time as this unit and the other devices will recognize each other automatically from the next time Depending on the device you may n...

Страница 16: ...n the device searching from this unit may not be possible In this case search for this unit from the connecting device If you search for this unit and the connecting device mutually at the same time this unit will not recognize the connecting device It may take time to search or connect Depending on the device the confirmation display of the connection appears before inputting the passcode The tim...

Страница 17: ...Bluetooth The phone call starts To reject a call Press OFF Tips If you set Auto Answer to on the phone call is automatically started in the set time page 19 If CALL is pressed during a call the handsfree function is deactivated and the microphone and speaker of the cellular phone are activated In this case the Bluetooth connection may become disconnected depending on the cellular phone Ending call...

Страница 18: ... cleared properly Changing a name in the phonebook 1 Select Phonebook c Contact List from the CALL menu 2 Select the name to change 3 Select Edit Name then input a new name Using the Preset Dial Storing the Preset Dial You can store a phone number in the phonebook to the Preset Dial 1 Select Preset Dial from the CALL menu 2 Select the preset number P1 P6 to store then select Preset Memory 3 Select...

Страница 19: ...stered devices appears 3 Select the device to delete 4 Select Delete c yes To clear all devices in the selection list select Delete All in step 4 Auto connection function If your car s ignition switch is set to the ACC position this unit reconnects automatically to the last connected Bluetooth device To Do this Skip tracks Push the joystick left right Reverse fast forward a track Push and hold the...

Страница 20: ...To turn the AUX source display on z or off page 22 Version To display the unit s firmware version Image To set various display images SpaceProducer z to create animated on screen patterns in time with the music off to not display any image All to step repeatedly through the display images in all display modes SA 1 5 to display the Spectrum Analyzer Movie 1 3 to display a movie Wallpaper 1 3 to dis...

Страница 21: ... 2 When MDLP disc is played Skipping albums and discs 1 During playback push the joystick up down BTM page 12 EQ3 Preset To select an equalizer type Xplod Vocal Edge Cruise Space Gravity Custom or Off z EQ3 Tune See Customizing the equalizer curve on page 21 DSO To select the DSO mode 1 2 3 or off z The larger the number the more enhanced the effect Balance To adjust the balance between the right ...

Страница 22: ...a changer use the optional AUX IN selector Selecting auxiliary equipment 1 Press SOURCE repeatedly until AUX appears Operate by the portable device itself Adjusting the volume level Be sure to adjust the volume for each connected audio device before playback 1 Turn down the volume on the unit 2 Press SOURCE repeatedly until AUX appears 3 Start playback of the portable audio device at a moderate vo...

Страница 23: ...ice or other soft drinks onto the unit or discs Notes on discs To keep a disc clean do not touch its surface Handle the disc by its edge Keep your discs in their cases or disc magazines when not in use Do not subject discs to heat high temperature Avoid leaving them in a parked car or on a dashboard rear tray Do not attach labels or use discs with sticky ink residue Such discs may stop spinning wh...

Страница 24: ...haracters Playback order of MP3 WMA files Notes When naming an MP3 file WMA file be sure to add the file extension mp3 wma to the file name During playback of a VBR variable bit rate MP3 WMA file or fast forward reverse elapsed playing time may not display accurately When the disc is recorded in Multi Session only the first track of the first session format is recognized and played any other forma...

Страница 25: ...reless technology is used but security may not be enough depending on the setting Be careful when communicating using Bluetooth wireless technology We do not take any responsibility for the leakage of information during Bluetooth communication Connection with all Bluetooth devices cannot be guaranteed A device featuring Bluetooth function is required to conform to the Bluetooth standard specified ...

Страница 26: ...any metal device Removing the unit 1 Remove the protection collar 1Detach the front panel page 15 2Pinch both edges of the protection collar then pull it out 2 Remove the unit 1Insert both release keys simultaneously until they click 2Pull the release keys to unseat the unit 3Slide the unit out of the mounting Specifications CD Player section Signal to noise ratio 120 dB Frequency response 10 20 0...

Страница 27: ...d remote commander RM X302 Parts for installation and connections 1 set Optional accessories equipment Rotary commander RM X4S BUS cable supplied with an RCA pin cord RC 61 1 m RC 62 2 m CD changer 10 discs CDX 757MX CD changer 6 discs CDX T70MX CDX T69 Source selector XA C40 AUX IN selector XA 300 Interface adaptor for iPod XA 120IP Your dealer may not handle some of the above listed accessories ...

Страница 28: ...e to start playback a disc recorded with a complicated tree structure a disc recorded in Multi Session a disc to which data can be added The ATRAC CD cannot play The disc is not created by authorized software such as SonicStage or SonicStage Simple Burner Tracks that are not included in the group cannot be played ID3 tag of the MP3 file is not displayed correctly Check the ID3 Tag setting page 20 ...

Страница 29: ...se E g If a window is open and road noise etc is loud shut the window If the air conditioner is loud lower the air conditioner The phone sound quality is poor Phone sound quality depends on reception conditions of cellular phone tMove your car to a place where you can enhance the cellular phone s signal if the reception is poor The volume of the connected audio device is low high Volume level will...

Страница 30: ...tion If the error indication remains on in the display consult your nearest Sony dealer Push Reset The CD unit and CD MD changer cannot be operated due to a problem tPress the RESET button page 6 Read The unit is reading all track and group information on the disc tWait until reading is complete and playback starts automatically Depending on the disc structure it may take more than a minute or Dur...

Страница 31: ...situation consult your nearest Sony dealer If you take the unit to be repaired because of CD playback trouble bring the disc that was used at the time the problem began Turn ON Bluetooth The Bluetooth setting is off tSet the Bluetooth setting to on ...

Страница 32: ...ieses Produkts schützen Sie die Umwelt und die Gesundheit Ihrer Mitmenschen Umwelt und Gesundheit werden durch falsches Entsorgen gefährdet Materialrecycling hilft den Verbrauch von Rohstoffen zu verringern Weitere Informationen über das Recycling dieses Produkts erhalten Sie von Ihrer Gemeinde den kommunalen Entsorgungsbetrieben oder dem Geschäft in dem Sie das Produkt gekauft haben Geeignetes Zu...

Страница 33: ...eren von Bluetooth Einstellungen 16 Pairing und Herstellen einer Verbindung mit einem Bluetooth Gerät 16 Herstellen einer Verbindung mit den registrierten Geräten 18 Freisprecheinrichtung 18 Tätigen von Anrufen 18 Entgegennehmen von Anrufen 19 Beenden eines Anrufs 19 Verwenden des Telefonbuchs 19 Verwenden der Kurzwahl 20 Musik Streaming 20 Wiedergeben von Musik von einem Audiogerät 20 Steuern ein...

Страница 34: ...ing von einem Mobiltelefon oder einem tragbaren Audiogerät Unterstützung der Profile HFP 1 0 A2DP OPP und AVRCP Klangeinstellungen EQ3 parametric Sie können eine der 7 voreingestellten Equalizer Kurven auswählen und wie gewünscht einstellen DSO Dynamic Soundstage Organizer Mithilfe virtueller Lautsprecher wird auch bei niedrig in der Tür montierten Lautsprechern eine bessere Raumklangwirkung erzeu...

Страница 35: ...n Kraftfahrzeugen wie z B elektronische Kraftstoffeinspritzsysteme elektronische Antiblockiersysteme elektronische Geschwindigkeitsregelsysteme oder Airbag Systeme Zur Installation oder Wartung dieses Geräts wenden Sie sich bitte an den Fahrzeughersteller oder einen Vertreter des Herstellers Eine fehlerhafte Installation oder Wartung kann gefährlich sein und zum Erlöschen der für dieses Gerät gült...

Страница 36: ...e Uhr auch automatisch einstellen lassen Seite 15 Einstellen des Lautstärkepegels der einzelnen Geräte Wenn Sie ein tragbares Audiogerät über den Anschluss BUS AUDIO IN AUX IN anschließen empfiehlt es sich den Lautstärkepegel für das angeschlossene Gerät einzustellen und zwar gegebenenfalls über das Konfigurationsmenü an diesem Gerät Bei einem an AUX IN angeschlossenen Gerät finden Sie Information...

Страница 37: ...eine CD ein um das Gerät einzuschalten Hinweis Legen Sie auf der Innenseite der Frontplatte nichts ab Einlegen einer CD in das Gerät 1 Drücken Sie OPEN 2 Legen Sie eine CD mit der beschrifteten Seite nach oben ein 3 Schließen Sie die Frontplatte Die Wiedergabe beginnt automatisch Auswerfen der CD 1 Drücken Sie OPEN 2 Drücken Sie Z Die CD wird ausgeworfen 3 Schließen Sie die Frontplatte c A B ...

Страница 38: ...n 4 drücken Überspringen mehrerer Gruppen 3 Alben 4 gedrückt halten Nach links rechts drücken Überspringen von Titeln drücken Überspringen mehrerer Titel drücken innerhalb von etwa 2 Sekunden erneut drücken und gedrückt halten Rückwärts Vorwärtssuchen in einem Titel gedrückt halten Radio Nach oben unten drücken Empfangen gespeicherter Sender Nach links rechts drücken Automatisches Einstellen von S...

Страница 39: ... 6 haben dieselben Funktionen wie die Zahlentasten am Gerät qk Tasten M m Das Drücken dieser Tasten entspricht dem Drücken des Joysticks nach oben bzw unten ql Tasten Das Drücken dieser Tasten entspricht dem Drücken des Joysticks nach links bzw rechts w Taste SCRL Bildlauf Hiermit lassen Sie die Informationen im Display durchlaufen wa Taste SOUND Auswählen von Klangoptionen ws Taste ATT Dämpfen de...

Страница 40: ...rtssuchen in einem Titel gedrückt halten C Taste Bluetooth 16 17 18 19 21 Zugreifen auf die Bluetooth Funktionen bzw Entgegennehmen eines Anrufs D Taste MENU 19 Aufrufen des Menüs bzw Entgegennehmen eines Anrufs E Display F Taste OFF 19 Ausschalten des Geräts Stoppen der Tonquelle bzw Beenden oder Zurückweisen eines Anrufs G Taste CALL 19 Zugreifen auf die Telefonfunktionen bzw Entgegennehmen eine...

Страница 41: ...Tasten entspricht dem Drücken des Joysticks nach links bzw rechts qj Tasten VOL Lautstärke Einstellen der Lautstärke qk Taste 19 1 Wenn ein MD Wechsler angeschlossen ist 2 Wenn ein Bluetooth Audiogerät das das Bluetooth Profil AVRCP unterstützt angeschlossen ist Je nach Gerät stehen möglicherweise nicht alle Funktionen zur Verfügung Hinweis Wenn Sie das Gerät ausschalten und die Anzeige ausgeblend...

Страница 42: ...oder stellen Auto Scroll on ein Seite 23 Tipp Je nach CD Typ Aufnahmeformat und Einstellungen werden unterschiedliche Informationen angezeigt Erläuterungen zu MP3 WMA finden Sie auf Seite 27 Erläuterungen zu ATRAC CDs auf Seite 28 Repeat und Shuffle Play 1 Drücken Sie während der Wiedergabe 1 REP oder 2 SHUF so oft bis die gewünschte Einstellung im Display erscheint 1 Bei Wiedergabe einer MP3 WMA ...

Страница 43: ...en Stationstaste einen anderen Sender speichern wird der zuvor gespeicherte Sender ersetzt Tipp Wenn ein RDS Sender gespeichert wird wird auch die AF TA Einstellung gespeichert Seite 14 Einstellen gespeicherter Sender 1 Wählen Sie den Frequenzbereich aus und drücken Sie eine Stationstaste 1 bis 6 Automatisches Einstellen von Sendern 1 Wählen Sie den Frequenzbereich aus und drücken Sie den Joystick...

Страница 44: ... und Nicht RDS Sender mit unterschiedlicher AF TA Einstellung speichern 1 Stellen Sie AF TA ein und speichern Sie die Sender dann mit BTM oder manuell ab Speichern der Lautstärke von Verkehrsdurchsagen Sie können die Lautstärke für die Verkehrsdurchsagen voreinstellen so dass Sie sie nicht überhören 1 Drehen Sie den Joystick um den Lautstärkepegel einzustellen 2 Halten Sie AF TA gedrückt bis TA Vo...

Страница 45: ...lt 2 Drücken Sie den Joystick nach oben bzw unten bis der gewünschte Programmtyp erscheint 3 Drücken Sie den Joystick Das Gerät beginnt nach einem Sender zu suchen der den ausgewählten Programmtyp ausstrahlt Programmtypen Hinweis Sie können diese Funktion in Ländern Regionen in denen keine PTY Daten zur Verfügung stehen nicht verwenden Einstellen der Uhrzeit CT 1 Stellen Sie bei der Konfiguration ...

Страница 46: ...instellung vor 5 Drücken Sie Bluetooth Menü Bluetooth Settings z gibt die Standardeinstellung an Hinweis Einzelheiten zu den Einstellungen an anderen Bluetooth Geräten finden Sie in den jeweiligen Anleitungen Pairing und Herstellen einer Verbindung mit einem Bluetooth Gerät Wenn Sie zum ersten Mal eine Verbindung zwischen Bluetooth Geräten herstellen wollen ist eine gegenseitige Registrierung erfo...

Страница 47: ...t ist Seite 16 1 Starten Sie am zu verbindenden Gerät die Suche 2 Wenn bei diesem Gerät Allow Connection angezeigt wird wählen Sie yes Die Verbindung wird hergestellt Je nach Gerät erscheint die Anzeige zum Eingeben des Passworts 3 Geben Sie das Passwort für das zu verbindende Gerät ein 4 Drücken Sie zum Bestätigen den Joystick Connected erscheint und die Verbindung ist damit hergestellt oder wird...

Страница 48: ...erät aus einen Anruf über das Mobiltelefon tätigen zu dem eine Verbindung besteht 1 Drücken Sie CALL Das Menü CALL erscheint 2 Wählen Sie die Optionen in der folgenden Reihenfolge aus und drücken Sie dann zum Tätigen des Anrufs den Joystick Menü CALL Wenn Sie Security einstellen Seite 21 erscheint Security Locked und die Funktion steht nicht zur Verfügung Dialed Calls Zum Auswählen aus der Ruflist...

Страница 49: ...innt das Telefongespräch automatisch nach der eingestellten Zeit Seite 21 Wenn Sie während eines Anrufs CALL drücken wird die Freisprechfunktion deaktiviert und Mikrofon und Lautsprecher des Mobiltelefons werden aktiviert In diesem Fall wird je nach Mobiltelefon möglicherweise die Bluetooth Verbindung getrennt Beenden eines Anrufs 1 Drücken Sie OFF Am Ende des Anrufs wird ein paar Sekunden lang di...

Страница 50: ...len Sie Delete c yes Musik Streaming Wiedergeben von Musik von einem Audiogerät Sie können mit diesem Gerät Musik von einem Audiogerät wiedergeben lassen wenn das Audiogerät das Bluetooth Profil A2DP Advanced Audio Distribution Profile unterstützt 1 Stellen Sie eine Verbindung zwischen diesem Gerät und dem Bluetooth Audiogerät her Seite 18 wird während der Verbindung angezeigt 2 Drehen Sie die Lau...

Страница 51: ...e alle Geräte in der Auswahlliste löschen wollen wählen Sie in Schritt 4 die Option Delete All Receive PB 1 2 Telefonbuch empfangen Zum Empfangen und Speichern der Telefonbuchdaten von einem Mobiltelefon Seite 19 Auto Answer automatische Anrufentgegennahme on Der Anruf wird bei Eingang automatisch entgegengenommen Stellen Sie die Dauer bis zum Beginn des Gesprächs ein 1 sec 60 sec off z Der Anruf ...

Страница 52: ...en Sie den Joystick nach oben bzw unten um die Einstellung auszuwählen und drücken Sie dann den Joystick Die Einstellung ist damit abgeschlossen 5 Drücken Sie MENU Im Display erscheint wieder die Anzeige für den normalen Wiedergabe Empfangsmodus Hinweis Die angezeigten Optionen unterscheiden sich je nach Tonquelle und Einstellung Tipps Sie können durch Drücken des Joysticks in die nächste Menüeben...

Страница 53: ...nstellen des automatischen Bildlaufs für Informationen mit vielen Zeichen beim Wechseln der CD des Albums der Gruppe bzw des Titels on Die Informationen laufen im Display durch off z Die Informationen laufen im Display nicht durch ID3 Tag Zum Wechseln der Priorität bei den angezeigten ID3 Tag Zeichen wenn CD als Tonquelle ausgewählt ist EUR z Westeuropäische Zeichen werden vorrangig angezeigt RUS ...

Страница 54: ...1 Drücken Sie SOURCE so oft bis CD oder MD erscheint 2 Drücken Sie MODE so oft bis der gewünschte Wechsler angezeigt wird Die Wiedergabe beginnt 1 Bei Wiedergabe einer MP3 Datei 2 Bei Wiedergabe einer MDLP Überspringen von Alben und CDs MDs 1 Drücken Sie während der Wiedergabe den Joystick nach oben bzw unten Repeat und Shuffle Play 1 Drücken Sie während der Wiedergabe 1 REP oder 2 SHUF so oft bis...

Страница 55: ...in Gerät angeschlossen ist können Sie AUX mit SOURCE nicht auswählen Tipp Wenn Sie ein tragbares Gerät und einen Wechsler anschließen wollen verwenden Sie den gesondert erhältlichen AUX IN Signalquellenwähler Auswählen eines zusätzlichen Geräts 1 Drücken Sie SOURCE so oft bis AUX erscheint Bedienen Sie das tragbare Gerät Einstellen des Lautstärkepegels Stellen Sie unbedingt vor der Wiedergabe die ...

Страница 56: ...htig Nehmen Sie die CD heraus und warten Sie etwa eine Stunde bis die Feuchtigkeit verdunstet ist So bewahren Sie die hohe Tonqualität Achten Sie darauf keine Säfte oder andere zuckerhaltige Getränke auf das Gerät oder die CDs zu verschütten Hinweise zu CDs Berühren Sie nicht die Oberfläche von CDs damit diese nicht verschmutzt werden Fassen Sie CDs nur am Rand an Bewahren Sie CDs in ihrer Hülle o...

Страница 57: ...rweiterten Joliet bzw Romeo Format sowie dem Multisession Format kompatibel Höchstzahl an Ordnern Alben 150 einschließlich Stammordner und leerer Ordner MP3 WMA Dateien Titeln und Ordnern auf einer CD 300 Wenn ein Ordner bzw die Dateinamen viele Zeichen enthalten ist die maximale Anzahl möglicherweise geringer als 300 anzeigbaren Zeichen für einen Ordner Dateinamen 25 Joliet bzw 50 Romeo ID3 Tags ...

Страница 58: ...ndet sich ein Hindernis wie z B Personen Metall oder eine Wand Ein Gerät mit 2 4 GHz Frequenz wie z B ein WLAN Gerät ein schnurloses Telefon oder ein Mikrowellenherd wird in der Nähe dieses Geräts verwendet Da Bluetooth Geräte und WLANs IEEE802 11b g mit derselben Frequenz arbeiten kann es zu Interferenzen im Mikrowellenbereich kommen Daher kann sich die Kommunikationsgeschwindigkeit verringern od...

Страница 59: ...darauf eine Ersatzsicherung mit dem gleichen Ampere Wert wie die Originalsicherung zu verwenden Dieser ist auf der Originalsicherung angegeben Wenn die Sicherung durchbrennt überprüfen Sie den Stromanschluss und tauschen die Sicherung aus Brennt die neue Sicherung ebenfalls durch kann eine interne Fehlfunktion vorliegen Wenden Sie sich in einem solchen Fall an Ihren Sony Händler Reinigen der Ansch...

Страница 60: ... 531 1 602 kHz LW 153 279 kHz Antennenanschluss Anschluss für Außenantenne Zwischenfrequenz 10 7 MHz 450 kHz Empfindlichkeit MW 30 µV LW 40 µV Drahtlose Kommunikation Kommunikationssystem Bluetooth Standard Version 2 0 Sendeleistung Bluetooth Standard Leistungsklasse 2 max 4 dBm Maximale Kommunikationsreichweite Sichtlinie ca 10 m 1 Frequenzbereich 2 4 GHz Frequenzbereich 2 4000 2 4835 GHz Modulat...

Страница 61: ...ite US amerikanische Patente und Patente anderer Länder lizenziert von Dolby Laboratories MPEG Layer 3 Audiocodiertechnologie und Patente lizenziert von Fraunhofer IIS und Thomson Für den Lötprozeß wird bleifreies Lot verwendet In bestimmten Leiterplatten werden keine halogenierten Flammschutzmittel verwendet Im Gehäuse werden keine halogenierten Flammschutzmittel verwendet Papier wird als Verpack...

Страница 62: ...RUS Kunden in anderen Ländern auf EUR setzen Beachten Sie dass das ID3 Tag möglicherweise nicht richtig angezeigt wird auch wenn die Option auf RUS gesetzt ist Im Display angezeigte Informationen laufen nicht automatisch durch Bei CDs MDs mit sehr viel Textinformationen laufen diese im Display möglicherweise nicht durch Auto Scroll ist auf off gesetzt tStellen Sie Auto Scroll on ein Seite 23 oder ...

Страница 63: ...tone auf Default Seite 21 Die Stimme des Gesprächsteilnehmers ist sehr leise Stellen Sie die Lautstärke über Talk Vol ein Seite 19 Bei Telefongesprächen ist ein Echo oder Rauschen zu hören Verringern Sie die Lautstärke EC NC Mode ist auf off gesetzt tSetzen Sie EC NC Mode auf Mode 1 oder Mode 2 Seite 21 Wenn Umgebungsgeräusche das Telefongespräch überlagern versuchen Sie diese Geräusche zu reduzie...

Страница 64: ...e Suchmodus aktiviert NO AF Für den aktuellen Sender gibt es keine Alternativfrequenz tDrücken Sie den Joystick nach links bzw rechts solange der Programmdienstname blinkt Das Gerät beginnt dann mit der Suche nach einer Frequenz mit denselben PI Daten Programme Identification Programmkennung PI Seek wird angezeigt NO Disc Im CD MD Wechsler befindet sich keine CD MD tLegen Sie CDs MDs in den Wechsl...

Страница 65: ... Dialed Calls Received Calls oder Phonebook im Menü CALL sind keine Daten vorhanden Beim Speichern der Kurzwahl befinden sich keine Daten im Telefonbuch Error Die Telefonbuchdaten können aufgrund eines Problems nicht empfangen werden HF Device is not available Es besteht keine Verbindung zum Gerät für das Freisprechen Invalid Code Der eingegebene Sicherheitscode ist nicht richtig Memory Full Der T...

Страница 66: ...nement et la santé humaine Le recyclage des matériaux aidera à préserver les ressources naturelles Pour toute information supplémentaire au sujet du recyclage de ce produit vous pouvez contacter votre municipalité votre déchetterie ou le magasin où vous avez acheté le produit Accessoire compatible Télécommande Elimination des piles et accumulateurs usages Applicable dans les pays de l Union Europé...

Страница 67: ...airage et connexion de cet appareil avec un périphérique Bluetooth 16 Connexion à des périphériques enregistrés 17 Discussion en mains libres 18 Appels 18 Réception d appels 19 Terminaison d appels 19 Utilisation du répertoire 19 Utilisation de la fonction Preset Dial 20 Transmission en continu de musique 20 Ecoute de musique à partir d un périphérique audio 20 Fonctionnement d un périphérique aud...

Страница 68: ...en continu de musique à partir de votre téléphone mobile ou d un autre appareil audio portatif Prise en charge des profils HFP 1 0 A2DP OPP et AVRCP Réglage du son EQ3 paramétrique vous pouvez choisir une des 7 courbes d égaliseur prédéfinies et effectuer le réglage souhaité DSO Répartiteur dynamique du son crée un champ sonore mieux réparti grâce à une synthèse de haut parleurs virtuels afin d am...

Страница 69: ...es ou les systèmes airbag Veuillez confier l installation ou l entretien de cet appareil au constructeur ou au concessionnaire de votre véhicule Une installation défectueuse ou un entretien mal fait peut être dangereux et annuler toute garantie concernant cet appareil Vérifiez auprès du constructeur de votre véhicule que l utilisation de votre téléphone mobile ne risque pas d affecter les systémes...

Страница 70: ...iquement au moyen de la fonction RDS page 15 Réglage du niveau de volume de chaque appareil En cas de raccordement à un appareil audio portatif via la borne BUS AUDIO IN AUX IN il est recommandé d ajuster le niveau du volume de l appareil raccordé ou d ajuster le niveau de volume de l appareil raccordé dans le menu de réglages de cet appareil Reportez vous à la section Réglage du niveau de volume ...

Страница 71: ...RCE de l appareil ou insérez un disque pour le faire fonctionner Remarque Ne posez rien sur la face interne de la façade Insertion du disque dans l appareil 1 Appuyez sur OPEN 2 Insérez le disque côté imprimé vers le haut 3 Fermez la façade La lecture commence automatiquement Ejection du disque 1 Appuyez sur OPEN 2 Appuyez sur Z Le disque est éjecté 3 Fermez la façade c A B ...

Страница 72: ... la touche et maintenez la enfoncée Poussez vers la gauche la droite pour ignorer des plages appuyez sur la touche ignorer des plages successives appuyez une première fois puis une seconde fois dans un délai d environ 2 secondes en maintenant la touche enfoncée Avancer reculer rapidement dans une plage appuyez sur la touche et maintenez la enfoncée Radio Poussez vers le haut le bas pour capter une...

Страница 73: ...lles des touches numériques de l appareil qk Touches M m Equivalent à pousser le bouton de commande vers le haut ou le bas ql Touches Equivalent à pousser le bouton de commande vers la gauche ou la droite w Touche SCRL défilement Permet de faire défiler le paramètre d affichage wa Touche SOUND Permet de sélectionner les paramètres du son ws Touche ATT atténuation du son Permet d atténuer le son Ap...

Страница 74: ...ancer reculer rapidement dans une plage appuyez sur la touche et maintenez la enfoncée C Touche Bluetooth 16 17 19 20 21 Permet d accéder aux fonctions Bluetooth de recevoir un appel D Touche MENU 19 Permet d accéder à un menu de recevoir un appel E Fenêtre d affichage F Touche OFF 19 Permet de mettre l appareil hors tension d arrêter la source de terminer ou de rejeter un appel G Touche CALL 19 P...

Страница 75: ...ou la droite qj Touches VOL volume Permet de régler le niveau du volume qk Touche 19 1 Lorsqu un changeur MD est raccordé 2 Lorsqu un appareil audio Bluetooth prenant en charge le profil AVRCP de la technologie Bluetooth est connecté Selon l appareil il est possible que certaines opérations ne soient pas disponibles Remarque Si vous mettez l appareil hors tension et que l affichage est désactivé i...

Страница 76: ...SPL pour faire défiler les paramètres C appuyez sur SCRL sur la mini télécommande ou sélectionnez Auto Scroll on page 22 Conseil Les paramètres affichés diffèrent selon le type de disque le format d enregistrement et les réglages Pour plus de détails sur le format MP3 WMA reportez vous à la page 26 pour les CD ATRAC reportez vous à la page 27 Lecture répétée et aléatoire 1 En cours de lecture appu...

Страница 77: ... mémorisez une autre station sur la même touche numérique la station mémorisée précédemment est effacée Conseil Lorsqu une station RDS est mémorisée le réglage AF TA est également mémorisé page 14 Réception des stations mémorisées 1 Sélectionnez la bande puis appuyez sur une touche numérique 1 à 6 Recherche automatique des fréquences 1 Sélectionnez la bande puis poussez le bouton de commande vers ...

Страница 78: ...vous pouvez prérégler à la fois des stations RDS et non RDS avec leurs réglages AF TA respectifs 1 Réglez AF TA puis mémorisez la station à l aide de la fonction BTM ou manuellement Préréglage du volume sonore des messages de radioguidage Vous pouvez prérégler le niveau de volume des messages de radioguidage de façon à ne manquer aucune information 1 Tournez le bouton de commande pour régler le ni...

Страница 79: ... le bas jusqu à ce que le type d émission souhaitée s affiche 3 Appuyez sur le bouton de commande L appareil commence à rechercher une station diffusant le type d émission sélectionné Types d émissions Remarque Cette fonction est inopérante dans certains pays ou régions où les données PTY ne sont pas disponibles Réglage de CT 1 Réglez CT on lors de la configuration page 22 Remarques Il est possibl...

Страница 80: ...s autres périphériques Bluetooth reportez vous à leurs manuels respectifs Pairage et connexion de cet appareil avec un périphérique Bluetooth Lorsque vous connectez des périphériques Bluetooth pour la première fois il est nécessaire que les périphériques se reconnaissent mutuellement Il s agit du pairage Cette reconnaissance pairage est nécessaire la première fois uniquement à partir de la seconde...

Страница 81: ...ppuyez sur le bouton de commande pour confirmer L indication Connected apparaît et la connexion est terminée L indication ou s affiche en cours de connexion Conseil Vous pouvez également saisir le code d authentification à l aide des touches numériques de la mini télécommande Remarques En cours de connexion avec un périphérique Bluetooth cet appareil ne peut pas être détecté par un autre périphéri...

Страница 82: ...sur CALL lorsque le numéro de téléphone est affiché Préréglage du volume de la sonnerie et de la voix du correspondant Vous pouvez prérégler le volume de la sonnerie et de la voix de votre correspondant Réglage de la sonnerie Tournez le bouton de commande lorsque le téléphone sonne L indication Ring Vol apparaît et le volume de la sonnerie est réglé Dialed Calls Sélectionne un numéro dans l histor...

Страница 83: ...ectionnez Phone Settings dans le menu de la fonction Bluetooth 2 Sélectionnez Receive PB L indication Waiting apparaît 3 Envoyez les données du répertoire à l aide du téléphone mobile L indication Data Receiving apparaît pendant la réception des données du répertoire L indication Complete apparaît lorsque la réception est terminée Remarques Avant de recevoir des données du répertoire débranchez to...

Страница 84: ...ture 5 Réglez le volume sur cet appareil Fonctionnement d un périphérique audio avec cet appareil Vous pouvez effectuer les opérations suivantes sur cet appareil si le périphérique audio prend en charge le profil AVRCP Audio Video Remote Control Profile de la technologie Bluetooth Le fonctionnement diffère selon le périphérique audio En fonction du périphérique il peut être nécessaire d appuyer de...

Страница 85: ...met de recevoir et d enregistrer les données du répertoire à partir d un téléphone mobile page 19 Auto Answer on pour commencer un appel automatiquement à la réception Réglez le délai de démarrage d un appel 1 sec à 60 sec off z pour ne pas commencer d appel jusqu à ce que vous appuyiez sur CALL MENU ou Bluetooth Ringtone Permet de commuter la sonnerie Cellular 3 z pour émettre la sonnerie réglée ...

Страница 86: ...r sur on z ou sur off RM Satellite de commande Pour changer le sens de fonctionnement des commandes du satellite de commandes NORM z pour utiliser le satellite de commande avec les réglages par défaut REV lorsque vous montez le satellite de commande du côté droit de la colonne de direction AUX Audio Pour régler l affichage de la source AUX sur on z ou off page 24 Version Pour afficher la version d...

Страница 87: ...n priorité RUS pour afficher les caractères cyrilliques en priorité Local mode de recherche locale off z pour régler la réception normale on pour régler uniquement les stations émettant des signaux forts Mono mode monaural Pour améliorer la réception FM faible sélectionnez le mode de réception monaurale off z pour entendre les émissions stéréo en stéréo on pour entendre les émissions stéréo en mon...

Страница 88: ...fiche 3 Appuyez sur le bouton de commande pour lire le disque L affichage revient en mode de lecture normale Appareil audio auxiliaire Vous pouvez raccorder des périphériques portatifs Sony en option à la borne BUS AUDIO IN AUX IN de l appareil Si le changeur ou l autre périphérique n est pas raccordé à la borne l appareil vous permet d écouter le périphérique portatif par l intermédiaire des haut...

Страница 89: ...ches correspondantes de l appareil Les commandes suivantes du satellite de commande ne s utilisent pas de la même manière que celles de l appareil Commande PRESET DISC Revient à pousser le bouton de commande de l appareil vers le haut ou le bas enfoncez et tournez Commande VOL volume Revient à tournez le bouton de commande de l appareil tournez Commande SEEK AMS Revient à pousser le bouton de comm...

Страница 90: ...rd notamment en forme de cœur de carré ou d étoile ne peuvent pas être lus avec cet appareil Vous risquez d endommager votre appareil si vous essayez de le faire N utilisez pas de tels disques Cet appareil ne permet pas la lecture des CD de 8 cm Avant la lecture nettoyez les disques avec un chiffon de nettoyage disponible dans le commerce Essuyez chaque disque en partant du centre vers l extérieur...

Страница 91: ...Il n est pas possible de lire des fichiers protégés par copyright A propos de CD ATRAC Format ATRAC3plus La norme ATRAC3 Adaptive Transform Acoustic Coding3 est une technologie de compression des données audio Elle comprime les données de CD audio à environ 1 10 de leur taille initiale ATRAC3plus qui est un format étendu de ATRAC3 comprime les données de CD audio à environ 1 20 de leur taille init...

Страница 92: ...isquent de ne pas se connecter ou de ne pas fonctionner correctement selon leurs caractéristiques ou spécifications Lors de communications téléphoniques en mains libres des parasites peuvent se produire en fonction du périphérique ou de l environnement de communication Selon le périphérique à connecter le délai avant le début de la communication peut être plus ou moins long Autres L appareil Bluet...

Страница 93: ...e moteur avant de nettoyer les connecteurs et retirez la clé du contact Ne touchez jamais les connecteurs directement avec les doigts ou avec un objet métallique Retrait de l appareil 1 Retirez le tour de protection 1Retirez la façade page 6 2Pincez les deux côtés du tour de protection puis tirez le 2 Retirez l appareil 1Insérez simultanément deux clés de déblocage jusqu à ce qu elles émettent un ...

Страница 94: ...lités Sorties Borne de sorties audio avant arrière Borne de sortie du caisson de graves mono Borne de commande de relais d antenne électrique Borne de commande d amplificateur de puissance Entrées Borne de commande ATT téléphone Borne de commande de l éclairage Borne d entrée de commande BUS Borne d entrée audio BUS AUX IN Borne d entrée de commande à distance Borne d entrée de l antenne Commandes...

Страница 95: ...té déconnecté Le cordon d alimentation n est pas raccordé correctement Les stations mémorisées et l heure sont effacées Le fusible a sauté Emission de bruit lorsque la position de la clé de contact est modifiée Les fils ne sont pas raccordés correctement au connecteur d alimentation du véhicule destiné aux accessoires L affichage disparaît de la fenêtre d affichage ou il ne s affiche pas Le gradat...

Страница 96: ...on page 23 Un programme FM émis en stéréo est entendu en mono L appareil est en mode de réception mono tRéglez le sur Mono on page 23 Fonction RDS Une recherche SEEK commence après quelques secondes d écoute La station ne diffuse pas de programmes de radioguidage fonction TP désactivée ou le signal capté est faible tDésactivez TA page 14 Aucun message de radioguidage Activez TA page 14 La station ...

Страница 97: ...en charge les fonctions en question Le nom du correspondant ne s affiche pas lors de la réception d un appel Ce correspondant n est pas enregistré dans le répertoire tEnregistrez le dans le répertoire page 19 Le téléphone appelant n est pas réglé pour envoyer le numéro de téléphone Un appel commence involontairement Le téléphone à connecter est réglé pour commencer un appel automatiquement L optio...

Страница 98: ...e cette opération peut prendre plus d une minute ou Pendant le retour ou l avance rapide vous avez atteint le début ou la fin du disque et vous ne pouvez pas aller plus loin Le caractère ne peut pas être affiché Busy La connexion Bluetooth n est pas terminée tInterrompez la réception des données du répertoire tArrêtez l opération en cours et attendez un instant Connection Complete La connexion Blu...

Страница 99: ......

Страница 100: ... Assicurandovi che questo prodotto sia smaltito correttamente voi contribuirete a prevenire potenziali conseguenze negative per l ambiente e per la salute che potrebbero altrimenti essere causate dal suo smaltimento inadeguato Il riciclaggio dei materiali aiuta a conservare le risorse naturali Per informazioni più dettagliate circa il riciclaggio di questo prodotto potete contattare l ufficio comu...

Страница 101: ...delle impostazioni Bluetooth 16 Associazione e connessione del presente apparecchio con un dispositivo Bluetooth 16 Connessione ai dispositivi registrati 17 Conversazioni vivavoce 18 Come effettuare le chiamate 18 Ricezione di chiamate 19 Come terminare le chiamate 19 Uso della rubrica 19 Uso di Preset Dial 20 Streaming musicale 20 Ascolto di musica da un dispositivo audio 20 Uso di un dispositivo...

Страница 102: ...no cellulare Streaming di file musicali dal telefono cellulare o dal dispositivo audio portatile Supporto dei profili HFP 1 0 A2DP OPP e AVRCP Regolazione audio EQ3 parametric è possibile scegliere una delle 7 curve dell equalizzatore preimpostate e regolarle come desiderato DSO Dynamic Soundstage Organizer crea un effetto audio più realistico mediante sintesi di diffusori virtuali per enfatizzare...

Страница 103: ... antisbandamento antiblocco elettronici sistemi di controllo della velocità elettronici o sistemi con airbag Per informazioni sull installazione o l assistenza del presente dispositivo consultare il produttore o i rappresentanti dell automobile in questione Un installazione o un intervento di assistenza errati possono risultare pericolosi e invalidare l eventuale garanzia applicabile al presente d...

Страница 104: ...unzione RDS pagina 15 Regolazione del volume di ciascun apparecchio Se viene effettuato il collegamento ad un dispositivo audio portatile tramite il terminale BUS AUDIO IN AUX IN si consiglia di regolare il volume del dispositivo collegato o di regolare il volume del dispositivo collegato nel menu di impostazione del presente apparecchio Per ulteriori informazioni sul collegamento di un dispositiv...

Страница 105: ...ecchio premere SOURCE sull apparecchio o inserire un disco Nota Non collocare alcun oggetto sulla superficie interna del pannello anteriore Inserimento del disco nell apparecchio 1 Premere OPEN 2 Inserire il disco lato etichetta verso l alto 3 Chiudere il pannello anteriore La riproduzione viene avviata automaticamente Estrazione del disco 1 Premere OPEN 2 Premere Z Il disco viene espulso 3 Chiude...

Страница 106: ...um 4 in modo continuo tenere premuto Premere verso sinistra verso destra per Saltare brani premere Saltare brani in modo continuo premere quindi premere di nuovo entro circa 2 secondi e tenere premuto Fare retrocedere fare avanzare rapidamente un brano tenere premuto Radio Premere verso l alto verso il basso per Ricevere una stazione memorizzata Premere verso sinistra verso destra per Sintonizzare...

Страница 107: ...ecchio qk Tasti M m Consentono di effettuare le stesse operazioni eseguite premendo il joystick verso l alto verso il basso ql Tasti Consentono di effettuare le stesse operazioni eseguite premendo il joystick verso sinistra verso destra w Tasto SCRL scorrimento Per scorrere le voci del display wa Tasto SOUND Per selezionare le voci relative all audio ws Tasto ATT attenuazione audio Per attenuare l...

Страница 108: ...cedere fare avanzare rapidamente un brano tenere premuto C Tasto Bluetooth 16 17 19 21 Per accedere alle funzioni Bluetooth ricevere una chiamata D Tasto MENU 19 Per accedere a un menu ricevere una chiamata E Finestra del display F Tasto OFF 19 Per disattivare l alimentazione arrestare la riproduzione della sorgente terminare o rifiutare una chiamata G Tasto CALL 19 Per accedere alle funzioni del ...

Страница 109: ...guite premendo il joystick verso sinistra verso destra qj Tasti VOL volume Per regolare il volume qk Tasto 19 1 Se è collegato un cambia MD 2 Quando è collegato un dispositivo audio Bluetooth che supporta il profilo AVRCP della tecnologia Bluetooth A seconda del dispositivo alcune operazioni potrebbero non essere disponibili Nota Se l apparecchio viene spento e il display disattivato non è possibi...

Страница 110: ... del display C premere SCRL sul telecomando a scheda o impostare Auto Scroll on pagina 23 Suggerimento Le voci visualizzate potrebbero non corrispondere a seconda del tipo di disco del formato di registrazione e delle impostazioni effettuate Per ulteriori informazioni sui file MP3 WMA vedere pagina 27 per ulteriori informazioni sui CD ATRAC vedere pagina 28 Riproduzione ripetuta e in ordine casual...

Страница 111: ...tra stazione viene memorizzata in corrispondenza dello stesso tasto numerico la stazione memorizzata in precedenza viene sostituita Suggerimento Se viene memorizzata una stazione RDS viene memorizzata anche l impostazione AF TA pagina 14 Ricezione delle stazioni memorizzate 1 Selezionare la banda quindi premere un tasto numerico da 1 a 6 Sintonizzazione automatica 1 Selezionare la banda quindi pre...

Страница 112: ...ne manuale è possibile preselezionare le stazioni RDS e non RDS con impostazioni AF TA distinte 1 Impostare AF TA quindi memorizzare la stazione mediante la funzione BTM o manualmente Preimpostazione del volume dei notiziari sul traffico È possibile preimpostare il livello del volume dei notiziari sul traffico in modo da poterli udire chiaramente 1 Ruotare il joystick per regolare il livello del v...

Страница 113: ...te 2 Premere il joystick verso l alto verso il basso fino a visualizzare il tipo di programma desiderato 3 Premere il joystick L apparecchio avvia la ricerca di una stazione che trasmette il tipo di programma selezionato Tipi di programma Nota Non è possibile utilizzare questa funzione in paesi regioni in cui non sono disponibili i dati PTY Impostazione del modo CT 1 Impostare CT on nelle impostaz...

Страница 114: ...uetooth consultare i rispettivi manuali Associazione e connessione del presente apparecchio con un dispositivo Bluetooth Quando si stabilisce la connessione di dispositivi Bluetooth per la prima volta è necessario che questi ultimi si registrino reciprocamente Questa operazione è denominata associazione e deve essere effettuata solo la prima volta in quanto alla successiva connessione il presente ...

Страница 115: ...missione del codice di protezione 3 Immettere il codice di protezione del dispositivo di connessione 4 Premere il joystick per confermare Una volta completata la connessione viene visualizzato Connected Durante la connessione viene visualizzato o Suggerimento È inoltre possibile immettere il codice di protezione utilizzando i tasti numerici del telecomando a scheda Note Durante la connessione a un...

Страница 116: ...ene impostata l opzione Security pagina 21 appare il messaggio Security Locked e l operazione non è disponibile Dialed Calls Consente di selezionare un numero dall elenco cronologico delle chiamate effettuate numero massimo di nominativi e numeri telefonici memorizzabili 10 Nominativo e numero telefonico da chiamare c Call Selezionare Delete per cancellare il nominativo e il numero telefonico desi...

Страница 117: ...matico all orario impostato pagina 21 Se si preme CALL durante una chiamata la funzione vivavoce viene disattivata quindi vengono attivati il microfono e l altoparlante del telefono cellulare In questo caso è possibile che la connessione Bluetooth venga terminata a seconda del telefono cellulare in uso Come terminare le chiamate 1 Premere OFF Al termine della chiamata la durata della conversazione...

Страница 118: ...usica da un dispositivo audio Se il dispositivo audio supporta il profilo A2DP Advanced Audio Distribution Profile della tecnologia Bluetooth è possibile ascoltare la musica proveniente da tale dispositivo utilizzando il presente apparecchio 1 Stabilire la connessione tra il presente apparecchio e il dispositivo audio Bluetooth pagina 17 Durante la connessione viene visualizzato 2 Abbassare il vol...

Страница 119: ... eliminare 4 Selezionare Delete c yes Per eliminare tutti i dispositivi inclusi nell elenco di selezione selezionare Delete All al punto 4 Receive PB 1 2 ricezione rubrica Per ricevere e memorizzare i dati della rubrica da un telefono cellulare pagina 19 Auto Answer on per rispondere in modo automatico a una chiamata al momento della relativa ricezione Impostare l intervallo di tempo per l avvio d...

Страница 120: ...stro selezione dell impostazione 4 Premere il joystick verso l alto verso il basso per selezionare l impostazione quindi premerlo L impostazione è completata 5 Premere MENU Il display torna al modo di riproduzione ricezione normale Nota Le voci visualizzate sono diverse a seconda della sorgente e dell impostazione Suggerimenti È possibile passare al livello di menu successivo premendo il joystick ...

Страница 121: ...nedi attenuatore della luminosità Auto Scroll Per fare scorrere in modo automatico la voce visualizzata composta da molti caratteri quando viene modificato il disco album gruppo brano on per attivare lo scorrimento off z per disattivare lo scorrimento ID3 Tag Per impostare la priorità del carattere tag ID3 visualizzato quando è selezionata la sorgente CD EUR z priorità del carattere di visualizzaz...

Страница 122: ...ile regolare anche altri tipi di equalizzatore Uso di apparecchi opzionali Cambia CD MD Selezione del cambia dischi 1 Premere più volte SOURCE fino a visualizzare CD o MD 2 Premere più volte MODE fino a visualizzare il cambia dischi desiderato Viene avviata la riproduzione 1 Durante la riproduzione di un MP3 2 Durante la riproduzione di un disco MDLP Come saltare album e dischi 1 Durante la riprod...

Страница 123: ...e assicurarsi che BUS CONTROL IN non sia collegato Se al terminale BUS CONTROL IN è collegato un dispositivo non sarà possibile selezionare AUX mediante SOURCE Suggerimento Se vengono collegati sia un dispositivo portatile che un cambia dischi utilizzare il selettore AUX IN opzionale Selezione dell apparecchio ausiliario 1 Premere più volte SOURCE fino a visualizzare AUX Utilizzare il dispositivo ...

Страница 124: ... lenti e del display dell apparecchio si formi della condensa Di conseguenza l apparecchio potrebbe non funzionare correttamente In tal caso rimuovere il disco e attendere per circa un ora fino a quando l umidità non sia evaporata completamente Per mantenere una qualità audio elevata Prestare attenzione a non versare bibite o altri liquidi sull apparecchio o sui dischi Note sui dischi Per mantener...

Страница 125: ...lbum 150 incluse la cartella principale e le cartelle vuote file MP3 WMA brani e cartelle contenuti in un disco 300 se il nome di una cartella di un file contiene molti caratteri è possibile che tale numero sia inferiore a 300 caratteri visualizzabili per un nome di cartella file 25 Joliet o 50 Romeo I tag ID3 versioni 1 0 1 1 2 2 2 3 e 2 4 sono relativi solo ai file MP3 I tag ID3 visualizzabili p...

Страница 126: ...e In tal caso effettuare quanto riportato di seguito Utilizzare il presente apparecchio ad una distanza minima di 10 m dal dispositivo LAN senza fili Se il presente apparecchio viene utilizzato entro un raggio di 10 m da un dispositivo LAN senza fili spegnere quest ultimo Installare il presente apparecchio e il dispositivo Bluetooth il più vicino possibile l uno all altro Le microonde trasmesse da...

Страница 127: ...izzare un fusibile dello stesso amperaggio di quello indicato sull originale Se il fusibile si brucia controllare i collegamenti dell alimentazione e sostituire il fusibile Se dopo la sostituzione il fusibile si brucia di nuovo è possibile che si tratti di un problema interno In tal caso rivolgersi al più vicino rivenditore Sony Pulizia dei connettori Se i connettori tra l apparecchio e il pannell...

Страница 128: ... 279 kHz Terminale dell antenna connettore antenna esterna Frequenza intermedia 10 7 MHz 450 kHz Sensibilità MW 30 µV LW 40 µV Comunicazione senza fili Sistema di comunicazione Bluetooth Standard versione 2 0 Uscita Bluetooth Standard Power Class 2 max 4 dBm Raggio di comunicazione massimo Circa 10 m 1 l uno di fronte all altro Banda di frequenza Banda da 2 4 GHz da 2 4000 a 2 4835 GHz Metodo di m...

Страница 129: ...chio Se il problema persiste visitare il sito di assistenza riportato di seguito Brevetti degli Stati Uniti d America e di altri Paesi concessi su licenza dai Dolby Laboratories Tecnologia di codifica audio MPEG Layer 3 e brevetti su licenza del Fraunhofer IIS e della Thomson Per i processi di saldatura vengono utilizzate leghe saldanti senza piombo Determinati circuiti stampati non contengono rit...

Страница 130: ...D3 Tag pagina 23 Per gli utenti in Russia impostare RUS per gli altri utenti impostare EUR Si noti che il tag ID3 potrebbe non venire visualizzato correttamente anche se si imposta la voce RUS Le voci del display non scorrono Per i dischi che presentano molti caratteri tali voci potrebbero non scorrere Auto Scroll è impostato su off tImpostare Auto Scroll on pagina 23 oppure premere SCRL sul telec...

Страница 131: ... conversazioni telefoniche si verifica il fenomeno dell eco o un disturbo Abbassare il volume EC NC Mode è impostato su off tImpostare EC NC Mode su Mode 1 o su Mode 2 pagina 21 Se il rumore ambientale risulta elevato durante la chiamata telefonica tentare di ridurlo Esempio se una finestra è aperta e il rumore proveniente dalla strada è eccessivamente alto chiudere la finestra Se il rumore proven...

Страница 132: ...chi tInserire i dischi nel cambia dischi NO Disc Name Il brano non include il nome del disco NO Group Name Il brano contenuto nel CD ATRAC non include il nome del gruppo NO ID3 Tag Il file MP3 non include informazioni sui tag ID3 NO Information Nel file ATRAC3 ATRAC3plus o WMA non sono presenti informazioni di testo NO Magazine Il contenitore di dischi non è inserito nel cambia CD tInserire il con...

Страница 133: ...vailable Il dispositivo vivavoce non è connesso Invalid Code È stato digitato un codice di protezione errato Memory Full Durante la ricezione dei dati della rubrica la memoria di quest ultima ha esaurito lo spazio disponibile La memoria della rubrica del presente apparecchio è piena Not Available Bluetooth AUDIO è selezionato come sorgente ma non è stato connesso nessun dispositivo audio Bluetooth...

Страница 134: ...g van materialen draagt bij tot het vrijwaren van natuurlijke bronnen Voor meer details in verband met het recyclen van dit product neemt u contact op met de gemeentelijke instanties het bedrijf of de dienst belast met de verwijdering van huishoudafval of de winkel waar u het product hebt gekocht Accessoire waarop dit van toepassing is Afstandsbediening Verwijdering van oude batterijen in de Europ...

Страница 135: ...eem koppelen en verbinden met een Bluetooth apparaat 16 Verbinding maken met geregistreerde apparaten 17 Handsfree bellen 18 Bellen 18 Gesprekken ontvangen 19 Gesprekken beëindigen 19 Het telefoonboek gebruiken 19 Snelkeuzenummers gebruiken 20 Muziek streamen 20 Muziek van een audioapparaat beluisteren 20 Een audioapparaat bedienen met dit systeem 20 Overige instellingen 20 Een handsfree apparaat ...

Страница 136: ...of draagbare audioapparaat De profielen HFP 1 0 A2DP OPP en AVRCP worden ondersteund Geluid regelen EQ3 parametric u kunt kiezen uit 7 ingestelde equalizercurves en deze desgewenst aanpassen DSO Dynamic Soundstage Organizer verbreedt het geluidsveld waarbij virtuele luidsprekersynthese zorgt voor een verbetering van het geluid zelfs als de luidsprekers onder in de deur zijn geïnstalleerd BBE MP ve...

Страница 137: ...nti blokkeersystemen anti slip elektronische snelheidsbeperkingssystemen of airbagsystemen Voor installatie van of onderhoud aan dit apparaat kunt u het beste contact opnemen met de fabrikant van uw auto of een vertegenwoordiger van de fabrikant Onjuiste installatie of onjuist onderhoud kan gevaarlijk zijn en kan eventuele garanties die van toepassing zijn op dit apparaat ongeldig maken Raadpleeg ...

Страница 138: ...aanpassen van elk apparaat Wanneer u het apparaat aansluit op een draagbaar audioapparaat via de BUS AUDIO IN AUX IN ingang kunt u het beste het volume van het aangesloten apparaat aanpassen of het volume van het aangesloten apparaat aanpassen in het instelmenu op dit apparaat Zie Het volume aanpassen pagina 25 voor een apparaat dat is aangesloten op de AUX IN ingang Het voorpaneel verwijderen U k...

Страница 139: ...steem of plaats een disc om het systeem te activeren Opmerking Plaats niets op de binnenkant van het voorpaneel De disc in het systeem plaatsen 1 Druk op OPEN 2 Plaats de disc met het label naar boven 3 Sluit het voorpaneel Het afspelen wordt automatisch gestart De disc uitwerpen 1 Druk op OPEN 2 Druk op Z De disc wordt uitgeworpen 3 Sluit het voorpaneel c A B ...

Страница 140: ...bums 4 overslaan duwen Groepen 3 albums 4 blijven overslaan duwen en vasthouden Naar links rechts duwen Tracks overslaan duwen Tracks blijven overslaan duwen en binnen 2 seconden nogmaals duwen en vasthouden Een track snel terugspoelen vooruitspoelen duwen en vasthouden Radio Omhoog omlaag duwen Opgeslagen zender ontvangen Naar links rechts duwen Automatisch afstemmen op zenders duwen Een zender h...

Страница 141: ...uncties als de cijfertoetsen op het systeem qk M m toetsen Dezelfde als het omhoog omlaag duwen van de joystick ql toetsen Dezelfde functie als het naar links rechts duwen van de joystick w SCRL scroll toets Het displayitem rollen wa SOUND toets Geluidsitems selecteren ws ATT dempen toets Het geluid dempen Druk nogmaals op de toets om te annuleren wd VOL volume toetsen Het volume aanpassen 1 Als e...

Страница 142: ...en Een track snel terugspoelen vooruitspoelen duwen en vasthouden C Bluetooth toets 16 17 19 20 21 Toegang tot de Bluetooth functies een gesprek ontvangen D MENU toets 19 Het menu openen een gesprek ontvangen E Display F OFF toets 19 Uitschakelen de bron stoppen een gesprek beëindigen of weigeren G CALL toets 19 Toegang tot de telefoonfuncties een gesprek ontvangen H Ontvanger voor de kaartafstand...

Страница 143: ... links rechts duwen van de joystick qj VOL volume toetsen Het volume aanpassen qk toets 19 1 Als een MD wisselaar is aangesloten 2 Als een Bluetooth audioapparaat is aangesloten moet het Bluetooth profiel AVRCP ondersteunen Afhankelijk van het apparaat zijn bepaalde functies wellicht niet beschikbaar Opmerking Als het systeem wordt uitgeschakeld en het display verdwijnt kan het systeem niet worden...

Страница 144: ...telt u Auto Scroll on in pagina 22 Tip De weergegeven items zijn afhankelijk van het disctype de opname indeling en de instellingen Zie pagina 26 voor meer informatie over MP3 WMA en pagina 27 voor meer informatie over ATRAC CD s Herhaaldelijk en willekeurig afspelen 1 Druk tijdens het afspelen herhaaldelijk op 1 REP of 2 SHUF tot de gewenste instelling wordt weergegeven 1 Bij het afspelen van een...

Страница 145: ...ndere zender opslaat onder dezelfde cijfertoets wordt de eerder opgeslagen zender vervangen Tip Als een RDS zender wordt opgeslagen wordt de AF TA instelling ook opgeslagen pagina 14 De opgeslagen zenders ontvangen 1 Selecteer de band en druk vervolgens op een cijfertoets 1 tot en met 6 Automatisch afstemmen 1 Selecteer de band en duw de joystick naar links rechts om de zender te zoeken Het zoeken...

Страница 146: ...DS als niet RDS zenders instellen met elk hun AF TA instelling 1 Stel AF TA in en sla de zender vervolgens met BTM of handmatig op Het volume van de verkeersinformatie instellen U kunt het volume van de verkeersinformatie vooraf instellen zodat u geen enkel bericht mist 1 Draai de joystick om het volume aan te passen 2 Houd AF TA ingedrukt tot TA Vol wordt weergegeven Noodberichten ontvangen Als A...

Страница 147: ...ystick omhoog omlaag tot het gewenste programmatype wordt weergegeven 3 Druk op de joystick Het systeem begint te zoeken naar een zender die het geselecteerde programmatype uitzendt Programmatypen Opmerking U kunt deze functie niet gebruiken in bepaalde landen regio s waar geen PTY gegevens beschikbaar zijn CT instellen 1 Stel CT on in bij de instellingen pagina 22 Opmerkingen Het is mogelijk dat ...

Страница 148: ... de betreffende handleidingen voor informatie over de instellingen van andere Bluetooth apparaten Dit systeem koppelen en verbinden met een Bluetooth apparaat Wanneer u Bluetooth apparaten voor het eerst aansluit moeten de apparaten onderling worden geregistreerd Dit wordt koppelen genoemd Deze registratie koppelen is alleen de eerste keer vereist Daarna herkennen dit systeem en de andere apparate...

Страница 149: ...stigen Connected wordt weergegeven en de verbinding is voltooid of wordt tijdens de verbinding weergegeven Tip De toegangscode kan ook worden ingevoerd met de cijfertoetsen van de kaartafstandsbediening Opmerkingen Als u verbinding maakt met een Bluetooth apparaat kan dit systeem niet worden herkend vanaf een ander apparaat Voor herkenning op een ander apparaat verbreekt u de huidige verbinding en...

Страница 150: ... U kunt het volume van de beltoon en het stemgeluid vooraf instellen De beltoon aanpassen Draai de joystick terwijl de telefoon overgaat Ring Vol wordt weergegeven en het volume van de beltoon wordt ingesteld Het stemgeluid aanpassen Draai de joystick tijdens een gesprek Talk Vol wordt weergegeven en het volume voor het stemgeluid wordt ingesteld Dialed Calls Selecteren uit de geschiedenis met gek...

Страница 151: ...th functiemenu 2 Selecteer Receive PB Waiting wordt weergegeven 3 Verzend de telefoonboekgegevens via de mobiele telefoon Data Receiving wordt weergegeven terwijl de telefoonboekgegevens worden ontvangen Complete wordt weergegeven wanneer de gegevens zijn ontvangen Opmerkingen Voordat u telefoonboekgegevens ontvangt moet u alle mobiele telefoons of audioapparaten verwijderen Als u de overdracht va...

Страница 152: ...oapparaat 5 Pas het volume aan op dit systeem Een audioapparaat bedienen met dit systeem U kunt de volgende bewerkingen uitvoeren op dit systeem als het audioapparaat het Bluetooth profiel AVRCP Audio Video Remote Control Profile ondersteunt De bediening verschilt per audioapparaat Afhankelijk van het apparaat moet u wellicht twee keer op deze toets drukken Bewerkingen die hierboven niet worden ge...

Страница 153: ...erbinding is gemaakt Receive PB 1 2 telefoonboek ontvangen Telefoonboekgegevens van een mobiele telefoon ontvangen en opslaan pagina 19 Auto Answer on een gesprek automatisch starten wanneer dit wordt ontvangen Stel de tijd in waarna u een gesprek wilt starten 1 sec 60 sec off z een gesprek pas beginnen nadat op CALL MENU of Bluetooth is gedrukt Ringtone De beltoon wijzigen Cellular 3 z de beltoon...

Страница 154: ...tellen op on of off z pagina 14 15 Beep Instellen op on z of off RM bedieningssatelliet De werkingsrichting van de bedieningselementen van de bedieningssatelliet wijzigen NORM z de bedieningssatelliet in de standaardpositie gebruiken REV als u de bedieningssatelliet aan de rechterzijde van de stuurkolom hebt gemonteerd AUX Audio Het AUX brondisplay instellen op on z of off pagina 25 Version De fir...

Страница 155: ...ns heeft voorrang RUS weergave van cyrillische tekens heeft voorrang Local lokale zoekfunctie off z afstemmen op normale ontvangst on alleen afstemmen op zenders met sterkere signalen Mono monostand Selecteer de mono ontvangststand als u slechte FM ontvangst wilt verbeteren off z stereo uitzendingen in stereo beluisteren on stereo uitzendingen in mono beluisteren Regional Instellen op on z of off ...

Страница 156: ...op naam LIST U kunt een disc selecteren in de lijst als een CD wisselaar met CD TEXT functie of een MD wisselaar is aangesloten Als u een naam hebt toegewezen aan een disc wordt de naam weergegeven in de lijst 1 Druk tijdens het afspelen op de joystick Het discnummer of de discnaam wordt weergegeven 2 Duw de joystick omhoog omlaag tot de gewenste disc wordt weergegeven 3 Druk op de joystick om de ...

Страница 157: ...j Menu items aanpassen MENU op pagina 22 Het ingangsniveau kan worden aangepast van 6 dB tot 6 dB Bedieningssatelliet RM X4S Het label bevestigen Houd bij het bevestigen van het label rekening met de positie waarin de bedieningssatelliet wordt gemonteerd Bedieningselementen De overeenkomstige toetsen op de bedieningssatelliet bedienen dezelfde functies als die op dit systeem De volgende bedienings...

Страница 158: ...pelen altijd schoon met een in de handel verkrijgbare reinigingsdoek Veeg de disc van binnen naar buiten schoon Gebruik geen oplosmiddelen zoals benzine thinner en in de handel verkrijgbare reinigingsmiddelen of antistatische sprays voor grammofoonplaten Opmerkingen over CD R s CD RW s Sommige CD R s CD RW s afhankelijk van de opnameapparatuur of de staat van de disc kunnen niet met dit systeem wo...

Страница 159: ...D gegevens worden gecomprimeerd tot ongeveer 1 10 van de oorspronkelijke grootte Met ATRAC3plus een uitgebreide indeling van ATRAC3 worden audio CD gegevens tot ongeveer 1 20 van de oorspronkelijke grootte gecomprimeerd Zowel de indeling ATRAC3 als ATRAC3plus is geschikt voor het systeem ATRAC CD Op een ATRAC CD zijn audio CD gegevens opgenomen die zijn gecomprimeerd tot ATRAC3 of ATRAC3plus indel...

Страница 160: ...oth SIG en moeten zijn geverifieerd Zelfs als het aangesloten apparaat voldoet aan de hierboven vermelde Bluetooth norm kan met sommige apparaten wellicht geen verbinding worden gemaakt of functioneert het apparaat niet correct afhankelijk van de kenmerken of technische gegevens van het apparaat Wanneer u handsfree belt via de telefoon kan ruis optreden afhankelijk van het apparaat of de omgeving ...

Страница 161: ...wattenstaafje Gebruik hierbij niet teveel kracht Anders kunnen de aansluitingen worden beschadigd Opmerkingen Uit veiligheidsoverwegingen moet u de motor uitschakelen en de sleutel uit het contactslot halen voordat u de aansluitingen reinigt Raak de aansluitingen nooit rechtstreeks aan met uw vingers of een metalen voorwerp Het systeem verwijderen 1 Verwijder de beschermende rand 1Maak het voorpan...

Страница 162: ... Subwooferuitgang mono Relaisaansluiting elektrische antenne Aansluiting versterker Ingangen Telephone ATT bedieningsaansluiting Aansluiting verlichtingsregelaar BUS bedieningsingang BUS audio AUX IN ingang Afstandsbedieningsingang Antenne ingang Toonregelingen Laag 10 dB bij 60 Hz of 100 Hz XPLOD Gemiddeld 10 dB bij 500 Hz of 1 kHz XPLOD Hoog 10 dB bij 10 kHz of 12 5 kHz XPLOD Voeding 12 V gelijk...

Страница 163: ...essoires van de auto Het display verdwijnt van verschijnt niet in het weergavevenster De dimmer is ingesteld op Dimmer on pagina 22 Het display verdwijnt als u op OFF drukt en deze toets ingedrukt houdt tDruk op OFF op het systeem en houd deze toets ingedrukt tot het display verschijnt De aansluitingen zijn vuil pagina 29 DSO werkt niet DSO heeft wellicht niet het gewenste effect afhankelijk van h...

Страница 164: ...eem niet worden herkend vanaf een ander apparaat Voor herkenning op een ander apparaat verbreekt u de huidige verbinding en zoekt u dit systeem vanaf het andere apparaat U kunt opnieuw verbinding maken met het apparaat waarmee u de verbinding hebt verbroken Selecteer het apparaat in de lijst met geregistreerde apparaten Dit systeem kan het te verbinden apparaat niet vinden Controleer de Bluetooth ...

Страница 165: ...De beltoon of de stem van de andere persoon wordt slechts via één luidspreker uitgevoerd Speaker Sel is ingesteld op FR L of FR R tStel Speaker Sel in op Front pagina 21 Tijdens handsfree bellen wordt er geen geluid uitgevoerd via de autoluidsprekers Als het geluid wordt uitgevoerd via de mobiele telefoon moet u de mobiele telefoon instellen om het geluid uit te voeren via de autoluidsprekers Blan...

Страница 166: ...nnection Complete De Bluetooth verbinding is voltooid Connection Failed Kan niet worden verbonden met het apparaat wegens een probleem Kan niet worden verbonden met het apparaat omdat de toegangscode onjuist is De tijdslimiet voor het verbinden is verstreken Disconnected Het Bluetooth signaal is verloren Empty De items Dialed Calls Received Calls of Phonebook in het menu CALL bevatten geen gegeven...

Страница 167: ......

Страница 168: ......

Страница 169: ......

Страница 170: ......

Страница 171: ......

Страница 172: ...wahren möchten Bitte bewahren Sie den Geräte Pass an einem sicheren Ort auf Er kann im Falle eines Diebstahls zur ldentifikation lhres Eigentums dienen caraudio Geräte Pass Dieser Geräte Pass dient als Eigentumsnachweis für Ihr caraudio Gerät im Falle eines Diebstahls Wir empfehlen den Geräte Pass nicht im Fahrzeug aufzubewahren um Missbrauch zu verhindern Modellbezeichnung MEX BT5100 Seriennummer...

Отзывы: