Français
Français
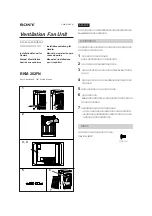
Appliquez la procédure suivante pour installer le
ventilateur d’aération dans le moniteur graphique couleur
Trinitron PGM-200R1A/200R1E/200R1U.
Installation du ventilateur
d’aération
Avant de procéder à l’installation, assurez-vous que tous
les appareils ont été mis hors tension.
1
Déposez le couvercle arrière du moniteur.
Déposez les deux vis à l’aide d’un tournevis.
2
Collez le coussinet fourni à l’arrière du couvercle.
3
Branchez la fiche CC du câble fourni sur la prise 12V
DC OUT à l’arrière du moniteur.
4
Installez le câble sur le moniteur dans la rainure.
5
Branchez l’autre extrémité du câble sur le ventilateur
d’aération.
6
Installez le ventilateur d’aération dans le moniteur en
veillant à orienter la marque SONY dans le bon sens.
7
Fixez le couvercle avec le coussinet.
• Serrez les deux vis déposées à l’étape
1
à l’aide d’un
tournevis.
• Réinstallez le couvercle après avoir placé la
longueur excédentaire de câble sous le couvercle
afin que le câble ne soit pas détendu.
Accessoires fournis
Les vis de réserve suivantes sont fournies.
+RK M3
×
8 (2)
(Real size)
(Taille réelle)
English
Follow the steps below to install the Ventilation Fan Unit
into the PGM-200R1A/200R1E/200R1U Trinitron Color
Graphic Monitor.
Installing the Ventilation Fan Unit
Before installation, make sure that the power to all the
equipment is off.
1
Remove the cover on the rear of the monitor
Remove the two screws with a screwdriver.
2
Stick the supplied cushion on the rear of the cover.
3
Connect the DC plug of the supplied cord to the 12V
DC OUT socket on the rear of the monitor.
4
Install the cord to the monitor along with the groove.
5
Connect the other end of the cord to the Ventilation
Fan Unit.
6
Install the Ventilation Fan Unit into the monitor with
the SONY mark facing out in the proper direction.
7
Attach the cover with the cushion.
• Tighten the two screws you removed in step
1
with a
screwdriver.
• Attach the cover after putting the excessive cord
under the cover to make sure that the cord is not
slack.
Supplied Accessories
The following spare screws are supplied.
+RK M3
×
8 (2)


