22
• The information is displayed or hidden (display
y
no display) each time you press DISP/
BATT INFO.
You can view images using the viewfinder
with the LCD panel closed to avoid wearing
down the battery, or when the image seen
on the LCD screen is poor.
z
Tips
• You can adjust the brightness of the viewfinder
backlight by touching
(HOME)
t
(SETTINGS)
t
[SOUND/DISP SET]
t
[VF
B.LIGHT] (p. 77).
Fasten the grip belt and hold your
camcorder correctly.
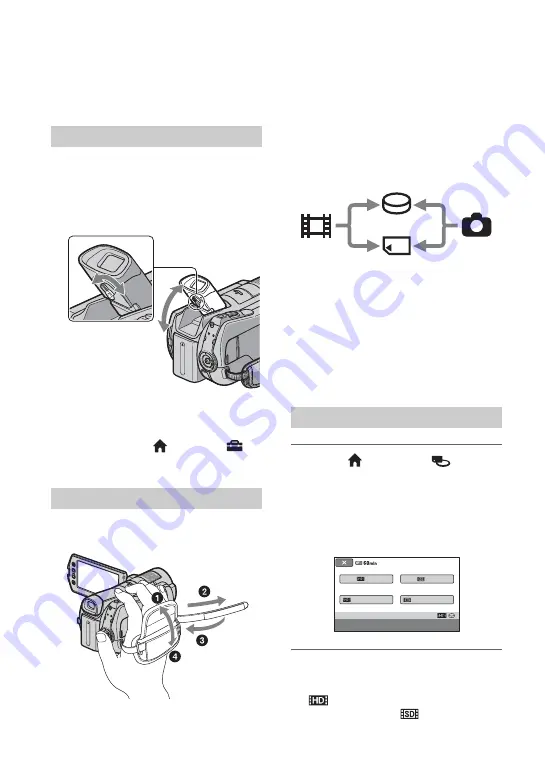
Adjusting the Viewfinder
Fastening the grip belt
Viewfinder lens
adjustment lever
Move it until the
image is clear.
Viewfinder
Step 5: Selecting the
media
You can select the hard disk or “Memory
Stick PRO Duo” as the recording/playback/
editing media on your camcorder. Select the
media for movies and still images
separately.
The default setting is hard disk for movies
and still images.
b
Notes
• You can do recording/playback/editing
operations for the selected media. When you
want to change media, reselect the media.
z
Tips
• See pages 11 and 24 for the recordable time.
• See page 52 on dubbing/copying between two
media.
1
Touch
(HOME)
t
(MANAGE MEDIA)
t
[MOVIE
MEDIA SET] on the LCD screen of
your camcorder.
The media setting screen for movies
appears.
2
Touch the desired media and
image quality.
indicates HD (high definition)
image quality, and
indicates SD
(standard definition) image quality.
Selecting the media for movies
Hard disk
“Memory Stick”
Movie
Still
image
MOVIE MEDIA SET
MEMORY STICK
HDD
HDD
MEMORY STICK
Select the media and image quality.


