SHORT INSTRUCTIONS
ULTRASONIC TESTING DEVICE
(When using other software applications, the display elements may vary from those shown).
Start / Stop recording
• Start: Tap the icon to start, or press the
"Recording” button on the sensor.
The icon turns red, the device records
for 10 secs and then stops automatically
(timings can be adjusted)
• Stop manually: Tap the icon / press the button.
Complete the testing data
•
Add photo / comment / voice memo:
Tap the icon and add the desired content.
•
Confi rm by tapping "OK" (bottom screen).
All test data and the additional data will be
stored in the defined folder.
Playback the testing data
• Select the test: Tap the "Folder" icon and select
an individual measurement.
• Play back the data: Tap the icon for playback
• Add data retroactively:
Tap the icon (then proceed as per Point 5).
• Back to Live Mode: Tap the icon.
Ultrasound occurs during a wide
range of processes. Using the
SONAPHONE testing device and
associated sensors these signals
can be verified.
Different apps are used in order to
perform recordings, evaluations and
documentation for the following
servicing tasks:
Leak detection and classifi cation
in gas, compressed air and
vacuum systems
Tightness testing of
non-pressurized systems
Steam trap and valve testing
Machinery condition monitoring
Detection of partial discharges
A wide range of other applications
is possible depending on the device
version and equipment.
SONOTEC GmbH
Nauendorfer Str. 2, 06112 Halle (Saale), Germany
www.sonotec.de
© All rights reserved
The SONAPHONE operating system includes free software under license. More information can be found in the user documentation.
Rev. 2; Date, Software version: LevelMeter V1.0.0 and higher.
4
5
6
Note: End the text input with "
".
Tapping the "Measurement Details"
icon allows for test data to be quickly expanded
upon to include additional information after it has
been saved.
SONOTEC
Quick Start
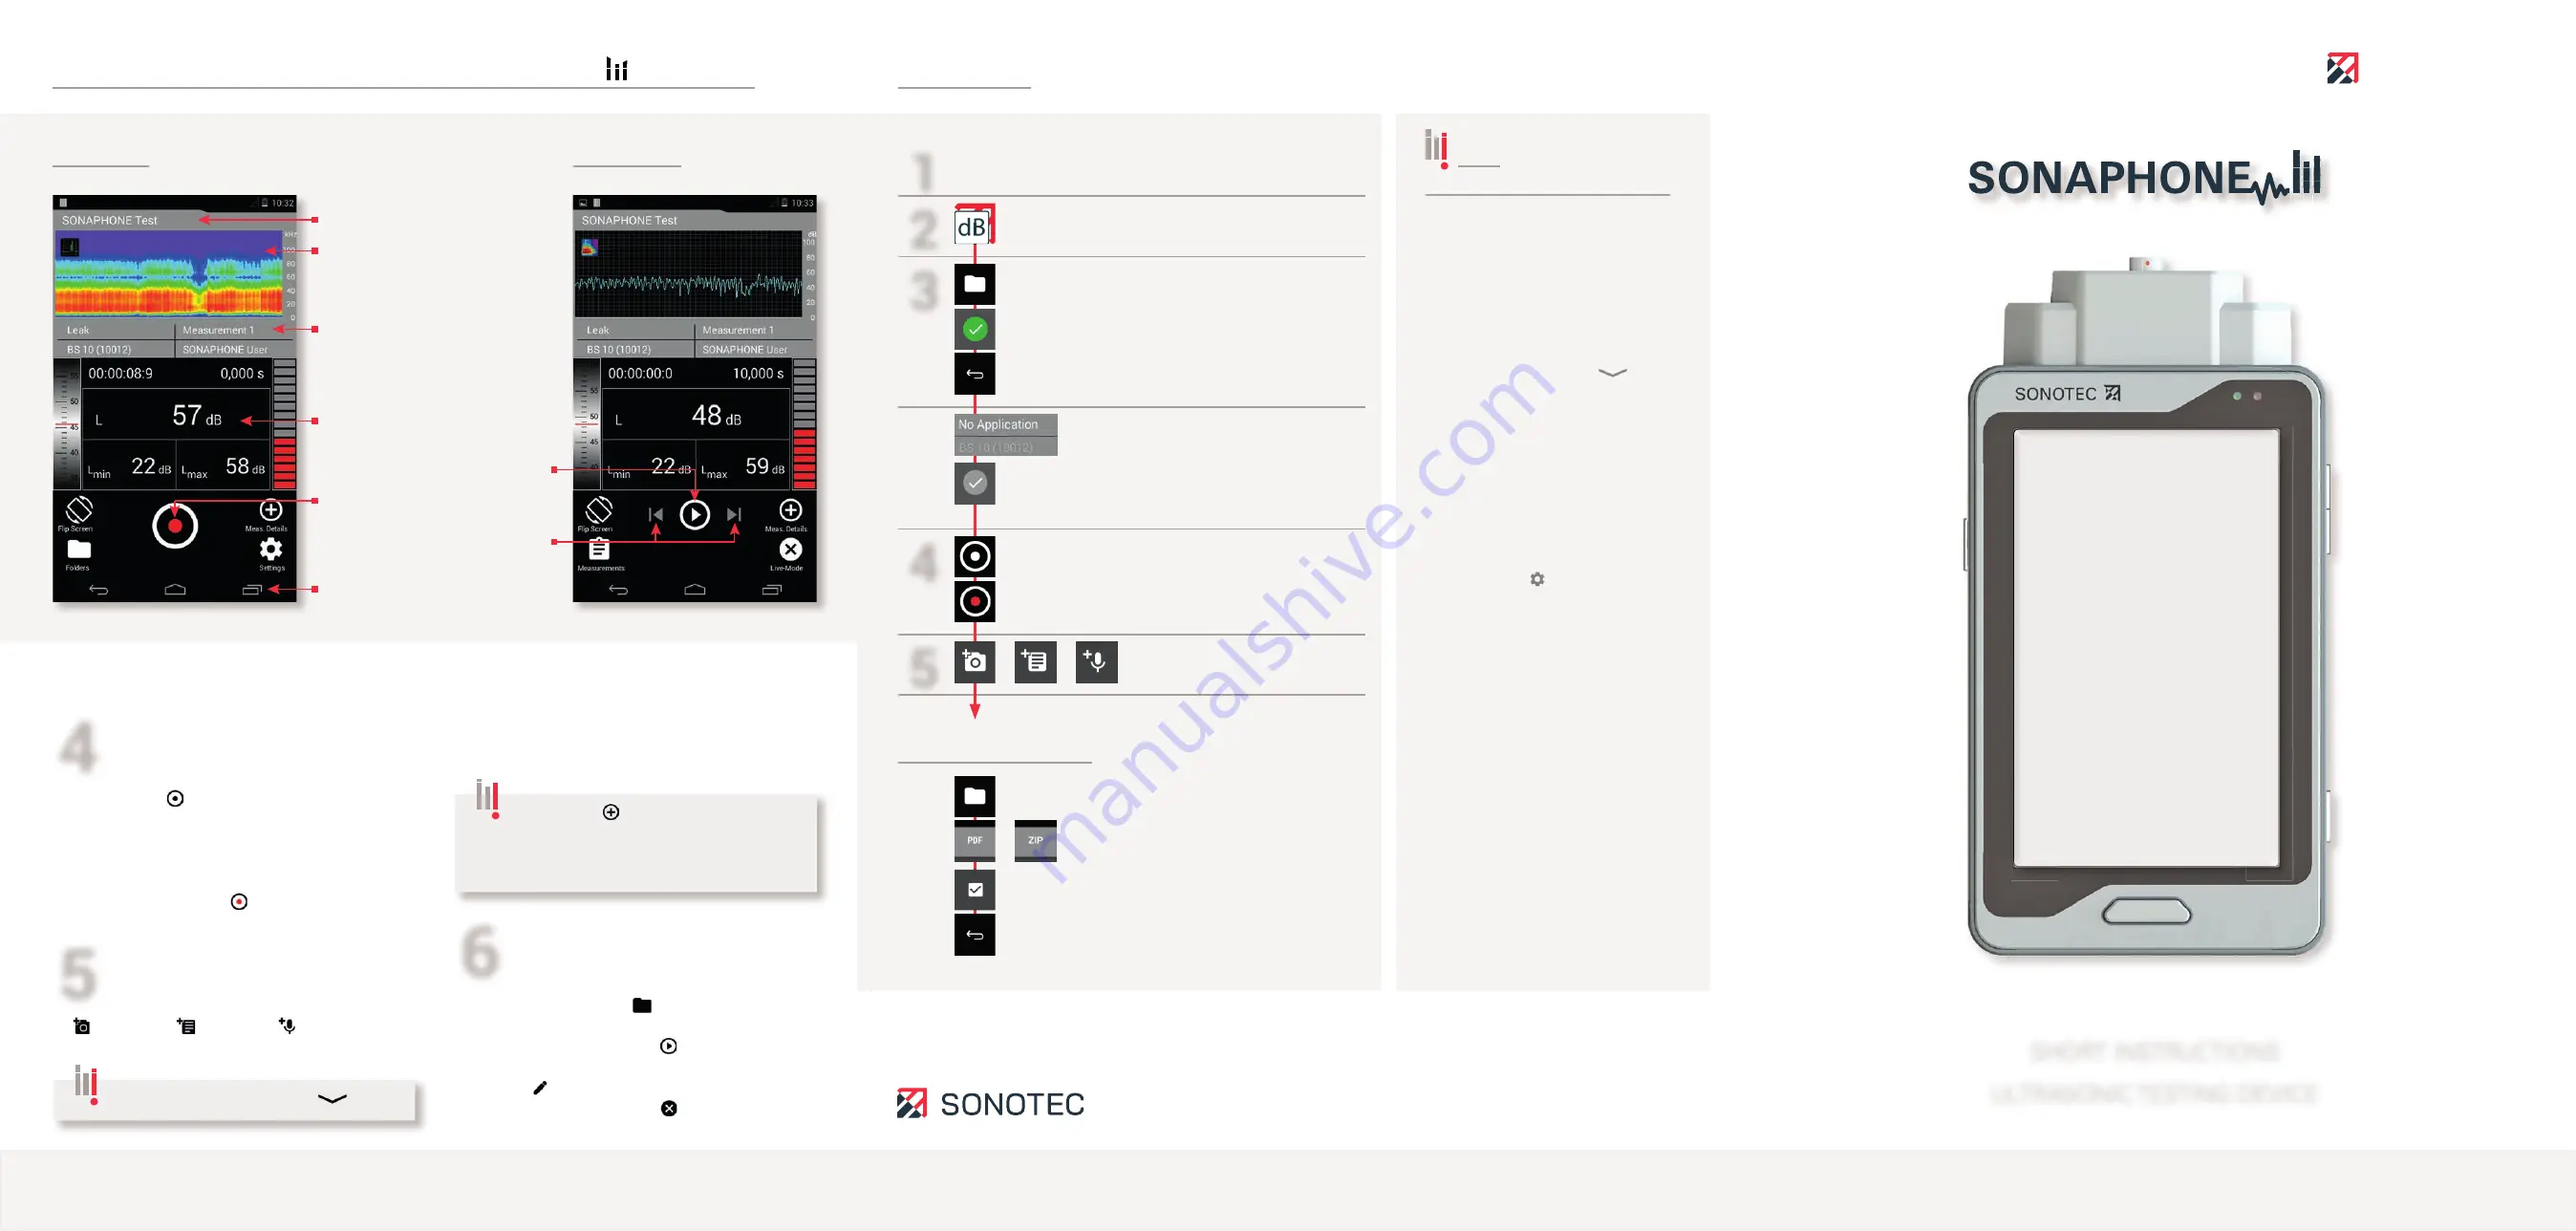
Display Elements and Functions of the
LEVEL ETER
App
Additional data for the test
being carried out:
Type of application (leak),
Connected sensor (BS10),
Name of test being carried out,
User (SONAPHONE User)
Back / Home /
Active applications (left to right)
Graphical output of the test data:
Spectrogram (Fig. left)
Level record (Fig. on the right)
Testing mode
Playback mode
Recording: Start / Stop
Numerical output of test values
(can be adapted individually)
Playback recording
Move to the previous / next
measurement
Active folder for tests
Notes
Open the folder overview
Add a photo / comment /
voice memo
Tap the LevelMeter app and
create a user name
Tap the application fi eld
(additional data in the top left-hand fi eld)
Activate the required application:
Active application = green background
The device automatically returns to Live Mode
Folders are automatically assigned
consecutive numbers. The name
can be edited (tap the name).
Close the keyboard with "
".
Go back to testing mode
The active folder is shown on the display
The name will be shown on the
display and in the exported data.
Choose a unique name.
Start test
Recording activated: The icon turns red
For documentation purposes and for
the report, each test can be expanded
upon to include the elements on the
side.
Areas of damage can be marked
on the photos.
Compile data in a test report (.pdf)
Export all test data (.zip)
Create a new folder or select an existing
folder: Active folder = green background
The recording stops automatically
after 10 seconds.
Change value: " Settings" -
"Measurement settings"
The application will be shown on the
display and in the exported data. It is
also used for evaluation.
User-defi ned applications can be
stored by selecting "Create new
application".
Stop the test manually
An active folder must be stored in
order to start a test.
Select the required data. Tap "OK" to confi rm.
The data is compiled for export.
Open the folder overview
The test data can be compiled in
the internal memory for evaluation
in Data Viewer (computer software
for LevelMeter app) and as a test
report (.pdf).
The data can then be transferred to
an end device.
Go back to testing mode
The data is ready for transfer.
1
2
3
4
5
Load battery
Connect sensor
Switch on device
Switch on headphones
Prepare test data for export


