Sonoro Elements W Скачать руководство пользователя страница 57

En

gli

sh

57

KG might void the user’s authorization for the operation of the device.

You can request the complete declaration of conformity at [email protected].
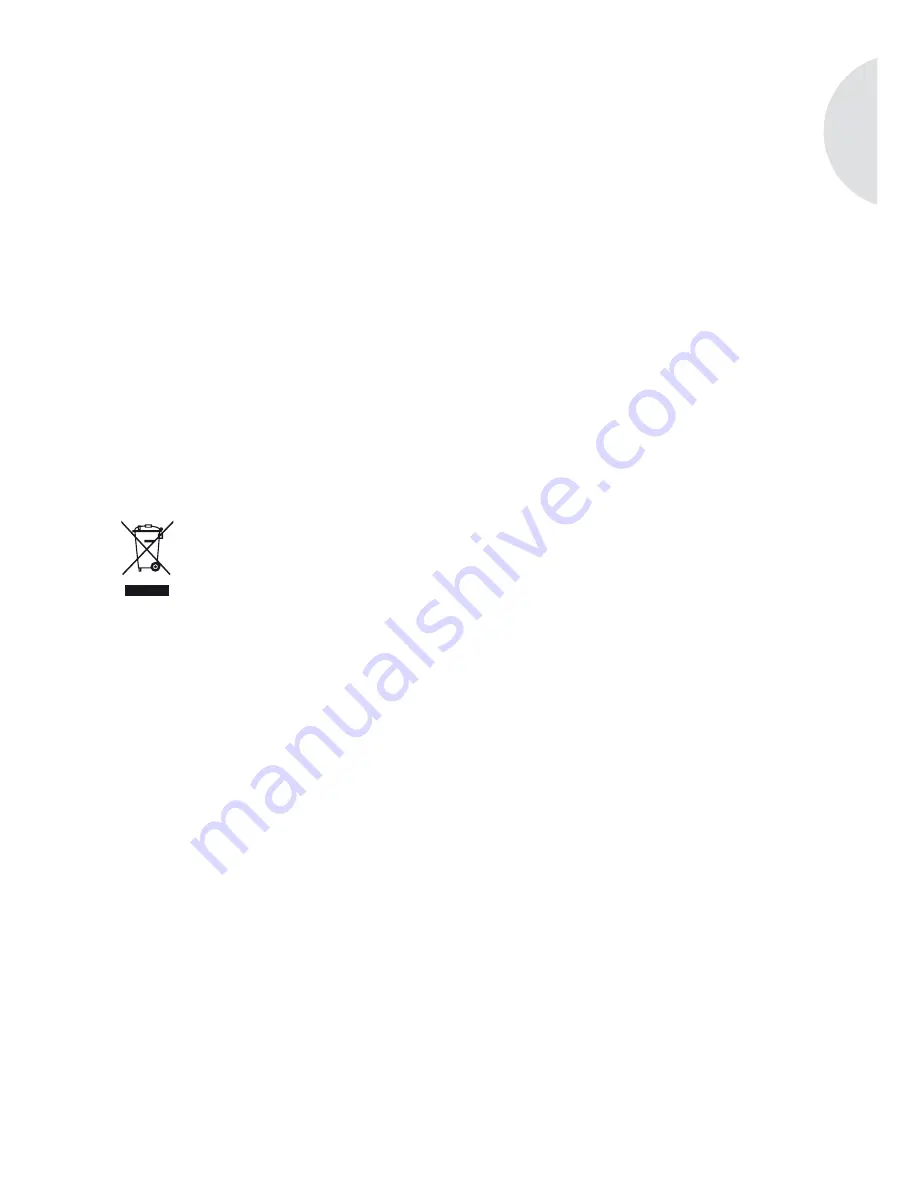
Disposal
Device

Please consider that your device is subject to the European Directive 2002/96/EC for the reduc-
tion of electronic waste.

Therefore please note that you are not permitted to dispose of your device in your household 

• 

waste.
You can receive information regarding the disposal of old devices at the municipal administ-

• 

ration, the waste disposal administration and the store where you purchased this product.
You can drop off your device free of charge at communal collection points.

• 

With the proper disposal of old devices you prevent environmental damage and don’t dama-

• 

ge your health.

Содержание Elements W

Страница 1: ...Instruction Manual...

Страница 2: ...therefore possible at any time For this reason no claims can be made based on the statements illustrations and descriptions inclu ded in this instruction manual The reprinting copying or translation i...

Страница 3: ...ply 12 5 4 Connecting the antenna 12 5 5 Connecting the headphones 13 6 Control elements and connections 14 7 Setting the basic functions 19 7 1 Setting the display language 19 7 2 Setting the brightn...

Страница 4: ...2 1 Location 36 12 2 2 Genre 37 12 2 3 Search 38 12 2 4 Storing a station 38 12 2 5 Storing a station with the remote control 39 12 2 6 Accessing stored stations on the device 39 12 2 7 Accessing a st...

Страница 5: ...f you give the device to third parties also include the instruction manual Non compliance with these instructions may result in serious injuries and damages to the device We do not assume any liabilit...

Страница 6: ...Audio playback from an iPod loading function for an iPod connecting adapter optionally available Audio playback for external devices that are connected through AUX Any other use is considered to be i...

Страница 7: ...he risk of fire completely disconnect the device from the power supply if you are not using the device for a longer time period To do this pull the power plug from the power socket 2 5 Batteries Remov...

Страница 8: ...luences moisture and high temperatures e g through direct sunlight Protect the device from sprayed and dripping water Never place liquid filled containers next to or on top of the device Never install...

Страница 9: ...and contact an authorized specialized dealer 2 12 Cleaning Always turn off the device before cleaning it Only clean the device on the outside with the provided cloth or another dry soft cloth Never us...

Страница 10: ...nstruction manual Remote control optionally available eDock optionally available 4 Supported formats Streaming format RTSP Real Time Streaming Prototcol Internet radio MMS Microsoft Media Streaming Pr...

Страница 11: ...ble to assess the dangers 5 1 Unpacking the device All parts of the device are delivered in a box 1 Unpack the device and all accessories and check the contents for completeness and intact ness NOTE I...

Страница 12: ...ter are always tightly connected to each other Pull the power adapter with the universal adapter from the power socket in a straight manner so that the adapter is not torn from its holder CAUTION The...

Страница 13: ...s device DANGER The improper use of headphones may result in injury Using headphones improperly can result in serious accidents and damages to your health When you listen with headphones do not turn t...

Страница 14: ...tion about the active mode 3 UP Navigation to the top During radio operation station search for the station at the next higher frequency 4 BACK Back button returns to the previous menu item 5 MODE Swi...

Страница 15: ...he alarm settings menu to select the alarm functions 3 FAVOR Station memory 4 SNOOZE Press briefly in playback mode switch the sound play back muting on off Press briefly in alarm mode start the repea...

Страница 16: ...al audio devices 6 iPod Connector socket for iPod eDock 7 Battery compartment Two batteries 1 5 V AA ensure that the clock continues to function if there is a power failure 8 ETHERNET Connector socket...

Страница 17: ...Switch to the next playback mode 5 DOWN FM Station scanning in the next lower frequency range iPod menu navigation to the bottom 6 MUTE SNOOZE Press briefly in playback mode switch the sound playback...

Страница 18: ...ogram button radio station 1 press briefly store the current station under this program button press for a long time 16 4 back fast rewind FM Program button radio station 4 press briefly store the cur...

Страница 19: ...o change to the next higher menu or leave the setup menu press the BACK button NOTE If you stop adjusting the settings for about 10 seconds the setup menu closes and the display will return to its ori...

Страница 20: ...onfirm your selection by pressing the menu button To set the brightness of the ring backlight select the light item also in the dimmer menu by pressing the UP or DOWN button 3 In both cases you can re...

Страница 21: ...the menu button again Now select time and confirm your selection again by pressing the menu button You will now see a split display with an actual and a desired value The actual one shows the time tha...

Страница 22: ...e the time through the Internet and NO if you do not want to use this function The time is now set according to your preferences 5 Now the device automatically returns to the previous menu To exit the...

Страница 23: ...he menu press the BACK button repeatedly until you have returned to the desired menu item or wait approx 10 seconds until the device automatically returns to the start menu Deactivating the sleep time...

Страница 24: ...setup menu appears 2 Open the factory settings item by pressing the menu button Factory Reset RESTORING No Yes 3 To restore the factory settings select the menu item factory settings with the UP or D...

Страница 25: ...the UP or DOWN buttons and confirm the selection by pressing the menu button Time Setting 20 00 06 00 Now Set Now shows the current time and Set shows the desired time 3 When the hour block is flashin...

Страница 26: ...t no iPod is connected you will hear the beep sound If the device is in playback mode when the alarm goes off the beep sound will also be activated regardless of which source you have selected 4 Selec...

Страница 27: ...ymbol will be shown on the display To turn off the alarm again briefly press the ALARM button on the top of the device or the remote control The alarm symbol will be removed Alternatively you can turn...

Страница 28: ...he snooze setting appears Snooze Setting Min 5 2 To extend or reduce the snooze time press the buttons UP or DOWN NOTE You can also set the length of the snooze time while the snooze function is activ...

Страница 29: ...increases since the device continues the data connection even in a switched off mode If the device is connected with the network through WLAN this connection also continues in a switched off state Th...

Страница 30: ...appropriate mode by pressing the MODE button To confirm the selection press the menu button Depending on the playback mode that you are currently in the remaining playback modes are available to you...

Страница 31: ...FM 2 Stored program location if the station was stored in the program memory 3 Station name if the station transmits RDS text 4 RDS text of the station if the station transmits RDS text Shown as scro...

Страница 32: ...ation in the device 1 Set the station that you would like to store 2 Press the FAVOR button on the device until the program memory is opened 3 The display will show SAVE FAVORITE followed by a number...

Страница 33: ...10 is done exclusively through the FAVOR button on the device 1 Briefly press the FAVOR button on the device The program memory is opened 2 Press the UP button repeatedly until you have reached the p...

Страница 34: ...de through the sleep timer press the MODE button and select the iRadio mode In the iRadio mode the display shows the following information 1 Mode iRadio 2 Station name of the current station 3 Informa...

Страница 35: ...pears after selecting the wireless network if using access with WPA encryption and Enter WEP key if using access with WEP encryption ABC_ 12 00 iRadio END AB END 3 1 2 4 1 Currently set mode here iRad...

Страница 36: ...ss data from a remo te directory Settings Makes it possible to change and view network language and configuration settings as well as restore iRadio As soon as you see this information on your display...

Страница 37: ...utton 2 Now you will receive a list with categories for which radio stations have been stored 60s Comedy Jazz Rock 70s Contemporary Jungle Soft Rock 80s Country Kids Spanish 90s Dance Latin hits Sport...

Страница 38: ...iRadio lettering NOTE The following symbols are available for the entry of a name ABCDEFGHIJKLMNOPQRSTUVWXYZ 0123456789 _ END END completes the entry of the key 3 Complete your search by selecting END...

Страница 39: ...remote control Accessing the program presets 6 10 is done exclusively through the FAVOR button on the device 1 Set the station that you would like to store 2 Press the program button button 1 5 at wh...

Страница 40: ...rom data carriers that are accessible through the network or PCs on the elements W There are various options for doing this which are explained below 12 4 1 Sharing The submenu item Search for PCs sta...

Страница 41: ...share and click with the right mouse button on the respective folder icon When the context menu opens select Properties Select the Sharing tab and then select Advanced Sharing Now select the field Sha...

Страница 42: ...dware Another possibility is that an active firewall is blocking it Operating system Microsoft Windows XP HOME Access the directory containing the folder you would like to share here music and click w...

Страница 43: ...field and select Enable file sharing in the query that follows Confirm the selection by clicking on OK If this display looks different on your system please just continue with the following item The...

Страница 44: ...entry by clicking on OK Now the folder icon of the folder you would like to share has changed It shows that a share has been activated for this folder Your elements W should now be able to find the s...

Страница 45: ...ndows Media Player and click on the menu item Library Here select the field Media Sharing and click Share my media in the following window Confirm your entry by clicking on the OK button Now select th...

Страница 46: ...lease note that the Media Player version 11 or higher is required for a successful connec tion Select the menu item UPNP Server by pressing the menu button The device will now begin to search for a PC...

Страница 47: ...sleep function 9 Time display 12 4 3 Playback options In this menu you have the option of switching the functions Repeat and Shuffle on or off Select the desired entry with the UP or DOWN buttons and...

Страница 48: ...settings Auto DHCP This function enables the automatic assignment of an IP address through a DHCP server Select YES to leave this function with the setting of an automatic IP assignment Now your elem...

Страница 49: ...owing additional menu items will also appear in the preceding menu Search for networks The option Search for networks allows you to start a new search for wireless networks To start a new search press...

Страница 50: ...ng the Radio restoring the factory settings Restores the factory settings to the Radio Please note that this will cause all of the settings stored in the Radio to be erased The folder My stuff will be...

Страница 51: ...n the iPod the UP and DOWN buttons func tion as navigation buttons NOTE When the device is switched into another mode the iPod playback is paused When you return to the iPod mode the playback at the m...

Страница 52: ...e Menu button Menu button End playback Start pause Stop 14 AUX playback You can connect and play additional audio devices such as MP3 players to the sonoro ele ments W through the AUX connection at th...

Страница 53: ...iPod docking sta tion at the top of the device see chapter iPod playback The type of iPod is not supported Check if your iPod is compatible with the device see chapter Supported formats The iPod does...

Страница 54: ...lished The network connector is not plugged in Plug the network connector into the LAN socket of the device The device is set to WLAN only Set the device to AUTO The network cable is defec tive Replac...

Страница 55: ...60Hz Input 100 240 V 50 60 Hz 0 7 A Output 12 V 2 A Batteries for the clock 2 alkaline manganese batteries 1 5 V type LR06 AA Mignon Batteries for the remote control 1 Lithium battery 3 V type CR2025...

Страница 56: ...ation Radio and television interference This device has been tested pursuant to part 15 of the FCC regulations with the limits for a Class B digital device electromagnetic energy These limits are desi...

Страница 57: ...f electronic waste Therefore please note that you are not permitted to dispose of your device in your household waste You can receive information regarding the disposal of old devices at the municipal...

Страница 58: ...58...

Страница 59: ...anu facturing errors free of charge according to our preference either by repairing or replacing the device Please contact your specialized dealer or send the defective device along with the guarantee...

Страница 60: ...0941 601 29...

Страница 61: ...Instruction Manual...

Страница 62: ...therefore possible at any time For this reason no claims can be made based on the statements illustrations and descriptions inclu ded in this instruction manual The reprinting copying or translation i...

Страница 63: ...ply 12 5 4 Connecting the antenna 12 5 5 Connecting the headphones 13 6 Control elements and connections 14 7 Setting the basic functions 19 7 1 Setting the display language 19 7 2 Setting the brightn...

Страница 64: ...2 1 Location 36 12 2 2 Genre 37 12 2 3 Search 38 12 2 4 Storing a station 38 12 2 5 Storing a station with the remote control 39 12 2 6 Accessing stored stations on the device 39 12 2 7 Accessing a st...

Страница 65: ...f you give the device to third parties also include the instruction manual Non compliance with these instructions may result in serious injuries and damages to the device We do not assume any liabilit...

Страница 66: ...s Audio playback from an iPod loading function for an iPod connecting adapter optionally available Audio playback for external devices that are connected through AUX Any other use is considered to be...

Страница 67: ...he risk of fire completely disconnect the device from the power supply if you are not using the device for a longer time period To do this pull the power plug from the power socket 2 5 Batteries Remov...

Страница 68: ...fluences moisture and high temperatures e g through direct sunlight Protect the device from sprayed and dripping water Never place liquid filled containers next to or on top of the device Never instal...

Страница 69: ...and contact an authorized specialized dealer 2 12 Cleaning Always turn off the device before cleaning it Only clean the device on the outside with the provided cloth or another dry soft cloth Never us...

Страница 70: ...nstruction manual Remote control optionally available eDock optionally available 4 Supported formats Streaming format RTSP Real Time Streaming Prototcol Internet radio MMS Microsoft Media Streaming Pr...

Страница 71: ...ble to assess the dangers 5 1 Unpacking the device All parts of the device are delivered in a box 1 Unpack the device and all accessories and check the contents for completeness and intact ness NOTE I...

Страница 72: ...ter are always tightly connected to each other Pull the power adapter with the universal adapter from the power socket in a straight manner so that the adapter is not torn from its holder CAUTION The...

Страница 73: ...s device DANGER The improper use of headphones may result in injury Using headphones improperly can result in serious accidents and damages to your health When you listen with headphones do not turn t...

Страница 74: ...tion about the active mode 3 UP Navigation to the top During radio operation station search for the station at the next higher frequency 4 BACK Back button returns to the previous menu item 5 MODE Swi...

Страница 75: ...he alarm settings menu to select the alarm functions 3 FAVOR Station memory 4 SNOOZE Press briefly in playback mode switch the sound playback muting on off Press briefly in alarm mode start the repea...

Страница 76: ...al audio devices 6 iPod Connector socket for iPod eDock 7 Battery compartment Two batteries 1 5 V AA ensure that the clock continues to function if there is a power failure 8 ETHERNET Connector socket...

Страница 77: ...Switch to the next playback mode 5 DOWN FM Station scanning in the next lower frequency range iPod menu navigation to the bottom 6 MUTE SNOOZE Press briefly in playback mode switch the sound playback...

Страница 78: ...ogram button radio station 1 press briefly store the current station under this program button press for a long time 16 4 back fast rewind FM Program button radio station 4 press briefly store the cur...

Страница 79: ...o change to the next higher menu or leave the setup menu press the BACK button NOTE If you stop adjusting the settings for about 10 seconds the setup menu closes and the display will return to its ori...

Страница 80: ...onfirm your selection by pressing the menu button To set the brightness of the ring backlight select the light item also in the dimmer menu by pressing the UP or DOWN button 3 In both cases you can re...

Страница 81: ...the menu button again Now select time and confirm your selection again by pressing the menu button You will now see a split display with an actual and a desired value The actual one shows the time tha...

Страница 82: ...e the time through the Internet and NO if you do not want to use this function The time is now set according to your preferences 5 Now the device automatically returns to the previous menu To exit the...

Страница 83: ...he menu press the BACK button repeatedly until you have returned to the desired menu item or wait approx 10 seconds until the device automatically returns to the start menu Deactivating the sleep time...

Страница 84: ...setup menu appears 2 Open the factory settings item by pressing the menu button Factory Reset RESTORING No Yes 3 To restore the factory settings select the menu item factory settings with the UP or D...

Страница 85: ...the UP or DOWN buttons and confirm the selection by pressing the menu button Time Setting 20 00 06 00 Now Set Now shows the current time and Set shows the desired time 3 When the hour block is flashin...

Страница 86: ...t no iPod is connected you will hear the beep sound If the device is in playback mode when the alarm goes off the beep sound will also be activated regardless of which source you have selected 4 Selec...

Страница 87: ...ymbol will be shown on the display To turn off the alarm again briefly press the ALARM button on the top of the device or the remote control The alarm symbol will be removed Alternatively you can turn...

Страница 88: ...he snooze setting appears Snooze Setting Min 5 2 To extend or reduce the snooze time press the buttons UP or DOWN NOTE You can also set the length of the snooze time while the snooze function is activ...

Страница 89: ...increases since the device continues the data connection even in a switched off mode If the device is connected with the network through WLAN this connection also continues in a switched off state Th...

Страница 90: ...appropriate mode by pressing the MODE button To confirm the selection press the menu button Depending on the playback mode that you are currently in the remaining playback modes are available to you...

Страница 91: ...FM 2 Stored program location if the station was stored in the program memory 3 Station name if the station transmits RDS text 4 RDS text of the station if the station transmits RDS text Shown as scro...

Страница 92: ...ation in the device 1 Set the station that you would like to store 2 Press the FAVOR button on the device until the program memory is opened 3 The display will show SAVE FAVORITE followed by a number...

Страница 93: ...10 is done exclusively through the FAVOR button on the device 1 Briefly press the FAVOR button on the device The program memory is opened 2 Press the UP button repeatedly until you have reached the p...

Страница 94: ...de through the sleep timer press the MODE button and select the iRadio mode In the iRadio mode the display shows the following information 1 Mode iRadio 2 Station name of the current station 3 Informa...

Страница 95: ...pears after selecting the wireless network if using access with WPA encryption and Enter WEP key if using access with WEP encryption ABC_ 12 00 iRadio END AB END 3 1 2 4 1 Currently set mode here iRad...

Страница 96: ...ss data from a remo te directory Settings Makes it possible to change and view network language and configuration settings as well as restore iRadio As soon as you see this information on your display...

Страница 97: ...utton 2 Now you will receive a list with categories for which radio stations have been stored 60s Comedy Jazz Rock 70s Contemporary Jungle Soft Rock 80s Country Kids Spanish 90s Dance Latin hits Sport...

Страница 98: ...iRadio lettering NOTE The following symbols are available for the entry of a name ABCDEFGHIJKLMNOPQRSTUVWXYZ 0123456789 _ END END completes the entry of the key 3 Complete your search by selecting END...

Страница 99: ...remote control Accessing the program presets 6 10 is done exclusively through the FAVOR button on the device 1 Set the station that you would like to store 2 Press the program button button 1 5 at wh...

Страница 100: ...rom data carriers that are accessible through the network or PCs on the elements W There are various options for doing this which are explained below 12 4 1 Sharing The submenu item Search for PCs sta...

Страница 101: ...share and click with the right mouse button on the respective folder icon When the context menu opens select Properties Select the Sharing tab and then select Advanced Sharing Now select the field Sha...

Страница 102: ...dware Another possibility is that an active firewall is blocking it Operating system Microsoft Windows XP HOME Access the directory containing the folder you would like to share here music and click w...

Страница 103: ...field and select Enable file sharing in the query that follows Confirm the selection by clicking on OK If this display looks different on your system please just continue with the following item The...

Страница 104: ...e entry by clicking on OK Now the folder icon of the folder you would like to share has changed It shows that a share has been activated for this folder Your elements W should now be able to find the...

Страница 105: ...indows Media Player and click on the menu item Library Here select the field Media Sharing and click Share my media in the following window Confirm your entry by clicking on the OK button Now select t...

Страница 106: ...Please note that the Media Player version 11 or higher is required for a successful connec tion Select the menu item UPNP Server by pressing the menu button The device will now begin to search for a P...

Страница 107: ...d sleep function 9 Time display 12 4 3 Playback options In this menu you have the option of switching the functions Repeat and Shuffle on or off Select the desired entry with the UP or DOWN buttons an...

Страница 108: ...settings Auto DHCP This function enables the automatic assignment of an IP address through a DHCP server Select YES to leave this function with the setting of an automatic IP assignment Now your elem...

Страница 109: ...lowing additional menu items will also appear in the preceding menu Search for networks The option Search for networks allows you to start a new search for wireless networks To start a new search pres...

Страница 110: ...ing the Radio restoring the factory settings Restores the factory settings to the Radio Please note that this will cause all of the settings stored in the Radio to be erased The folder My stuff will b...

Страница 111: ...on the iPod the UP and DOWN buttons func tion as navigation buttons NOTE When the device is switched into another mode the iPod playback is paused When you return to the iPod mode the playback at the...

Страница 112: ...e Menu button Menu button End playback Start pause Stop 14 AUX playback You can connect and play additional audio devices such as MP3 players to the sonoro ele ments W through the AUX connection at th...

Страница 113: ...iPod docking sta tion at the top of the device see chapter iPod playback The type of iPod is not supported Check if your iPod is compatible with the device see chapter Supported formats The iPod does...

Страница 114: ...lished The network connector is not plugged in Plug the network connector into the LAN socket of the device The device is set to WLAN only Set the device to AUTO The network cable is defec tive Replac...

Страница 115: ...60Hz Input 100 240 V 50 60 Hz 0 7 A Output 12 V 2 A Batteries for the clock 2 alkaline manganese batteries 1 5 V type LR06 AA Mignon Batteries for the remote control 1 Lithium battery 3 V type CR2025...

Страница 116: ...g interference that may cause undesired operation Radio and television interference This device has been tested pursuant to part 15 of the FCC regulations with the limits for a Class B digital device...

Страница 117: ...y This transmitter must not be co located or operated in conjunction with any other antenna or transmitter Disposal Device Please consider that your device is subject to the European Directive 2002 96...

Страница 118: ...118...

Страница 119: ...anu facturing errors free of charge according to our preference either by repairing or replacing the device Please contact your specialized dealer or send the defective device along with the guarantee...

Отзывы: