


Set up a Windows PC to allow the Morpheus to access your audio files via a UPnP server.
(Continued...)
4.
You will now need to connect your Morpheus to Windows Media Player 11 and configure it to allow
it to access your media library. In order to this, you will need to do the following:
a. Keep pressing
BACK
to get to Morpheus’
Main menu
and then turn the Dial and
select
Media Player
and press
OK
.
b. Turn the main dial to highlight
UPNP Servers
and press
OK.
c. The Morpheus will scan for all available UPnP servers. Note, this may take a few
seconds
to
complete the scan. Until the scan has completed, the radio will display
[Empty],
and will
continue to display
[Empty]
if no UPnP servers are found.
d. After a successful scan, select your UPnP server, by rotating the Dial if there is more than
one, and then press OK
(Note: the display
Access Denied
at
this
stage).
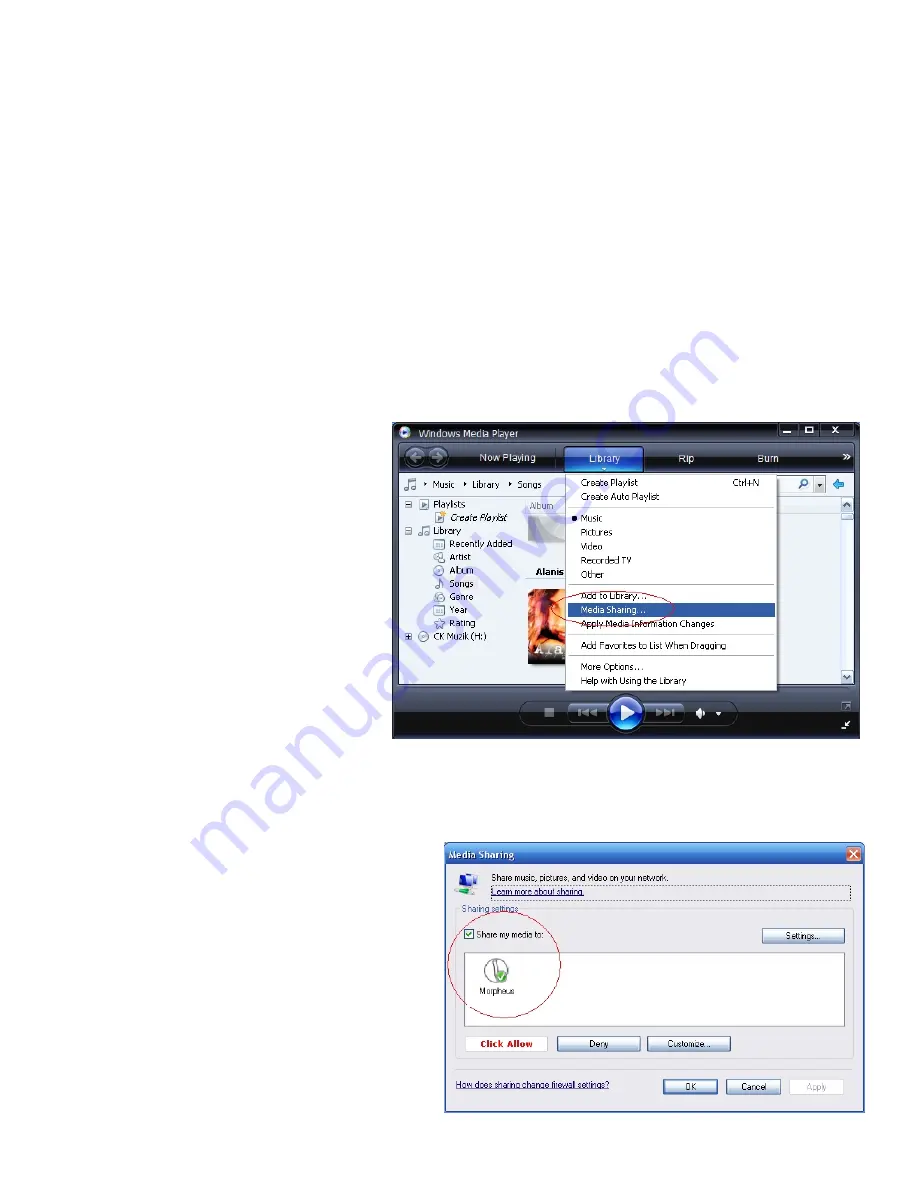
5.
Your PC will now prompt you that a device has attempted to connect to your UPnP server. In order
to allow the Morpheus to have access to your media files, you will need to click the
Library
tab from
Windows Media Player 11 and select the
Media Sharing…
item to open the
Media Sharing
window.
6.
From the
Media Sharing
window,
you will see
Morpheus
listed with our hoop logo or under the
name
, Morpheus
. Click on the
device listed, then click the ‘Allow’ button and then click ‘OK. Your
Morpheus should now be able to connect to your Windows Media Player under UPnP configuration. ’
You may rename your Morpheus afterwards using the Menue system on your Morpheus music
centre.
Now, to play your music files with UPnP
is exactly the same as with Windows Shares
as explained in previous sections.
You can also control the music playback, add
to queues etc exactly the way as explained
in the Media Player section.


