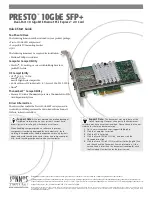
Quick Start Guide for Presto 10GbE SFP+
INSTALLATION STEPS FOR MAC USERS
The following section covers installation and configuration steps
for the Presto card in a Mac computer or Thunderbolt-to-PCIe
card expansion system connected to a Mac. If you are installing
the Presto card into a Windows PC, skip to INSTALLATION
STEPS FOR WINDOWS USERS on the next page.
Installation Preparation
Sonnet strongly recommends that you read the section in your
computer’s user manual that addresses PCI card installation, prior
to installing the Presto 10GbE card into your system.
Card Installation Steps
1.
Shut down your computer or Thunderbolt-to-PCIe card
expansion system and disconnect it from its power source,
and then open it to access the expansion card area (PCIe
slots); refer to the user’s manual for specific information.
2.
Locate an available x8 (8-lane) or x16 (16-lane) PCI Express
slot and remove its access cover.
3.
Remove the Sonnet card from its packaging, and then
install it into the PCI Express slot;
make sure the card is
firmly seated and secured
.
4.
Close your computer or expansion system, and then
reconnect it to its power source. If the card is installed in
an expansion system, also connect the Thunderbolt cable
between the Thunderbolt ports on the system and computer.
5.
If you are using SFP+ terminated Twinax copper cables to
connect the Sonnet card, connect them now, and then go to
step 7. Otherwise, read the documentation included with the
SFP+ transceivers you purchased, and then install them into
the Sonnet card.
6.
Connect cables between the transceivers in the Sonnet card
and in the switch or device.
7.
Turn on your computer; depending on the computer and
operating system used:
• If you installed the card into a Mac Pro (Mid 2012), Mac
Pro (Mid 2010), Mac Pro (Early 2009), or Mac Pro (Early
2008), or, into a Thunderbolt-to-PCIe card expansion
system, proceed to Driver Download and Installation.
• If you installed the card into a pre-2008 Mac Pro, Expansion
Slot Utility should open automatically. If it does not open
by itself, you must do so manually (Expansion Slot Utility
is located in the /System/Library/CoreServices folder). Select
the configuration appropriate for your setup (your Sonnet
card is an x8 card, and should be assigned at least an x8
slot), and then click Quit if the default configuration was
appropriate, or click Save and Restart if you changed the
configuration. Proceed to the next section.
Driver Download and Installation Steps
1.
Launch a Web browser and go to www.sonnettech.com/
support, and then click the Downloads, Manuals, &
Knowledgebase link.
2.
On the Support Categories page, click the Computer Cards
link, and then click the PCIe Cards link. On the PCIe Cards
page, click the Presto 10GbE SFP+ link.
3.
On the Presto 10GbE SFP+ page, click the Driver link,
and then click the Download Now button next to driver
software for macOS; the software will be downloaded.
4.
Double-click the .dmg file; the file will expand and a new
window will open.
5.
Double-click the Sonnet Twin-10G.pkg file to launch the
driver installer. Follow the on-screen instructions, and then
click Restart to restart your system and finish the driver
installation.
Basic Card Configuration Information
Configure the Presto 10GbE card in the System Preferences
Network preferences panel; the card will be identified as a PCI
Ethernet card.
Performance Tuning Steps
Listed below are steps required to configure the Presto card for
maximum performance. Please note that to take advantage
of these settings, the switch or router to which the card is
connected must also support these features.
1.
Open System Preferences, and then click Network. In the
Network System Preferences panel, click one of the Presto
card’s ports in the left panel, and then click Advanced; a
new panel appears.
3.
In the Advanced panel, click Hardware. From the Configure
drop-down menu, select “Manually”. In the Speed drop-
down menu, leave the setting at 10G… In the Duplex drop-
down menu, select “full-duplex” (not “full duplex, flow-
control”). In the MTU drop-down menu, select “Custom,”
and then enter “9000” in the box below.
3.
When you’ve completed changing the settings, click OK.
4.
Repeat steps 1-3 for the other port, if necessary.
5.
Back in the main Network window, click Apply after you’ve
completed changing the settings.
6.
If you used existing settings and do not need to combine
Ethernet ports (link aggregation), your installation is
complete. For additional information on combining
Ethernet ports, open a browser and go to support.apple.com;
type “network, Ethernet” and “Manage Virtual interfaces” to
display various articles.
2


