4
GPU Card Installation Steps
11.
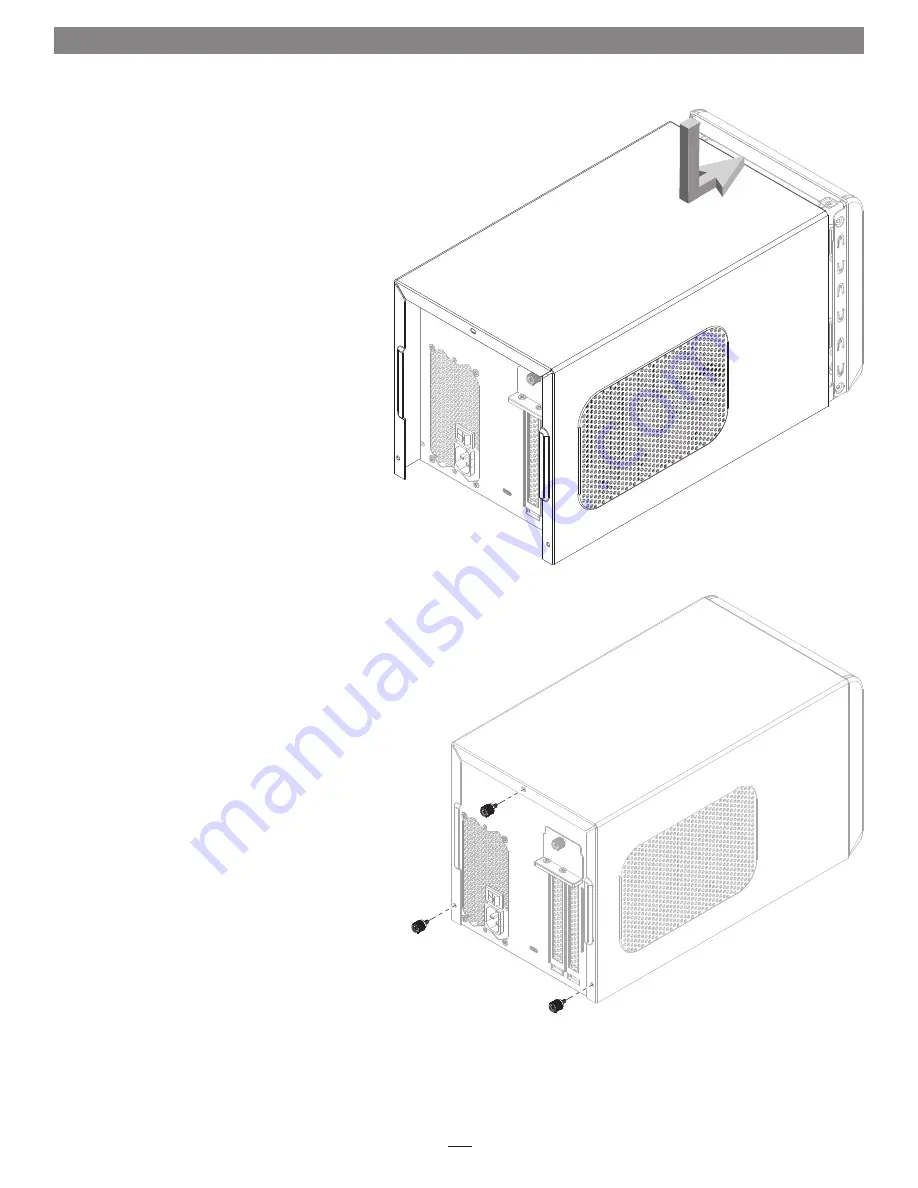
Pulling its sides apart slightly, lower the top cover over the inner
assembly’s top brackets as shown, and then push the sides toward each
other so that the guides on the cover and assembly engage each other
(Figure 6)
.
12.
Slide the top cover all the way forward until it stops
(Figure 6)
.
13.
Secure the top cover to the inner assembly with the three thumbscrews
you removed previously
(Figure 7)
.
14.
Connect the included Thunderbolt cable between the Thunderbolt 3
port on the box and a Thunderbolt 3 port on your computer. When
using a MacBook Pro (13-inch, Late 2016, Four Thunderbolt 3 Ports)
connect to one of the left-hand ports for full 40Gbps PCIe bandwidth.
15.
Connect the included power cord between a wall outlet or
power strip and the box’s power socket, and then flip the power
switch to the on position. Note that the power indicator on the
box will not light until the computer is powered on, but LEDs
inside the box (visible through the grills) will light whenever the
box is powered.
Figure 6
Figure 7


