


- 26 -
CUSTOMIZING THE DVD FUNCTION SETTINGS
NOTE
• Some DVDs may not play in the audio language you selected. A prior language may be programmed on the
disc.
• Some DVDs may be set to display subtitles in a language other than the one you selected. A prior subtitle
language may be programmed on the disc.
• Some DVDs allow to change subtitle selections only via the disc menu. If this is the case, press the
DVD
MENU
button and choose the appropriate subtitle from the selection on the disc menu.
• Some DVDs may not included your pre-selected language. In this case, the DVD player automatically
displays disc menus consistent with the disc’s initial language setting.
Cut off when a wide-screen
video image is played.
Pan Scan
Letter Box
Wide-screen
LANGUAGE SETUP
1. Press the
SETUP
button.
2. Use the or button to select the Language Setup, then press the
button to enter.
3. Use the or button to select the option (
OSD Language, Audio,
Subtitle, DVD Menu
), then press the button to enter.
4. Use or button to select your preferred language and press the
ENTER•OK
button to confirm.
5. Press the
button to go back to the previous menu. Repeat steps
3 and 4 to adjust other options.
6. To exit the SETUP MENU and return to the normal screen, highlight the Exit Setup Mode (
) and
press the
ENTER•OK
button.
Language Setup
Enter : Select
OSD Language
Audio
Subtitle
DVD Menu
VIDEO SETUP
1. Press the
SETUP
button.
2. Use the or button to select the Video Setup.
3. Press the button to highlight the TV TYPE.
4. Use the or button to select the desired TV type.
5. To exit the SETUP MENU and return to the normal screen, highlight
the Exit Setup Mode (
) and press the
ENTER•OK
button.
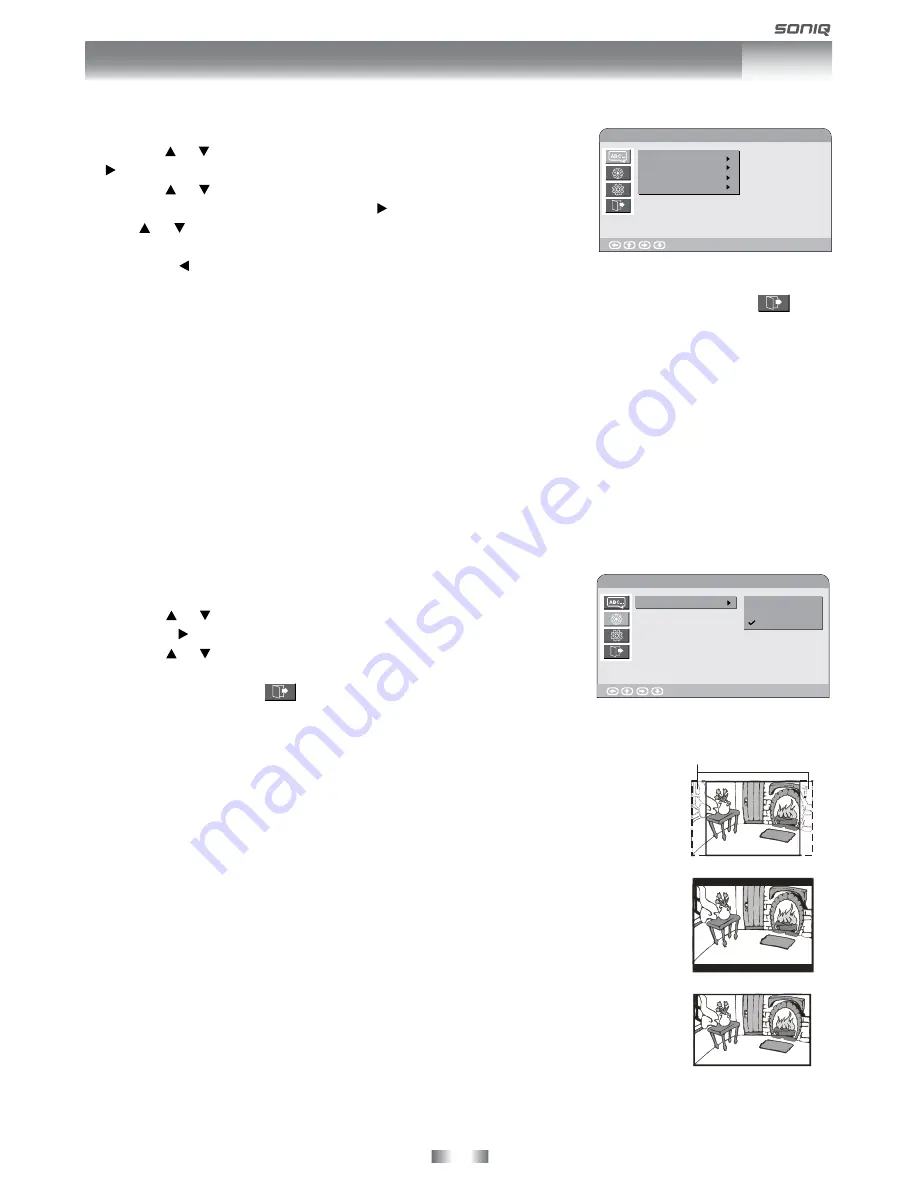
TV TYPE
Pan Scan
• When wide-screen video is played, this mode clips the right and left sides of the
image so that it can be viewed on a conventional screen.
• Some wide-screen DVDs that do not permit Pan Scan mode playback are
automatically played in letterbox mode (black bands that appear at the top and
bottom of the screen).
Letter Box
• When wide-screen video is played in this mode on a conventional screen, black
bands appear at the top and bottom of the screen.
Wide screen
• This is the correct mode for playing wide-screen videos on the unit or other
external wide-screens.
NOTE
• The displayable picture size is preset on the DVD. Therefore the playback picture
of some DVDs may not conform to the picture size you select.
• When you play DVDs recorded in the 4:3 aspect ratio, the playback picture will
always appears in the 4:3 aspect ratio regardless of the TV TYPE setting.
• If the screen mode is still not correct, press the LCD MODE
button repeatedly to
adjust it.
Video Setup
TV Type
Pan Scan
Letter Box
Wide Screen
Enter : Select


