7
Programming 3
Once in programming mode the sign will default to input state 1, press the
INPUT (8) button to step through the input states 2 – 4 *, until you have
selected the one you wish to change.
(* noting that the green LED indicates Input 1 and
the red LED
input 2.)
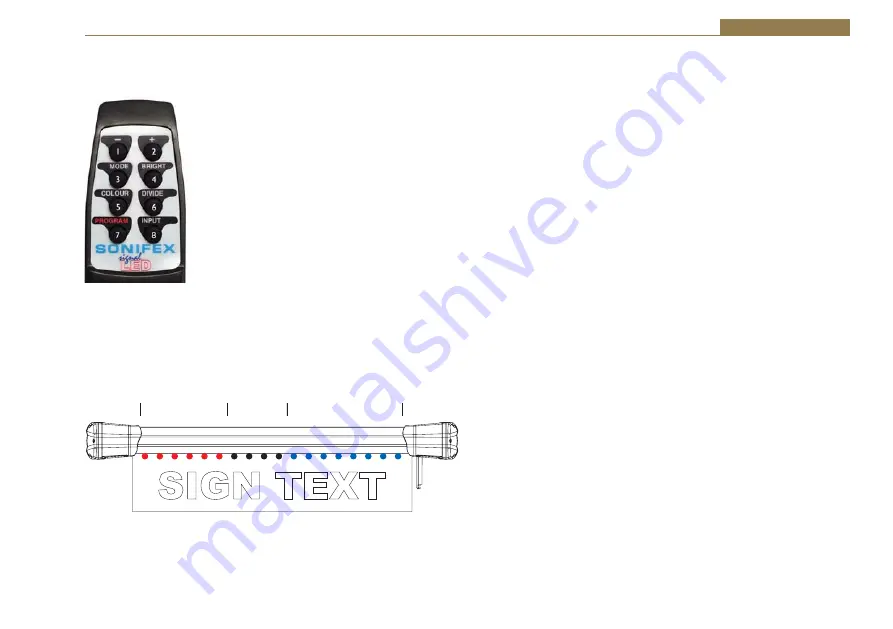
Setting The LED Sections of The Sign
The sign can be treated as a single sign or can be
split into two separate sets of LEDs anywhere along
the sign’s length, referred to as Sections 1 and 2
below, with a non-displaying centre section, the
‘dead zone’.
Press the DIVIDE (6) button to set the divide position for Section 1. Pressing
the DIVIDE (6) button again alternates the currently selected section
between Sections 1 and 2.
Section 1 initially consists of the 9 LEDS closest to the opening, with Section
2 being the 9 LEDs furthest away (on a 40cm sign).
Pressing the + (2) button advances the Section 1 divide position one LED for
each time you press the button. If Section 1 reaches Section 2 then Section
2 is pushed back (i.e. its divide position retreats).
Pressing the – (1) button causes the Section 1 divide point to retreat. But
this time Section 2’s divide position remains unchanged and a dead zone
(i.e. no LEDS illuminate here) is created. Similarly when Section 2 is being
set the – (1) button will advance Section 2 into Section 1 causing the
Section 1 divide position to retreat, but pressing the + (2) button will cause
the divide position of Section 1 to remain unchanged again introducing a
dead zone. This is complex to explain and it’s probably better that you try it
yourself to see how it works!
The divide point for Section 1 or Section 2 cannot be moved so that the
Section 1 is not visible. To set the sign to all one colour we suggest moving
the divide point of Section 1 to its maximum which will make Section 2
invisible, although the same result can be achieved by setting both sections
to the same colour.
Setting The Colour of The Section/Sign
To set the colour of each Section, (or the whole sign if only one Section
is defined), press the COLOUR (5) button to select Section 1. Pressing the
colour button again alternates the currently selected section.
Press the + (2) and – (1) buttons to change the selected colour according to
the colour table below. Normally the User colour setting is undefined and
therefore not selectable. However, for special orders Sonifex can create
distinct colour sets and these will use the User colour setting.
Fig 3-3: Operation of DIVIDE
Section 2
Dead
Zone
Section 1
Содержание SignalLED Series
Страница 26: ...Notes...
Страница 27: ...Notes...
Страница 28: ...www sonifex co uk t 44 0 1933 650 700 f 44 0 1933 650 726 sales sonifex co uk...


