background image

VeseNET,

www.vesenet.co.uk

5

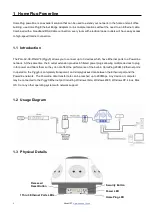
Front Panel LEDs

Power

On

- Normal operation.

Off

- No power

HomePlug

On

- The Powerline network is active. This means that at least one other HomePlug de-

vice was detected.

Off

- Powerline network is not available - no other HomePlug devices were detected.

Flashing

- Data is being transmitted or received via the Powerline network.

1-3 Ethernet

Security

Reset

On

- Ethernet connection is active.

Off

- No Ethernet connection.

Flashing

- Data is being transmitted or received via the Ethernet Port.

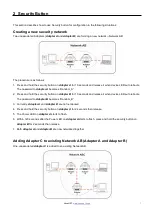
This button is designed to generate an individual network group under multiple nods envi-

ronment.

Please refer to

Security Button

section for more details.

This button is used to clear ALL data and restore ALL settings to the factory default val-

ues. Press and release the reset button to begin restore factory default.

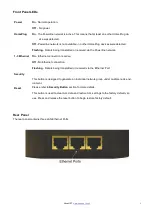
Rear Panel

The rear panel contains three LAN Ethernet Ports.

Содержание PLA-AV-3E-PIGGY6

Страница 1: ...User Manual PLA AV 3E PIGGY6 HomePlug AV 3 Ethernet Ports with 6 Outlet Power Strip Ver 1 0 03 10 08...

Страница 2: ...subject to the following two conditions 1 This device may not cause harmful interference 2 This device must accept any interference received including interference that may cause undesired operation...

Страница 3: ...co uk 3 Table of Contents 1 HOMEPLUG POWERLINE 4 1 1 INTRODUCTION 4 1 2 USAGE DIAGRAM 4 1 3 PHYSICAL DETAILS 4 1 4 SETUP 6 2 SECURITY BUTTON 7 CREATING A NEW SECURITY NETWORK NETWORK AB 7 3 OPERATION...

Страница 4: ...werline network At the same time the 6 outlet extension provides 6 filtered power plugs allowing multiple devices to plug in for power and filters them so they do not affect the performance of the bui...

Страница 5: ...twork 1 3 Ethernet Security Reset On Ethernet connection is active Off No Ethernet connection Flashing Data is being transmitted or received via the Ethernet Port This button is designed to generate a...

Страница 6: ...or startup to be completed and then check the LEDs The Power LED should be ON The HomePlug LED will be ON 4 Hardware Installation is now completed enjoy HomePlug Powerline connectivity Installation in...

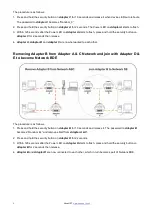
Страница 7: ...and hold the security button on Adapter B for 10 seconds and release it when device LED auto reboots The password to Adapter B becomes Random_B 3 Currently Adapter A and Adapter B are not networked 4...

Страница 8: ...e 4 Adapter A Adapter B and Adapter C are now networked to each other Removing Adapter B from Adapter A C Network and join with Adapter D E to become Network BDE The procedure is as follows 1 Press an...

Страница 9: ...llowing Try plugging the unit into an adjacent plug Use a pin and hold the Reset Button down for two seconds on each unit you are trying to connect The unit lights should flash Then units will then co...

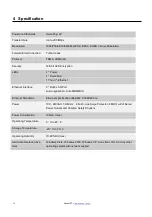
Страница 10: ...Ethernet Interface 3 RJ45 LAN Port Auto negotiation Auto MDI MDIX Ethernet Standards Ethernet specification IEEE802 3 IEEE802 3u Power 100 240VAC 50 60 Hz 6 Full 3 Line Surge Protector 3MOV with Filte...

Отзывы: