background image


Note:  Make sure power is off and the power cord is not plugged into an elec-

trical outlet prior to performing any maintenance on the unit.


Clean or Replace Filter 

-


The Clean Filter indicator will illuminate every 250 hours of operation as a 

reminder to clean the filter. A clean filter will keep the unit operating at optimum performance. Remove the 

filter from the back of the unit by using your thumbs to press down on the filter tabs directly above the filter. 

Clean the filter with warm, soapy water. Dry thoroughly before replacing the filter. Once the filter is complete-

ly dry, place the filter back in the unit and press the FILTER button to reset the filter indicator.


CAUTION: DO NOT OPERATE THE DEHUMIDIFIER WITHOUT THE INCLUDED FILTER


Clean the Unit Housing 

1)  Keep the unit from being exposed directly to the sun to prevent color   

fading.


2) Clean the surface with a damp cloth and dry it with a soft towel.


MAINTENANCE


End of Season Storage / Transporting the Unit


1)  Turn off the dehumidifier


2)


Unplug the unit and secure the power cord to the back of the unit


3)


Clean or replace filter 

-

 Refer to Operating Instructions Clean or Replace Filter section


4)


Empty any water remaining in the bucket and rinse bucket with a mild detergent


5)


Insert the empty water bucket back into the dehumidifier


6)


Your dehumidifier is now ready for storage or transportation


7)


The unit should be stored in a cool dry place


NOTE: 

While in Pump Mode, if the unit is turned off, the pump will remove all remaining water from inter-

nal tank prior to the unit completely powering down. The pump indicator light will stay on during this period. 

Do not unplug the power cord until pump indicator light is off. 


NOTE: Do not clean filter in dishwasher


Содержание DS1-30-01B

Страница 1: ...3058080 V 181113 Dehumidifier must be upright for 24 hours prior to operating This ensures that the compressor will function as intended...

Страница 2: ...manual carefully Store this manual in a safe place for future reference 1 Always place the unit on a level surface 2 Never use or store gasoline or other flammable vapor or liquid near this unit unle...

Страница 3: ...isture accumulating in the air As this moisture level decreases the dehumidifier will not need to collect as much moisture as seen in previous operation Please do not be concerned if the dehumidifier...

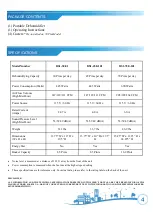
Страница 4: ...le Dehumidifier 1 Operating Instructions 4 Casters Pre installed on 70 Pint Model Model Number DS1 30 01 DS1 45E 101 DS1 70E 101 Dehumidifying Capacity 30 Pints per day 45 Pints per day 70 Pints per d...

Страница 5: ...on Bucket full indicator and audible alarm signals as soon as the bucket is full and ready to be emptied Ultra quiet operation allows for use almost anywhere Perfect for heavy traffic areas like a fam...

Страница 6: ...insert the casters Make sure the ring around the caster is flush against the bottom of the dehumidifier Fig 3 POWER BUTTON INCREASE DECREASE ROOM HUMIDITY LEVEL TIMER BUTTON FILTER BUTTON FAN SPEED B...

Страница 7: ...ements 5 hours up to 10 hours After 10 hours each press of the or buttons will increase the timer in 1 hour increments up to 24 hours Once the desired time is reached the unit will automatically turn...

Страница 8: ...a mild detergent to clean the bucket Once clean com pletely dry the bucket and place it back inside the dehumidifier NOTES When the bucket is full or removed from the dehumidifier the compressor will...

Страница 9: ...rformance Use the dehumidifier in areas that have excessive moisture such as entry ways bathrooms basements and laundry rooms NOTE Place the dehumid ifier away from a clothes dryer Use the dehumidifie...

Страница 10: ...w the cap on the back of the unit to access the garden hose nozzle Thread a garden hose not supplied onto the accessible nozzle lead to a floor drain and cut to length Make sure that there are no kink...

Страница 11: ...ng 1 Keep the unit from being exposed directly to the sun to prevent color fading 2 Clean the surface with a damp cloth and dry it with a soft towel MAINTENANCE End of Season Storage Transporting the...

Страница 12: ...Replace Filter section on Page 11 The Humidity Control may not be set low enough For drier air press the button to lower the percent humidi ty desired in the room or set the dehumidifier to CO for max...

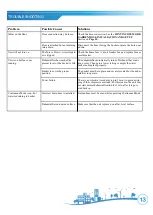
Страница 13: ...cket is full The dehumidifier automatically turns off when either condi tion occurs Change to a lower setting or empty the water bucket and replace properly Bucket is not in the proper position The bu...

Страница 14: ...ll customer service 877 665 9765 Self Diagnosing Code Description Resolution E1 Compressor Overheat Protection Please call Soleus Customer Service at 877 665 9765 E2 Condenser Overheat Protection EH H...

Страница 15: ...visions in the instructions Damage to the finish of the case or other appearance parts caused by wear Damage caused by repairs or alterations of the unit by anyone other than those authorized by Soleu...

Отзывы: