background image

 The Folding and Unfolding

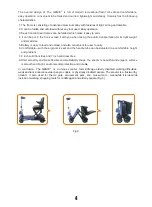
Fig.18

Fold

Unfold

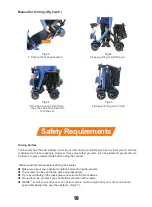
Manual for unfolding:(Fig.19-22)

Note: 

The manual one don't have the automatic function and remote control. The folding and 

          unfolding operation, please reference to the “Folding and unfolding”.

Automatic Fold Switch on the scooter (Fig.18 )

● 

Open the outer carton, the remote contorl and scooter has been matched well.

● 

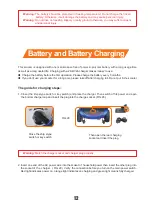
Put the battery into battery box. "A" mean open. "B" mean close.

● 

When the remote control didn't match with the scooter, or use another remote contol.

● 

Please take out the battery from the battery box, wait for 5 seconds, then put the battery back to 

      box, long press "A" button for 5 seconds.

battery 

● 

If you can heard a ticking sound the unlimited controller, that means it works.

● 

If you haven't heard a ticking sound, please match it again.

9

1.Leave folded scooter on the

    smooth ground.

2.Pull the manual switch forward

(to the tiller direction)

3.One hand on the front tiller the

    other one on the seat, move 

    reverse to unfold the car.

4.Pushh down the foot pad

until 

.

“click”

Fig.19

Fig.20

Fig.21

Fig.22

Содержание GENIE+

Страница 1: ...www solaxmobilityscooters com au...

Страница 2: ...cate warning and matters need to pay attention therefore it is important for you to fully understand and master the content All of the information and pictures in this manual are subject to the factor...

Страница 3: ...duct Specifications and Relevant Parameters Main Parts and Relevant Function The Folding and Unfolding Safety Requirements Battery and Battery Charging Operation Instruction Basic Troubleshooting Main...

Страница 4: ...arts Familiarize yourself with the terminology to better understand part references throughout the Owner s Manual Fig 2 1 2 3 Control Panel Adjustable Height Handle Forward Reverse Control Lever Tille...

Страница 5: ...attery is easy to load and unload and also convenient for user to carry 6 Comfortable with the ergonomic seat and the handle tube can be adjusted to a comfortable height and gradient 7 6 inch solid fr...

Страница 6: ...or Battery Charger GENIE 0 96 m 37 9 in Tire Size Front 6 x 1 5 Tire Size Rear 7 x 2 36 in 0 45 m 17 7 in 6 km h 3 7 mph 0 12 15 km 9 32 miles 1 4 m 55 in 24 kgs 53 lbs 125 kgs 0 56 m 22 in 24V 120W S...

Страница 7: ...f the control panel has been affected by moisture before using please ensure it is dry when you operate it Power Switch Key switch Fig 7 1 Turn the key switch clockwise to ON can drive 2 Turn the key...

Страница 8: ...bar with both hands Pull the control lever on the right the scooter will go forward Pull the control lever on the left the scooter will go backward When the scooter moves backward the horn will start...

Страница 9: ...ooter or pull the scooter after fold Motor Transmission component Motor Transmission component as a mechanical and electrical part will convert the electrical energy rear wheel drive to Remote control...

Страница 10: ...he remote control didn t match with the scooter or use another remote contol Please take out the battery from the battery box wait for 5 seconds then put the battery back to box long press A button fo...

Страница 11: ...certain height but you must minimize the and slowly drive over the obstacle Fig 27 speed Driving Surface The Scooter has the best stability under the normal driving conditions such as dry level ground...

Страница 12: ...ting or refitting your scooter is forbidden Please be careful when driving in the busy steets market or shopping center driving in the unsafe zone Prohibited area is forbidden Please consult local aut...

Страница 13: ...its power and open the bottom charger cap and insert the plug into the charge socket FIG 28 The guide for charging steps Charge the battery before the first operation Please charge the battery every 3...

Страница 14: ...the battery vollage is low the battery charger outputs a large current to charge the battery When battery vollage is close to full the battery charger outputs a small current When battery is full the...

Страница 15: ...an be used for a long time after full charged The battery is fully charged already before leaving the factory but may change its initial performance during the transportation due to the temperature Th...

Страница 16: ...ped Brake can be automatic locked when scooter fully stopped Driving Please inspect the battery is fully charged or not Refers to 6 Battery and Battery Charging Please make sure you know the route wel...

Страница 17: ...ve no corrosion The battery should be placed flatly inside the battery holder The connection of the battery and electrodes There are few parts of SOLAX scooter require maintenance The following issues...

Страница 18: ...bles such as the inner core and outer tires bearings light bulbs etc limits of warranty are not covered in the 5 Any unauthorized changes to vehicle design 6 Any nature disasters or accidents such as...

Отзывы: