2
MAN-01-00028-1.1
►
Configuring the SolarEdge device using the user buttons:
1
Verify that the SolarEdge device’s ON/OFF switch is OFF.
2
Press the LCD Light button once to turn ON the backlight.
3
WARNING!
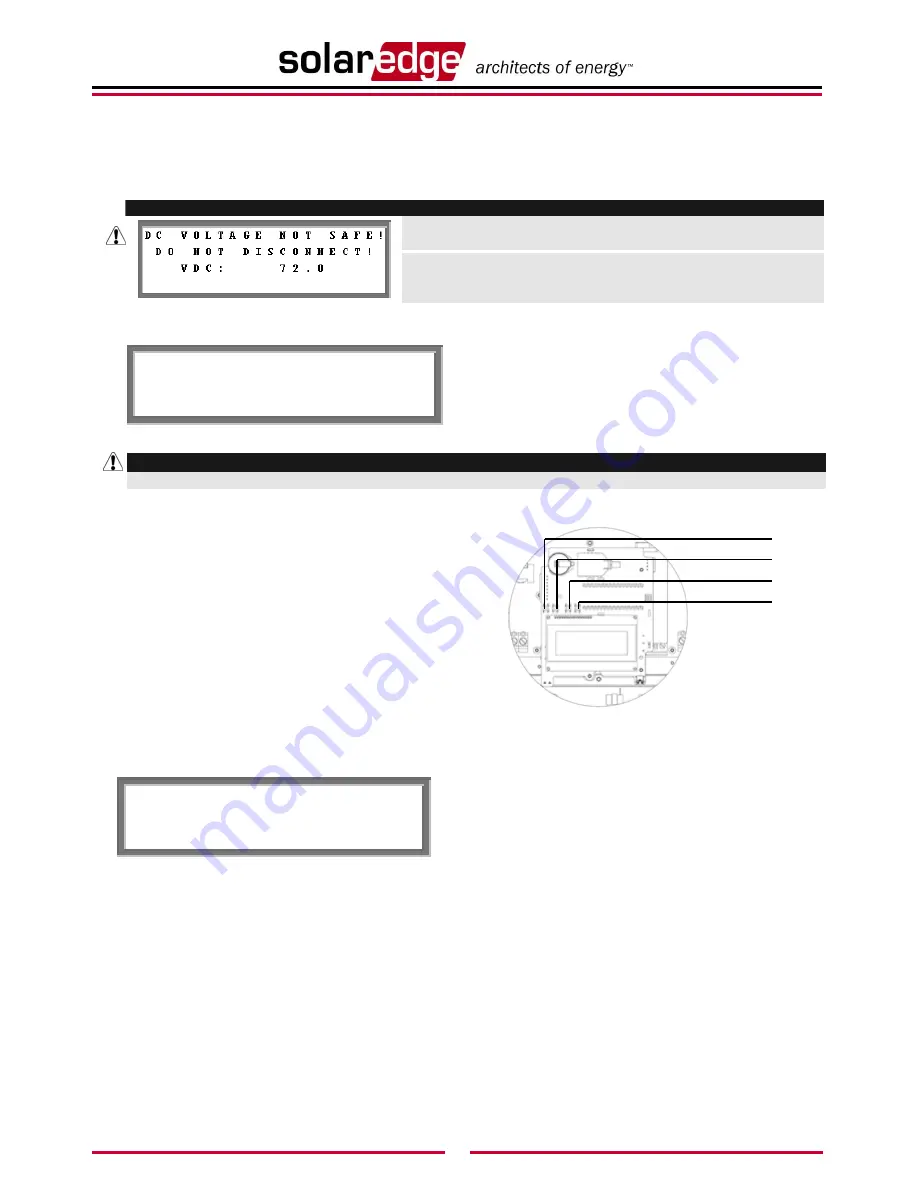
If the SolarEdge device worked properly before this action, the adjacent message is
displayed.
This message is displayed until the DC is below the safety voltage threshold. The
default safety voltage is 50 V. Do not open the cover or open DC connectors until
the voltage is indicated as safe or until at least five minutes have passed.
3
Short press the LCD button to scroll through the informative screens to show the ID status window and verify the CPU
firmware version. Verify if it is below or above version 2.250.
I D : # # # # # # # # # #
D S P 1 / 2 : 1 . 0 2 1 0 / 1 . 0 0 3 4
C P U : 0 0 0 2 . 0 2 5 0
C o u n t r y : U S A
4
The following configuration procedures are performed with the SolarEdge device cover open.
WARNING!
Refer to the SolarEdge device manual for instructions about how to open the SolarEdge device cover.
Four buttons for controlling the LCD panel menus are then accessible, as shown below:
Esc:
Goes to the beginning of the currently entered
parameter or to the previous menu.
Up (1):
Goes up one option in a menu.
Down (2):
Goes down one option in a menu.
Enter (3):
Confirms the entry or selection of a parameter.
Figure 4: LCD Panel Menu Buttons
5
Press the
Enter
button for at least five seconds. The following message is displayed:
P l e a s e e n t e r
P a s s w o r d
* * * * * * * *
The SolarEdge device is now in Setup mode and all its LEDs are lit. The SolarEdge device automatically exits Setup mode
if no buttons are pressed for more than two minutes.
6
Use the three right-most buttons inside the SolarEdge device (the
UP-1
,
Down-2
and
Enter-3
buttons), shown above, to
type in the following default password:
12312312
.
7
Scroll down to the
Communication
submenu and select it.
For firmware versions above 2.250, continue to step
14
. For earlier versions, complete steps
8
through
13
below.
8
Select the
Server
submenu, scroll down to the
RS232
option and select it. The SolarEdge device performs a reset
immediately after the selection is made.
9
Repeat steps
5
through
7
to enter Setup mode.
Enter (3)
Esc
Up (1)
Down (2)


