background image

7

-14

7

C

a

me

r

a


Adv

a

nced Fe

a

tures

Durin

g

 Shootin

g

St

a

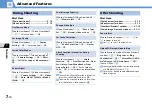
rt Here

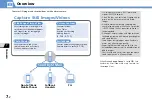
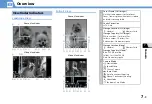
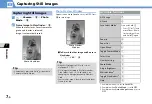
Photo Viewfinder

 ............................... P. 7-6

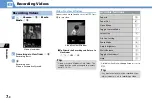
Video Viewfinder

 ............................... P. 7-8

After Shootin

g

St

a

rt Here

Photo Preview

 window ...................... P. 7-6

Video Preview

 window ...................... P. 7-8

Thumbnail Preview

 window ............ P. 7-10

Framed Image Preview

 window ...... P. 7-11

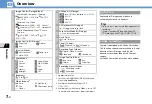
Use Camera Menu

Photo Viewfin

d

er

/

Vi

d

eo Viewfin

d

er


o


 Select an item 


d

Set Image Quality

Vi

d

eo Viewfin

d

er


u


Quality 

Setting


d


 Select an item 


d

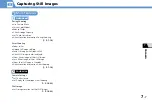
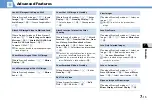
Switch Color Modes

Photo Viewfin

d

er

/

Vi

d

eo Viewfin

d

er


u


Camera Settings


d


Effect


d


Full Color

Sepia

 or 

Monochrome


d

Reduce Flicker

Photo Viewfin

d

er

/

Vi

d

eo Viewfin

d

er


u


Camera Settings


d


Flicker


d


Auto

,

 Mode 1 (50Hz)

 or 

Mode 2 

(60Hz)


d

Check Storage Capacity

Photo Viewfin

d

er

/

Vi

d

eo Viewfin

d

er


u


Memory Info


d

Change Video Type

Vi

d

eo Viewfin

d

er


u


Movie Type 

Set


d


Normal

Video

 or 

Voice


d

Set Shake Correction

Photo Viewfin

d

er

/

Vi

d

eo Viewfin

d

er


u


Shake Correction


d


Auto

 or 

OFF


d

Attach Location Information During 
Shooting

Photo Viewfin

d

er


u


Attach 

Location


d


From Position Loc.

,

 From 

Loc. History

,

 From Phonebook

 or 

From 

Owner Details


d

 (

 Enter Security 

Co

d


d

) (

 Select location information 


d

)

To check the attached Location Information, 
select 

Loc. Info Detail

 and press 

d

.

To delete the attached Location Information, 
select 

Delete Loc. Info

 and press 

d

.

Zoom In/Out

Photo Preview

 win

d

ow 


p


o

 or 

p

 to zoom in or out.

Press 

u

 to return to original size.

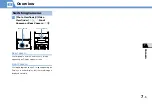
Upload Still Image/Video to Blog

Photo Preview

win

d

ow/

Vi

d

eo Preview

win

d

ow 


o


Blog


Cont

. or 

Blog 

Contribution


d

 (


Attach Mail

QVGA 

Scale Down

 or 

VGA Scale Down


d


Create S

!

 Mail 


o

Specify a blog upload destination beforehand 
with Blog/Mail Member (P. 5-4).
You may not be able to upload depending on 
video image size.

Содержание 930N

Страница 1: ...Images 7 6 Recording Videos 7 8 Recording Videos 7 8 Various Features 7 10 Using Smile Mode 7 10 Continuous Shooting 7 10 Add Frames to Images 7 11 Auto Timer 7 11 Panoramic Shooting 7 11 Speed Movie...

Страница 2: ...to change Screen is set to ON turn handset on its left side while using Camera for Landscape View Still images are saved in JPEG format and videos in MPEG4 format Clean the lens with soft cloth Finger...

Страница 3: ...led Shake Correction Auto Storage Location Still Image Handset Memory Card Storage Capacity Still Image 1 White number 11 or more files Yellow number 10 or less files Red number No memory space Storag...

Страница 4: ...anorama 2738 480 Horizontal Movie Mode Speed Movie2 Chance Capture VGA 640 480 to QCIF 176 144 Image Quality Still Image Super Fine Normal Fine File Size Video Mail attachment3 Long time Up to 2 MB Ph...

Страница 5: ...Front Camera or Rear Camera d Rear Camera Use for people animals and scenery Image appearing on Display appear as seen Front Camera Use to photograph yourself Image appearing on Display is in mirror d...

Страница 6: ...Screen is set to OFF Tip Alternatively press and hold Tx to activate Camera in Photo Mode 1 2 Photo Viewfinder Tip Attach still images to S Mail or set as wallpaper P 7 15 Still images are stored in...

Страница 7: ...ting Zoom In Out Upload Still Image to Blog Send Still Image with Graphic Mail Attach Still Image to Mail and Send Show Mirror Image of Shot Still Image Save Mirror Image of Shot Still Image Show Shot...

Страница 8: ...Viewfinder t YES d Available Functions Available when Auto change Screen is set to OFF 1 Video Viewfinder 2 3 Tip Video is saved to Videos in Data Folder The storage location can be changed to memory...

Страница 9: ...eck Storage Capacity Change Video Type Set Shake Correction P 7 14 After Shooting Upload Video to Blog Attach Video to Mail and Send Show Recorded Video in Standby Edit Title of Video P 7 14 Customize...

Страница 10: ...s after you release the shutter Manual continuous shooting mode Shoots a set number of images each of which is shot by releasing the shutter manually See P 14 23 for details on setting interval number...

Страница 11: ...shes blue About five seconds before shooting a countdown tone sounds and Illumination flashes rapidly To stop Auto Timer press o or t For Still Images Images are automatically saved For Videos d Recor...

Страница 12: ...r d Recording starts d Recording ends Video is automatically saved Chance Capture Continue recording a video until you shoot the desired scene even when the available recording time is over Photo View...

Страница 13: ...es Save as Animation Open an Image as Mirror Image Attach to Mail Change Frame before Saving Image P 7 14 Customize Camera Settings Set Level of Smile for Smile Mode Set Interval for Continuous Shooti...

Страница 14: ...deo Viewfinder u Movie Type Set d Normal Video or Voice d Set Shake Correction Photo Viewfinder Video Viewfinder u Shake Correction d Auto or OFF d Attach Location Information During Shooting Photo Vi...

Страница 15: ...Position Loc From Loc History From Phonebook or From Owner Details d Enter Security Code d Select location information d To check the attached Location Information select Loc Info Detail and press d...

Страница 16: ...to Mail Thumbnail Preview window Select an image o twice Attach Image d Attach Mail QVGA Scale Down d Compose S Mail o Change Frame before Saving Image Framed Image Preview window u Change Frame d Se...

Отзывы: