background image

Page 3 - 8

TL49J

MAINTENANCE PROCEDURE

POWER PACK 

The power pack consists of a fully integrated pump, 

tank, preset relief valve and a return filter. The biggest 

cause of hydraulic problems is due to contaminated 

oil and filter. The oil and filter needs changing at least 

every 6 months even though the hydraulic system is 

a closed system. The only access for external dirt is 

through the filter breather. Contamination will occur 

due to seal kit wear (black sludge in the bottom of the 

tank, mechanical wear from the gear pump, valve block 

and cartridges in addition to water contamination due 

to tank condensation). Refer to the power pack section 

for more details.

The hydraulic system is fully self contained. Oil tank 

capacity is 15 litres. When operating above  0°C, 

ISO22 grade hydraulic mineral oil (refer to health & 

safety guidelines supplied with the oil prior to 

handling) is recommended.

The main cause of hydraulic issues, sticking valves and leaking cylinders is due to contaminated oil. 

There is no need to replace the oil in the hose. R

eplace the oil in the tank and filter every 6 months. 

Oil is not discharged from the system and as a result, if oil is required, this would indicate an oil leak 

which must be investigated prior to using the machine.

CORRECT OIL LEVEL

It is critical that the correct oil level is maintained. Too little oil will cause cavitation and failure of the 

pump. Too much oil will lead to oil leak through the return filter breather or a massive oil leak when 

using the emergency lower valves on the top and bottom boom. When using the emergency lower 

valves, enough space is required in the tank to accommodate oil which normally would be pumped 

into the annular side of the cylinder. If this should happen, clean up the oil spillage. Fully extend all 

rams and then close up all the rams to check for the amount of free space in the tank using the dip 

stick. The correct level expected is that at the bottom mark of the dipstick.

DC MOTOR & PUMP

The hydraulic pump is submerged in the tank. Oil 

is drawn in through a suction strainer protecting the 

pump. The DC motor is directly coupled to the pump 

shaft. On the AC motor, a small adaptor coupling is 

used between the motor and pump shaft. To replace 

the pump;

1.  Remove the tank by removing the 4 bolts secur-

ing it in place. 

2.  Remove the power pack from the machine. 

3. 

Remove the 4 fixing bolts securing the pump to 

the aluminium block.

4.  With the pump removed, inspect the gears for 

wear.

5.  If the gears are worn out or broken, replace the 

complete pump. The replacement pump is a unit 

consisting of the gears but without the strainer.

6. 

Torque the 4-5/16 hex fixing bolts evenly to 

     17.63 Nm (13 ft/lbs) to ensure correct operation    

     of the pump. Do not overtighten.

7. 

Before re-fitting, thoroughly clean the tank and the magnet found inside.

8.  De-grease and replace the large “O” ring and apply a small amount of silicone around the 

circumference of the de-greased tank neck.

9.  Place the tank back on and secure with the 4 bolts removed earlier.

SERVICE AND REPAIR

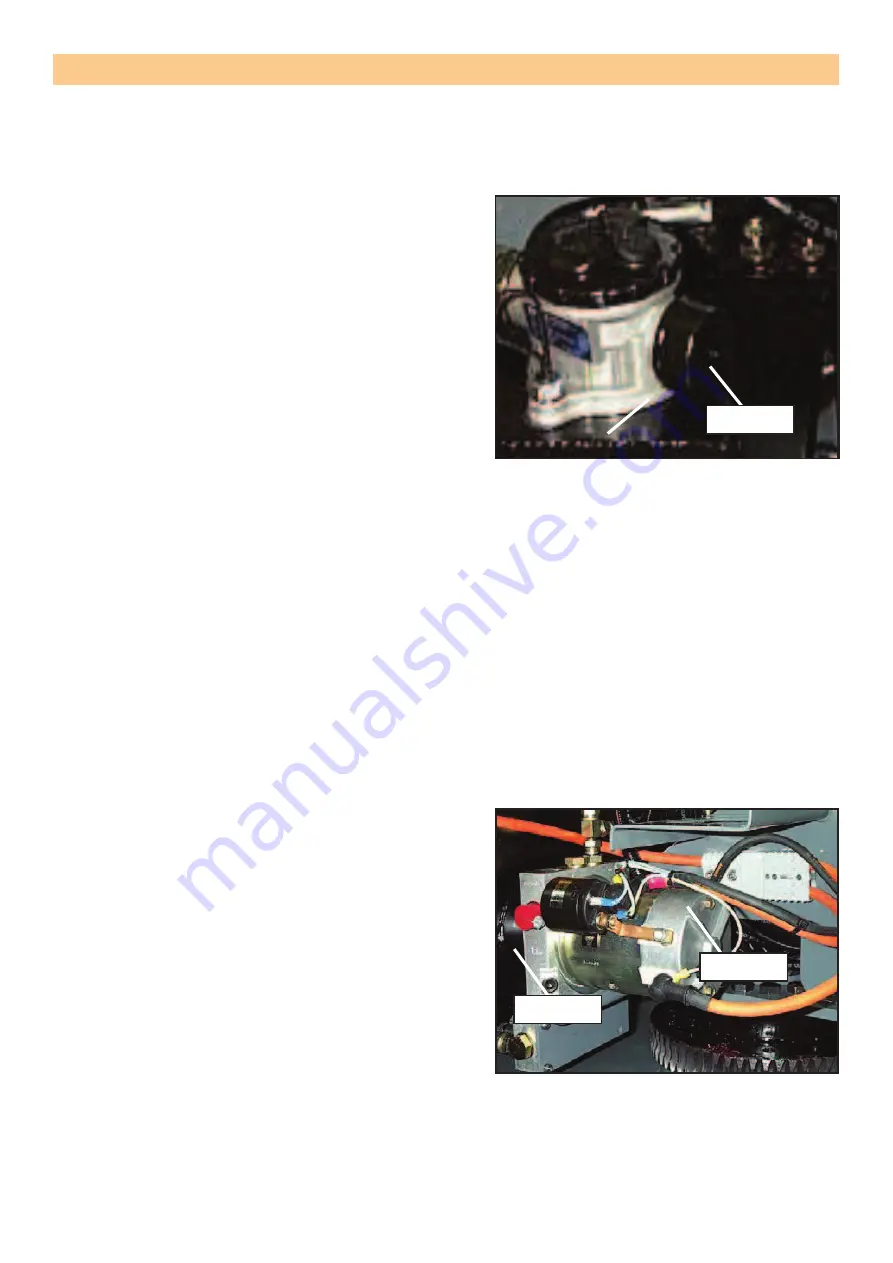
Figure 3-1

: Filter breather location.

Figure 3-2

:  DC  motor  coupled  to  the  pump               

shaft.

Filter Breather

DC Motor

Pump Shaft

Courtesy of Crane.Market 

Содержание TL49-01-008562

Страница 1: ...PARTS SERVICES MANUAL Part Number 513868 200 June 2016 Serial Number TL49 01 008562 and after Courtesy of Crane Market ...

Страница 2: ...Courtesy of Crane Market ...

Страница 3: ...m MAXIMUM DRIVE HEIGHT ft m MAXIMUM PLATFORM LOAD MAXIMUM ALLOWABLE WIND SPEED mph m s MAXIMUM PLATFORM REACH ft m 511039 300 MAXIMUM ALLOWABLE MANUAL FORCE SIDE PULL lbs N Indoors Outdoors SLOPE SENSOR ALARM SETTING FRONT TO BACK deg SIDE TO SIDE deg MAXIMUM OUTRIGGER LOAD lbs kg MAXIMUM GRADEABILITY CHARGER INPUT V ASSEMBLED IN Axle weights with machine in the stowed position lbs lbs kg kg DRIVE...

Страница 4: ...problems SECTION 5 SCHEMATICS Schematics and valve block diagrams with description and location of components SECTION 6 ILLUSTRATED PARTS BREAKDOWN Complete parts list with illustrations SPECIAL INFORMATION NOTE Provides helpful information D A N G E R Indicates an imminently hazardous situation which if not avoided will result in death or serious injury W A R N I N G Indicates a potentially hazar...

Страница 5: ... procedures safety principles and service operations are not included Please note that this manual contains warnings and cautions against some specific service methods which could cause personal injury or could damage a machine or make it unsafe Please understand that these warnings cannot cover all conceivable ways in which service whether or not recommended by Snorkel might be carried out or of t...

Страница 6: ...Courtesy of Crane Market ...

Страница 7: ...recommended maintenance schedules troubleshooting schematics and illustrated parts breakdown GENERAL DESCRIPTION The work platform consists of the platform upper and lower controls elevating assembly outriggers and a chassis W A R N I N G DO NOT use the work platform without guardrails properly assembled and in place Features of the TL49J is shown in Figure 1 1 1 Platform 2 Upper controls 3 Elevat...

Страница 8: ...e platform is raised and lowered by the elevating assembly The hydraulic pump driven by the engine powers the 3 stage lift cylinders CHASSIS The chassis is a structural frame that supports all the components of the TL49J work plat form PURPOSE OF EQUIPMENT The objective of the work platform is to provide a quickly deployable variable height work platform to elevate personnel and materials to overh...

Страница 9: ...Page 2 1 TL49J OPERATION AND SPECIFICATION Courtesy of Crane Market ...

Страница 10: ...OP In case of an emergency push the EMERGENCY STOP switch to de activate all powered functions ALARM If the alarm sounds while the platform is elevated STOP operation immediately and carefully lower the platform Move the machine to a firm level surface SWING GATE Dismantling the entry gate or other railing components is prohibited Always make certain that the entry gate is closed and securely lock...

Страница 11: ...tions depending upon platform occupancy rating see operators manual decals Type 3 Harness attachment point Type 3 is rated for one lanyard attachment per loop as shown in the illustrations depending upon platform occupancy rating see operators manual decals Top View Top View 2 lanyard attachments Top View 1 lanyard attachment Top View 2 lanyard attachments 1 lanyard attachment 1 lanyard attachment...

Страница 12: ...oval of Snor kel 3 The driving of MEWP S on the public highway is subject to national traffic regulations 4 It is important to ensure that the machine meets the requirements of stability during use trans portation assembly dismantling when out of service testing or foreseeable breakdowns 5 Never use a machine that is damaged or not functioning properly Verify that all labels are in place and legib...

Страница 13: ...askiner 2006 42 EC EF Overensstemmelseserklaering for Maskiner 2006 42 EC EU Vaatimustenmukaisuusvakuutus 2006 42 EC Manufacturer Snorkel Hersteller Vigo Centre Washington Fabrikant Tyne and Wear England NE38 9DA Produsent TEL 44 0 845 1557 755 Tillverkare FAX 44 0 845 1557 756 Valmistaja Fabbricante Fabricante Fabricant Authorized Representative Stuart Campbell Design Manager Autorisierte Vertret...

Страница 14: ...NCY SLEW 2 16 EMERGENCY LOWERING VALVES 2 16 EMERGENCY STOP 2 16 EMERGENCY LOWERING SWITCH 2 16 EMERGENCY HAND PUMP 2 16 STRUCTURES 2 17 WELDMENTS 2 17 FASTENERS 2 17 UPPER CONTROL STATION 2 17 GUARDRAIL SYSTEM 2 17 EMERGENCY LOWERING SWITCH 2 18 EMERGENCY STOP 2 18 OPERATION 2 19 PREPARING FOR OPERATION 2 19 LOWER CONTROLS 2 19 UPPER CONTROLS 2 20 PLATFORM 2 21 SIDE TRAY COVERS 2 21 EMERGENCY PRO...

Страница 15: ...s GENERAL DESCRIPTION Figure 2 1 Work platform Platform Upper Controls Lower Ground Controls Boom structure Emergency Lowering Valve Toeboards Wheels Outriggers Identification Number Plate Emergency Hand Pump Jockey Wheel Chassis Battery Disconnect Plug Safety Harness Attachment Point Manual Holder Rear Lights Right Side Left Side Courtesy of Crane Market ...

Страница 16: ...walls or other structures out side the work platform The maximum allowable manual force is limited to 200N 45 lbs of force per occupant with a maximum of 400N 90 lbs for two or more occupants D A N G E R DONOT exceed the maximum amount of manual force for this machine BEAUFORT SCALE Beaufort Scale m Sec Ground Conditions 3 3 5 5 4 6 8 Raises dust and loose paper small branches are moved 5 9 10 Sma...

Страница 17: ...und All machine functions will cease to operate To operate the machine a load equal to or less than the safe working load must be placed on the platform To re start the machine functions the excess load must be first removed to stop the alarm from sounding D A N G E R Neveroperatethemachinewithaplatformloadgreaterthantherated capacity Courtesy of Crane Market ...

Страница 18: ... lower enable button 9 Platform raise lower enable button 10 Outrigger raise lower levers 11 Platform raise lower levers Figure 2 3 Chassis controls and indicator locations Raise Lower Boom Lower Lower Boom Slew Anti clockwise Slew Clockwise Raise Top Boom Lower Top Boom Retract Tele Boom Extend Tele Boom Lower Dropnose Raise Dropnose Platform Rotate Clockwise Platform Rotate Anti clockwise Platfo...

Страница 19: ...anual Holder To inspect the operator s manual and manual holder 1 Make certain the Operator s Manual holder is securely fastened in place 2 Check to see that the proper Operator s Manual is in the holder 3 Check to see that the manual is complete with all pages intact and in readable condition ELECTRICAL SYSTEM Electrical power is supplied from four 6 volt batteries The batteries supply 24 volt DC...

Страница 20: ...terminals BATTERY FLUID LEVEL To inspect the battery fluid level 1 Remove the caps from the batteries refer to Figure 2 5 Figure 2 5 Battery tray 2 Visually check the battery fluid level making sure the level is 6 mm above the plates 3 If necessary add distilled water Note Use only distilled water when refilling the battery Tap water may contain metallic solids such as iron which can reduce the li...

Страница 21: ...ed Figure 2 6 LED Charge Indicator 3 Unplug the charger DAMAGED OR LOOSE FITTINGS Visually inspect the machine for signs of wear and tear damage loose or missing parts WHEELS Check tyres are at the correct pressure of 76 psi 5 25 bar and that the wheel nuts are tightened using the correct torque settings 147 5 ft lbs 200 Nm CABLES AND WIRING HARNESS To inspect the cables and wiring harness 1 Visua...

Страница 22: ... level surface Open the hydraulic tray cover and visually check the fluid level using the hydraulic level indicator attached to the hydraulic tank refer to Figure 2 7 Some machines may have a fill cap with a dipstick The fluid must be visible on the dipstick Figure 2 7 Hydraulic Tank Not all hydraulic fluid is suitable to use in the hy draulic system Some have poor lubricating char acteristics and ...

Страница 23: ...L STATION With no personnel or materials on the platform test the operation of each control from the lower controls refer to Figure 2 8 Figure 2 8 Lower Control Station OPERATING CONTROLS Use the following procedure to operate and test the machine from the lower controls 1 Plug the battery disconnect refer to Figure 2 9 2 At the lower controls twist and pull the emergency stop switch outwards to t...

Страница 24: ...d the unit switched off check The emergency lowering valves located on the lift cylinders lower the boom when pushed in a slow and controlled manner and the boom movement is stopped on releasing the valve EMERGENCY STOP To test the emergency stop button from the lower controls 1 Push the emergency stop button inward to turn off electrical power 2 Test the lower control functions to make sure they ...

Страница 25: ...e 3 Look for visible cracks in the welds and at the weld to parent material joints A bright light may be used to provide adequate visibility of the inspection area 4 Pay close attention to welds in areas where changes in cross section takes place near the at tachment points of highly loaded components FASTENERS To inspect the fasteners 1 Visually inspect all fasteners to see that none are missing ...

Страница 26: ...hey swing freely and are not deformed in any way Make sure the doors are secure when they are closed EMERGENCY LOWERING SWITCH To test the Emergency Lowering Switch from the Upper controls Note The emergency lowering switch relies on the electrical system The switch will not function if the electri cal system is faulty Turn the switch clockwise to lower the top boom Turn the switch anti clockwise ...

Страница 27: ...ed PREPARING FOR OPERATION Use the following procedure to prepare the aerial platform for operation 1 Perform a prestart inspection 2 Connect the battery disconnect plug 3 Close and latch the swing out tray cover LOWER CONTROLS The lower controls may be used for initial set up of the aerial platform and for testing and inspection The lower controls can also be used to raise and lower both the outr...

Страница 28: ...following procedure to operate the aerial platform from the upper controls 1 From the lower controls twist and pull the emergency stop button outward refer to Figure 2 12 2 Switch the control select ground operation switch to the upper controls position Note The upper controls will not operate while the control selector is in the lower position 3 Enter the platform and secure the lock rail 4 From ...

Страница 29: ...nts are enclosed in trays covered by a swing out cover refer to Figure 2 15 on each side of the chassis Figure 2 15 Side Tray cover y The battery tray is on the left side and contains four batteries y The right side of the chassis contains the battery charge indicator The diagnostic center LCD display is also on this tray y The hydraulic tray on the right side of the chassis contains the hydraulic...

Страница 30: ...tion in the hydraulic or electrical system In the event of a failure the machine can be manually slewed by moving the slew platform clock wise or anticlockwise by inserting the slew lever and rotating the gearbox by moving upwards and downwards Figure 2 16 Slew Lever Insert EMERGENCY LOWERING VALVES In the event of a power failure the emergency lower valve on the ram can be used to lower the booms...

Страница 31: ...mp procedure to use is as follows Insert the hand pump lever into the pump shaft refer to Figure 2 18 Move the platform raise lower lever to the required direction of movement and operate the hand pump Continue pressing down on the platform raise lower lever when the machine starts to lower Figure 18 Hand Pump Emergency Lowering Procedure EMERGENCY LOWERING SWITCH The Emergency lowering switch can...

Страница 32: ...oad must first be removed to stop the alarm from sounding In a situation where the excess load cannot be removed immediately then the platform overload switch refer to Figure 2 13 can be used to move the platform to a safe position so that the excess load can be removed safely Emergency Stop Button Emergency Lower Switch Outrigger LED Lights Control Select Ground Operation Switch Platform Raise Lo...

Страница 33: ...ith the ground should the unit be lowered further until the jockey wheel makes contact with the supporting surface 6 Fully raise the outriggers until they are in the stowed position 7 Switch off the platform and ensure all loose items covers are secure TRANSPORTATION The aerial platform may be moved on a transport vehicle or towed Depending on the particular situation the aerial platform may be li...

Страница 34: ...ins or straps to securely fasten the aerial platform to the transport vehicle using the front and rear tie down lugs refer to Figure 22 as attachment points Proper tie down and hauling is the responsibility of the carrier Figure 2 22 Tie Down Lug Locations HOISTING Use a four point sling arrangement attached to the lifting lugs when hoisting the aerial platform Machine damage can occur if the slin...

Страница 35: ...result from the cable contacting the sharp corners of the lug y There is no effective way of putting a corner protector in the hole of the lug 5 Use spreader bars of sufficient length to keep the chains straps or cables from contacting the structure or platform y When using cables use rigid corner protectors at any point where the cable contacts on sharp corners to prevent damaging the cable y Car...

Страница 36: ...e is an option to have attached to the aerial platform It allows for the aerial platform to be moved over short distances with ease Use the following procedure to operate the friction drive 1 Ensure that the booms are fully lowered and all outriggers are fully raised 2 Push down on the friction drive hand lever to engage the drive cylinders against the tyres until they lock over centre refer to Fi...

Страница 37: ... platform in a straight direction Push both levers backwards to reverse the aerial platform in a straight direction Push the left lever only forwards or backwards to turn the machine to the right Push the right lever only forwards or backwards to turn the machine to the left Figure 2 26 Hydraulic Levers 6 Ensure the hand brake is engaged when the machine is in position Courtesy of Crane Market ...

Страница 38: ...formed by personnel who are trained and familiar with mechanical and electrical procedures W A R N I N G Before performing preventative maintenance familiarize yourself with the operation of the machine Always block the elevating assembly whenever it is nessecary to per form maintenance while the platform is elevated The daily preventative maintenance checklist has been designed for machine servic...

Страница 39: ...ller Check condition and operation Platform deck and rails Check fasteners are in place correctly tightened and not damaged Check the structure and welds for dam age deformation corrosion and cracks Check condition of deck no damage deformation corrosion or cracks Check entry gate closure functions correcly Table 2 2 Daily preventative maintenance checklist Elevating assembly Inspect for external ...

Страница 40: ... parameters Safe working load 441 lb 200 kg Maximum horizontal pull 89 9 lbs 400 N Maximum wind speed 28 mph 12 5 m s Rotation 680 Control system Hydraulic proportional Outrigger raise 112 s Outrigger lower 84 s Platform raise 136 s Platform lower 101 s Maximum ground slope 5 Stabilizer feet to accommodate ground uneveness of at least 10 5 Tyres 205 75R16 Brakes Hand brake spring release Hydraulic...

Страница 41: ...m wind speed 28 mph 12 5 m s Table 2 3 TL49J Specification NOTE Specifications are subject to change without notice Hot weather or heavy use may affect performance Refer to the service manual for complete parts and service information This ma chine meets or exceeds all applicable OSHA and ANSI A92 6 1999 Courtesy of Crane Market ...

Страница 42: ... Kerosene 3 4 6 Deicers Oils can NOT be disposed down the drain Oily Water even if they are not hazardous waste No Is your waste Yes Armer cable Electrical Components Electrical circuit boards No Is your waste Yes Polymer wear pads Tyres Hydraulic hoses Is the waste a Polymer Tyre or Hose Your waste is a HAZARDOUS WASTE Follow your HAZARDOUS WASTE Is the waste an electrical component or wiring Is ...

Страница 43: ...AM 3 10 RAM NOT HOLDING UNDER LOAD 3 11 DROPNOSE RAM 3 11 OUTRIGGER RAM 3 12 PLATFORM CONTROL VALVE 3 12 GROUND CONTROL VALVE 3 13 DIVERTER VALVE 3 13 OUTRIGGER CONTROL VALVE 3 14 RESTRICTORS 3 14 SLEW MOTOR 3 14 GENERAL TESTS OF LOAD HOLDING VALVES 3 15 SLEWING PLATFORM RAM 3 15 BLEEDING 3 15 HYDRAULIC PUMP 3 15 ENGINE SETTINGS 3 16 ELECTRICAL START STOP 3 17 LEVEL GAUGE 3 17 PHYSICAL DAMAGE 3 18...

Страница 44: ...he main components are shot blasted and then powder coated The cylinders are wet painted The machine also includes a fully automatic running gear with auto reverse and an integrated trailer lighting At the towing end of the machine there is a heavy duty coupling head as well as a pneumatic jockey wheel The maximum allowable load on the outrig gers is 10 3 kN and the allowable sideway inclination i...

Страница 45: ...EN280 and the machinery direc tive Emergency Stop Buttons Emergency stop buttons are fitted on the machine to stop operation in an emergency There are two emergency stop buttons one on the upper control panel and the other on the lower control panel Note The lower controls override the upper controls If the upper control emergency stop button is engaged the lower controls can still be used to oper...

Страница 46: ... power powered machines have different speeds FUNCTION SPEED TIME SECONDS TOLERANCE SECONDS Bottom boom up 32 5 Bottom boom down 17 5 Top boom up 41 5 Top boom down 26 5 Dropnose boom up 14 1 Dropnose boom down 8 1 Slew clockwise 180 degrees 73 10 Slew counter clockwise 180 degrees 73 10 Platform rotation 8 2 Emergency decent top boom 87 2 DUTY CYCLES The mains power pack and the engine are both c...

Страница 47: ... details OPERATOR S RESPONSIBILITY It is the responsibility of the operator to ensure that the machine is safe to use To do so all the daily checks provided should be performed prior to operating the machine The weekly and 6 monthly period checks should be performed for maintenance purposes The information on the maintenance schedule are set to cover most eventualities If further advice is needed ...

Страница 48: ...t and bolts Replace immediately Locking pegs Check that all locking pegs are present Broken peg seized shaft Check that no shafts are seized Transport locks lifting points Check that all transport lock pins are present Do not transport machine without locking pin Check for damaged lifting points Battery Charging If fitted check the operation of the charger Record specific gravity of each cell Clea...

Страница 49: ...fferent intervals may be acceptable Slew gear Check slew gear for excessive wear Grease if needed MONTHLY CHECKS ACTION NOTES DC motor Check and replace motor brushes if the machine is used very frequently If 2 3 worn out replace Wheel bearings Check for wear Perform checks after every 3000 miles 6 MONTHLY CHECKS ACTION NOTES Thorough Inspection Contact Snorkel or its local representative Change o...

Страница 50: ...n using the emergency lower valves on the top and bottom boom When using the emergency lower valves enough space is required in the tank to accommodate oil which normally would be pumped into the annular side of the cylinder If this should happen clean up the oil spillage Fully extend all rams and then close up all the rams to check for the amount of free space in the tank using the dip stick The ...

Страница 51: ...acing To stop the motor in this situation use the battery disconnect plug or lightly tap the contactor on its end with the handle of a large screw driver to free the internal contact points Note The main relief valve is factory set to 210 bar and should not need adjusting Breaking the seal during the warranty period will invalidate the warranty SOL 1 The SOL 1 valve diverts oil from the outrigger ...

Страница 52: ...e time and not just when a cylin der movement is required as on the battery version Having oil circulating through the different valve blocks may lead to uncontrolled movements should the controls be accidentally operated By fitting the dump valve the oil will always flow to tank unless the dump valve is activated Refer to the relevant circuit diagram under schematics or contact Snorkel or its loc...

Страница 53: ...cartridge clean or replace 3 If leakage is from the O C valve clean and adjust the relief valve or replace Check valves are non adjustable and can only be cleaned or replaced 1 If the leakage is from the piston seal kit re place The leakage is possibly through annular port which has no lock valve 2 DROPNOSE RAM The dropnose ram is fitted with two O C valves There are two ways to determine which co...

Страница 54: ...and should be adjusted in accordance with the set up procedure To adjust the pressure remove the cap of the relief valve and screw the adjusting screw inwards to increase pressure and outwards to decrease pressure Place the cap back after adjusting The spools are all the same and are closed centred in the neutral position It is critical that the valve block does not leak internally when in the neu...

Страница 55: ...nd cap This refers to either the end where the lever is or at the opposite end where the return spring is Never fully withdraw the spool Push it out opposite to where the leak is coming from with sufficient space to clear the O ring which can now be observed with a small screw driver Apply plenty of grease and keep well lubricated when pushing the spool back in If the spool is not centring check t...

Страница 56: ...r fitted in the valve block If the restrictor gets blocked the cylinder will not operate correctly When looking for a fault relating to cylinders and valve blocks swapping hose connections can eas ily provide a good pointer to where the fault is If the fault position doesn t change then the fault is in the valve block If the fault position moves then the fault is in the cylinder Do not overtighten...

Страница 57: ...put during transportation If this occurs move the valve lever with the pump running Moving the platform from side to side will fill the cylinder with oil and the platform will lock in place when the lever is released BLEEDING The hydraulic system needs no special bleeding If a cylinder is stripped down or hoses for repair removed operate the cylinder fully in and fully out for the system to be ope...

Страница 58: ...ircuits for faults Note Always let the engine reach operating temperature before loading the hydraulic circuit Some engines are fitted with a low oil level safety cut out which will stop the engine and prevents starting if the oil level is low Note The engine Stop Run Start key switch must be in the run position even when starting the engine manually Check the battery level weekly and top up with ...

Страница 59: ... the signal to the ignition coil go to earth LEVEL GAUGE The level gauge used for setting up the machine is located next to the outrigger control valve block If the level is damaged or has been removed do not use the machine until a new level has been fitted SERVICE AND REPAIR Figure 3 18 Engine engine schematics Figure 3 19 Level gauge location Level Gauge Courtesy of Crane Market ...

Страница 60: ...e to damage is the drop nose When reversing the basket may hit a low wall or a post The impact may not be easy to spot on an already battered basket however may bend the bot tom of the drop nose Check the straightness of the top tie bar A slight dip is acceptable but a kink or sideways bend is unacceptable Check both booms for creases in the steel next to the main bosses which is next to the slew ...

Страница 61: ... Depending on which shaft is causing the prob lem the structure might need support to prevent jamming when extracting the shaft LOCKING PINS It is important that the boom locking pins are used when the machine is transported Never transport a machine if the pin is missing The fixing clips fitted on machines have been provided to prevent paint damage by the pin hitting the structure during use When...

Страница 62: ... light to show voltage selected Short circuit protection Designed to withstand heavy vibration Modular design The black box will control 12 V 24 V and 48 V at 30 A outputs with the appropriate transformer Auto boost to enable batteries to be kept in optimum condition when machine is in storage with the charger connected OPERATION The LED s are visible on the battery charger 50 green LED blinking i...

Страница 63: ...e not to disconnect the charger during a charging cycle Always let the charger reach Charge complete or Time out to pre vent overcharging PRACTICAL APPLICATIONS The machine will not work if the batteries are run down fully This is still the case even if the charger is connected The electric motor requires as much as 3 times the charger output The charger will float on 30 A maximum and the motor wi...

Страница 64: ...e if the fault occurs roughly in the same place If it does it is highly likely there is an internal cable failure and the complete cable should be replaced On mains powered machines the control circuit is almost identical apart from voltage variants and the use of an isolation transformer on the control circuit The bolt on motor contactor used on the DC pack is replaced by a combined thermal overl...

Страница 65: ... axle increased wear will be noticed on the inside part of the tyre tyres compared to the outside part It is important that correct tyre pressure is maintained at all times The correct pressure is 3 8 bar 55 PSI and not what may be indicated on the tyre Refer to the tyre pressure sticker fitted on the top of the mudguard Tyre size is 205 75R16 Note For full service and maintenance information on t...

Страница 66: ...rds The brake rod must not be under tension or bowed when the handbrake is disengaged AXLE The axle is fully maintenance free Check the fixing bolts If ordering replacement axle quote all refer ence numbers on the oval serial number plate riveted to the axle beam En sure that the draw bar is fully extended Screw the brake rod into the pivot head and secure with an M10 nut Using the M10 ball nut co...

Страница 67: ...e to DIN 51825 KTA 3K clean and oil all other moving parts WHEEL BEARINGS The wheel bearings are sealed permanently and require no maintenance or grease The service life for a set of bearings is in the region of 20000 to 30000 miles depending on running conditions It is vital that the brakes have not been overheated as this will cause the grease in the sealed ball bearings to evaporate and the bea...

Страница 68: ...E WHITE BROWN GREEN GREEN BROWN RED WHITE WHITE BLACK RED NUMBER REFERENCE COLOUR FUNCTION 1 L YELLOW L H INDICATOR 2 54G BLUE REARFOGLAMP S 3 31 WHITE EARTH 4 R GREEN R H INDICATOR NUMBER REFERENCE COLOUR FUNCTION 5 58R BROWN R H TAIL 6 54 RED STOPLIGHTS 7 58L BLACK L H TAIL NUMBERPLATE SERVICE AND REPAIR Figure 3 34 Colour and function table for rear lights Courtesy of Crane Market ...

Страница 69: ...ce of the slew ring When greasing the worm housing take care not to push out the oil seal on the end face If you do remove excess grease from the end and drive the seal back in Refer to the slew drive section for more details SLEW DRIVE GEARS The slew drive gear is designed to be largely maintenance free However it is recommended that the gear teeth be greased on a weekly monthly basis with a high...

Страница 70: ...lip on the slew gear Keep on greasing as the grease will now be pushed out through the outer and inner sealing ring of the slew bearing Grease escaping from the inner seal will drop unto the slew stop ring 2 LPS 3 lubrication can also be sprayed between the slew tube and the chassis plate The slew stop mechanism is very simple and prevents the cables and hoses getting tangled up by continuous rota...

Страница 71: ... of lubrication to ensure that the slew stop ring has not got jammed Again if the problem does not disappear contact Snorkel or its local representative for further assistance Note All machines being operated in the UK must have a thorough inspection carried out every 6 months in accordance with LOLER regulations 1998 and a certificate of Thorough Inspection produced by a competent person When the...

Страница 72: ...Page 3 30 TL49J Courtesy of Crane Market ...

Страница 73: ...Page 4 1 TL49J TROUBLESHOOTING CONTENTS FAULT FINDING 4 2 FAULT FINDING MATRIX 4 4 Courtesy of Crane Market ...

Страница 74: ...the motor brushes Check the motor fuse Ensure the emergency stop button is not engaged DC motor turning but not able to operate outriggers Ensure the top boom is lowered and the boom switch is activated Check that the limit switch arm is secure on the boom switch Ensure the diverter valve is de activated Re fer to the hydraulic circuit Check the hydraulic pressure If there s no pressure check the ...

Страница 75: ... Check the pump and coupling Mains motor engine stalls when trying to operate the machine Check relief valve setting Mains motor stalls when operating the machine Check for voltage drop Use shorter extension lead If the voltage reading on the motor terminals is below 10 of the motor rating when it is run ning under load the motor will fail Do not run the machine RCD on mains powered machines keeps...

Страница 76: ...perators Manual NO YES NO Does the Engine have Oil Fuel YES Fill up the Oil or Fuel tank Read Operators Manual Is the Choke On Apply the Choke Read Operators Manual NO YES NO Are the Batteries Fully Charged YES Charge Batteries Read Operators Manual Has the Circuit Breaker tripped Reset the Circuit Breaker Read Operators Manual If further advice is required consult an Snorkel Technician NO YES Cou...

Страница 77: ... advice is required consult an Snorkel Technician NO YES Is the Correct Power supply Connected Connect power supply Read Operators Manual NO YES All extensions must be a minimum of 2 5mm and no longer than 10m due to possible voltage drop which will damage the motor Voltage Drop may be the cause Use a shorter Extension lead If further advice is required consult an Snorkel Technician NO YES Check t...

Страница 78: ...nual Are all Emergency Stops Reset Reset Emergency stops Read Operators Manual NO YES NO Are the Batteries Fully Charged YES Charge Batteries Read Operators Manual Has the Circuit Breaker tripped Reset the Circuit Breaker Read Operators Manual If further advice is required consult an Snorkel Technician NO YES NO YES Select appropriate control Read Operators Manual Courtesy of Crane Market ...

Страница 79: ...Deadman being pressed Press the Deadman Read Operators Manual NO YES NO YES Resett he Outriggers until all LEDs are Illuminated Read Operators Manual Are the Hydraulics under pressure NO YES Is there enough Oil in the tank NO Top up Oil Level Read Operators Manual YES If further advice is required consult an Snorkel Technician A change of motor tone can be heard Select appropriate control Read Ope...

Страница 80: ...t or booms Remove obstruction or reposition Read Operators Manual Is the Motor Run Deadman being pressed Press the Deadman Read Operators Manual NO YES NO YES Resett he Outriggers until all LEDs are Illuminated Read Operators Manual Are the Hydraulics under pressure NO YES Is there enough Oil in the tank NO Top up Oil Level Read Operators Manual YES A change of motor tone can be heard Courtesy of ...

Страница 81: ...ket YES Select appropriate control Read Operators Manual Is the Motor Run Deadman being pressed Press the Deadman Read Operators Manual NO YES NO YES Lower the booms until the switch is made Read Operators Manual If further advice is required consult an Snorkel Technician Outriggersw ill not extend retract NO CHANGE Courtesy of Crane Market ...

Страница 82: ...elect appropriate control Read Operators Manual NO YES Reset the Outriggers until all LEDs are Illuminated Read Operators Manual Has the slew reached theslew stop NO YES Is there enough Oil in the tank NO Top up Oil Level Read Operators Manual YES If further advice is required consult an Snorkel Technician Is there an obstruction Preventing the slewing action Remove obstruction or reposition Read ...

Страница 83: ...TL49BATTERYPGELECTRICSCHEMATIC 513354 001 5 2 TL49 PETROL PG ELECTRIC SCHEMATIC 513354 002 5 3 TL49 DIESEL PG ELECTRIC SCHEMATIC 513354 003 5 4 TL49 BI PETROL PG ELECTRIC SCHEMATIC 513354 004 5 5 TL49 BI DIESEL PG ELECTRIC SCHEMATIC 513354 005 5 6 TL49 MAINS PG ELECTRIC SCHEMATIC 513354 006 5 7 TL49 MAINS GENSET PG ELECTRIC SCHEMATIC 513354 007 5 8 TL49 BATTERY MAINS HYDRAULICS SCHEMATIC 515057 00...

Страница 84: ...Page 5 2 TL49J SCHEMATICS TL49 BATTERY PG ELECTRIC SCHEMATIC 513354 001 Courtesy of Crane Market ...

Страница 85: ...Page 5 3 TL49J SCHEMATICS TL49 PETROL PG ELECTRIC SCHEMATIC 513354 002 Courtesy of Crane Market ...

Страница 86: ...Page 5 4 TL49J SCHEMATICS TL49 DIESEL PG ELECTRIC SCHEMATIC 513354 003 Courtesy of Crane Market ...

Страница 87: ...Page 5 5 TL49J SCHEMATICS TL49 BI PETROL PG ELECTRIC SCHEMATIC 513354 004 Courtesy of Crane Market ...

Страница 88: ...Page 5 6 TL49J SCHEMATICS TL49 BI DIESEL PG ELECTRIC SCHEMATIC 513354 005 Courtesy of Crane Market ...

Страница 89: ...Page 5 7 TL49J SCHEMATICS TL49 MAINS PG ELECTRIC SCHEMATIC 513354 006 Courtesy of Crane Market ...

Страница 90: ...Page 5 8 TL49J SCHEMATICS TL49 MAINS GENSET PG ELECTRIC SCHEMATIC 513354 007 Courtesy of Crane Market ...

Страница 91: ...Page 5 9 TL49J SCHEMATICS TL49 BATTERY MAINS HYDRAULICS SCHEMATIC 515057 000 TL49J Battery Mains Power June 05 Courtesy of Crane Market ...

Страница 92: ...Page 5 10 TL49J SCHEMATICS TL49 DIESEL PETROL HYDRAULICS SCHEMATIC 515057 001 June 05 TL49J Diesel Petrol Powered Courtesy of Crane Market ...

Страница 93: ...Page 5 11 TL49J SCHEMATICS TL49 BI FUEL HYDRAULICS SCHEMATIC 515057 002 TL49J Bi Fuel Powered June 05 Courtesy of Crane Market ...

Страница 94: ...Page 5 12 TL49J SCHEMATICS TL49 BI FUEL FRICTION DRIVE OPTION SCHEMATIC 515057 002 July 07 TL49J Bi Fuel with friction drive option Courtesy of Crane Market ...

Страница 95: ...6 16 DROPNOSE 6 18 CAGE SUPPORT 6 19 STEEL CAGE 6 20 GRP BASKET 6 22 OUTRIGGER RAM 6 23 BOTTOM RAM 6 24 TOP RAM 6 25 MASTER RAM 6 26 TELESCOPIC RAM 6 27 LEVELLING RAM 6 28 DROPNOSE RAM 6 29 CAGE ROTATION RAM 6 30 TRAILER ELECTRIC KIT PARTS 6 31 STANDARD LOWER CONTROL PANEL 6 31 STANDARD PLATFORM CONTROL PANEL 6 33 BATTERY MAINS PLATFORM CONTROL PANEL 6 35 ENGINE PLATFORM CONTROL PANEL 6 36 BI FUEL...

Страница 96: ...ylock nut 8 PART DESCRIPTION QTY 513836 000 Harness tow hitch to chassis 1 513836 001 Harness chassis to side marker lamps 1 513839 000 Harness rear light to registration lamp 2 513838 000 Harness rear light to side marker lamp 2 513492 000 Amber marker lamp 6 513403 000 White reflector 2 512687 000 13 pin plug 1 512689 000 8 core cable 10m ILLUSTRATED PARTS LIST 1 1 2 3 4 4 5 6 7 8 Figure 6 1 Lig...

Страница 97: ...ot 4 3 13 3608 Outrigger ram 4 4 22 5179 Outrigger ram cover 4 5 15 0886 Ram cover skid pad 4 6 12 2054 Banjo bolt 8 7 SB 030030 Bush 24 8 SP 016E216 Pin 4 9 SP 030D171 Pin 4 10 SP 030D203 Pin 4 11 SP 030K211 Pin 4 12 10 2627 Retaining peg 16 Figure 6 2 Outrigger assembly Table 6 3 Outrigger components Courtesy of Crane Market ...

Страница 98: ...Page 6 4 TL49J ILLUSTRATED PARTS LIST CHASSIS ASSEMBLY 1 2 3 4 5 6 7 8 9 10 11 12 13 14 15 16 17 18 19 20 21 22 23 24 25 26 27 28 Figure 6 3 Chassis assembly Courtesy of Crane Market ...

Страница 99: ... bracket L H 1 513449 000 Mudguard support bracket R H 1 17 513416 000 Mudguard mount bracket 2 513793 000 Mudguard mount bracket Friction drive units only 2 18 IT250 Mudguard 2 19 11 3449 Bolt M12 x 80 mm 26 20 08 0192 Slew bearing worm drive c w motor 1 21 10 5271 Slew limiting ring 1 22 13 2537 Stabilizer control valve 1 23 25 0239 Levelling bubble 1 24 513403 000 White marker lamp 2 25 513492 ...

Страница 100: ...Page 6 6 TL49J SLEW BI FUEL POWER ILLUSTRATED PARTS LIST Figure 6 4 Slew Bi fuel assembly Courtesy of Crane Market ...

Страница 101: ... 5581 Control cover box 1 19 13 0888 Base control valve 1 20 11 3448 Bolt M12 x 85 mm 28 21 10 2672 Retaining peg 2 22 24 2880 Retaining peg large 2 23 SP 035D320 Pin 2 24 21 0852 Pin 4 25 22 5577 Splash guard 1 26 20 0055 Kubota OC60 diesel engine c w stop start kit 1 20 0044 Honda petrol engine 1 27 13 0529 In line check valve 2 28 13 1949 Bell housing 1 29 13 1950 Flexible coupling 1 30 13 3649...

Страница 102: ...Page 6 8 TL49J ILLUSTRATED PARTS LIST SLEW MAINS POWER Figure 6 5 Slew mains assembly Courtesy of Crane Market ...

Страница 103: ... assy mains 1 11 19 0155 Tank Powerpack 1 12 19 0155 2 Handpump handle 1 13 19 0155 1 Handpump 1 14 22 5516 Float charger cover 1 15 09 1937 Float charger 1 16 13 3609 Hydraulics manifold 1 17 513348 000 Ground control box 1 18 22 5581 Control box cover 1 19 13 0888 Base control valve 1 20 11 3448 Bolt 28 21 10 2672 Retaining peg 2 22 24 2880 Retaining peg Large 2 23 SP 035D320 Pin 2 24 21 0852 Pi...

Страница 104: ...Page 6 10 TL49J ILLUSTRATED PARTS LIST SLEW BATTERY POWER Figure 6 6 Slew battery assembly Courtesy of Crane Market ...

Страница 105: ...ry charger 1 12 19 0154 Tank Powerpack 1 13 19 0154 2 Handpump handle 1 14 19 0154 1 Handpump 1 15 22 5577 Splash guard 1 16 09 0998 Contactor 1 17 13 3609 Hydraulics manifold 1 18 513348 000 Ground control box 1 19 22 5581 Control box cover 1 20 13 0888 Base control valve 1 21 11 3448 Bolt 28 22 10 2672 Retaining peg 2 23 24 2880 Retaining peg large 2 24 SP 035D320 Pin 1 25 21 0852 Pin 2 26 24 44...

Страница 106: ...Page 6 12 TL49J ILLUSTRATED PARTS LIST SLEW ENGINE POWER Figure 6 7 Slew engine assembly Courtesy of Crane Market ...

Страница 107: ... Return line filter 1 16 13 3609 Hydraulics manifold 1 17 513348 000 Slew control box 1 18 22 5581 Control box cover 1 19 13 0888 Base control valve 1 20 11 3448 Bolt 28 21 10 2672 Retaining peg 2 22 24 2880 Retaining peg Large 2 23 SP 035D320 Pin 1 24 21 0852 Pin 2 25 22 5613 Tank lid 1 26 20 0044 Engine petrol 1 20 0055 Engine diesel 1 27 13 3549 In line check valve 2 28 13 1949 Bell housing 1 2...

Страница 108: ...Page 6 14 TL49J ILLUSTRATED PARTS LIST LOWER BOOM Figure 6 8 Lower boom assembly Courtesy of Crane Market ...

Страница 109: ... 3606 Top ram 1 6 13 3604 Master ram 1 7 21 0852 Pin 2 8 SP 035D201 Pin 1 9 21 0850 Pin 1 10 SP 030D320 Pin 1 11 SP 035D320 Pin 1 13 SB 060060 Bush 8 14 SB 035035 Bush 6 15 SB 030030 Bush 2 16 SB 025025 Bush 2 17 10 2672 Retaining peg 8 18 24 2880 Retaining peg 2 19 15 0884 Boom rest pad 1 20 15 0883 Boom rest pad 1 Table 6 10 Lower boom components Courtesy of Crane Market ...

Страница 110: ...Page 6 16 TL49J ILLUSTRATED PARTS LIST TOP BOOM Figure 6 9 Top boom assembly Courtesy of Crane Market ...

Страница 111: ...ear pad 1 9 15 0896 Wear pad 1 10 15 0882 Wear pad 2 11 24 3952 Pad retaining nut 8 12 10 5138 Wear pad keep plate 4 13 SP 035D203 Pin 1 14 SP 025D200 Pin 1 15 SP 040D203 Pin 1 16 SP 025A120 Pin 1 17 SP 025D164 Pin 1 18 10 2672 Retaining peg 8 19 SB 030030 Bush 2 20 SB 040040 Bush 2 21 SB 025025 Bush 4 22 09 2121 Cable tray 1 23 24 3909 Hose trunking 1 24 15 0883 Boom rest pad 1 25 15 1009 Drag ch...

Страница 112: ...DESCRIPTION QTY 1 10 5078 Drop nose boom 2 2 10 5077 Quadrant 1 3 13 3602 Drop nose ram 1 4 SP 025D200 Pin 3 5 SP 030D216 Pin 1 6 10 2672 Retaining peg 6 7 SB 025025 Bush 12 Figure 6 10 Drop nose assembly Table 6 12 Drop nose components Courtesy of Crane Market ...

Страница 113: ...k bracket 1 5 SP 025D235 Pin CE 4 SP 025D200 Pin ANSI 2 6 SP 025D330 Pin 1 7 SP 016B108 Pin 1 8 10 2672 Retaining peg 9 9 SB 025015 Bush 8 10 SB 025025 Bush 2 11 SB 016020 Bush 4 12 04 0113 Thrust washer 2 13 13 2403 Cage rotation ram 1 14 23 0031 Spring 2 15 11 3442 Bolt M12 x 170 mm 2 Figure 6 11 Cage support assembly Table 6 13 Cage support components Courtesy of Crane Market ...

Страница 114: ...Page 6 20 TL49J STEEL CAGE ILLUSTRATED PARTS LIST Figure 6 12 Steel cage assembly Courtesy of Crane Market ...

Страница 115: ...ble over centre valve 1 10 13 2200 Control valve 1 11 22 5370 Rear cover 1 12 22 5601 Blanking plate 1 13 09 1276 Socket 110 V 1 14 513321 004 Platform control panel Battery 1 513321 005 Platform control panel Engine 1 513321 006 Platform control panel Bi fuel 1 513321 004 Platform control panel Mains 1 15 508140 000 RCD 1 16 09 2126 Amber marker lamp 2 17 09 1939 Swivel light 2 ILLUSTRATED PARTS ...

Страница 116: ... 7 13 0176 Double overcentre valve 1 8 13 2200 Control valve 1 9 22 5370 Rear cover 1 10 22 5601 Blanking plate 1 11 09 1276 Socket 110 V 1 09 1392 Socket 230 V 1 12 513321 004 Platform control panel Battery 1 513321 005 Platform control panel Engine 1 513321 006 Platform control panel Bi fuel 1 513321 004 Platform control panel Mains 1 Figure 6 13 GRP basket assembly Table 6 15 GRP basket compone...

Страница 117: ... 3608 1 Tube assembly 1 2 13 2351 Seal kit 1 3 13 1004 Head bush 1 4 13 0604 PO Check valve 2 5 13 0973 Locknut 1 6 13 1007 Piston 1 7 SS 0400023 Spacer 1 8 13 3608 2 Rod assembly 1 Figure 6 14 Outrigger ram assembly Table 6 16 Outrigger ram components 13 3608 Courtesy of Crane Market ...

Страница 118: ...3 0968 Head bush 1 4 13 0392 Over centre valve 1 5 13 2474 2 Emergency lower valve 1 6 09 2090 Solenoid 1 7 13 2425 77 Hirschmann connector 1 8 13 0973 Locknut 1 9 13 0971 Piston 1 10 SS 0500343 Spacer 1 11 13 3607 2 Rod assembly 1 Figure 6 15 Bottom ram assembly Table 6 17 Bottom ram components 13 3607 Courtesy of Crane Market ...

Страница 119: ...3 0968 Head Bush 1 4 13 0392 Over centre valve 1 5 13 2474 2 Emergency lower valve 1 6 09 2090 Solenoid 1 7 13 2425 77 Hirschmann 1 8 13 0973 Locknut 1 9 13 0971 Piston 1 10 SS 0500037 Spacer 1 11 13 3606 2 Rod 1 12 13 3606 3 Bearing 1 Figure 6 16 Top ram assembly Table 6 18 Top ram components 13 3606 Courtesy of Crane Market ...

Страница 120: ...PART DESCRIPTION QTY 1 13 3604 1 Tube assembly 1 2 13 3603 3 Seal kit 1 3 13 1061 Head bush 1 4 13 0973 Locknut 1 5 13 1064 Piston 1 6 13 3604 2 Rod assembly 1 Figure 6 17 Master ram assembly Table 6 19 Master ram components 13 3604 Courtesy of Crane Market ...

Страница 121: ...bly 1 2 13 3605 3 Seal kit 1 3 13 3605 4 Head bush 1 4 13 0472 Over centre valve 1 5 13 0659 PO check valve 1 6 13 3605 5 Piston 1 7 13 3605 6 Locknut 1 8 13 3605 Spacer 1 9 13 3605 2 Rod assembly 1 Figure 6 18 Telescopic ram assembly Table 6 20 Telescopic ram components 13 3605 Courtesy of Crane Market ...

Страница 122: ...QTY 1 13 3603 1 Tube assembly 1 2 13 3603 3 Seal kit 1 3 13 1061 Head bush 1 4 13 2489 Over centre valve 2 5 13 1064 Piston 1 6 13 0973 Locknut 1 7 13 3603 2 Rod assembly 1 Figure 6 19 Levelling ram assembly Table 6 21 Levelling ram components 13 3603 Courtesy of Crane Market ...

Страница 123: ...602 1 Tube assembly 1 2 13 3603 3 Seal Kit 1 3 13 1061 Head bush 1 4 13 2489 Over centre valve 2 5 13 1064 Piston 1 6 13 0973 Locknut 1 7 13 3602 3 Spacer 1 8 13 3602 2 Rod assembly 1 Figure 6 20 Drop nose ram assembly Table 6 22 Drop nose ram components 13 3602 Courtesy of Crane Market ...

Страница 124: ...TION QTY 1 13 2403 1 Tube assembly 1 2 13 0993 Seal kit 1 3 13 0988 Head bush 1 4 13 0992 Piston 1 5 13 0994 Locknut 1 6 SS 0200020 Spacer 1 7 13 2403 2 Rod assembly 1 Figure 6 21 Cage rotation ram assembly Table 6 23 Drop nose ram components 13 2403 Courtesy of Crane Market ...

Страница 125: ...PARTS STANDARD LOWER CONTROL PANEL L T 10 24 25 33 28 27 27 27 27 30 31 31 31 31 31 32 34 38 7 9 8 12 13 14 15 16 A B C D E F G H I J K L 1 6 5 23 4 3 2 19 20 21 17 18 29 11 24 Figure 6 22 Standard lower control panel assembly 513348 000 Courtesy of Crane Market ...

Страница 126: ...2 000 End plate 2 19 513311 000 Feed through terminal 4 way ground 3 20 513314 000 Terminal end stop 2 21 513313 000 Jumper 2 22 513315 000 Spacer 4 23 512817 000 15 way panel plug 2 24 513319 000 Lower control box trailers 1 25 510152 000 Cable gland 12 26 510153 000 Cable gland 12 27 09 2378 Switch cable 4 28 09 2379 Switch cable 1 29 09 2326 Relay 24 V DC 1 30 513350 000 5 Core cable 1 ITEM PAR...

Страница 127: ...ATED PARTS LIST STANDARD PLATFORM CONTROL PANEL 15 17 7 16 11 8 9 10 10 22 23 20 21 18 GASKET SEALS ON OUTSIDE 19 14 12 4 1 6 3 2 5 13 A Figure 6 23 Standard platform control panel assembly 513321 000 Courtesy of Crane Market ...

Страница 128: ... way panel plug 1 10 510157 000 12 way panel plug 2 11 510145 000 Mate N lock socket contact 14 12 09 2378 Switch cable 1 13 510152 000 Cable gland 1 14 510153 000 Cable gland 1 15 058501 025 M5 x 25 S C H S GR 12 9 2 16 056066 005 M5 nylock nut 8 2 17 056069 005 M5 washer Grade 8 2 18 513949 000 9 way chassis socket 1 19 514327 000 Resistor 1 K 0 5 W 5 1 20 513590 002 Cable mounting plate 1 21 51...

Страница 129: ...ontrol panel standard 1 2 512449 000 Keyswitch 2 position stayput 1 3 513328 004 TL49 UCP overlay bat mains 1 4 513307 000 Switch 3 way spring to center 1 3 4 1 2 Figure 6 24 Battery Mains platform control panel assembly 513321 004 Table 6 26 Battery Mains Platform control panel components 513321 004 Courtesy of Crane Market ...

Страница 130: ... standard 1 2 512449 000 Keyswitch 2 position stayput 1 3 513317 000 Green push button 1 4 513328 005 TL49 UCP overlay engine 1 5 513307 000 Switch 3 way spring to center 1 4 2 5 1 3 Figure 6 25 Engine platform control panel assembly 513321 005 Table 6 27 Engine Platform control panel components 513321 005 Courtesy of Crane Market ...

Страница 131: ...standard 1 2 512543 000 Keyswitch 3 position stayput 1 3 513317 000 Green push button 1 4 513328 006 TL49 UCP overlay bi fuel 1 5 513307 000 Switch 3 way spring to center 1 5 2 1 4 3 Figure 6 26 Bi fuel platform control panel assembly 513321 006 Table 6 28 Bi fuel Platform control panel components 513321 006 Courtesy of Crane Market ...

Страница 132: ...T MOTOR CABLE LENGTH 1800mm MARK MOTOR STRIP 50mm MAINS IN CABLE LENGTH 3700mm MARK MAINS IN STRIP 50mm 1 2 5 3 4 6 7 8 10 9 11 12 13 TERMINATE WITH GREY BOOTLACE FERRULES 513067 000 Figure 6 27 Mains motor starter assembly 513999 000 Courtesy of Crane Market ...

Страница 133: ...1 9 508077 000 3 core cable 2 5 CSA HO7RN F 6 m 10 514002 000 MCB 16 A 1 11 514003 000 Motor starter contactor 12 V DC coil 1 12 514004 000 Overload relay 1 13 514005 000 PSU 230 V AC to 12 V DC 7 5 A 1 14 514007 000 Decal isolate supply 1 15 514008 000 Cable 2 5 mm CSA Tri rated brown 0 5 m 16 514009 000 Cable 2 5 mm CSA tri rated blue 0 5 m 17 514010 000 Cable 2 5 mm CSA tri rated green yellow 0...

Страница 134: ...4 000 Fuse 175 A 1 501877 000 Fuse holder 1 PART DESCRIPTION QTY 502494 000 Motor starter box assembly 1 CABLE ASSEMBLIES PART DESCRIPTION QTY 513323 000 Platform Cable TL49 1 PART DESCRIPTION QTY 513325 000 Battery cable set TL49 1 ILLUSTRATED PARTS LIST Table 6 30 External components All variants Table 6 31 External components All battery variants Table 6 32 External components All mains variant...

Страница 135: ...al elbow 6 12 1110 7 16 JIC equal Tee female on run 6 12 1501 1 2 Dowty washer 6 12 1502 3 8 Dowty washer 64 12 1507 1 4 Dowty washer 45 12 1511 1 8 Dowty washer 1 12 1867 9 16 JIC male female elbow 1 12 2001 1 2 BSP male plug 1 12 2003 3 8 BSP male plug 6 12 2002 1 8 BSP male plug 1 12 0927 9 16 UNF male x 9 16 JIC male straight adaptor 1 12 9007 9 16 UNF male plug 1 5063701 7 16 4 JIC female cap...

Страница 136: ... 4 R7 7 16 JIC female straight 7 16 JIC female straight 6900 G12 1 Telescope ram drain 1 4 R7 7 16 JIC female straight 7 16 JIC female straight 6900 G13 1 Base valve P to manifold GP 3 8 702 9 16 JIC female straight 9 16 JIC female straight 1200 G14 2 Base valve to manifold slew Tee 1 4 R7 7 16 JIC female straight 7 16 JIC female straight 1000 G15 1 Hand pump to manifold HP1 1 4 R7 7 16 JIC female...

Страница 137: ...le 90 2300 G31 1 Basket valve to slewing ram 1 4 R7 7 16 JIC female straight 7 16 JIC female 90 2200 G32 2 Basket valve to drop nose ram 1 4 R7 7 16 JIC female straight 7 16 JIC female 90 4100 G33 2 DOC valve to basket levelling ram 1 4 R7 7 16 JIC female straight 7 16 JIC female 90 3900 G34 2 Basket valve to DOC valve 1 4 R7 7 16 JIC female straight 7 16 JIC female 90 600 H1 1 Pump to manifold 1 ...

Страница 138: ...6 JIC F 90 190 1 H7 1 4 1SN 9 16 JIC F 45 x 9 16 F 90 250 1 H8 1 4 1SN 9 16 JIC F 45 x 9 16 f 90 1525 2 H9 1 4 1 SN 9 16 JIC F 45 x 9 16 F 90 1650 2 H10 3 8 1SN 9 16 JIC F STR x 9 16 JIC F 45 3275 1 H11 3 8 1SN 9 16 JIC F STR x 9 16 JIC F 90 3275 1 H12 1 4 1SN 9 16 JIC F STR x 9 16 JIC F STR 910 2 H13 1 4 1SN 9 16 JIC F STR x 9 16 JIC F STR 1220 1 Table 6 37 TL49J friction drive kit 13 3670 Courte...

Страница 139: ...0 18 0483 508507 000 508507 000 18 0578 508525 001 508521 000 508508 000 508508 000 508523 000 508507 000 508507 000 18 0071 510280 000 510280 000 508525 001 508522 000 508508 000 508508 000 508506 000 508519 000 Table 6 27 TL49J decal locations Courtesy of Crane Market ...

Страница 140: ...Page 6 46 TL49J ILLUSTRATED PARTS LIST 508523 000 510280 000 508525 001 18 0578 508513 000 18 0483 508507 000 Courtesy of Crane Market ...

Страница 141: ...Page 6 47 TL49J ILLUSTRATED PARTS LIST 18 0071 508506 000 508521 000 508522 000 508508 000 508519 000 Courtesy of Crane Market ...

Страница 142: ...Courtesy of Crane Market ...

Страница 143: ...E MIDDLE EAST AFRICA ASIA PHONE 44 0 845 1550 057 FAX 44 0 845 1557 756 NORTH SOUTH AMERICA PHONE 1 785 989 3000 TOLL FREE 1 800 225 0317 FAX 1 785 989 3070 AUSTRALIA PHONE 61 2 9725 4000 FAX 61 2 9609 3057 NEW ZEALAND PHONE 64 6 3689 168 FAX 64 6 3689 164 Powered by TCPDF www tcpdf org Courtesy of Crane Market ...

Отзывы: