background image


Preparing the appliance for operation: 

It is recommended to prepare the appliance for operation with a helper. 


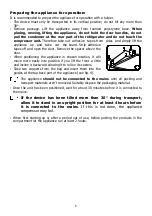
The device must only  be  transported in its  vertical position; do not tilt any more than 
30°. 


Remove  package.  Lift  the  appliance  away  from  foamed  polystyrene  base.  When 
placing,  moving,  lifting  the  appliance,  do  not  hold  the  door  handles,  do  not 

pull  the  condenser  at  the rear  part  of  the  refrigerator  and  do  not  touch  the 
compressor unit. 
Therefore take out  adhesive  tapes from  sides  and simply lift the 

appliance    up    and    take    out    the  board.  Strip  adhesive 
tapes off and open the door. Remove the spacer above the 
door. 


When  positioning  the  appliance  in  chosen  location,  it  will 
move  more  easily  into  position  if  you  lift  the  front  a  little 

and incline it backward allowing it to roll on its casters. 


Take  two  supports  from  the  bag  and  insert  them  into  the 

guides at the top back part of the appliance (see fig. 4). 

The  appliance  should  not  be  connected  to  the  mains  until  all  packing  and 

transport materials aren’t removed. Suitably dispose the packaging material. 


Once the unit has been positioned, wait for about 30 minutes before it is connected to 

the mains. 

If  the  device  has  been  tilted  more  than  30°  during  transport, 

allow it to stand in an upright position for at least 4 hours before 
it  is  connected  to  the  mains
.  If  this  is  not  done,  the  appliance 
compressor may fail. 


When  first  starting-up  or  after  a  period  out  of  use,  before  putting  the  products  in  the 
compartment let the appliance run at least 2 hours. 


Содержание WD35SM

Страница 1: ...WD35SM Instruction for Use...

Страница 2: ...ies with the requirements stipulated in the guidelines of the council for the harmonization of the legal provisions of the member states on electromagnetic compatibility Directive 2014 30 EU and on th...

Страница 3: ...ug it in or unplug from the electricity supply socket Do not allow children to play with the packaging material from the appliance Cleaning and user maintenance shall not be made by children without s...

Страница 4: ...N If the installed interior lighting diode LED lamp for the cooling device is not functioning contact the maintenance and repair representative for replacements LAMPS CAN BE REPLACED ONLY BY THE MAINT...

Страница 5: ...ators or direct sunlight The appliance must not touch any pipes for heating gas or water supply or any other electrical devices Minimum distances from the heat sources from the electric gas and other...

Страница 6: ...chosen location it will move more easily into position if you lift the front a little and incline it backward allowing it to roll on its casters Take two supports from the bag and insert them into th...

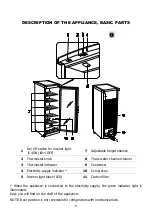
Страница 7: ...cleaner 3 Thermostat indicator 9 Condenser 4 Electricity supply indicator 10 Compressor 5 Interior light block LED 11 Carbon filter When the appliance is connected to the electricity supply the green...

Страница 8: ...ator display 3 see fig 1 page 1 The numbers 0 1 2 3 4 5 do not mean a specific temperatures The temperature is regulated on the scale of five digits 0 Compressor is switched off WARNING Electric curre...

Страница 9: ...ppliance is left empty for long periods switch off defrost clean dry and leave the door open to prevent mould developing within the appliance OPERATION PROBLEMS AND THEIR SOLUTIONS What if The applian...

Страница 10: ...e documents accompanying the product indicates that this appliance may not be treated as household waste Instead it shall be handed over to the applicable collection point for the recycling of electri...

Отзывы: