Smeg HG736 Скачать руководство пользователя страница 4

Safety Precautions

6

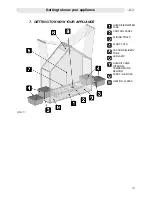
3. SAFETY PRECAUTIONS

DO NOT ATTEMPT TO MOVE THE DEVICE BY PULLING ON THE HANDLES OF ITS SLIDING
DOORS OR THE SLIDING TRAY SUPPORTS.

ON INSTALLATION, IF ANY MANUFACTURING DEFECTS OR DAMAGE CAUSED IN TRANSIT ARE
NOTED, CALL YOUR NEAREST SERVICE CENTRE.

FOR INSTALLATION AND CONNECTION, FOLLOW THE INSTRUCTIONS PROVIDED IN THIS
MANUAL ONLY.

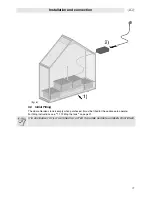
IN CASE OF MALFUNCTION, DISCONNECT THE APPLIANCE FROM THE POWER SUPPLY BY
REMOVING THE PLUG, WITHOUT PULLING ON THE POWER SUPPLY LEAD.

ALL REPAIRS OR OTHER WORK NOT COVERED BY THIS MANUAL MUST BE CARRIED OUT BY A
QUALIFIED ENGINEER, WHO CAN BE CONTACTED AT AN AUTHORISED SERVICE CENTRE.

NEVER ATTEMPT TO REPAIR THE APPLIANCE YOURSELF.

NEVER STORE SPRAY CANS CONTAINING FLAMMABLE GASES INSIDE THE APPLIANCE. ANY
LEAKS MAY CONSTITUTE A SERIOUS THREAT TO USERS' SAFETY.

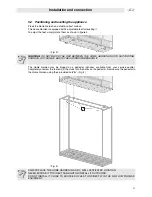
TO RAISE AND LOWER ITS SIDE WALLS, ALWAYS USE ONLY THE PROVIDED HANDLES 

 AND

TAKE CARE NOT TO PLACE YOUR FINGERS ON THE APPLIANCE’S STEEL FRAME

.

THE APPLIANCE PRIMARILY IS INTENDED FOR USE BY ADULTS. 
CHILDREN OR INFIRM PERSONS SHOULD USE ONLY UNDER ADULT SUPERVISION.
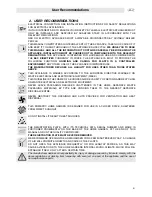
WARNING:
CLASS 1M LED LAMP (EN 60825-1:2003 - IEC 60825-1:1991 + A1:1997 + A2:2001 CONSOLIDATED
EDITION 1.2) - DO NOT VIEW THE BEAM OF LIGHT EMITTED DIRECTLY THROUGH LENSES,
GLASSES, ETC., OR AT DISTANCES OF LESS THAN 10 CM, SINCE THIS MAY BE DANGEROUS
FOR THE EYES.

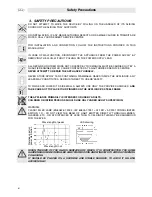
Wave lenght of peaks

LED drawing

Relativ

e

 spec

tr

al

po

w

e

r dist

ri

b

u

tio

n

Wave lenght (nm)

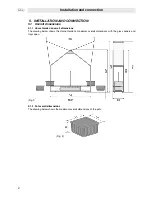
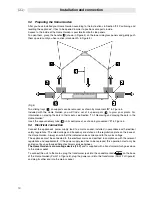
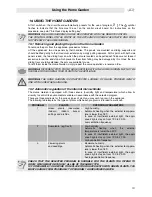
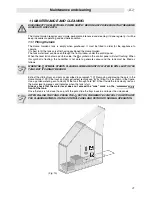
GIVEN THE SIZE OF THE GLASS SURFACES OF WHICH IT IS CONSTRUCTED, THE HOME
GARDEN SHOULD BE INSTALLED AWAY FROM DOORS AND WINDOWS TO AVOID ACCIDENTAL
COLLISIONS.
IT SHOULD BE PLACED ON A SUITABLE AND STABLE SURFACE, TO AVOID IT FALLING
ACCIDENTALLY.

Содержание HG736

Страница 1: ...symbol 15 8 8 Internal light ON symbol 15 8 9 Cuttings function on symbol 15 8 10 Remote control sensor 15 9 THE REMOTE CONTROL 16 9 1 Red led 16 9 2 Standby key 16 9 3 Cuttings function on key 17 9 4...

Страница 2: ...THE ADDRESSES OF COLLECTION RECYCLING AND DISPOSAL FACILITIES NEVER LEAVE ALL OR PART OF THE PACKAGING LYING AROUND PACKAGING PARTS AND ESPECIALLY PLASTIC BAGS MAY REPRESENT A SUFFOCATION HAZARD FOR C...

Страница 3: ...02 96 EC ON WASTE ELECTRICAL AND ELECTRONIC EQUIPMENT WEEE THIS GUIDELINE IS THE FRAME OF A EUROPEAN WIDE VALIDITY OF RETURN AND RECYCLING ON WASTE ELECTRICAL AND ELECTRONIC EQUIPMENT NEVER LEAVE PACK...

Страница 4: ...ASES INSIDE THE APPLIANCE ANY LEAKS MAY CONSTITUTE A SERIOUS THREAT TO USERS SAFETY TO RAISE AND LOWER ITS SIDE WALLS ALWAYS USE ONLY THE PROVIDED HANDLES AND TAKE CARE NOT TO PLACE YOUR FINGERS ON TH...

Страница 5: ...REGULARLY IRRIGATE MANURE TRIM THEM AND CLEAN THEIR LEAVES AND TAKE ALL THE FURTHER MEASURES NECESSARY FOR THEIR CARE THESE MEASURES ARE NOT RENDERED UNNECESSARY BY THE USE OF OUR PRODUCT BUT ARE IND...

Страница 6: ...all dimensions 5 1 1 Home Garden s overall dimensions The drawing below shows the Home Garden s maximum overall dimensions with the glass panels and trays open Fig 1 5 1 2 Pot overall dimensions The d...

Страница 7: ...PORTING SURFACE AS THIS MAY BLOCK THE AIR INTAKES BENEATH IT The Home Garden may be placed on a pedestal optional available from your service centre Completely unscrew the feet and fit the studs into...

Страница 8: ...tube in its central seat as shown by movement C in Figure 5 5 4 Electrical connection Connect the appliance s power supply lead to a mains socket installed in accordance with electrical safety regulat...

Страница 9: ...al Filling The Home Garden s tank is empty when purchased It must be filled for the appliance to operate For filling instructions see 11 1 Filling the tank on page 21 IT IS ADVISABLE TO FILL THE TANK...

Страница 10: ...res required to start up the Home Garden when using it for the first time 1 switch on the Home Garden by pressing the button on the remote control see Section 9 2 Standby key 2 select the program depe...

Страница 11: ...our appliance 13 7 GETTING TO KNOW YOUR APPLIANCE FIG 7 HUMIDIFIERWATER TANK CONTROL PANEL SLIDING TRAYS PLANT POTS VAPOUR DELIVERY TUBE LED LAMP HUMIDITY AND INTERNAL TEMPERATURE SENSOR TANK FILLER C...

Страница 12: ...Internal clock setting display symbol This symbol indicates that the key on the remote control has been pressed to show the current time on the displays For instructions for setting the time see 9 6...

Страница 13: ...ontrol has not been used for ten minutes consecutively the Home Garden locks its current setting and commands are not accepted from the remote control This is a precaution against misuse accidental or...

Страница 14: ...run a check of the displays and all control panel leds will light up Once this check has terminated the system will ask you to select one of the 3 pre set programs or the manual setting program For se...

Страница 15: ...ION ARE ON DO NOT TOUCH THESE PANELS WITH YOUR BARE HANDS BEFORE ALLOWING THEM SUFFICIENT TIME TO COOL DOWN 9 4 Humidifier key This key manually delivers a few jets of water vapour into the Home Garde...

Страница 16: ...he selected program During normal operation and when the Home Garden is not locked press the key once to display the time For the preset programs see 10 2 Automatic regulation of the internal micro cl...

Страница 17: ...ARGELY OF GLASS PROCEED GENTLY AND WITH CARE WHEN HANDLING 10 2 Automatic regulation of the internal micro climate The Home Garden is equipped with three sensors humidity light and temperature which a...

Страница 18: ...rogram The Home Garden has a manual program in which the operating parameters temperature and humidity can be modified To do this select program as described in point 10 3 Selecting the programme To m...

Страница 19: ...hing the humidifier is not able to generate vapour and the tank must be filled as follows WHEN THE SYMBOL STARTS FLASHING SOME AMOUNT OF WATER IS STILL LEFT IN THE TANK BUT IT CANNOT BE USED Extract t...

Страница 20: ...it simply pull it upwards and clean it under running water or with a steel wire 11 3 Cleaning the ultrasound vaporiser If it is necessary to clean the internal vaporiser for example because vapour is...

Страница 21: ...has been exceeded The tank has been filled beyond the maximum level Wait a few minutes and try again Empty the tank with a syringe or similar device as described in paragraph 11 1 Filling the tank The...

Страница 22: ......

Страница 23: ......

Страница 24: ......

Отзывы: