EN
|
Instruction manual
NL
|
Gebruiksaanwijzing
FR
|
Mode d’emploi
DE
|
Bedienungsanleitung
ES
|
Manual de usuario
IT
|
Manuele utente
PL
|
Instrukcja obsługi
SV
|
Bruksanvisning
CIP-37350
|
PRIVACY CAMERA
EN
Instruction manual
BOX CONTENT
•
Camera
•
USB cable
•
USB power adapter
•
Instruction manual
•
Window sticker
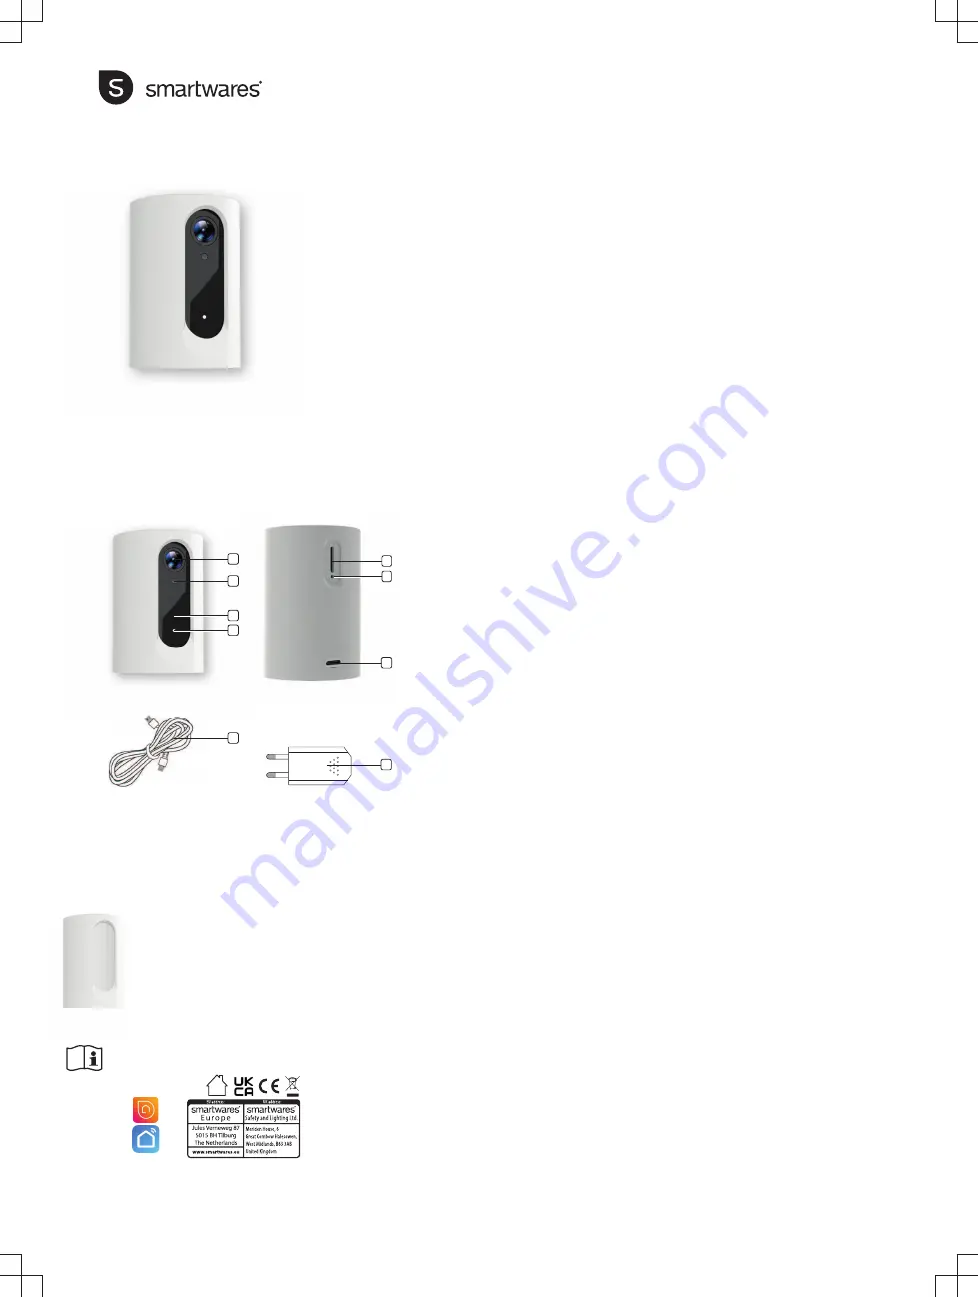
PARTS DESCRIPTION
1. Camera lens
2. Day-night sensor
3. Microphone
4. Indication LED
5. S SD-card
slot
6. USB cable
7. USB power adapter
8. USB port
9. Reset button
BEFORE THE FIRST USE
Follow the instructions below to quickly get started
with your privacy camera.
Optional: Inserting a MicroSD card (not
included)
•
First make sure your camera is not connected
to the power adapter. Insert your Micro-SD
card into the MicroSD card slot on the camera.
Only use a class 10 MicroSD card (max
512GB).
•
A MicroSD card is required for recording
footage.
Download the app
•
Download the Connected at Home app from
the Appstore or Google Playstore.
•
Alternatively, you can also use the Smart Life
app.
Note:
One device can only be paired with one App
account at a time, if the device has already been
paired with another account, then it can’t be paired
to a new account. The device can be removed from
the app account by deleting it from the app.
INSTALLATION
•
Plug one side of the USB cable into the camera
and the other side into the power adapter.
•
Place the power adapter in a wall socket.
•
The camera will now start booting. This will
take about 1 minute. Wait until the indication
LED flashes white rapidly.
•
Open the Connected at Home or Smartlife app.
•
Register or log in with existing account.
•
Press + button to add the camera.
•
For Connected at home app: Choose the
Privacy camera.
•
For Smartlife app: Choose Smart camera (Wi-
Fi)
•
Follow the instructions in the app to configure
the camera.
NOTE:
Only 2,4 GHz Wi-Fi network is supported.
PRIVACY MODE
Privacy mode will give you a peace of mind when
you are at home, as you don’t have to worry about
your privacy. The camera will close and disable
viewing, recording and microphone functions.
Schedule
Define times when you want the camera to be in
privacy mode. You can add multiple times for
different days to suit your needs. For example, you
can choose close the camera during the day and
open it at night.
HOW TO CREATE A PRIVACY MODE
SCHEDULE
1. Press 'Scene' at the bottom of the home screen
of the app.
2. Press the + button at the top right corner.
3. Press ‘Schedule’.
4. Select a time (for instance 07:00).
5. Select ‘Repeat’ to define on which days this timer
should be active.
6. Press ‘Next’.
7. Press 'Add Task'.
8. Select “Run the device’.
9. Select your privacy camera.
10. Select ‘Private mode’.
11. For privacy mode select ‘On’. The privacy mode
(lens closed) will be activated at the
selected time, (7:00) in this example.
12. Press ‘Save’.
13. Press ‘Next’.
14. Press ‘Save’.
15. Press ‘Yes’.
16. To create a privacy off (lens open) schedule,
repeat steps 1 – 10 then select ‘Off”. The privacy
mode will be deactivated on the scheduled time.
TROUBLESHOOTING
Reset
If needed, you can reset your camera by pressing
and holding the reset button for at least 6 seconds.
Wait for 1 minute until the white LED flashes
rapidly.
NOTE: If the camera is not in privacy mode, the
reset button will be covered. You need to switch the
camera off and on again. During the reboot, the
reset button will be uncovered for about 30
seconds.
Camera LED indicator information
Solid white: Normal operation
Solid red: Booting
Flashing red: No internet connection
Flashing white: Pairing mode
MORE INFORMATION
For more instructions and information, please visit
"CIP-37350".
NL
Gebruiksaanwijzing
INHOUD VAN DE DOOS
•
Camera
•
USB-kabel
•
USB-stroomadapter
•
Gebruiksaanwijzing
•
Raamsticker
BESCHRIJVING VAN DE ONDERDELEN
1. Cameralens
2. Dag-/nachtsensor
3. Microfoon
4. Indicatieled
5. Luids sleuf
voor SD-kaarten
6. USB-kabel
7. USB-stroomadapter
8. USB-poort
9. Resetknop
VOORAFGAAND AAN HET EERSTE
GEBRUIK
Volg de onderstaande instructies om snel met uw
privacy camera aan de slag te gaan.
Optioneel: Een MicroSD-kaart (niet inbegrepen)
plaatsen
•
Zorg er eerst voor dat uw camera niet is
verbonden met de stroomadapter. Schuif uw
MicroSD-kaart in de MicroSD-kaartsleuf van de
camera. Maak alleen gebruik van een Klasse
10 MicroSD-kaart (max. 512 GB).
•
Een MicroSD-kaart is vereist voor het maken
van filmopnames.
De app downloaden
•
Download de Connected at Home-app van de
Appstore of de Google Playstore.
•
Als alternatief kunt u ook gebruik maken van de
Smart Life-app.
Let op:
Een apparaat kan slechts aan één app-
account tegelijk gekoppeld worden. Als een
apparaat al is gekoppeld aan een ander account,
Wireless technology:
Wi-Fi
Operating frequency:
2,4 GHz
Max. radio-frequency power: 19.79 dBm
Only use the supplied power
adapter
Requirements:
iOS 11 or higher
Android 5.1 or higher
image 1
PARTS DESCRIPTION / TEILEBESCHREIBUNG / DESCRIPTION DES PIÈCES /
ONDERDELENBESCHRIJVING / DESCRIPCIÓN DE LAS PIEZAS /
DESCRIZIONE DELLE PARTI / OPIS CZĘŚCI / BESKRIVNING AV DELAR
1
2
3
4
5
9
7
6
8


