background image


HARDWARE INSTALLATION 
 

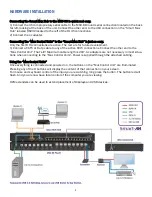
Connecting the Smart Mux Hub to the MXU-88 Is quick and easy. 
1) Connect the 3.5mm proprietary serial cable to the MXU-88 round serial connection located on the back 
far left, looking at the back of the unit. Connect the other end, to the db9 connection on the “Smart Mux 
Hub” labeled RS232 located to the left of the RJ 45 connections. 
2) Connect the ac adapter. 
 
Connecting the “Mux Control Units” to the “Smart Mux Hub” is just as easy.  
Only the first 8 RJ connections are active. The rest are for future development. 
1) Connect a CAT5 or 6 utp cable to any of the active RJ45 connections. Connect the other end to the 
”Mux Control Unit”. That’s it!! Maximum cable length is 200’. Ac adapters are not necessary in most situa-
tions when connecting to the “Mux Control Units”. Power is supplied through the attached cabling.  
 
Using the “Mux Control Units” 
Once everything is connected and powered on, the buttons on the “Mux Control Unit” are illuminated. 
Pressing any of the 8 buttons will display the content of that connection on your screen.  
For mouse and keyboard control of the input you are watching, long press the button. The button led will 
flash. And you are now have total control of the computer you are viewing. 
 
KVM extenders can be used to extend placement of Displays and USB devices. 

Содержание MXU-88 Plus

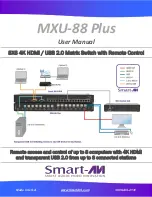
Страница 1: ...martAVI com 1 800 AVI 2131 MXU 88 Plus User Manual Remote access and control of up to 8 computers with 4K HDMI and transparent USB 2 0 from up to 8 connected stations 8X8 4K HDMI USB 2 0 Matrix Switch...

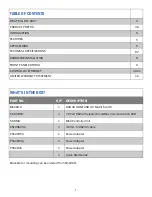
Страница 2: ...ALLATION 8 FRONT PANEL CONTROL 9 CONTROL VIA ETHERNET 10 11 LIMITED WARRANTY STATEMENT 12 WHAT S IN THE BOX PART NO QTY DESCRIPTION MXU88 S 1 8X8 4K HDMI USB 2 0 Matrix Switch SC HUB16 1 16 Port RS232...

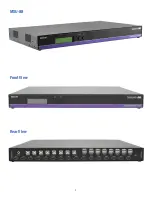
Страница 3: ...3 Front View Rear View MXU 88...

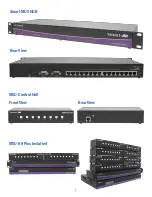
Страница 4: ...4 Rear View Smart MUX HUB MXU Control Unit Front View Rear View MXU 88 Plus Installed...

Страница 5: ...choose the MXU 88 Plus matrix switch powered by SmartAVI The MXU 88 is an ideal solution for medical industrial studio and defense applications where it is not practical or safe to have multiple works...

Страница 6: ...e TMDS DVI D with adapter Max Cable length Up to 20 ft Audio Stereo Embedded in HDMI signal USB Signal Type USB 2 0 1 1 and 1 0 Input 8 USB Type B Female No Emulation Output 16 USB Type A Female CONTR...

Страница 7: ...E Data Format 5 to 8 bits Interface RS 232 async Speed 300 bps to 76 8 kbps Power 115 230 TO 12vdc 3a Switches Code Operated Weight 3 8 lbs MUX Controller CE Approval Yes Signal RS232 half duplex 12V...

Страница 8: ...T5 or 6 utp cable to any of the active RJ45 connections Connect the other end to the Mux Control Unit That s it Maximum cable length is 200 Ac adapters are not necessary in most situa tions when conne...

Страница 9: ...Video Change which computer is connected to which monitor Press ST2 to move from IN port to IN port Press ST1 when the cursor is on the IN port you want to change the OUT port connected to it Press ST...

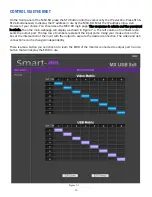
Страница 10: ...password is admin Then the main webpage will display as shown in Figure 7 1 The left column of numbers repre sents the output port The top row of numbers represent the input ports Using your mouse cl...

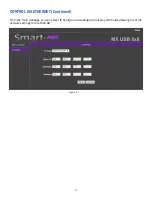
Страница 11: ...11 CONTROL VIA ETHERNET Continued From the main webpage you can select IP Config and a webpage will display with fields allowing to set the network settings for the MXU 88 Figure 8 1...

Страница 12: ...t AVI Any replacement product could be new or like new provided that it has functionality at least equal to that of the product being replaced Smart AVI limited warranty is valid in any country where...

Страница 13: ...AVI will not be liable for errors contained herein or for incidental or consequential damages in connection with the furnishing performance or use of this material No part of this document may be phot...

Отзывы: