background image

24

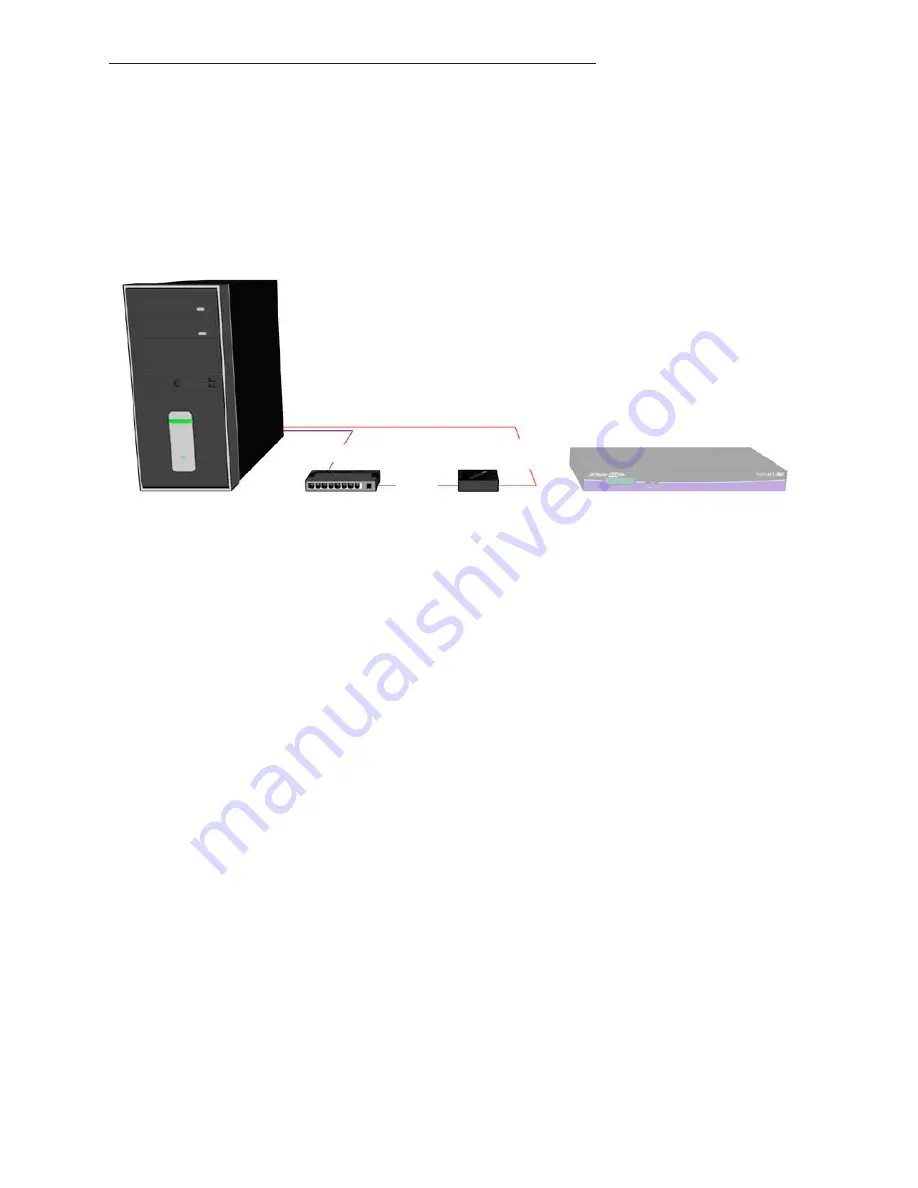
COMPUTER

IP ROUTER

SMTCP-2

RS-232

SERIAL

CAT5

CAT5

MATRIX SWITCH (NOT CONNECTED)

Connecting to the SMTCP-2 for the first time


The first time you connect the SMTCP-2, you will need to perform the following steps to set 

the initial configuration. This includes establishing an HTTP connection and manually setting 

the IP address for the SMTCP-2.

1. 

Power off all devices. 

2. Use a female to male 

Straight-Through

 RS-232 (Serial) cable to    

connect the SMTCP-2 to the computer. 


3. Use a CAT5 ethernet cable to connect the SMTCP-2 to a TCP/

IP network via a network router or other network connection 

that 

has DHCP enabled

. If your network does not support DHCP, 

please see page 22 of this manual for instructions. 


2. 

Power on the computer and run a terminal program such as Hyperterminal to open a 

serial connection to the SMTCP-2 using the standard 9600 baud, 8, N, 1 configuration.

3. 

Power on the SMTCP-2. When powered on, it will obtain an IP address automatically via 

DHCP from the network.

4. 

The IP information for the SMTCP-2 will be displayed on the terminal screen as follows:


**************************


    * SmartAVI control is UP *


    *   version 10.12.20#6   *


    **************************


    addr:192.168.1.102


    Mask:255.255.255.0


    gtwy:192.168.1.1


    **************************

NOTE: the above IP address is for demonstration purposes only. Actual results may be different.

5. 

The IP address shown must be used to connect to the SMTCP via HTTP.  


6. 

Open a web browser and navigate to the IP address that is indicated. You will be 

Using the SMTCP module (continued)

Содержание HDR16X16

Страница 1: ...8 16 port HDMI Matrix Switch with Front Panel RS 232 IR and TCP IP Control HDR16X16 HDR8X8 Installation Manual COMPLIANT Made in the U S A...

Страница 2: ...ts INTRODUCTION FEATURES 3 TECHNICAL SPECIFICATIONS 4 APPLICATIONS 5 HARDWARE INSTALLATION 6 USING THE FRONT PANEL CONTROL 7 USING THE SMARTCONTROL SOFTWARE 9 OPTIONAL CONTROL METHODS 15 USING THE IR...

Страница 3: ...itch to any source locally or remotely via Front Panel RS 232 IR or TCP IP connection It is controlled by Windows based software that is easy to understand and simple to use a cornerstone of all Smart...

Страница 4: ...1 Year Parts and Labor Control Panel RS 232 IR USB and TCP IP Power Internal 100 240 VAC Dimensions 19 W x 5 25 H 2U x 7 D Weight 10 lbs HDR 16X16 Approvals FCC CE RoHS Compliant Power Supply Approval...

Страница 5: ...rport Installations Air Traffic Control Passenger Information KVM Extension where Exceptional Quality of Signal is Crucial Medical Remote Operation Away from Sensitive Magnetic Equipment Recording for...

Страница 6: ...8 HDR16X16 5 Power on the input devices and the displays Controlling the HDR8X8 HDR16X16 There are multiple ways to control the HDR8X8 HDR16X16 via the front panel via the SmartControl software via RS...

Страница 7: ...g mode press ESC IMPORTANT BecauseHDCPtakestimetonegotiate whenswitchingports wait 2 seconds for the process to complete Failure to do so may cause an error with the HDCP and the HDR8X8 HDR16X16 may l...

Страница 8: ...ets the HDR8X8 HDR16X16 to send an RS 232 command back to the controller when the configuration is changed via the front panel or remote control optional Memory Save Sets the HDR8X8 HDR16X16 to save t...

Страница 9: ...p File HDR8X8 HDR16X16 Manual in PDF format Double click SmartControlPro exe in order to initiate software installation Click Install After installation has completed click CLOSE In order to use the s...

Страница 10: ...6 outputs Com Port Select the appropriate com port that your computer is using to access the router Router Time out This field is set to 0 by default meaning the computer acknowledges commands almost...

Страница 11: ...ice the input buttons running down the left side while the output buttons run across the top They are each labeled 1 through 8 16 Note The three small colored buttons at the lower right labeled ALL VI...

Страница 12: ...outes called macros Crosspoint Panel This is probably the simplest way to route the connections Simply click on the cross point itself The input on the left will then be routed to the output above Not...

Страница 13: ...on one output then hold the shift key down and click the last output When the input is clicked it is routed to all selected outputs To select multiple outputs individually hold the control key down an...

Страница 14: ...ding This makes it possible to combine the routes of two or more macros into one bigger macro 4 When finished click the Save Macro button You will be instructed to then click on one of the macro butto...

Страница 15: ...software With SmartControl you can assign a unique name to each port on the HDR8X8 HDR16X16 as well as each display customizing projects to meet your needs Although all the functions of the matrix are...

Страница 16: ...nnector not always available in all boxes in order to interface the remote control with the matrix The way the remote control the matrix is as follows Xx enter yy enter When XX is the output YY is the...

Страница 17: ...the RS 232 compliant device 3 Power on the device Establish a connection to your RS 232 compliant device Setting up the Terminal application Hyperterminal Settings 1 Open Hyperterminal on the PC or us...

Страница 18: ...ion details the use of the Debug Mode To enter Debug Mode type d on enter and you will see the following prompt To exit Debug Mode and enter Command Mode type d off enter To display the HDR8X8 HDR16X1...

Страница 19: ...0 HDCP is now in mode 0 on output 1 DBG br 2 EDID learn Successfully learned EDID EDID learn Successfully learned EDID EDID learn Successfully learned EDID DBG edid EDID Mode EDID To display the help...

Страница 20: ...y transmitted to the HDR8X8 HDR16X16 However it is not necessary to perform the CHECKSUM in most cases Commands with CHECKSUM begin with Commands without CHECKSUM begin with Sending Commands WITH CHEC...

Страница 21: ...d with 0x80 0x80 0x80 0x80 CR The router will send back one byte for each output and the string ends with a CR The first byte sent is Output 1 In the example above since there are 5 bytes total we kno...

Страница 22: ...CR 5 To query crosspoints from PC FxxU CR If all outputs are connected to input 1 then a 4x4 Matrix will respond with 0x80 0x80 0x80 0x80 CR The router will send back one byte for each output and the...

Страница 23: ...des transparent command control of your matrix perfect for use with automated third party control software Features Supports HTTP and TELNET control 10 100 Ethernet Interface Up to 10 user definable c...

Страница 24: ...etwork does not support DHCP please see page 22 of this manual for instructions 2 Power on the computer and run a terminal program such as Hyperterminal to open a serial connection to the SMTCP 2 usin...

Страница 25: ...ed to enter a username and password 7 The default login case sensitive is as follows User ID Admin Password Pass 8 Once connected to the SMTCP 2 you will see the following menu of options 9 Once you h...

Страница 26: ...o save a preset simply configure your crosspoints and press the SAVE button next to the desired preset To recall a preset simply click on the button with its name To edit the preset names see the Devi...

Страница 27: ...he inputs outputs and presets reset the names and reset the system to factory defaults To begin set the type of device you are using from the drop down menu labeled Device Type and specify the Matrix...

Страница 28: ...ccept the standard RS 232 commands For a list of the available commands please see the user manual for the matrix you are using Although the commands are not echoed to the client display the commands...

Страница 29: ...n the SMTCP 2 press and hold Shift 1 exclamation until a command prompt appears 6 Press enter to show the network configuration help screen as follows Command Network Configuration help Enter a comman...

Отзывы: