


4x2 Multiviewer KVM switch
9
OSD MENU
The OSD Menu is used to update the Preview Display. The OSD Menu overlaps the Preview screen
and is controlled through any standard keyboard connected to one of the K/M slots on the device:
Important Notice:
After entering the OSD Menu, all keyboard and mouse functionality will be
blocked from the computer and only used for the OSD commands. After exiting the OSD menu using
Ctrl + Ctrl + o Command, all keyboard and mouse functionality will be restored.
NOTE
: When entering one of the Function commands, the Enter Key must be pressed for the
function to take effect
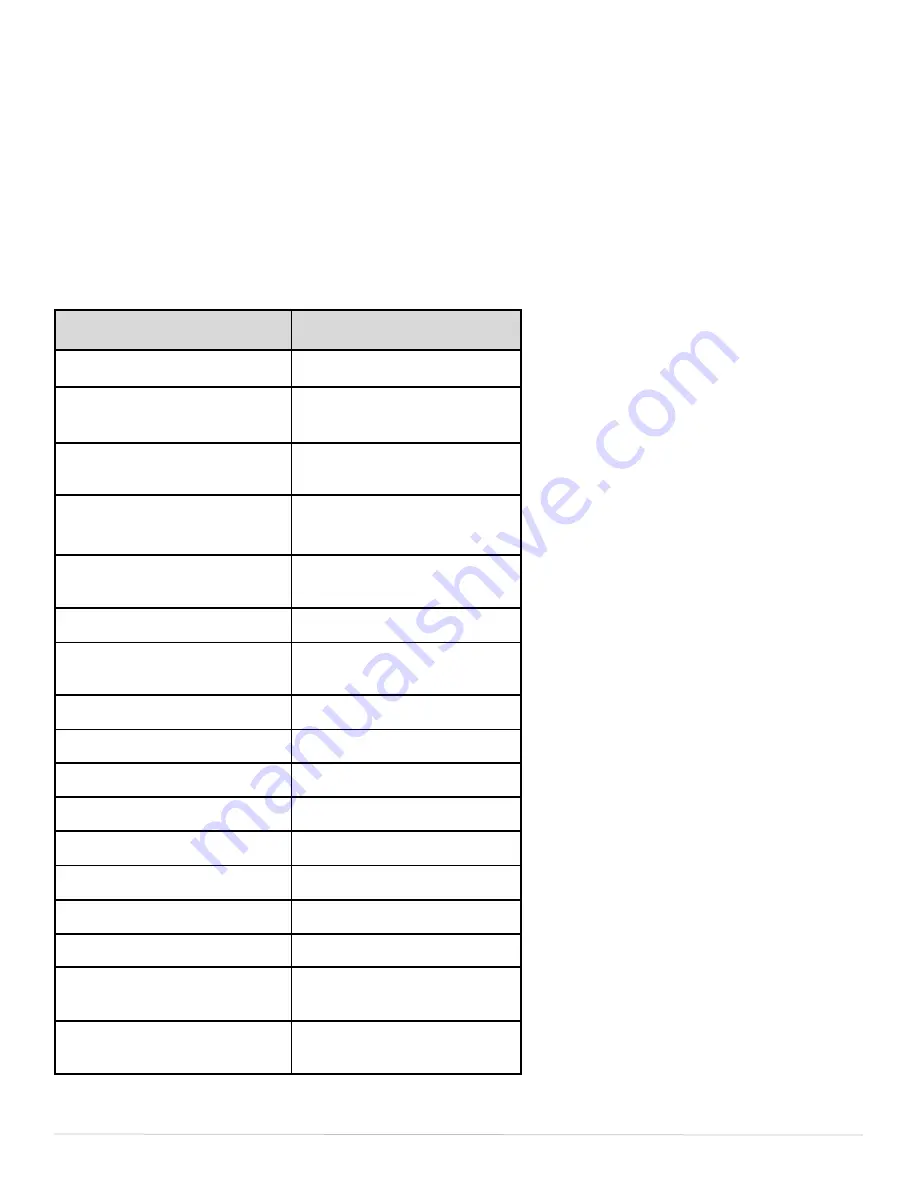
Command Description
HotKey Commands
Enable/Disable OSD menu
[CTRL] [CTRL]
o
[ENTER]
Moves pointer UP
on OSD Menu
▲
(UP arrow)
Moves pointer DOWN
on OSD Menu
▼
(DOWN arrow)
Moves pointer LEFT
on OSD Menu
◄
(LEFT arrow)
Moves pointer RIGHT
on OSD Menu
►
(RIGHT arrow)
Enter Selected Input
[ENTER]
ESC from Information
and EDID sub menus
[ESC]
Full Screen mode
F2
Quad-T mode
F3
Quad-Q mode
F4
PiP mode/switch Sub-channels
F5
Location
F6
Size
F7
Name
F8
EDID
F9
Dual Mode/switch Sub-
channels
F10
Connection/Resolution
Information
F11


