background image

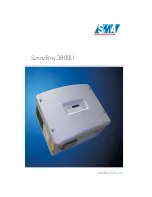
Installation Guide

SB3800U-12:SE2006

SMA America

i

Copyright © 2005 SMA America, Inc. All rights reserved.

No part of this document may be reproduced, stored in a retrieval system, or 
transmitted, in any form or by any means, electronic, mechanical, photographic, 
magnetic or otherwise, without the prior written permission of SMA America, Inc.

SMA America makes no representations, express or implied, with respect to this 
documentation or any of the equipment and/or software it may describe, including 
(with no limitation) any implied warranties of utility, merchantability, or fitness for 
any particular purpose. All such warranties are expressly disclaimed. Neither SMA 
America nor its distributors or dealers shall be liable for any indirect, incidental, or 
consequential damages under any circumstances.

(The exclusion of implied warranties may not apply in all cases under some 
statutes, and thus the above exclusion may not apply.)

Specifications are subject to change without notice. Every attempt has been made 
to make this document complete, accurate and up-to-date. Readers are cautioned, 
however, that SMA America reserves the right to make changes without notice and 
shall not be responsible for any damages, including indirect, incidental or 
consequential damages, caused by reliance on the material presented, including, 
but not limited to, omissions, typographical errors, arithmetical errors or listing 
errors in the content material.

SMA America, Incorporated

12438 Loma Rica Drive

Grass Valley, California 95945

Tel 530.273.4895

Fax 530.274.7271

www.sma-america.com

Revision History

Rev. No.

Date

By

Version

1.0

May 04, 2005

YS

1st Edition

2.0

June, 2005

JP

1st US Edition

2.1

August, 2005

JP

2nd US Edition

2.2

November, 2005

JP

3rd US Edition

2.3

February, 2006

JP

4th US Edition

2.4

May, 2006

JP

5th US Edition

Содержание Sunny Boy 3800U

Страница 1: ...5WPP Q 7 PUVCNNCVKQP WKFG...

Страница 2: ......

Страница 3: ...clusion of implied warranties may not apply in all cases under some statutes and thus the above exclusion may not apply Specifications are subject to change without notice Every attempt has been made...

Страница 4: ...personal injury and to ensure the safe installation and operation of the Sunny Boy you must carefully read and follow all instructions cautions and warnings in this Installation Guide Safety and Haza...

Страница 5: ...ion Guide This symbol accompanies notes that call attention to supplementary information that you should know and use to ensure optimal operation of the system All electrical installations must be don...

Страница 6: ...ed by qualified personnel Warranty All Sunny Boy inverters sold in the USA have a five year warranty as indicated on the warranty card included in the Sunny Boy shipping container For warranty coverag...

Страница 7: ...unting Procedure 3 5 4 AC Voltage Configuration Opening the Sunny Boy 3800U 4 1 Locating Internal Components 4 2 5 Wiring the Sunny Boy 3800U Wiring the AC Output 5 3 AC Connection Requirements 5 3 Co...

Страница 8: ...14 8 Troubleshooting General 8 1 Error Messages 8 3 9 Maintenance Cleaning the Fans 9 1 Cleaning the Exhaust Vent 9 2 Testing the Fan 9 3 10 Technical Specifications FCC Compliance Information 10 1 S...

Страница 9: ...use with photovoltaic PV fuel cell wind turbine and other sources of DC power In general the SB3800U takes power from a DC source PV modules and converts it to AC power for the utility grid This power...

Страница 10: ...regulatory agencies to effectively destabilize and disconnect from a balanced island condition PV Ground Fault Detection and Interruption The SB3800U is equipped with a ground fault detection device I...

Страница 11: ...turing experience has gone into the design of the SB3800U As a result the SB3800U represents state of the art technology high reliability and overall ease of use all the qualities you ve come to expec...

Страница 12: ...Input Voltage Configuration This section includes information on removing the cover locating primary components within the inverter and selecting the appropriate voltage configuration for the installa...

Страница 13: ...after unpacking it report the damage immediately to your SMA dealer and to the shipping company that delivered the Sunny Boy If it becomes necessary to return the Sunny Boy use the original packaging...

Страница 14: ...2 2 SMA America SB3800U 12 SE2006...

Страница 15: ...his can result in derated output power to protect the internal components from damage Install the SB3800U in a location that maintains an ambient air temperature that is less than 45 C To maintain a s...

Страница 16: ...install the SB3800U during periods of precipitation or high humidity 95 Moisture trapped within the enclosure may cause corrosion and damage to the electronic components CAUTION If you are installing...

Страница 17: ...er Dimensions of the SB3800U CAUTION You must ensure that there is sufficient clearance for the flow of the air around the SB3800U In a normal operating environment with good ventilation eight inches...

Страница 18: ...3 4 SMA America SB3800U 12 SE2006 Figure 3 3 Dimensions of the Wall Mounting Bracket 434 60 mm 17 12 in 250 mm 9 85 in 75 mm 2 95 in 349 3 mm 13 76 in 178 9 mm 7 05 in 104 mm 4 09 in...

Страница 19: ...t the Sunny Boy on is sturdy enough to support the weight 38 kg 85 lb and that the wall is plumb The bracket may also be mounted on stone brick or solid walls Be sure to use the appropriate type of mo...

Страница 20: ...approximately at eye level Place a level on the top edge of the mounting plate and adjust the position of the mounting plate until it is level The bottom of the mounting plate will be equal to the ap...

Страница 21: ...he wall Tighten the screws until the mounting plate is held firmly against the wall Do not overtighten the screws WARNING The SB3800U weighs 85 lb 38 kg To avoid injury be sure to use proper lifting t...

Страница 22: ...3 8 SMA America SB3800U 12 SE2006...

Страница 23: ...ews or the lock washers as all four screws and lock washers are required to ensure that the cover is grounded properly and is fully sealed to the case Handle the cover carefully as even minor damage t...

Страница 24: ...ar components Figure 4 1 SB3800U Internal Components L1 L2 N Status LEDs Display Terminal for optional communication RS 232 or RS 485 GFDI Fuse Holder Output AC Line Terminals N L1 and L2 Sockets for...

Страница 25: ...w the SB3800U to be connected to transformers where the neutral is not present such as the 208V and 240V Delta shown in Figure 4 3 Refer to the figure below for a description of jumper settings Figure...

Страница 26: ...onnecting the SB3800U to the utility the phase relationship is not important but the voltage must be compatible ELTA 79 4 53 ELTA 79 ELTA 3TINGER ELTA ELTA EUTRAL 3PLIT 0HASE ELTA 4 53 4HESE CONFIGURA...

Страница 27: ...ove illustrates the proper jumper settings when connecting to a 240 Delta 120V Stinger type transformer Note the order in which inverters are connected to the phases Inverter 3 Jumper Settings 120 V 1...

Страница 28: ...4 6 SMA America SB3800U 12 SE2006...

Страница 29: ...n the procedures in this section Deviating from these procedures could expose you to lethal voltage that can cause serious injury WARNING Always turn OFF all breakers and switches in the PV system bef...

Страница 30: ...es and the National Electrical Code NEC ANSI NFPA 70 WARNING Before connecting the SB3800U to the electrical utility grid contact the local utility company This connection must be made only by qualifi...

Страница 31: ...all AC wiring connections to the Sunny Boy 3800U Voltage drop and other considerations may dictate that larger size wires be used WARNING The National Electrical Code NEC states that the inverter must...

Страница 32: ...tween L1 N and L2 N the inverter will determine if it is connected to a 208 V or 240 V grid Table 5 1 lists the voltage and frequency limits for the AC connection Table 5 1 Voltage and Frequency Limit...

Страница 33: ...1 Fasten the conduit fitting on the inside of the SB3800U with the appropriate locknut 5 Install 3 4 inch conduit between the main breaker panel and the SB3800U s AC wiring knockout 6 Pull the AC wir...

Страница 34: ...erica SB3800U 12 SE2006 Figure 5 3 AC Connection Terminals L1 L2 N L1 wire connected to L1 terminal L2 wire connected to L2 terminal N wire connected to N terminal Equipment ground wire connected to P...

Страница 35: ...lectrical Code NEC ANSI NFPA 70 For installation in Canada the installations must be done in accordance with applicable Canadian standards Use 10AWG minimum 90 degC copper wire for all DC wiring conne...

Страница 36: ...5 8 SMA America SB3800U 12 SE2006 Figure 5 5 Online String Configuration Calculator at www sma america com...

Страница 37: ...or the SB3800U to completely discharge before connecting any wires to the SB3800U or disconnecting any wires from the SB3800U Failure to do so could expose you to lethal voltages that can cause seriou...

Страница 38: ...t See Figure 5 1and Figure 5 6 Fasten the conduit fitting on the inside of the SB3800U with the appropriate locknut 4 Install 3 4 inch conduit between the DC disconnect enclosure and the SB3800U s DC...

Страница 39: ...ositions so two pairs of DC input wires can be connected in parallel CAUTION Avoid using wire nuts to join any wires together or to make any connections anywhere in the PV system Wire nuts are a frequ...

Страница 40: ...ny Boy and a PC Only one Sunny Boy can be connected with an RS 232 serial cable to a PC Requirements for RS 232 Communication The SB3800U must be equipped with an RS 232 Piggy Back communication mod u...

Страница 41: ...nnect the appropriate wires to the communication terminal block in the SB3800U 6 Connect the cable shield to the SB3800U s case See Figure 5 7 Do NOT connect the cable shield to the PC s DB 9 connecto...

Страница 42: ...r PC 25 pin Serial Port Connector PC Case Shield Case Case 2 RxD Output from Sunny Boy 2 3 3 TxD Input to Sunny Boy 3 2 5 GND 5 7 3 5 2 3 5 2 St rung Failure Betrieb Operatio n Erdschlu ss Earth Fault...

Страница 43: ...n RS 485 Cable Use the following procedure to install an RS 485 data communication network Note The following steps describe how to connect one or more Sunny Boy inverters to an RS 485 bus For more in...

Страница 44: ...n Terminal Block for RS 485 Connections Jumpers B C Installed Jumper A installed Installing these jumpers puts 680 Ohm symmetry resistors between pin 2 Data and 5V and between pin 7 Data and Ground In...

Страница 45: ...ure that the cover is grounded properly and is fully sealed to the case Handle the cover carefully as even minor damage to the cover could result in an inadequate seal between the cover and the case t...

Страница 46: ...e holes in the cover into the threaded holes in the case and turn them until they are finger tight Be careful not to cross thread any of the screws Do not use power tools to start the screws 5 Verify...

Страница 47: ...90 5 The PV array normally operates in a grounded configuration The array s negative conductor is connected to the grounding system inside the inverter as a part of the UL1741 Listed ground fault dete...

Страница 48: ...and AC disconnects to the SB3800U and troubleshoot the array Note If there is adequate solar irradiation and the resulting PV input voltage is sufficient the SB3800U will automatically begin feeding p...

Страница 49: ...s LED is lit the GFDI fuse has cleared or is not present The yellow LED indicates that there is a fault of some kind either inside the inverter or somewhere in the PV system The inverter will not oper...

Страница 50: ...Displays and Messages 7 2 SMA America SB3800U 12 SE2006 Figure 7 1 The Sunny Boy LED Status Indicator St rung Failure Betrieb Operation Erdschluss Earth Fault...

Страница 51: ...array is sufficient to initialize control power but not yet powerful enough to begin normal operation Data transmission is not possible during initialization Occasionally during inclement weather or...

Страница 52: ...he T Start parameter setting See Section 8 The inverter will also show this status if it has been manually set to STOP mode Waiting The inverter has determined that there is enough DC voltage to opera...

Страница 53: ...ypically used for fuel cell or micro hydro applications Turbine Mode This mode is used for DC rectified motor sources with a dynamic power curve typically wind turbines The user can set the magnitude...

Страница 54: ...ay ground faults Note All GFDI faults are disabled in turbine mode Cleared GFDI Fuse The GFDI fuse located in the fuse holder on the bottom of the inverter has been cleared or is not present This fuse...

Страница 55: ...e SB3800U has detected a fault within the internal monitoring systems When the inverter detects a fault of this kind it will no longer connect to the utility grid To correct this the inverter must be...

Страница 56: ...d Frequency fac Min High Grid Frequency fac Max Rapid change in grid frequency or voltage Check the condition of the grid at the AC terminal blocks within the SB3800U Also inspect the AC disconnect be...

Страница 57: ...a DC input voltage that is too high for safe operation WARNING Disconnect the PV array from the SB3800U immediately High DC input voltage can permanently damage the inverter Have the input source che...

Страница 58: ...ed 3 times If the condition remains the code will continue to be sent The inverter has encountered an internal fault that prohibits normal operation and will most likely require servicing Contact SMA...

Страница 59: ...ugh the display messages The backlight shuts off automatically after 2 minutes INIT Messages The following messages are displayed during initialization of the inverter The installed firmware versions...

Страница 60: ...ion and actual line to neutral voltage measurements MSG 3 Actual AC power output and DC input MSG 4 Accumulated yield of the device since installation and the total operating hours Note The screens ma...

Страница 61: ...particular parameter present Warning For example this Warning message would be displayed if the inverter detected a problem with the array voltage Typically Warning messages indicate a system condi t...

Страница 62: ...enna installed in the SB3800U Communication distance is dependent upon obstructions and the radio environment Sunny Data This Windows based application has a user friendly graphical interface that all...

Страница 63: ...ith the Sunny Beam Piggy Back option and provides wireless communication with up to four Sunny Boys in the PV plant Its graphic display shows a bar chart of actual output power as well as daily and to...

Страница 64: ...edge of the display PC board The language choices are Spanish English French and German Use the diagram and chart below for setting the display language Figure 7 3 Language Selection Switches for the...

Страница 65: ...oint MPPT DC voltage target Iac Grid current Vac Grid voltage Fac Grid frequency Pac Power fed to grid Vpv PE PV voltage to earth For troubleshooting PV ground faults Ipv PV current E Total Total ener...

Страница 66: ...ing Synchronizing to grid at start up MPP Search MPPT range test at start up MPP Sunny Boy is in MPP mode normal operation V Const Sunny Boy is in constant voltage MPP mode Derating Reduction of the g...

Страница 67: ...are important in case the parameter Operating Mode is set to V const Vpv Start V 8 2x VAC nominal 264 V 240 V AC 229 V 208 V AC Minimum DC voltage for the Sunny Boy to connect to the grid Set using f...

Страница 68: ...visible in user level to default values Reset errors Resets all permanent device disable errors Name Unit Range Default Description Plimit W 3800 Upper limit of AC output power SMA SN Serial Number of...

Страница 69: ...age Fixed permanent permanent changed parameters are stored in EEPROM and are still available after restarting the Sunny Boys volatile prevents storing the parameters in EEPROM i e parameters are only...

Страница 70: ...Displays and Messages 7 22 SMA America SB3800U 12 SE2006...

Страница 71: ...e If necessary check the DC and AC voltages at terminals inside the inverter Be sure to observe all of the safety precautions listed throughout this manual when doing so or hire a qualified profession...

Страница 72: ...the PV module Output power of the module Open circuit voltage Voc of the module Number of modules in each string Number of PV strings connected to the inverter If it becomes necessary to send the Sunn...

Страница 73: ...ange Bfr or Srr is an internal function The Sunny Boy assumes that the utility grid is down and disconnects to prevent island ing Check the grid frequency and the grid wire connections in the Sunny Bo...

Страница 74: ...for ground faults Error EarthCur Max B The earth current between PV and GND has exceeded the maximum limit Check the PV array for ground faults Error GFDI Fuse Ope The GFDI Fuse is open or cleared Che...

Страница 75: ...8 5 Error EeRestore Internal failure Error Grid Time out Grid Fault S The type of grid could not be detected 208 240 Error VacL1 Bfr VacL2 Bfr VacL1 Srr VacL2 Srr Voltage is too high or too low Error...

Страница 76: ...8 6 SMA America SB3800U 12 SE2006...

Страница 77: ...Turn OFF the DC disconnect and the AC discon nect and wait 5 minutes for any residual voltages to dissipate Carefully remove the black plastic plate and filter in front of the fan The fan is fastened...

Страница 78: ...clean the vent follow the steps below Put your fingers into the opening on the top of the SB3800U next to the exhaust vent and gently remove it It is only snapped in Clean the filter and fins with a s...

Страница 79: ...the Sunny Boy 3800U see Figure 9 1 Turn off the AC and DC breakers and wait five minutes until the LEDs got out Open the Sunny Boy 3800U and set the jumpers as shown below for fan test Close the SB38...

Страница 80: ...9 4 SMA America SB3800U 12 SE2006...

Страница 81: ...d in accordance with the instructions may cause harmful interference to radio communications However there is no guarantee that interference will not occur in a particular installation If this equipme...

Страница 82: ...ions Inverter Technology Sine wave current source high frequency PVM AC Input Voltage 183 229 208 V AC 211 264 240 V AC AC Input Frequency 59 3 60 5 60 Hz Peak Power Tracking Voltage 400 V DC DC MPPT...

Страница 83: ...V DC 208 V AC 1 099 x VAC Nom Maximum AC Output Current 16 A AC Maximum DC Input Current 20 A DC DC Voltage Ripple Less than 10 Power Consumption 0 1 W nighttime 7 W in operation CO2 Conversion Facto...

Страница 84: ...10 4 SMA America SB3800U 12 SE2006...

Страница 85: ......

Страница 86: ......

Отзывы: