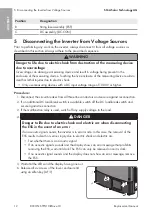


8 Recommissioning the Inverter
SMA Solar Technology AG
Replacement Manual
DCCON-STPTL10-RM-xx-10
23
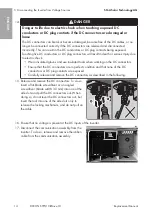
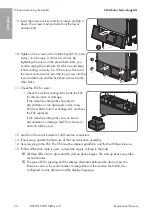
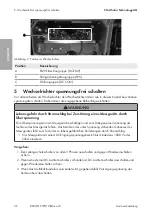
17. Reattach the DC protective cover. Tighten all 4
screws in the order 1 to 4 (hex socket, AF3,
torque:3.5 Nm).
18. Recommission the inverter (see Section 8, page 23).
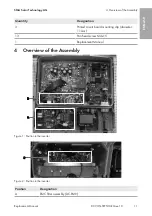
8
Recommissioning the Inverter
1. Carry out the necessary tests according to the locally applicable laws, standards and
directives for the correct recommissioning after power assembly replacement. Take the
requirements for component replacements into account (see Section 2.2 "IMPORTANT
SAFETY INSTRUCTIONS", page 7).
2. Ensure that the grounding conductor in the inverter is correctly connected and functions
properly.
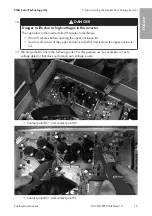
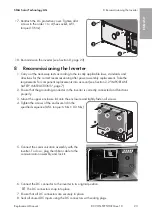
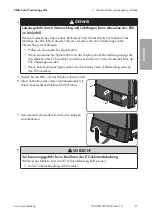
3. Mount the upper enclosure lid onto the enclosure and lightly fasten all screws.
4. Tighten the screws of the enclosure lid in the
specified sequence (AF4, torque: 6 Nm ± 0.3 Nm).
2 3
1
4
56
789
C
AB
0
F
E
D
2 3
1
4
56
789
C
AB
0
F
E
D
2 3
1
4
56
789
C
AB
0
F
E
D
A
B
C
1
2
3
4
5
6
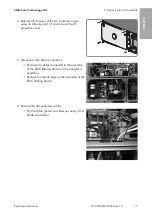
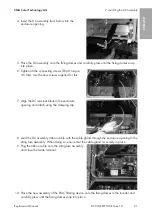
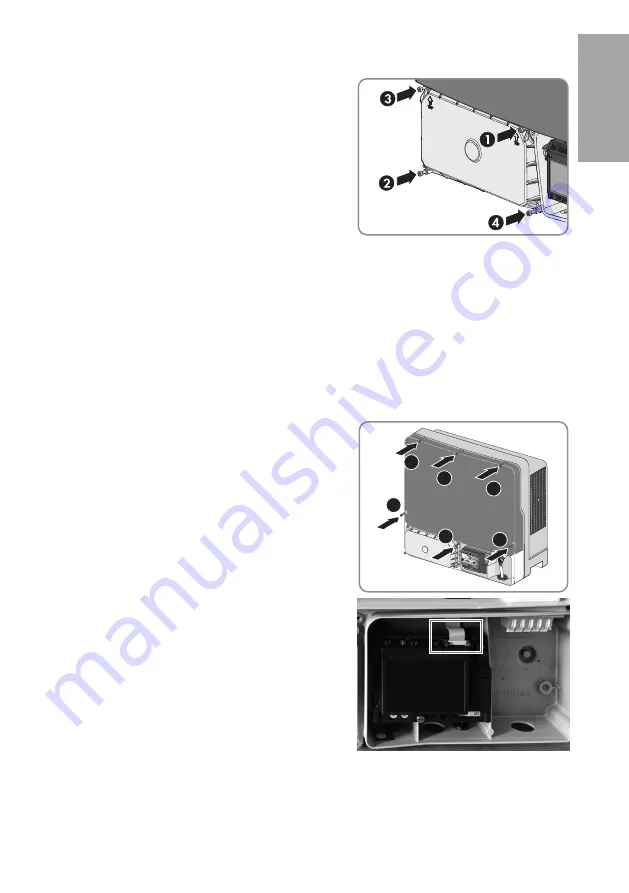
5. Connect the communication assembly with the
inverter. To do so, plug the ribbon cable to the
communication assembly and lock it.
6. Connect the DC connector to the inverter in its original position.
☑ The DC connectors snap into place.
7. Ensure that all DC connectors are securely in place.
8. Seal all unused DC inputs using the DC connectors with sealing plugs.
ENGLISH
Содержание NR-STP-DC-CON-1012
Страница 77: ...1 SMA Solar Technology AG DCCON STPTL10 RM xx 10 77 1 5 1 6 X703 1 X703 6 10...
Страница 79: ...2 SMA Solar Technology AG DCCON STPTL10 RM xx 10 79 SMA Solar Technology AG SMA Solar Technology AG 2 2...
Страница 80: ...2 SMA Solar Technology AG DCCON STPTL10 RM xx 10 80 DC DC DC DC 5...
Страница 81: ...2 SMA Solar Technology AG DCCON STPTL10 RM xx 10 81 Electronic Solar Switch ESS DC AC DC 1000 V...
Страница 82: ...2 SMA Solar Technology AG DCCON STPTL10 RM xx 10 82 5 C v v SMA SMA...
Страница 83: ...3 SMA Solar Technology AG DCCON STPTL10 RM xx 10 83 SMA Solar Technology AG 3 1 DC 3 11 mm 13 M4x15 1 4 B A 1...
Страница 84: ...5 SMA Solar Technology AG DCCON STPTL10 RM xx 10 84 C 2 A HM DC EMV B PVS C DC DC CON 5 DC 1000 V 1 3 2 DC 3...
Страница 85: ...5 SMA Solar Technology AG DCCON STPTL10 RM xx 10 85 4 ESS ESS ESS ESS ESS 5 LED 6 6 3 7 8 DC DC DC...
Страница 87: ...5 SMA Solar Technology AG DCCON STPTL10 RM xx 10 87 15 DC 3 5 mm DC DC 1 2 16 DC 17 18 20 20 4 19 2...
Страница 88: ...5 SMA Solar Technology AG DCCON STPTL10 RM xx 10 88 DC DC DC PE...
Страница 89: ...6 DC SMA Solar Technology AG DCCON STPTL10 RM xx 10 89 DC PE 20 v v 6 DC 1 5 84...
Страница 90: ...6 DC SMA Solar Technology AG DCCON STPTL10 RM xx 10 90 2 4 DC 3 DC 3 8 4...
Страница 91: ...6 DC SMA Solar Technology AG DCCON STPTL10 RM xx 10 91 5 ESS ESS ESS 6 TX20 7 4...
Страница 92: ...6 DC SMA Solar Technology AG DCCON STPTL10 RM xx 10 92 8 9 10 DC 11 DC TX20...
Страница 94: ...7 DC SMA Solar Technology AG DCCON STPTL10 RM xx 10 94 4 DC 5 DC 6 TX20 3 5 Nm 7 DC 8 DC 9...
Страница 95: ...7 DC SMA Solar Technology AG DCCON STPTL10 RM xx 10 95 10 4 11 TX20 3 5 Nm 12 ESS 13 14 15 8 16...
Страница 98: ...9 SMA Solar Technology AG DCCON STPTL10 RM xx 10 98 16 LED LED LED DC DC LED 17 9 1 SMA Solar Technology AG 2...
Страница 269: ......
Страница 270: ...www SMA Solar com...