29
Operator’s Manual -
Model
NXG-6550-PS
A
djusting
O
n
-s
creen
d
isplAys
|
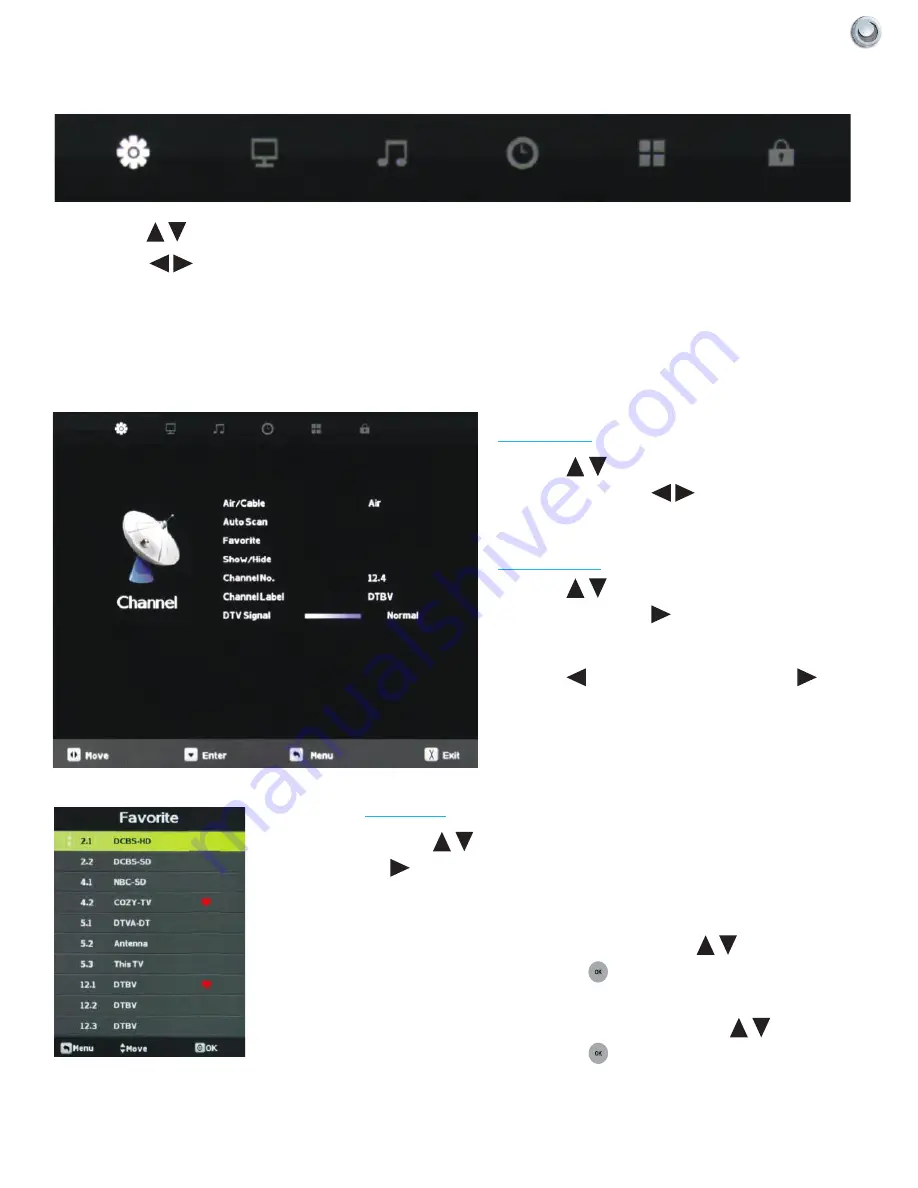
Adjusting On-Screen Displays – Channel Menu
1. Press the
buttons on the remote or CH+/CH- on the TV to move the cursor to the item to be selected.
2. Press the
buttons on the remote or VOL+/VOL- on the TV to make the desired adjustments.
3. When adjustments are complete, press MENU or EXIT on the remote or MENU on the TV to exit the main menu.
The Channel Menu is available only when TV is selected as the source. To select TV as the source, push the Input
button on the remote repeatedly until TV comes up as the source in the on-screen display. Or push the Input button
on the side of the TV, then push the CH+ or CH- button on the side of the TV repeatedly until TV comes up as the
source in the on-screen display.
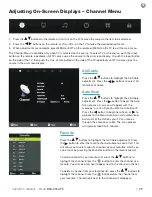
Air/Cable
Press the
buttons to highlight the Air/Cable
adjustment. Press the
buttons to select Air
(antenna) or Cable.
Auto Scan
Press the
buttons to highlight the Air/Cable
adjustment. Press the
button to begin the Auto
Scan process. A screen will appear with the
message “Are You Sure You Want to Auto Scan?”
Press the
button to begin Auto Scan, or
to
go back to the Menu. Auto Scan will automatically
build a list of the stations your TV can receive
through the antenna or cable. The scan process
will typically take 3 to 5 minutes.
Favorite
Press the
buttons to highlight the Air/Cable adjustment. Press
the
button to enter the favorite channel submenu seen at left. This
will allow you to select specific channels as your favorites, which you
can access by pressing the Favorites button on the remote control.
To add a channel to your favorites list, press the
buttons to
highlight the channel. Press the
button to enter the channel as a
favorite. You will see a red heart appear next to the channel in the list.
To delete a channel from your favorites list, press the
buttons to
highlight the channel. Press the
button delete the channel from
your favorites. The red heart next to the channel will disappear.
Содержание NXG-6550-PS
Страница 2: ......
Страница 4: ......
Страница 18: ...16 All Rights Reserved SkyVue Figure 2 Figure 3 Figure 4 Figure 5 Remove for Speakerbar Do Not Remove Figure 1...


