background image


Installation 

English 


Power supply 

Before connecting the amplifier to the power supply, make sure that: 

-


The electrical system and power socket are earthed and comply with safety regulations; (if in doubt, consult a qualified 

electrician). 

-


The mains voltage corresponds to the voltage indicated on the back of the appliance (a deviation of +/-10 % is permitted). 

-


The power cord is undamaged and no wires are exposed. 

-


The on/off switch is in the OFF position. 

The amplifier must also be switched off when the power cord is unplugged. 


Switching on and off 

In an audio system, the amplifier must always be switched on last and switched off first. All gain and volume controls must be 

turned all the way down to avoid dangerous signal peaks. 


Installation 

and operation 

The amplifier produces high levels of power. Therefore, it must be installed in a well-ventilated place. Never expose it to 

direct sunlight, high heat, strong vibrations, dust or moisture. This will cause malfunction and may result in fire and electric 

shock. 


Installation and operation (cont.) 

The cooling air passes through the slots on the front and rear. Therefore, sufficient air circulation must be provided around the 

appliance. 
If the appliance is to be installed in a rack or flight case, make sure that the air circulation is not obstructed. Never install the 

amplifier in a rack or flight case with a closed rear panel. 
Since some of the heat is dissipated through the metal bottom of the amplifier, it is advisable to place at least 1 U under the 
amplifier when mounting it in an equipment rack. 


Audio connections 

Do not make any connections unless the appliance is switched off. 
Only use good quality cables of the type described in this manual. 
Handle the cables with care. They are often the cause of minor or major problems. Check their condition frequently. Always hold 

the plug, never pull on the cable. Wind up the cables without forming knots or kinks. 


Preventing malfunctions 

First check whether your amplifier is exposed to interference frequencies. Do not place the amplifier near radio or TV sets, 

mobile phones, etc. that may cause interference. When connecting other equipment in your audio system, be aware of ground 

loops, which cause noise and affect the amplifier's excellent signal-to-noise ratio and low distortion. The best way (although not 

always possible) to avoid ground loops is to connect the electrical ground of old equipment to a central point. In this case, the 

central point of the system would be the mixing console. To determine the cause of the malfunction, connect the various 

components of the mixing console to the rest of the equipment in the following order and listen to the outcome: 
Outputs: Amp loudspeaker boxes (master outputs); 
Amp monitor boxes (AUX outputs);  
Effects (AUX outputs or EFF send/return). 
Inputs: Instruments with line signals (keyboards, samplers, recorders, etc.); 
Microphones (last and one at a time). 

Содержание PRO-1000

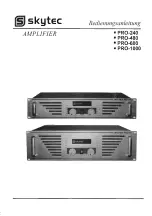
Страница 1: ...skytec Bedienungsanleitung AMPLIFIER PRO 240 PRO 480 PRO 600 PRO 1000 ...

Страница 2: ...Vorderseite Rückseite ...

Страница 3: ...eil der Hitze über den Metallboden des Verstärkers abgeführt wird ist es ratsam mindestens 1 HE unter dem Verstärker freizulassen wenn er in ein Geräterack eingebaut wird Audioverbindungen Alle Anschlüsse nur bei ausgeschaltetem Gerät vornehmen Nur Kabel von guter Qualität des in dieser Anleitung beschriebenen Typs verwenden Behandeln Sie die Kabel vorsichtig Sie sind häufig die Ursache von kleine...

Страница 4: ...INE EINGANG Klinkenverbinder Diese Verbinder sind parallel geschaltet mit den entsprechenden 6 35mm Klinken oder Cinchverbindern Dadurch kann ein zweites Gerät z B ein anderer Verstärker an den ersten angeschlossen werden Auf diese Weise können mehrere Verstärker hintereinander geschlossen werden die alle dasselbe Signal verarbeiten und somit eine leistungsstärkere Anlage bilden 2 LAUTSPRECHERAUSG...

Страница 5: ... W 4 Ω 2 x 500 W 4 Ω Klirrfaktor 20 20000 Hz 0 5 0 5 0 5 0 5 Frequenzbereich 20 20000 Hz 0 5 dB 0 5 dB 0 5 dB 0 5 dB Störabstand 95 dB 98 dB 98 dB 98 dB Kanaltrennung f 1KHz 82 dB 82 dB 82 dB 82 dB Eingangspegel 0 dB 0 dB 0 dB 0 dB Eingangsimpedanz 10 KΩ 10 KΩ 10 KΩ 10 KΩ Versorgung 230 V 50 60 Hz 230 V 50 60 Hz 230 V 50 60 Hz 230 V 50 60 Hz ...

Страница 6: ......

Страница 7: ...Operating instructions ...

Страница 8: ...Front side Back side ...

Страница 9: ...th a closed rear panel Since some of the heat is dissipated through the metal bottom of the amplifier it is advisable to place at least 1 U under the amplifier when mounting it in an equipment rack Audio connections Do not make any connections unless the appliance is switched off Only use good quality cables of the type described in this manual Handle the cables with care They are often the cause ...

Страница 10: ...ates the master output level BACK SIDE 1 LINE INPUT Jack connector These connectors are wired in parallel with the corresponding 6 35mm jack or RCA connectors This allows a second device e g another amplifier to be connected to the first one In this way several amplifiers can be connected in series all processing the same signal forming a more powerful system 2 LOUDSPEAKER OUTPUT Terminal connecti...

Страница 11: ...4 Ω 2 x 500 W 4 Ω Distortion factor 20 20000 Hz 0 5 0 5 0 5 0 5 Frequency range 20 20000 Hz 0 5 dB 0 5 dB 0 5 dB 0 5 dB Signal to noise ratio 95 dB 98 dB 98 dB 98 dB Channel separation f 1KHz 82 dB 82 dB 82 dB 82 dB Input level 0 dB 0 dB 0 dB 0 dB Input impedance 10 KΩ 10 KΩ 10 KΩ 10 KΩ SUPPLY 230 V 50 60 Hz 230 V 50 60 Hz 230 V 50 60 Hz 230 V 50 60 Hz ...

Страница 12: ......

Страница 13: ...Mode d emploi ...

Страница 14: ...Face avant Dos de l appareil ...

Страница 15: ... avec une paroi arrière fermée Comme une partie de la chaleur est dissipée par la base métallique de l amplificateur il est conseillé de laisser au moins 1U de libre sous l amplificateur lorsqu il est installé dans un rack d équipement Branchements audio N effectuez toutes les connexions que lorsque l appareil est éteint Utilisez uniquement des câbles de bonne qualité du type décrit dans ce manuel...

Страница 16: ...IL 1 ENTRÉE DE LIGNE Connecteur Jack Ces connecteurs sont connectés en parallèle avec les connecteurs jack 6 35 mm ou RCA correspondants Cela permet de connecter un deuxième appareil par exemple un autre amplificateur au premier De cette façon plusieurs amplificateurs peuvent être connectés les uns derrière les autres qui traitent tous le même signal et forment ainsi un système plus puissant 2 SOR...

Страница 17: ...Ω Facteur de distorsion 20 20000 Hz 0 5 0 5 0 5 0 5 Plage de fréquence 20 20000 Hz 0 5 dB 0 5 dB 0 5 dB 0 5 dB Rapport signal sur bruit 95 dB 98 dB 98 dB 98 dB Séparation des canaux f 1KHz 82 dB 82 dB 82 dB 82 dB Niveau d entrée 0 dB 0 dB 0 dB 0 dB Impédance d entrée 10 KΩ 10 KΩ 10 KΩ 10 KΩ Alimentation 230 V 50 60 Hz 230 V 50 60 Hz 230 V 50 60 Hz 230 V 50 60 Hz ...

Страница 18: ......

Страница 19: ...Manual de instrucciones ...

Страница 20: ...Parte delantera Parte trasera ...

Страница 21: ...ería o carcasa con pared trasera cerrada Puesto que una parte del calor es conducida por la base metálica del amplificador se aconseja dejar como mínimo 1 unidad rack por debajo del aparato cuando se empotre Conexiones de audio Todas las conexiones deben realizarse con el aparato apagado Solo se debe utilizar cable de alta calidad descrito en estas instrucciones Trate el cable con cuidado Habitual...

Страница 22: ...alida principal PARTE TRASERA 1 ENTRADA DE LÍNEA Conector de la clavija Estos conectores están activados de modo paralelo con las clavijas correspondientes de 6 35 mm o RCA De este modo se puede conectar un segundo dispositivo p ej otro amplificador al primero Así se pueden conectar varios amplificadores en línea que trabajen con la misma señal y así crear un sistema más potente 2 SALIDA DE ALTAVO...

Страница 23: ...0 W 4 Ω Factor de distorsión 20 20000 Hz 0 5 0 5 0 5 0 5 Banda de frecuencia 20 20000 Hz 0 5 dB 0 5 dB 0 5 dB 0 5 dB Señal ruido 95 dB 98 dB 98 dB 98 dB Separación de canales f 1 KHz 82 dB 82 dB 82 dB 82 dB Nivel de entrada 0 dB 0 dB 0 dB 0 dB Impedancia de entrada 10 KΩ 10 KΩ 10 KΩ 10 KΩ Suministro 230 V 50 60 Hz 230 V 50 60 Hz 230 V 50 60 Hz 230 V 50 60 Hz ...

Страница 24: ......

Страница 25: ...Istruzioni per l uso ...

Страница 26: ...Lato anteriore Lato posteriore ...

Страница 27: ...te del calore evacua tramite il fondo di metallo dell amplificatore è consigliabile lasciare almeno 1U sotto al dispositivo se deve essere montato in un rack Connessioni audio Eseguire tutti gli allacciamenti solo a dispositivo spento Utilizzare solo cavi di buona qualità del tipo descritto in queste istruzioni Maneggiare i cavi con accortezza dato che sono spesso la causa di piccoli o grossi prob...

Страница 28: ...INGRESSO LINE Connettore jack Questi connettori sono collegati in parallelo con i relativi jack da 6 35 mm o connettori RCA In questo modo è possibile collegare un secondo dispositivo p es un altro amplificatore con il primo Così si possono collegare più amplificatori uno dietro l altro che elaborano lo stesso segnale formando un impianto più potente 2 USCITA PER ALTOPARLANTI Terminali di connessi...

Страница 29: ...re di distorsione 20 20000 Hz 0 5 0 5 0 5 0 5 Gamma di frequenza 20 20000 Hz 0 5 dB 0 5 dB 0 5 dB 0 5 dB Rapporto segnale disturbo 95 dB 98 dB 98 dB 98 dB Separazione dei canali f 1KHz 82 dB 82 dB 82 dB 82 dB Livello di ingresso 0 dB 0 dB 0 dB 0 dB Impedenza di ingresso 10 KΩ 10 KΩ 10 KΩ 10 KΩ Alimentazione 230 V 50 60 Hz 230 V 50 60 Hz 230 V 50 60 Hz 230 V 50 60 Hz ...

Страница 30: ...R ...

Отзывы: