


01/09/2020
7/18
E_MH_Mounting_instructions_Skylux_Cintralux_Alu_EP10-10
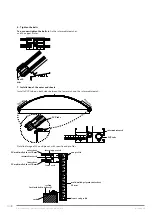
Sizes
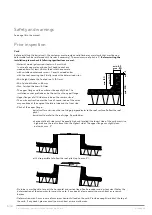
Since the barrel vault is made to size, the overall length and widht of the curb (roofing included) must be equal to
the ordered size dimensions of the barrel vault. Look for the narrowest and widest spaces* and measure the min.
and max. overall width:
Permissible tolerances regarding the ordered size:
Width: min: -2 cm
max: +1 cm
Length: ± 0,05%
(about 5 cm in a length of 100 m)
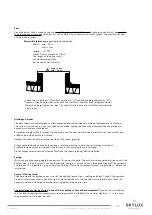
The length of the barrel vault
can be shortened at site,
but we advise not to do this.
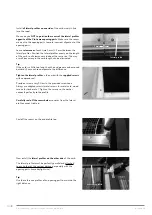
• Check the straightness* (±1cm/5m), parallelism* (±1 cm/5m) and perpendicularity (±1°).
* Tighten a rope on both sides of the curb (or use lasers). Look for the average position of
the curb edge to tighten the rope. This rope will also be used to install the lateral profiles
nicely in line
Glazing and arches
The glass sheets are only clamped to allow expansion and contraction in function of temperature fluctuations.
The system is conceived in a way that silicone and rubber sealings between the aluminium and the glazing are
unnecessary (and even forbidden).
All profiles and glass sheets (except the end sheets and the end sheet divisions) are cut to size, pre-curved, pre-
drilled and provided with screw thread.
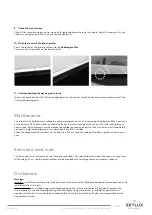
Respect the exposed UV protected top side of the sheets (glazing).
Always apply the bolts by hand before using a screwing machine to have two full rotations in the arch
profiles provided with screw thread. Otherwise you risk damaging the screw thread.
Do not forget to remove the protective film from the sheets (glazing) after installation.
Sealing
When using roof covering, apply it correctly until it covers the curb. The curb must be covered entirely up until the
daylight size. If the barrel vault is not detached and it borders 1 or several walls, the connection must be vertically
and smooth. This is possible e.g. by using a lead flashing. Please clean, remove sawdust, irregularities, … before the
installation.
Control of the upstand
Check previously the agreed correct sizes of the upstand (overall size – roofing included). Check if the upstands
are parallel with each other. Check the right angles and make sure the top side is smooth and equal. Clean it if
necessary before installation and remove sawing pieces, irregularities, etc.
The installation cannot be started if one of these conditions has not been respected! If you do start installation,
this can lead to negative consequences on several parameters (stability, air and water tightness, …). In this case,
the guarantee will no longer be valid.
A
max + 1 cm
min - 2 cm


