


-22-
PROGRAMMING
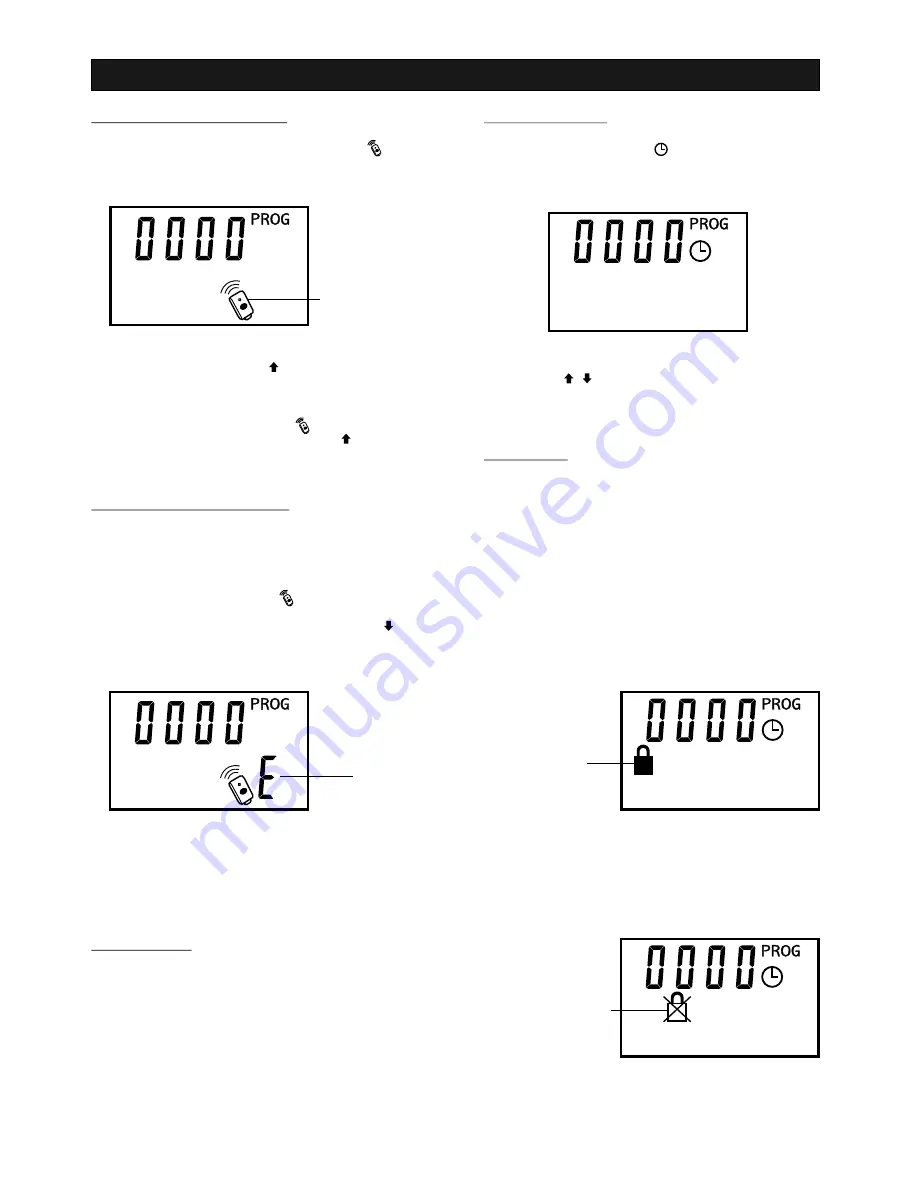
Program Remote Controls
1) During the Remote Programming Sequence, “ ” icon
will flash on the display.
2) To add a remote, press the “ ” button, the remote control
icon will be steadily on indicating it is ready to add new
remote control.
3) Press the button on the remote control you would like to
add. Once the remote is added, “ ” icon will flash
again. To add another remote, press the “ ” button
again, or press “SET” button to the next programming
sequence, “Clock Setting”.
Erase All Remote Controls
To erase any unwanted remote control, first erase all
remotes.
1) To erase remote controls, begin with Remote
Programming Sequence, i.e. “ ” icon flashing on
the display.
2) To erase all remote controls, press and hold the “ ”
button for 5 seconds. Letter “E” will appear on the
display.
3) Press “SET” button to confirm to erase all the remote. You
have now successfully erased all the remotes.
You have now erased all the remote controls. Reprogram
each remote you wish to use.
Clock Setting
The clock is displayed in 24-hour format. The clock can be
used in different ways:
- Show the current time on the display
- Set the time to activate and deactivate the lock feature
(disable all remote controls operation)
- Display the time for up to the 10 previous door opening /
closing events
To set the clock:
1) In the clock setting mode, “ ” icon will be shown, and
the default time is 00:00 or it will show the current time on
the Wall Console.
2) Press the “ / ” buttons to set the clock to the
current time, then press “SET”.
3) The clock is now set. The next programming sequence is
to program the time for the lock timer.
Lock Timer
Lock timer allows you to disable all remote controls from
operating the garage door opener within a specific period of
time, such as from 12:00 midnight to 6:00 in the morning, as
you don't expect any remote activation during this period of
time. Once the lock timer is set, and enabled, it will be
activated everyday during the preset time interval. To
program the lock timer, follow the procedures below.
1) During the lock timer programming, time will be shown as
well as the clock icon and lock icon.
2) The lock icon means this is the time you would like to
start the lock timer. Select the desired time with the
up / down arrow, then press “SET”.
3) After setting the start timer, you are now ready to set the
time when you want to terminate the lock feature. This is
represented by a lock icon with a cross. This is the time
when remote controls can begin operation again. Select
the desired time with the up / down arrow, then press
“SET”.
4) You have now finished the programming sequence. The
Wall Console will return to standby mode, displaying the
current time.
Remote Icon
:
Letter “E”
:
:
Start Lock Timer
:
Stop Lock Timer
:


