9
DesignView Presentation System is a product of Skyline Exhibits
Patents Pending
©2011 Skyline Exhibits
DesignView
®
Presentation System
ImagE ProjEcTIon
cD.)
6.
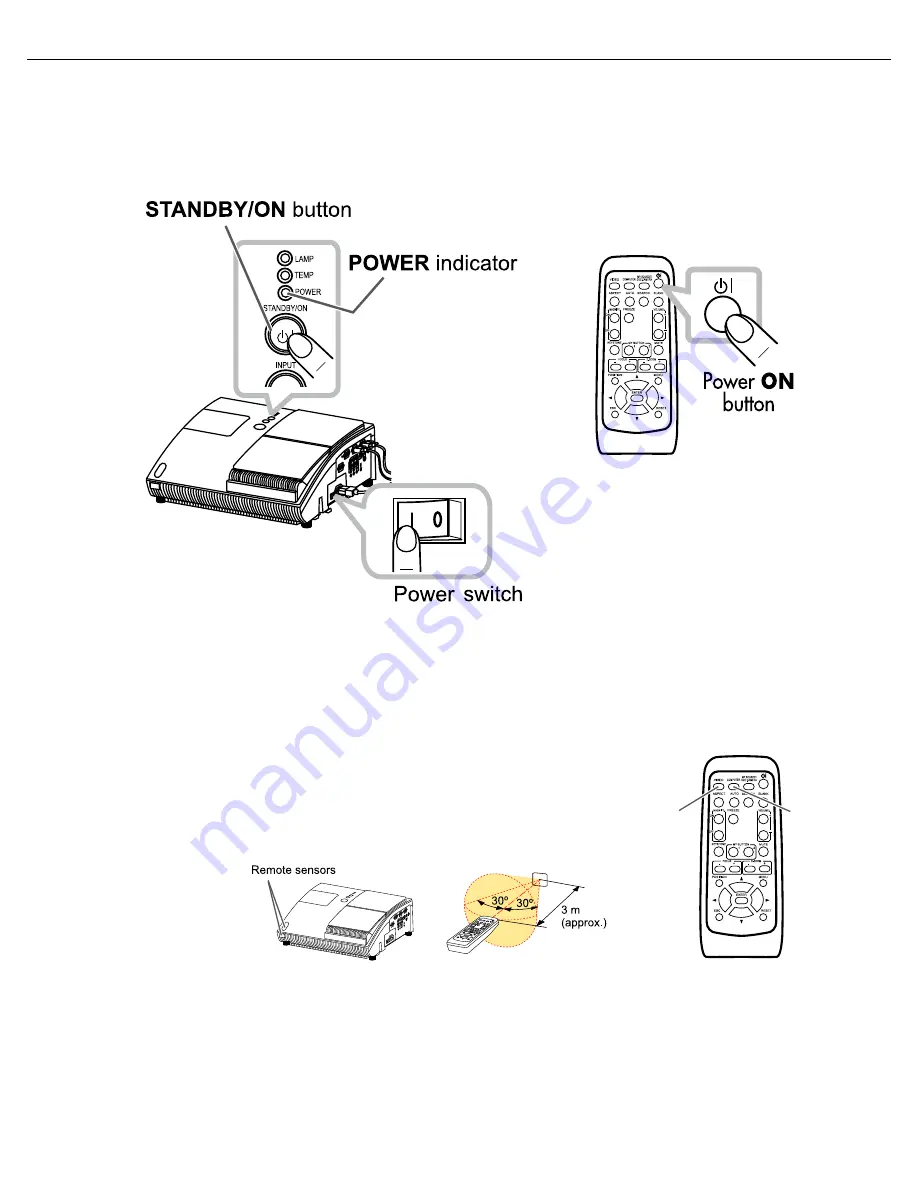
Turn on the main power switch
by pressing the projector
Power switch
to the
“I”
position. Then
press the Power
“sTanDbY/on”
button on the top of the projector or the Power
“on”
button on the remote control for a minimum of two seconds, until the power indicator light turns green.
Wait a couple seconds after the power indicator lights up to use the control buttons.
7.
Move the projector closer to or farther from the screen, until the image fits outside
of the screen borders.
note that as the size of the image increases or decreases, the displayed
image will move up or down. Smaller images will move less than larger ones.
The screen
height may have to be changed using the adjustable feet, if the projector is moved.
The distance between the screen and projector cannot be changed without changing image size.
8.
To Display and switch the image,
press the
VIDeo
or
CoMPUTeR
button on the remote to see the image from one of the active input ports.
Each time you press the button, the port is switched (when there are two or
more signals going into the projector.) make sure that the remote control
is pointed at the sensor in the projector to assure it receives the signal.
noTE: If screen proportion is off, press function key
f8
on the computer
(the function key used may vary, depending on the computer.) The most
COMPUTER
VIDEO
common resolution is 1024 x 768.
9.
To adjust from front to rear projection:


