background image

User manual  / Handbuch / Navod k obsluze

QUATRO Light 160

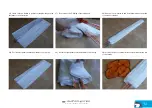
37)  Close the 4th flap of the inner container and secure it with 
loop of the lines; the length of this loop must be 4 cm.

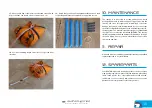
38)  S-coil the remaining length of the lines on top of the inner 
container.

39)  Check that you have all the hardware that has been used 
for packing and that none remained in the packed rescue.

.

10. MAINTENANCE  

The  canopy  is  to  be  stored  in  a  clean  and  dry  area.  Avoid 
prolonged exposure to direct sunlight. If it gets wet, dry the 
canopy  and  lines  thoroughly  and  immediately  to  prevent 
damage caused by mould. Contamination by oils, or any other 
chemicals could significantly reduce the load stability of the life-
saving system. The manufacturer must inspect contaminated 
canopies. The container can be cleaned (WITHOUT the canopy 
inside!) using water and a mild detergent followed by a thorough 
rinse and drying. Use only clean water without soap to clean 
the canopy and lines.

11.  REPAIR  

All repairs must be carried by the manufacturer. Any unqualified 
repair might lead to a system failure.

12. SPARE PARTS  

Your QUATRO Light 160 reserve parachute consists of many 
high-quality, long-life components. When replacing parts (lines, 
risers, fabric panels, etc.), only original parts should be used. 
In  addition  to  the  continued  airworthiness  of  your  reserve 
parachute, this is important for your safety as well.

15

Содержание QUATRO Light 160

Страница 1: ...User manual for Reserve Parachute Betriebshandbuch Rettungsfallschirme Návod k obsluze pro záložní padák 2021 QUATRO Light 160 ...

Страница 2: ...s von Sky Paragliders entgegenbringen Wir hoffen dass unser Produkt Sie zufrieden stellt und Ihre Erwartungen erfüllt Wir empfehlen Ihnen dringend das Handbuch vor Einbau des Retters zu studieren damit werden Sie mit dem Retter und dessen Handhabung besser und schneller vertraut Děkujeme že používáte produkty Sky Paragliders Doufáme že budete s tímto výrobkem spokojeni a že splníVaše očekávání Důr...

Страница 3: ...Version 1 0 Effective 2 3 2020 Updated 25 08 2021 Contents 5 Inhalt 18 Obsah 31 3 QUATRO Light 160 ENG DE CZ ...

Страница 4: ...rselves on our own purpose built state of the art production facilities in the Czech Republic Our management and development teams are located just 19 steps above the glider production facility This close contact is incredibly important to us and helps to ensure that our products are of the highest possible quality with minimal air miles on our raw materials QUATRO LIGHT 160 EN 4 ...

Страница 5: ...A T A 6 3 MA TERIALS 7 4 OPERA TING LIMITS 7 5 CONSTRUCTION 7 6 CONNECT THE RESERVE PARACHUTE TO THE HARNESS 7 7 COMPA TIBILITY TEST 7 8 PRE FLIGHT CHECK AND RELEASING THE RESCUE SYSTEM 8 9 PACKING INSTRUCTION 8 10 MAINTENANCE 15 11 REPAIR 15 12 SPARE PARTS 15 13 GUARANTEE 16 14 DISPOSAL 16 5 ...

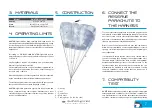
Страница 6: ... selected for their superior strength and resiliency which reduces opening shock especially at high speeds The QUATRO Light 160 canopy has a centre line This design feature shortens the opening time and aids in stabilisation The canopy lines are packed in loops and each loop is secured with a rubber fitting As the system is deployed the loops are released one by one thereby preventing tangling and...

Страница 7: ...ve parachute to the bridle you must use a shackle with at least 2400 daN ultimate strength The shackle has to be secured on both sides with rubber bands or O rings by means of a Larks Head knot with fixing tape or a neoprene jacket to protect against fraying and abrasion Direct connection between the main riser and the harness bridle is not recommended as a wrongly installed knot or shock opening ...

Страница 8: ...rom the canopy 5 The canopy thanks to the central line inflates quickly and easily 6 The pilot should then collapse the main paraglider by pulling the B risers to stabilise the descent and prevent the paraglider from interfering with the reserve parachute As with all paraglider rescue systems the deployment throw must be forceful enough to separate the inner container from the canopy 9 P ACKING IN...

Страница 9: ...the 1st panel on the right 1 String the packing loops on a line 20 packing loops 2 When you put the main rescue lines under tension the 4 corner lines are loose 3 Separate the lines of the two halves of the canopy on each side of the centre thicker white lines 4 Separate the right panels apart from the left panels 9 ...

Страница 10: ... the left perfectly balanced see picture 8 for details 7 1st 2nd can be laid in perfect rectangles 8 3rd 4th panels are corner panels stretch out those two panels to the right and to the left perfectly balanced 9 Pull the upper edge of the corner slot towards the top of the canopy to stretch the corner line 10 Bring the 4th panel to the right 3rd and 4th panels do have a peculiar shape see dashed ...

Страница 11: ... top of the canopy to stretch the corner line see picture 9 for details 14 Bring the 10th panel to the right 9th and 10th panels do have a peculiar shape see the dashed line and the symmetry on picture 10 15 11th 12th can be laid in perfect rectangles they are the last panels on the right side 16 Bring all the remaining left panels to the right over the right panels Left panels are sorted out exac...

Страница 12: ...symmetry on picture 10 19 Pull the upper edge of the corner slot towards the top of the canopy to stretch the corner line see picture 9 for more details 20 Pull the upper edge of the corner slot towards the top of the canopy to stretch the corner line see picture 9 for more details 21 5th 6th 7th 8th panels can be laid in perfect rectangles 22 9th 10th panels are corner panels again stretch out th...

Страница 13: ... 30 Position the inner container with the elastic towards the top of the canopy 25 11th 12th can be laid in perfect rectangles they are the last panels on the left side 26 Z coil the left panels under the middle of the canopy 27 Front view of the Z folding of the left panels 28 Z fold the right panels over the middle of the canopy 13 ...

Страница 14: ...es in the front of the inner container 31 Slide the inner container under the bottom of the canopy 32 Z fold the canopy lengthwise over the inner container 33 Close the flap of the inner container with the elastic and the two side flaps 34 S coil the lines the loops of the coiled lines are secured in two groups with rubber bands 14 ...

Страница 15: ...tamination by oils or any other chemicals could significantly reduce the load stability of the life saving system The manufacturer must inspect contaminated canopies The container can be cleaned WITHOUT the canopy inside using water and a mild detergent followed by a thorough rinse and drying Use only clean water without soap to clean the canopy and lines 11 REP AIR All repairs must be carried by ...

Страница 16: ...ed service life and once your reserve parachute reaches this point it must be disposed of properly Please make sure your reserve parachute is disposed of in the correct environmental manner or send it back to Sky Paragliders for correct disposal If you have any questions regarding the information in this manual contact your Sky Paragliders dealer Sky Paragliders a s Okružní 39 739 11 Frýdlant nad ...

Страница 17: ...olz auf unsere auf dem neuesten Stand der Technik ausgestattete Produktion in der Tschechischen Republik Management und Entwicklungsteams sitzen nur 19 Stufen oberhalb des Produktionsbetriebes Dieser enge Kontakt ist fu r uns unglaublich wichtig und hilft uns dabei Produkte ho chster Qualita t mit minimaler Umweltbelastung und minimiertem Verbrauch von Material anbieten zu ko nnen QUATRO LIGHT 160...

Страница 18: ...NISCHE DA TEN 19 3 MA TERIALIEN 20 4 BETRIEBSGRENZEN 20 5 AUFBAU 20 6 VERBINDEN DES RETTUNGSGERÄ TES MIT DEM GURTZEUG 20 7 KOMPA TIBILIT Ä TSTEST 20 8 AUSLÖSUNG DES RETTUNGSGERÄ TES 21 9 PACKANLEITUNG 21 10 PFLEGE 28 11 REPARA TUR 28 12 ERSA TZTEILE 28 13 GARANTIE 29 14 VERFÜGUNG 29 18 ...

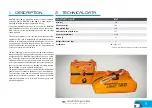
Страница 19: ...he Konstruktion jegliche Vorwärtsfahrt verhindert und ein stabiles Sinken mit einfacher Landung ermöglicht Die verwendeten Materialien sind robust und garantieren ein langes Produktleben Gewicht des komplett ausgerüsteten Piloten ohne Schirm QUATRO Light 160 Fläche m2 40 Min Anhängelast kg 106 Max Anhängelast Nutzlast kg 160 Sinken bei der jeweilig zugelassenenAnhängelast m s 5 35 Länge der Mittel...

Страница 20: ...es sind mit einem Ankerstich Knoten aus Gummibändern Klebeband oder einer Neoprenhülle gegen Ausfransen und Abrieb zu sichern Eine direkteVerbindung von Haupttragegurt der Reserve und der Verbindungsleine wird nicht empfohlen da ein falscher Knoten oder der Schock bei der Auslösung das Gesamtsystem erheblich schwächen kann Stellen Sie sicher dass die Verbindung mittig ist die beiden Verbindungslei...

Страница 21: ...ert den Gleitschirm mittels der B Leinen Wie bei allen Rettungswürfen muss der Wurf kraftvoll genug sein um dem Retter aus dem Innencontainer zu ziehen 9 P ACKANLEITUNG Die folgende Anleitung richtet sich an Piloten welche mit Packen moderner Kreuzkappen vertraut sind Die Anleitung ist kein Ersatz für richtiges Training im Retterpacken Der Hersteller kann die Sicherheit und Zuverlässigkeit des Sys...

Страница 22: ...st die 6 Bahn von rechts 1 Fädeln Sie die Packschlaufen auf eine Leine 20 Packschlaufen 2 Sobald der Retter unter Spannung steht werden die 4 Eckleinen lose 3 Trennen Sie die Leinen der beiden Schirmseiten zu den Seiten der dickeren Mittelleinen 4 Breiten Sie die rechten und linkenTuchbahnen getrennt aus 22 ...

Страница 23: ...kt gleichförmig aus siehe Bild 8 7 Erste und zweite Bahn können in perfekten Rechtecken ausgelegt werden 8 Die dritte und vierte Bahn sind Eckbahnen legen Sie diese perfekt gleichförmig aus 9 Ziehen Sie die Oberkante der Mitte nach oben um die Zentralleine zu strecken 10 Falten Sie die 4 Bahn nach rechts die 3 und 4 Bahn haben einen besonderen Schnitt siehe strichlierte Linie 23 ...

Страница 24: ...eine zu strecken siehe Bild 9 14 Falten Sie die 10 Bahn nach rechts die 9 und 10 Bahn haben einen besonderen Schnitt siehe Bild 10 15 Die 11 und 12 Bahn können in perfekten Rechtecken ausgelegt werden sie sind die letztenTuchbahnen der rechten Seite 16 Legen Sie die verbleibenden linken Tuchbahnen nach rechts über die schon gefalteten rechten Bahnen Die linken Bahnen werden exakt gleich wie die re...

Страница 25: ...n besonderen Schnitt siehe Bild 10 19 Ziehen Sie die Oberkante der Mitte nach oben um die Zentralleine zu strecken siehe Bild 9 20 Falten Sie die 4 Bahn nach rechts die 3 und 4 Bahn haben einen besonderen Schnitt siehe strichlierte Linie auf Bild 10 21 Die 5 6 7 und 8 Bahn können in perfekten Rechtecken ausgelegt werden 22 Die 9 und 10 Bahn sind Eckbahnen legen Sie diese perfekt gleichförmig aus s...

Страница 26: ...nnencontainer so vor dass die elastische Schlaufe zur Spitze des Retters zeigt 25 Die 11 und 12 Bahn können in perfekten Rechtecken ausgelegt werden sie sind die letztenTuchbahnen der linken Seite 26 S coil the left panels under the middle of the canopy 27 Frontalansicht der S Faltung der linken Tuchbahnen 28 Falten Sie die Bahnen der rechten Seite S förmig über die Mitte 26 ...

Страница 27: ...encontainers 31 Platzieren Sie den Innencontainer unter der Unterkante der Schirmkappe 32 Falten Sie die Schirmkappe in S Schlägen auf dem Innencontainer 33 Verschließen Sie den Innencontainer mittels der elastischen Schlaufe und der beiden Seitenklappen 34 Versorgen Sie die Leinen in S Schlägen die Schlaufen der Leinen werden in zwei Gruppen mit Gummibändern gesichert 27 ...

Страница 28: ...rden sollte der Retter umgehend getrocknet werden Schimmel ist dringend zu vermeiden da das Tuch dadurch angegriffen wird Verunreinigungen durch Öl oder Chemikalien können maßgeblich die Eigenschaften des Rettungsschirms negativ beeinflussen Der verunreinigte Rettungsschirm muss zur Überprüfung zum Hersteller gesendet werden 11 REP ARA TUR Alle Reparaturen mu ssen vom Hersteller durchgefu hrt werd...

Страница 29: ...urch starke mechanische Einwirkungen 14 VERFÜGUNG Auch das beste Produkt hat eine begrenzte Lebensdauer und sobald Ihre Flugausrüstung diesen Punkt erreicht muss sie korrekt entsorgt werden Stellen Sie also sicher dass Ihr Rettungsschirm umweltgerecht entsorgt wird oder senden Sie ihn dazu an Sky Paragliders zurück Bei Fragen zu den Informationen aus diesem Handbuch kontaktieren Sie Ihren Sky Para...

Страница 30: ...ublice ve vlastních prostorách speciálně navržených pro paraglidingovou výrobu Technologické a vývojové oddělení dělí přesně 19 schodů od výrobních prostor Díky tomu můžeme udržet vysokou kvalitu výrobního procesu a postarat se o to aby všechny naše nápady byly s výrobou úzce propojeny a výrobky před tím než se dostanou k Vám našim zákazníkům nenacestovaly tisíce mil QUATRO LIGHT 160 CZ 30 ...

Страница 31: ... A 32 3 POUŽITÉ MA TERIÁL Y 33 4 PROVOZNÍ LIMITY 33 5 KONSTRUKCE 33 6 PŘIPOJENÍ ZÁLOŽNÍHO PADÁKU K SEDAČCE 33 7 TEST KOMPA TIBILITY 33 8 KONTROLA ZÁLOŽNÍHO PADÁKU PŘED ST ARTEM A AKTIVACE ZÁLOŽNÍHO PADÁKU 34 9 BALENÍ 34 10 ÚDRŽBA 41 11 OPRAVY 41 12 NÁHRADNÍ DÍL Y 41 13 ZÁRUKA 42 14 LIKVIDACE 42 31 ...

Страница 32: ...ost opadání a symetrická konstrukce zabraňuje kyvům což umožňuje stabilní opadání se snadným přistáním Použité pevné a odolné materiály zajišťují dlouhou životnost výrobku QUATRO Light 160 Plocha vrchlíku m2 40 Min užitečné zatížení kg 106 Max užitečné zatížení kg 160 Opadání při maximálním zatížení m s 5 35 Délka středové šňůry mm 6520 Objem l 5 3 Hmotnost kg 1 7 Certifikace EN 12491 LTF užitečné...

Страница 33: ...t šroubovací karabinu o pevnosti min 2400 daN Volné konce musí být na karabině zabezpečeny proti posunu pomocí gumových kroužků uzlem liščí smyčka a neoprenovým návlekem který chrání volné konce proti oděru Přímé propojení popruhu záložního padáku a postroje tedy bez šroubovací karabiny nedoporučujeme Při nesprávně instalovaném uzlu nebo při silném rázu při otevření záchranného systému může dojít ...

Страница 34: ...í kontejner směrem do volného prostoru pryč od hlavního vrchlíku kluzáku 4 Po napnutí nosných pruhů se vyvléknou šňůry z balících gumiček a dojde k otevření vnitřního kontejneru a uvolnění vrchlíku z něj 5 Uvolněný vrchlík se působením středové šňůry velmi rychle naplní vzduchem 6 Stažením B popruhů zbortíte hlavní padák čímž stabilizujete sestup a předejdete nechtěnému znovu nafouknutí hlavního v...

Страница 35: ...e prvním panelem napravo 1 Začněte tím že si na šňůru navlečete 20 balících poutek 2 Když napnete hlavní šňůry záložního padáku 4 rohové šňůry zůstanou volné 3 Šňůry vrchlíku rozdělte na dvě poloviny rozložte si je napravo a nalevo od hrubých středových bílých šňůr 4 Rozdělte si panely vrchlíku na pravé a levé 35 ...

Страница 36: ...k ať je jejich plocha napnutá a vyhlazená viz 8 7 První a druhý panel rozložte do obdélníku 8 Třetí a čtvrtý panel jsou rohové rozložte si je napravo a nalevo tak ať je jejich plocha napnutá a vyhlazená 9 Horní okraj rohových panelů vytáhněte nahoru Tím se středová šňůra natáhne 10 Čtvrtý panel přehněte doprava Třetí a čtvrtý panel mají zaoblenou profil viz šrafovaný obrys panelů 36 ...

Страница 37: ...panelů vytáhněte nahoru Tím se středová šňůra natáhne viz 9 14 Desátý panel přehněte doprava Devátý a desátý panel mají zaoblenou profil viz šrafovaný obrys panelů v 10 15 Jedenáctý a dvanáctý panel si rozložte do obdélníku Toto jsou poslední dva panely na pravé straně 16 Všechny zbývající panely na levé straně si překlopte na pravé panely Levé panely se skládají stejně jako pravé Panely jsou syme...

Страница 38: ...profil viz šrafovaný obrys panelů v 10 19 Horní okraj rohových panelů vytáhněte nahoru Tím se středová šňůra natáhne viz 9 20 Čtvrtý panel přehněte doprava Třetí a čtvrtý panel mají zaoblenou profil viz šrafovaný obrys panelů v 10 21 Pátý šestý sedmý a osmý panel si rozložte do obdélníku 22 Devátý a desátý panel jsou rohové rozložte si je napravo a nalevo tak ať je jejich plocha napnutá a vyhlazen...

Страница 39: ...chlíku klopou s gumičkou směřující nahoru 25 Jedenáctý a dvanáctý panel si rozložte do obdélníku Toto jsou poslední dva panely na levé straně 26 Levé panely složte pod střední část vrchlíku do pomyslného tvaru S tak že je překlopíte na třetiny viz obrázek 27 Přední pohled na sklad levých panelů 28 Přední pohled na sklad levých panelů 39 ...

Страница 40: ...čené šňůry umístěte do přední části kontejneru 31 Kontejner vsuňte pod spodní část vrchlíku 32 Délku vrchlíku podkládejte do vnitřního kontejneru do tvaru Z 33 Zavřete klopu s gumičkou a dvě postranní klopy 34 Stočte šňůry dle obrázku vždy dvě smyčky stočených šňůr přeložte přes sebe a zajistěte gumičkou 40 ...

Страница 41: ...tění tuky oleji nebo jinými chemikáliemi může výrazně snížit pevnost jednotlivých částí záchranného systému Takto poškozený padák musí projít důkladnou prohlídkou u výrobce Při čištění kontejneru BEZ záložního padáku je možno použít běžných saponátů s následným důkladným opláchnutím proudem čisté vody K čištění šňůr a vrchlíku lze použít pouze čistou vodu 11 OPRAVY Veškeré opravy musí probíhat zás...

Страница 42: ...ní padák dospěje do tohoto bodu musí být řádně zlikvidován Prosím zajistěte aby byl váš záložní padák zlikvidován správným způsobem vůči životnímu prostředí nebo jej pošlete zpět do Sky Paragliders a my to uděláme za vás Pokud máte pocit že nerozumíte dostatečně některé části manuálu kontaktujte prosím svého prodejce výrobků Sky Paragliders Sky Paragliders a s Okružní 39 739 11 Frýdlant nad Ostrav...

Отзывы: