Skanhex SX410z Скачать руководство пользователя страница 32

32

BASIC RECORDING PROCEDURE - CONT'D

5

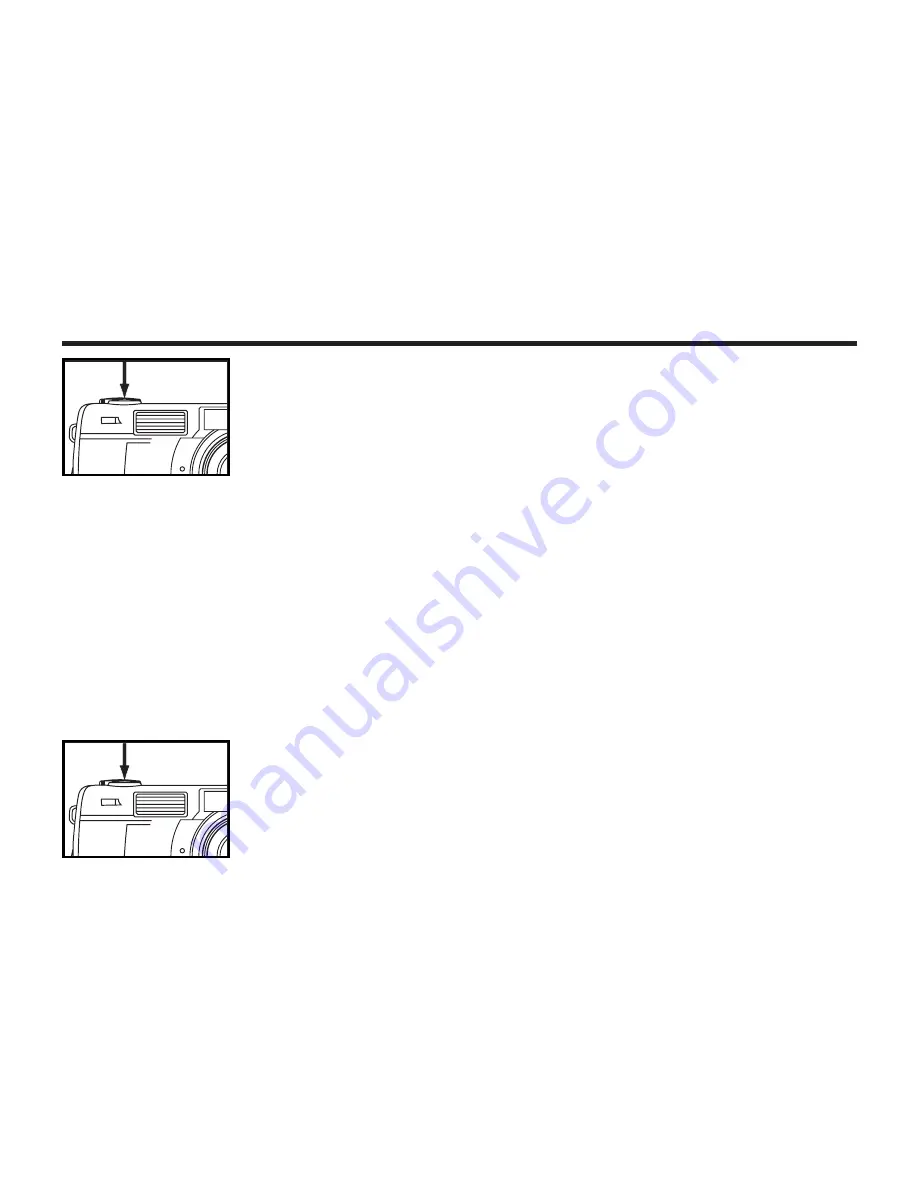
5 Press the shutter-release button part-way down.

• The camera adjusts the focus automatically. When the subject is focused,

the focus lamp (green) lights up.

• When the focus lamp (green) blinks, follow the operation from step

again.

• When the flash will fire, the flash lamp (orange) lights up.
• When the flash lamp (orange) blinks slowly (about 2 times in a second), the

shutter speed becomes slow. Taking a picture in this mode may cause an
image blurred. We recommend you to take pictures after fixing the camera
on the tripod.

6

6 Press the shutter-release button the rest of the way down.

•  If the flash lamp (orange) blinks when the shutter-release button is pressed

all the way down, the flash is being charged. When the shutter-release but-
ton is kept pressed in this status, the shutter is released at the same time
when the flash is charged.

•  The captured image is displayed on the LCD monitor and is recorded in the

CF card. While the image is recorded, the focus lamp (green) blinks slowly
(about 2 times in a second) and "RECORDING" blinks on the LCD monitor
slowly. Be sure not to open the battery-chamber door, disconnect the plug
of the AC adapter or remove the CF card until the recording in the CF card
is completed (until the focus lamp (green) and "RECORDING" stops blink-
ing). otherwise,The data in the CF card may be damaged or lost..

*   When pressing the

shutter-release but-

ton, there is a point

where the button

stops halfway. To

press the shutter-

released button to

this point is

described "Press

part-way down" in

this manual.

Содержание SX410z

Страница 1: ......

Страница 2: ...rof Me 32 MB RAM 110MB free memory capacity VGA colour monitor CD ROM drive USB SYSTEM REQUIREMETS IMac iBook G3 blue white series G4 series MacOS 8 6 9 9 0 2 if possible 9 0 4 32MB RAM or higher 110M...

Страница 3: ...nt regulations CE stands for Conformit Europ enne European Conformity This device complies with Part 15 of the FCC Rules Operation is subject to the fol lowing two conditions 1 This device may not cau...

Страница 4: ...il dren Keep batteries or things that could be swallowed away from young children Contact a doctor immediately if an object is swallowed Immediately remove the batteries and discontinue use if the cam...

Страница 5: ...Alkaline Batteries x 4 Video Cable x 1 Hand Strap x 1 Camera Case x 1 USB Cable x 1 16MB CompactFlash Card x 1 Software and Documentation on CD ROM USB Driver Software for Windows 98 Windows 98 SE Wi...

Страница 6: ...ATION ATTACHING THE HAND STRAP 22 INSERTING THE BATTERIES 23 CHECKING THE BATTERY POWER 25 AUTO POWER OFF 26 USING THE DC ADAPTER Sold Separately 26 INSERTING REMOVING THE COMPACT FLASH CF CARD 27 INS...

Страница 7: ...ATION 55 ADJUSTING THE BRIGHTNESS OF THE LCD MONITOR 57 SPECIFYING THE RECORDING MODE SPECIFYING THE RECORDING MODE 59 THE RECORDING MODE MENU DISPLAY LCD Monitor 59 THE RECORDING MODE MENU ITEMS 59 S...

Страница 8: ...MODE MENU DISPLAY 111 THE SETUP MODE MENU DISPLAY ON THE LCD MONITOR 111 THE SETUP MODE MENU ITEMS AND EACH SETTINGS 111 SPECIFYING THE TIME FOR THE AUTO ZOOM PLAY 80 SLIDE SHOW TO START THE SLIDE SHO...

Страница 9: ...D MONITOR 124 RESETTING TO THE DEFAULT SETTINGS 126 CONNECTING TO THE PERSONAL COMPUER CONNECTING TO THE PERSONAL COMPUTER 130 Edition 130 For Windows 2000 Professinal 130 For Windows Me 130 For Macin...

Страница 10: ...10 NAMES OF PARTS CAMERA BODY Do not touch...

Страница 11: ...11 NAMES OF PARTS...

Страница 12: ...12 NAMES OF PARTS CONT D INSIDE THE TERMINAL COVER BOTTOM OF BODY USB connector Video out terminal DC terminal Battery chamber door Tripod socket...

Страница 13: ...er changes depending on the scene or subject you record DATA PANEL The following diagram shows all items displayed to aid the explanation Battery condition indicator Self timer indicator Number displa...

Страница 14: ...hich is closer than 1m through the viewfinder only the part under the close framing guide is recorded So use the LCD monitor to check the image composition when you shoot a subject which is closer tha...

Страница 15: ...t Flash card The camera reads out the image from the CF card Focus Area as a Guide Flash Lamp Orange In the autofocus mode the focus is adjusted at the gray part as shown in the figure Lights The flas...

Страница 16: ...ENCES GETTING STARTED TAKING PICTURES See page 31 for details 1 1 Insert the batteries see page 23 2 2 Insert the CF card see page 27 1 1 Rotate the function dial to 2 2 Slide the power switch to turn...

Страница 17: ...hts up 4 4 Adjust the image range and size with the four way keys When the key is pressed the image size becomes large When the key is pressed the image range becomes wide 6 6 Press the shutter releas...

Страница 18: ...age 77 for details 1 1 Rotate the function dial to 2 2 Slide the power switch to turn on the camera The latest image which was recorded last is displayed on the LCD monitor 3 3 When the or key is pres...

Страница 19: ...ails 1 1 Display the image to be deleted on the LCD monitor by per forming from steps 1 1 to 3 3 of MONITORING THE CAP TURED IMAGES described on the previous page 2 2 Press the MENU button The playbac...

Страница 20: ...d the display to conform whether you delete the image or not appears as shown in the figure QUICK REFERENCES CONT D 6 6 To complete the operation of deleting an image after con firming that NO is high...

Страница 21: ...21 PREPARATION...

Страница 22: ...22 ATTACHING THE HAND STRAP 1 1 Insert the smaller loop of the hand strap through the strap eyelet 2 2 Insert the other end of the hand strap through the small loop...

Страница 23: ...ry charger 1 1 When replacing the batteries slide the power switch to turn off the camera You may skip this step when inserting the batteries for the first time after a purchase 2 2 Slide the battery...

Страница 24: ...ter nor batteries are used more than 5 minutes the built in clock may delay or be reset to the default setting In this case set the date and time again by following the procedure described on page 119...

Страница 25: ...er that blinks for 5 seconds and then all indica tors go out again Perform the following either operation Replace all batteries with new ones Remove all batteries and use the DC adapter sold separatel...

Страница 26: ...than 30 minutes The time for the auto power off function is fixed in 30 minutes USING THE DC ADAPTER Sold Separately We recommend you to use the AC adapter sold separately when using the camera indoor...

Страница 27: ...ter trans ferring the data from the card to your computer if the data is safe INSERTING THE CF CARD 1 1 Open the card slot door as shown in the figure 2 2 Insert the CF card into the card slot Positio...

Страница 28: ...ld the lever Otherwise the card slot door cannot be closed 4 4 Close the card slot door until it clicks 1 1 Confirm that the power of the camera is turned off 2 2 Open the card slot door as shown in t...

Страница 29: ...as shown in the figure 4 Push in the card release lever straight As the CF card ejects slightly from the camera pull out the card Be careful with the card because it may be hot Keep the CF card in the...

Страница 30: ...30 TAKING PICTURES...

Страница 31: ...on the LCD please press once 3 3 Determine the image composition while looking into LCD monitor or viewfinder When holding the camera be sure not to cover the lens with your fingers and so on When the...

Страница 32: ...utton is pressed all the way down the flash is being charged When the shutter release but ton is kept pressed in this status the shutter is released at the same time when the flash is charged The capt...

Страница 33: ...DISPLAY ON THE LCD MONITOR Each time the display button is pressed the display on the LCD monitor changes in the following order Live view The camera settings are displayed The LCD monitor is turned...

Страница 34: ...34 BASIC RECORDING PROCEDURE CONT D THE DISPLAY OF THE CAMERA SETTINGS For details see the pages in parentheses...

Страница 35: ...he subject closer than the minimum focus distance or farther than 40 cm in the close up mode Refer to the followings FOCUS DISTANCE IN THE AUTOFOCUS MODE Minimum Focus Distance The focus distance in t...

Страница 36: ...g subjects In this case use the focus lock function see page 37 that you once focus on the other subject which is at the same distance as the subject you want to take the picture and change the image...

Страница 37: ...STING THE FOCUS CONT D 1 1 Aim the camera so that the subject is in the center of the frame and press the shutter release button part way down The camera adjusts the focus automatically When the focus...

Страница 38: ...Adjust the focus with the or while looking into the LCD monitor 1 Rotate the function dial to and press the MENU button The recording mode menu is displayed on the LCD monitor 2 Press the or key so t...

Страница 39: ...just the focus so that the subject is displayed clearly on the LCD monitor When the key is pressed the focus position is moved to the part in a long distance When the key is pressed the focus position...

Страница 40: ...flash does not fire Select this mode when taking a picture in the place where the flash pho tography is prohibited such as in a museum etc The flash fires the short burst 2 times before the main flash...

Страница 41: ...ELECTING THE FLASH MODE 1 1 Rotate the function dial to and press the MENU button The recording mode menu is displayed on the LCD monitor 4 4 Press the or key so that the desired flash mode in highlig...

Страница 42: ...ain Flash Lamp The flash lamp orange shows the flash status The flash rdady for fires The flash is being charged The shutter release button is not released The shutter speed becomes slow Taking a pict...

Страница 43: ...43 ADVANCED OPERATIONS...

Страница 44: ...ures about 12 pictures ECON Economy about 8 pictures about 12 pictures See page 64 for the image quality and page 67 for the image size 2272X1704 or 1600X1200 or VGA size The number of the picture you...

Страница 45: ...the MENU button The continuous shot icon appears on the upper right side of the LCD monitor See page 34 The flash mode is set to FLASH CANCEL automatically When tak ing a continuous shot the flash doe...

Страница 46: ...ease button all the way down When your finger is lifted from the shutter release button or the maximum number of picture is taken the continuous shot is completed When taking a continuous shot the foc...

Страница 47: ...The recording mode menu is displayed on the LCD monitor 2 2 Press the or key so that DRIVE MODE is highlighted and press the key 3 3 Press the or key so that is Self Timer highlighted press to finish...

Страница 48: ...le looking into LCD monitor or viewfinder and adjust the image rang and size with the or key When the key is pressed the image size becomes large Telephoto mode When the key is pressed the image range...

Страница 49: ...p lights up to show the time to take a shot The beep sounds at the time when the lamp blinks The beep can be can celed with the menu in the SETUP mode When the subject is not in the center of the fram...

Страница 50: ...press the key in the recording mode so that the image is zoomed to the maximum 2 2 Press and hold the key for more than 2 seconds The digital zoom function is set The indicator that shows the image r...

Страница 51: ...own to take a picture The focus lock function can be also used see page 37 Even after taking a picture The digital zoom is not cancelled To cancel the digital zoom function press and hold the key unti...

Страница 52: ...ng the frame with the subject in about 6 cm x 4 cm 1 1 Rotate the function dial to and press the MENU button The recording mode menu is displayed on the LCD monitor 2 Press the or key so that FOCUSING...

Страница 53: ...side of the LCD monitor and it shows that the close up mode is selected The flash mode is set to FLASH CANCEL automatically When the close up mode is selected the flash does not fire 4 Press the or k...

Страница 54: ...urned off in the close up mode 7 7 Press the shutter release button part way down If the focus lamp green blinks check that the subject is within the distance from 4 cm to 40 cm is not apart more than...

Страница 55: ...and the smaller the exposure compensation value is the darker the image is 1 1 Rotate the function dial to and press the MENU button The recording mode menu is displayed on the LCD monitor 2 2 Press...

Страница 56: ...pecify 0 for the exposure compensation value or turn off and on the camera again When the image to be captured is whitish increase the exposure compensation value so that the white part can be easily...

Страница 57: ...e brightness of the LCD monitor appear 3 3 Press the or key so that the desired brightness is highlighted press the key to finish the setting The brightness can be adjusted in the range from 0 to 9 Th...

Страница 58: ...58 SPECIFYING THE RECORDING MODE...

Страница 59: ...LAY LCD Monitor THE RECORDING MODE MENU ITEMS FLASH For the Flash mode see page 41 FOCUSING For the Focus mode see page 35 Auto Auto focus CLOSE UP Close up shot MANUAL Manual focus Auto flash Fill fl...

Страница 60: ...E For the White Balance see page 69 QUALITY For the Image quality see page 64 Single shot Continuous shot Multi shot 16 Self timer shot FINE Fine mode STD Standard mode ECON Economy mode IMAZE SIZE Fo...

Страница 61: ...see page 70 HARD NORMAL SOFT DEFAULT For the Default see page 72 YES NO EXPOSURE For the Exposure com pensation see page 55 2 0 1 5 1 0 0 5 0 0 5 1 0 1 5 2 0 LCD For the LCD see page 57 9 bright 8 7...

Страница 62: ...is turned off or before the batteries are removed For FLASH mode see page 52 For the exposure compensation see page 55 For the MANUAL Focus mode see page 38 For CLOSE UP mode see page 53 For the DRIV...

Страница 63: ...n in the mode The compression rate image recording format image file size and the recordable number of the image using the CF card of 8 MB in each and are as follows SPECIFYING THE IMAGE QUALITY MODE...

Страница 64: ...e image quality mode changes in the following order 2 2 Press the or key so that QUALITY is highlighted and press the key SPECIFYING THE IMAGE QUALITY MODE CONT D 1 1 Rotate the function dial to and p...

Страница 65: ...in different image quality modes in a CF card The setting of the image quality mode is stored in the camera s memory even after the camera is turned off Changing the image quality mode affects the re...

Страница 66: ...e image size Changing the image size affects the number of the image which can be recorded in the CF card The FULL or HALF or VGA size can be selected 1 Rotate the function dial to and press the MENU...

Страница 67: ...mode is specified and displayed under the image quality on the upper left side of the LCD monitor see page 34 The setting of the image size mode is stored in the camera s memory even after the camera...

Страница 68: ...mode when taking the picture of the subject illuminated by a sunlight Light bulb mode Select this mode when taking the picture of the subject illuminated by an incandescent light or tungsten light Fl...

Страница 69: ...mode changes in the following order 4 4 Press the MENU button The selected white balance mode is specified and the icon of the selected white balance mode is displayed on the left side of the flash mo...

Страница 70: ...nd press the MENU button The recording mode menu is displayed on the LCD monitor SPECIFYING THE SHARPNESS MODE This camera has three sharpness modes as described below HARD NORMAL SOFT This enhances t...

Страница 71: ...sharpness is highlighted The sharpness mode changes in the following order HARD NORMAL SOFT 5 5 Press the MENU button The selected sharpness mode is specified and displayed on the lower left side of...

Страница 72: ...s The default settings Flash Autoflash with red eye reduction Focus mode Auto Focus Area Central region Drive Mode Single Image size Full 2272X1704 Quality Standard White Balance Auto Exposure EV 0 Ex...

Страница 73: ...k ke ey y s so o t th ha at t D DE EF FA AU UL LT T i is s h hi ig gh hl li ig gh ht te ed d a an nd d p pr re es ss s k ke ey y 2 2 Press the key that YES is highlighted and press key The camera set...

Страница 74: ...74 PALYBACK MODE...

Страница 75: ...nitor 3 3 Press or key to display the desired image When the key is pressed the following image is displayed When the key is pressed the preceding image is displayed When the latest image last recorde...

Страница 76: ...HE PLAYBACK MODE DISPLAY ON THE LCD MONITOR Each time the display button is pressed the display on the LCD monitor changes in the following order Single frame play with the image information Index 9 f...

Страница 77: ...ed in the CF card When the camera enters the index play mode the frame number of the image displayed last in the sin gle frame play mode is highlighted The ninth frame is the last displayed image in t...

Страница 78: ...the display button once or twice see page 76 When the image information is displayed in the single frame play mode press the display button twice and when no information is displayed press the display...

Страница 79: ...selected when the number 9 is highlighted and the key is pressed the following 9 frames are displayed When the tenth frame is selected when the number 10 is highlighted and the key is pressed the prec...

Страница 80: ...This mode allows you to increase the magnification of image around the canter 2 5 times and display it on the LCD monitor It is convenient when checking the details of the image 1 1 Rotate the functio...

Страница 81: ...index play mode the single frame play with no image information mode returns when the display button is pressed and the index play mode returns when the button is pressed again In the zoom play mode...

Страница 82: ...e the function dial to and press the menu button The play back mode menu is displayed on the LCD monitor 2 2 Press the or key so that SLIDE SHOW is highlighted 3 3 Press the or key so that START is hi...

Страница 83: ...ide show stops temporarily One of the and keys Display button MENU button ENTER button When the ENTER button is pressed while the slide show stops temporarily the slide show stop When the MENU button...

Страница 84: ...DE MENU 1 1 Rotate the function dial to and press the MENU button 2 2 Press the or key so that SLIDE SHOW is highlighted 3 3 Press the or key so that TIME is highlighted and press key 4 4 Press the or...

Страница 85: ...g SLIDE SHOW CONT D 6 6 Press the or key so that DIRECTION is highlighted and press key Continued on Next page 7 7 Press the or key so that the desired direction is high lighted and press to finish th...

Страница 86: ...86 DELETING IMAGES...

Страница 87: ...on dial to The function dial can be rotated even when the camera is turned on 2 When the camera is not turned on slide the power switch to turn on the camera The power switch returns to the initial po...

Страница 88: ...ELETE is highlighted press the key 6 6 press the or key so that SELECTED IMAGE is highlight ed press the key The color of the background in the left figure is gray so that you can easily find out the...

Страница 89: ...button that YES is higlighted and press key to finish the Deleting Delete selected image is displayed on the lower of the monitor 9 9 To complete the operation of deleting an image after con firming...

Страница 90: ...e function dial to The function dial can be rotated even when the camera is turned on 2 2 When the camera is not turned on slide the power switch to turn on the camera The power switch returns to the...

Страница 91: ...ALL IMAGES CONT D 4 4 After confirming that DELETE is highlighted press the key 5 5 Press the key so that ALL IMAGES is highlighted and press the key The display to confirm whether you delete all ima...

Страница 92: ...unction dial to The function dial can be rotated even when the camera is turned on 2 2 When the camera is not turned on slide the power switch to turn on the camera The power switch returns to the ini...

Страница 93: ...es are deleted the focus lamp green blinks slowly about two times a second Select NO it won t delete the folder DELETING FOLDERS CONT D 4 4 After confirming that DELETE is highlighted press the key 7...

Страница 94: ...ccording to the angle at which you watch it or the brightness around the monitor so that the display on the LCD monitor can be seen clearly 2 2 After confirming that LCD is highlighted press the key I...

Страница 95: ...the range from 0 to 9 The smaller the number is darker and the larger number is brighter on the LCD monitor The color of the background in the left figure is gray so that you can easily find out the...

Страница 96: ...96 SPECIFYING THE PLAYBACK MODE...

Страница 97: ...MODE MENU ITEMS AND EACH SETTINGS DELETE For deleting images see page 87 ZOOM For the zoom play mode see page80 SLIDE SHOW For the slide show mode see page 82 SELECT IMAGE DELETE ALL IMAGES FOLDER YE...

Страница 98: ...100SK410 Other folder name For DELETE deleting images see page 88 For ZOOM zoom play see page 80 For SLIDE SHOW auto play see page 82 Only the 2 items of PRINT Specifying the print setting with DPOF...

Страница 99: ...the file name or your password Also if you set the media including the DPOF data in the personal printer which supports the DPOF you can print the specified images at the specified number automatical...

Страница 100: ...ted is selected the number to be printed is high lighted The sixth frame is selected and the key is pressed the following 6 frames are diaplayed When the seventh frame is selected and the key is press...

Страница 101: ...4 4 and 5 5 to specify the number to be printed for all images For the image you do not want to print specify 0 7 7 Press the ENTER button to finish the setting The DPOF file including data of the im...

Страница 102: ...hat INDEX is highlighted and press key to finish the setting The display to confirm whether you print the images as an index print or not appears as shown in the figure SPECIFYING THE PRINT SETTINGS W...

Страница 103: ...s recorded in the CF card After the file is recorded the LCD monitor display returns to the playback mode menu 4 Press the MENU button The LCD monitor display returns to the playback mode SPECIFYING T...

Страница 104: ...twice so that CANCEL is highlighted and press the key to finish the setting The display to confirm whether you cancel all print settings or not appears as shown in the figure SPECIFYING THE PRINT SET...

Страница 105: ...back mode menu The file name of the image to be recorded con sists of SIMG 4 digit number and jpg The files are recorded in the 100sk410 folder until the 4 digit number becomes 9999 the file mane of S...

Страница 106: ...of other digital camera in the playback mode menu 1 Rotate the function dial to and press the MENU button The playback mode menu is displayed on the LCD monitor 2 Press the or key so that FOLDER is hi...

Страница 107: ...hlighted and press key 3 Press the or key so that New is highlighted and press key 4 Press or key select the character you desire and press the key for determine If you won t give a new name press the...

Страница 108: ...that the folder name in which the image to be played back is recorded is highlighted and press the ENTER button When only 100SK410 folder exists the folder name does not change even the or key is pres...

Страница 109: ...ing operation can be available between the digital equipment conformed to DCF The images captured with your digital camera can be played back on the LCD monitor of other digital camera The images capt...

Страница 110: ...110 SETUP...

Страница 111: ...page 115 NO YES THE SETUP MODE MENU DISPLAY ON THE LCD MONITOR POWER SAVE For the time for the auto power off function see page 113 30 min 30 minutes 10 min 10 minutes 5 min 5 minutes 3 min 3 minutes...

Страница 112: ...M DD HH MM BEEP For turning on or off the beep see page 120 ON The beep sounds OFF The beep does not sound VIDEO OUT For switching the video signal from the video out terminal see page 122 PAL NTSC LA...

Страница 113: ...hown in the fig ure 3 3 Press the or key so that POWER SAVE is highlight ed and press the key SPECIFYING THE TIME FOR THE AUTO POWER OFF FUNCTION To save the battery power this camera will be turned o...

Страница 114: ...g Only when suing the batteries the time for the auto power off function can be specified When using the AC adapter sold separately the time for the auto power off function is fixed in 30 minutes and...

Страница 115: ...annot be recovered be careful when for formatting the CF card 1 1 Rotate the function dial to and slide the power switch to turn on the camera The power switch returns to the initial position 2 2 Rota...

Страница 116: ...d press key The display to confirm whether you format the CF card or not appears 4 4 Press the key so that YES is highlighted and press the Key to finish the setting The format of the CF card starts A...

Страница 117: ...ly the wrong date and time ate recorded Set the date and time correctly by performing the procedure below 1 1 Rotate the function dial to and slide the power switch to turn on the camera The power swi...

Страница 118: ...e and time appears as shown in the figure 4 4 Press the or key so that DATE is highlighted and press the key 5 5 Press the or key to specify or correct the date and press key to finish the setting Whe...

Страница 119: ...rs as shown in the figure 7 7 Press the or key so that TIME is highlighted and press the key 8 8 Press the or key to specify or correct the date and press the to finish the setting When you press and...

Страница 120: ...g after you purchase this camera When you use this camera in the situation you cannot make noise such as a wedding ceremony etc you can turn off the beep 1 1 Rotate the function dial to and slide the...

Страница 121: ...ate with the buttons or the function dial The volume of the beep cannot be changed SETTING THE BEEP SOUND CONT D 3 3 Press the or key so that BEEP is highlighted and press the key 4 4 Select ON or OFF...

Страница 122: ...l can be switched between NTSC and PAL What is an NTSC system and a PAL system Both are the color television broadcast system The NTSC system is mainly used in U S A Japan Canada Mexico the Philippine...

Страница 123: ...eo out terminal is switched to the selected one 3 3 Press the or key so that VIDEO OUT is highlighted and press the key SWITCHING THE VIDEO SIGNAL FROM THE VIDEO OUTPUT TERMINAL CONT D PAL NTSC 4 4 Se...

Страница 124: ...lish 1 1 Rotate the function dial to and slide the power switch to turn on the camera The power switch returns to the initial position 2 2 Rotate the function dial to SETUP The setup mode menu is disp...

Страница 125: ...inish the setting The language on displayed on the LCD monitor is switched to the selected one 4 Select ENGLISH with the or key The language changes in the following order SWITCHING THE LANGUAGE DISPL...

Страница 126: ...up settings Power save see page 113 Beep sound see pages 120 The Camera pc setting PC connection The default playback settings Selected Image 5sec Forward STD standard 100SK410 5 The default setup set...

Страница 127: ...the function dial to and slide the power switch to turn on the camera The power switch returns to the initial position 2 Rotate the function dial to SETUP The setup mode menu is displayed on the LCD m...

Страница 128: ...efault The LCD monitor display returns to the setup mode menu 3 3 Press the or key so that DEFAULT is highlighted and press the key The display to confirm whether you reset the camera settings to the...

Страница 129: ...129 CONNECTING TO THE PERSONAL COMPUTER...

Страница 130: ...used in Microsoft Windows series Operating System Operating System must support USB device first For example Windows 98 98 SE ME 2000 1 Insert installation CD ROM 2 Digital camera is power on and rea...

Страница 131: ...Search for the best driver for your device Recommended it will be searched auto matically P ress Next button 6 Select digital camera driver s location and press Next button INSTALLATION OF THE DRIVER...

Страница 132: ...ALLATION OF THE DRIVER AND DRIVER SOFTWARE 7 Window find digital camera device press Next button 8 Copying files please wait for a few minutes 9 Congratulation install success Remember to reboot your...

Страница 133: ...133 CONNECTING TO THE PERSONAL COMPUTER CONT D The following operation is required for both OS 8 6 and OS 9 X 1 Select appropriate driver for your operation system 2 Double click icon for installation...

Страница 134: ...134 3 When Welcome dialog box appers click Continue CONNECTING TO THE PERSONAL COMPUTER...

Страница 135: ...135 CONNECTING TO THE PERSONAL COMPUTER CONT D 4 Click the install button to install 5 Look the warning message then click the con tinue botton If you want to leave please click cancel to leave...

Страница 136: ...136 6 6 Install was successful 7 7 Click the restart button to initial your sys tem suggests or click continue if you wish to perform this TWAIN driver immediately CONNECTING TO THE PERSONAL COMPUTER...

Страница 137: ...e CF card On Windows2000 Professional the data transfer is not actually completed due to the delay of writing even when the display on the computer shows that copying is finished As the data is transf...

Страница 138: ...may be turned off while transferring data If this happens the error may occur the camera and the computer may not function correctly or the image data recorded in the CF card may be erased or damaged...

Страница 139: ...s 95 Windows 98 Windows2000 Windows NT 4 0 Service Pack 5 16 MB or more of built in memory For Windows NT 32 MB or more of built in memory 110 MB or more of available hard disk space Resolution 800 x...

Страница 140: ...lect Start Run and input D ENGLISH NSTALL SETUP EXE in the box of Open when your CD ROM drive is the D drive and click OK Installing to the Apple Macintosh 1 Turn on the computer and start up Mac OS 2...

Страница 141: ...141 APPENDIX...

Страница 142: ...and connect the mini plug of the supplied video cable to the video out terminal of the camera The LCD monitor is turned off 4 Connect the other side of the video cable to the video input terminal on...

Страница 143: ...0 cm in the close up mode Solution Take a picture with the focus lock function or in the manual focus mode Take a picture when the subject is farther than 40 cm or when the subject is within the dista...

Страница 144: ...Solution The CF card is full Delete unwanted images or transfer the image data to the computer and then delete all images or use other CF card which has a memory space Rotate the function dial to and...

Страница 145: ...the CF card Wait until the reading is completed and the focus lamp and PLAY BACK stop blinking Take a picture within the flash range 0 4 to 3 m TROUBLESHOOTING CONT D Problem The image cannot be play...

Страница 146: ...function cannot be played back in the zoom play mode Specify 0 for the exposure compensation value If the battery condition indicator blinks all the indicators will disappear after 5 seconds while th...

Страница 147: ...cold environment the battery can recover its power when the battery warms up Remove the batteries when they are not in use for an extended period The battery leakage may damage the battery chamber Occ...

Страница 148: ...e gently wipe it with a soft clean dry cloth Copyright TV program films video tapes and other materials may be copy righted Unauthorized recording of such materials may be contrary to the provision of...

Страница 149: ...roper use of card 2 Static electrical discharge near card or electric noise 3 Removing the card or interrupting power supply while camera or equipment is accessing the caed read ing writing formatting...

Страница 150: ...removing batteries and the CF card or operating the camera with wet hands may daage the camera When using the camera at the beach or near water take care not to drop water or sand on the cam era If wa...

Страница 151: ...with a silica gel drying agent Remove the batteries or the CF card from the camera when not in use for an extended period Do not store the camera in the closet with mothballs We recommend you to pres...

Страница 152: ...ge 40 cm to infinity The close up mode 4 cm to 40 cm Digital zoom maximum zoom in the telephoto mode X2 Image Storage Recording medium CF card Type 1 Image file format Exit 2 1 JPEG DCF standards DPOF...

Страница 153: ...rical shutter with a Mechanical shutter Shutter speed 1 500 sec to 1sec Exposure compensation 2EV in 0 5EV increments White balance Automatic Manual setting available outdoors tungsten fluorescent LCD...

Страница 154: ...ght mode Flash intensity control Adjusted automatically by an external light Interface Video output Compositevideo signal switchable between NTSC and PAL PC interface USB port Power Supply Batteries A...

Страница 155: ......

Отзывы: