SIRS NAVIGATION LTD
COMPONENT MAINTENANCE MANUAL
NOTE: Do the procedure that follows quickly. The filling plug hole must always be
covered by silicone fluid.
(9) Increase the pressure to atmospheric level. Remove the ‘silicone fluid container’
and assemble the washer (200), disc (210) and filling plug (190). Use the torque
screwdriver to tighten the filling plug to a torque of 2880 gf/cm
±
5% (40 ozf).
(10) Remove the bellows setting jig.
(11) Clean the compass in a solution of warm water and weak detergent to remove the
silicone fluid. Dry the compass.
(12) Put the compass in the vacuum chamber with the front face up.
(13) Subject the compass to a vacuum of 13.55 Kpa A (4 in Hg A) for 20 minutes.
(14) Make sure that no air bubbles are seen in the fluid.
(15) If air bubbles are seen, remove the washer, disc, filling plug and do the filling
procedure again from paragraph (1).
(16) Solder the end of the nut (40) to the screw (30) to lock the components together.
G. Corrector Assembly (160)
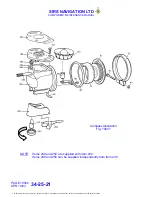
(1) Apply vibratite VC3 to threads of the four screws (170) and cover approximately
50% of the threaded area. Let the Vibratite VC3 dry before use.
(2) Assemble the corrector assembly (160) to the compass with four screws (170).
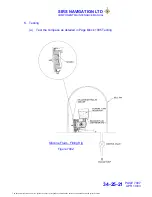
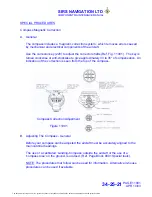
NOTE: The corrector shaft alignment must be in its neutral-effect condition.
Use the corrector key (220), to adjust if necessary. (Ref. Fig. 11001)
H. Lamp Housing Assembly (230)
(1) Attach the lamp housing assembly (230) to the bottom of the compass bowl.
(2) Put the lamp (240) in the spring of the lamp housing and assemble the cap (250).
J. Lead and Socket Assembly (260)
(1) Assemble a new lead and socket assembly (260) when necessary.
PAGE 7006
APR 10/03
34-25-21
The document reference is online, please check the correspondence between the online documentation and the printed version.

