background image

7/8

B

ASSEMBLY INSTRUCTIONS / INSTRUCTIONS D’ASSEMBLAGE

NOTICE / AVIS

Please use a screwdriver for the screws. The screwdriver is not included in the pack.

SVP utilisez un tournevis pour les vis. Le tournevis n’est pas fourni avec le produit.

Please use a screwdriver for the screws. The screwdriver is not included in the pack.

SVP utilisez un tournevis pour les vis. Le tournevis n’est pas fourni avec le produit.

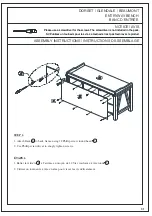
STEP 5 : Fitting for bottom running sliding doors

ÉTAPE 5 : Montage inférieur pour portes coulissantes

1. Slide the wheels on bottom of each door to the slots on Bottom panel   D  .
2. Pull down the pins on top of each door then place the door to be parallel with the bench leg post. Afterward release the
pins. The pins will be stuck into the slots underneath of Seat   B  .
3. To adjust the height of wheels up or down, use the Allen key   7   to rotate the bolts on the wheels (Rotating clockwise
will adjust the wheels higher, rotating counter clockwise will adjust the wheels lower) .

1. Glissez les roues au bas de chaque porte dans les fentes du panneau inférieur   D  .
2. Tirez les embouts sur le dessus de chaque porte, et ensuite placez celle-ci en parallèle avec la patte du banc. Relâchez les
embouts par la suite. Les embouts resteront ancrés dans les fentes sous le siège   B  .
3. Pour ajuster la hauteur des roues, utilisez une clé Allen   7   pour faire pivoter les écrous sur les roues (en tournant dans le
sens horaire, cela ajustera en hauteur; dans le sens horaire contraire, cela réduira la hauteur).

DORSET / GLENDALE / BEAUMONT

ENTRYWAY BENCH

BANC D’ENTRÉE

D

G

G

7

7

Содержание 3AXCDORBEN

Страница 1: ...E D ASSEMBLAGE DORSET GLENDALE BEAUMONT ENTRYWAY BENCH BANC D ENTRÉE ITEM NUMBER NUMÉRO D ARTICLE 3AXCDORBEN Like us on share your pictures and comments to be eligible for exclusive promotions Suivez nous sur partagez vos photos et vos commentaires afin d être admissibles à des promotions exclusives 1 8 TM TM TM ...

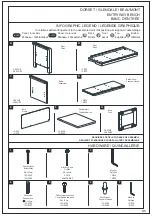
Страница 2: ...R UNE PAIRE 1 PIECE 1 PIÈCE INFOGRAPHIC LEGEND LÉGENDE GRAPHIQUE In relative spatial arrangement to the assembled unit Disposition par rapport à l assemblage INNER Panel Inner side Back OUTER F B DORSET GLENDALE BEAUMONT ENTRYWAY BENCH BANC D ENTRÉE Panneau côté intérieur Panel Outer side Front Top Panneau côté externe Bottom T Arrière Avant Supérieur Inférieur Phillips screw round head Vis crucif...

Страница 3: ...1 1 Insert 2 Dowels 4 into of each Dividers C 2 Align pre drilled holes on Bottom panel D with Dowels 4 in Dividers C 3 Using 6 Allen Key Screw 2 attach Bottom panel D to Divider C 4 Use Allen Key 3 to tighten screws Do not over tighten 1 Inseùrer 2 goujons 4 dans les coins supeùrieurs de chaque Seùparateur C 2 Aligner les trous preùperceùs infeùrieur au Panneau infeùrieur D avec des goujons 4 dan...

Страница 4: ...sert 2 Dowels 4 into of each Sides A 2 Align pre drilled holes on Bottom panel D with Dowels 4 in Sides A 3 Using 6 Allen Key Bolts 1 attach Bottom panel D to Side A 4 Use Allen Key 3 to tighten screws Do not over tighten 1 Inseùrer 2 goujons 4 dans les coins supeùrieurs de chaque Coâteùs A 2 Aligner les trous preùperceùs infeùrieur au Panneau infeùrieur D avec des goujons 4 dans les Coâteùs A 3 U...

Страница 5: ... Dividers C 2 Align pre drilled holes on Seat B with Dowels 4 in Sides A and Divider C 3 Using 12 Allen Key Bolts 1 attach Side A and Divider C to Seat B 4 Use Allen Key 3 to tighten screws Do not over tighten 1 Inseùrer 2 goujons 4 dans les coins supeùrieurs de chaque Coâteùs A et Seùparateur C 2 Aligner les trous preùperceùs infeùrieur au Sieøge B avec des goujons 4 dans les Coâteùs A et Seùpara...

Страница 6: ... Please use a screwdriver for the screws The screwdriver is not included in the pack SVP utilisez un tournevis pour les vis Le tournevis n est pas fourni avec le produit STEP 4 EÙTAPE 4 1 Use 4 Shelf Support 6 for each Shelf cabinet F in desired location 1 Utiliser les 4 Support aø tablette 6 pour chacque Tablette d armoire F aø la position souhaiteùe 6 A A 6 6 C C A A C C F F F DORSET GLENDALE BE...

Страница 7: ...leg post Afterward release the pins The pins will be stuck into the slots underneath of Seat B 3 To adjust the height of wheels up or down use the Allen key 7 to rotate the bolts on the wheels Rotating clockwise will adjust the wheels higher rotating counter clockwise will adjust the wheels lower 1 Glissez les roues au bas de chaque porte dans les fentes du panneau inférieur D 2 Tirez les embouts ...

Страница 8: ...rewdriver is not included in the pack SVP utilisez un tournevis pour les vis Le tournevis n est pas fourni avec le produit STEP 6 EÙTAPE 6 1 Attach Back E to back frame using 12 Phillip screw round heads 5 2 Use Phillip screwdriver to snugly tighten screws 1 Relier le Arrieøre E aø I arrieøre au moyen de 12 Vis cruciforme aø teâte ronde 5 2 Utiliser un tournervis aø teâte eùtoileùe pour visser les...

Отзывы: