background image


9


The panel-mounted printer requires very little maintenance and service. This section provides 
instructions for cleaning and maintenance. Electrical and mechanical repairs should be performed 
only by qualified personnel.   
 

Make certain all electrical connections are disconnected before any service is performed on 
the panel-mounted printer. 


Voltmeter 


Denatured alcohol 


Cleaning cloths 


Cotton swabs 


Lubricant (IBM #23, Lubriplate #70, Silicon #35) 


You may clean the exterior cabinet of the printer with a non-abrasive cleanser. Do not allow 
liquids to enter the inside of the mechanical assembly. In a dirty environment, you may clean the 
printhead with alcohol and a cotton swab. You may also use compressed air to clean the printhead. 
Do not direct air flow directly to the printer platen; this action may damage the printing surface on 
the platen. When the printhead is clean and free of dirt, you may apply a light silicon lubricant 
(sparingly) to the moving mechanical components. 
 

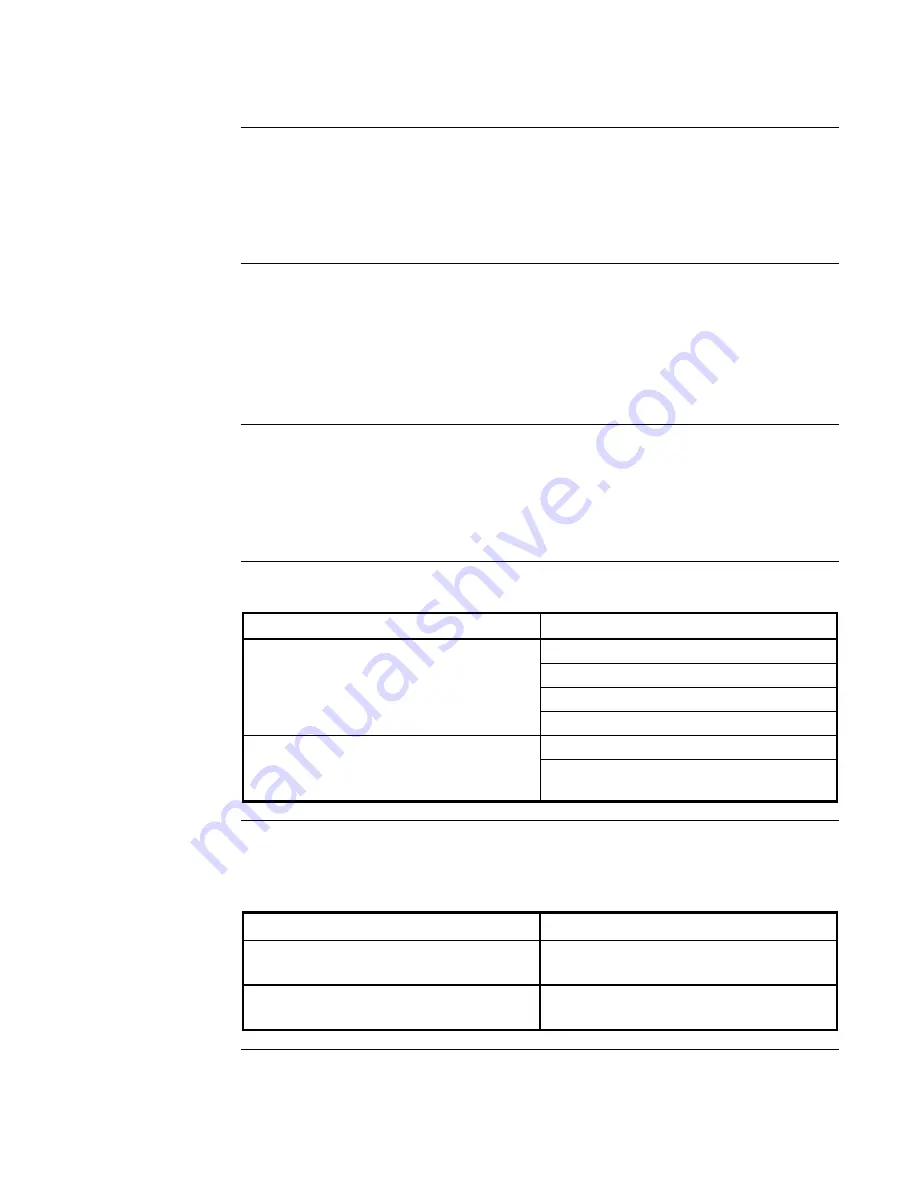
Table 3.  Print Problems 

Problem Possible 

Cause 

Poor Print Quality 

Dirty thermal printhead 

Worn printhead 

Poor quality thermal paper 

Damaged thermal 

Premature Wear of Thermal Printhead 

Printing with non-Simplex approved paper 

Printing in an environment where abrasive 
particles enter the printhead 


The following chart is a recommended maintenance schedule for the panel-mounted printer.  
Specific environmental conditions may shorten or lengthen the periods between cleaning. 

Table 4.  Periodic Maintenance Schedule 

Clean Office or Light Use 

Once Per Year 

Clean Factory Environment or  
Medium Use 

Monthly 

Dirty Factory Environment or  
Heavy Use 

Weekly 


Maintenance 

Overview 

Required Tools and 
Supplies 

Cleaning  

Printing Problems 

Maintenance Chart 

firealarmresources.com

Содержание 4100-1293

Страница 1: ...ce Simplex and the Simplex logo are trademarks of Tyco International Ltd and its affiliates and are used under license 579 249 Rev C This publication describes the installation procedure for the 4100...

Страница 2: ...supplier ELECTRICAL HAZARD Disconnect electrical field power when making any internal adjust ments or repairs All repairs should be performed by a representative or authorized agent of your local Simp...

Страница 3: ...tically detects the interface which is sending data and produces the appropriate output The serial interface parameters are factory set and stored on the printer firmware The standard factory settings...

Страница 4: ...guidelines when choosing the location for the printer If possible place the printer in the main control panel middle bay left or right justified If no printer space is available in the main control p...

Страница 5: ...pport 1 9 PIN DB SHELL RS 232 RS 232 HARNESS OR TB1 TB2 1 1 DRAIN XMT CTS GND XMT CTS GND BLK WHT OR OR TO POWER SUPPLY MASTER OR EXPANSION TO NEXT SIGNAL MODULE PANEL MOUNTED PRINTER RS 232 PLUGGABLE...

Страница 6: ...ion 1 GROUND Chassis Ground 2 TXD Data output from the printer to the host 3 RXD Data input to the printer 20 mA input optional 4 CTS Inhibits TXD line when held at 10v by host 5 GROUND Signal Ground...

Страница 7: ...chanism Use the power switch in the FEED PATH position to advance paper further through the mechanism Feed an appropriate amount of paper through the printer to allow the installation onto the paper t...

Страница 8: ...rectly To activate the self test toggle the power switch from the OFF position bottom to the FEED position top and hold it there until the test begins The panel mounted printer enters self test mode a...

Страница 9: ...inter platen this action may damage the printing surface on the platen When the printhead is clean and free of dirt you may apply a light silicon lubricant sparingly to the moving mechanical component...

Страница 10: ...579 249 Rev C White Text firealarmresources com...

Отзывы: