


21
ADVANCED OPERATIONS
SAMPLE TRANSFERS
You will need the SD1250 WAV Transfer program to move audio files
from your computer to the SD1250. You can download this software
from Simmonsdrums.net. We strongly advise that you back up any User
kits and sounds you want to keep before loading User samples.
1. Plug in the SD1250 into your computer via USB.
2. Launch the SD1250 WAV Transfer program. You should see the
program indicate that you are connected to the SD1250’s flash
memory.
3. Select the .wav files you want to transfer to the module using the
Select WAV button. You can transfer up to 28Mb of 16Bit .wav
samples to the module.
4. After selecting the files you will see them listed on the transfer screen.
5. Click on the Transfer button to send the files to the module.
6. After the program completes the transfer, you will need to disconnect
the power on the back of the module and restart. Pulling the power cable
before powering down normally may erase some User kits and sounds.
Once the files are inside the module you can now assign them to User
Wave programs.
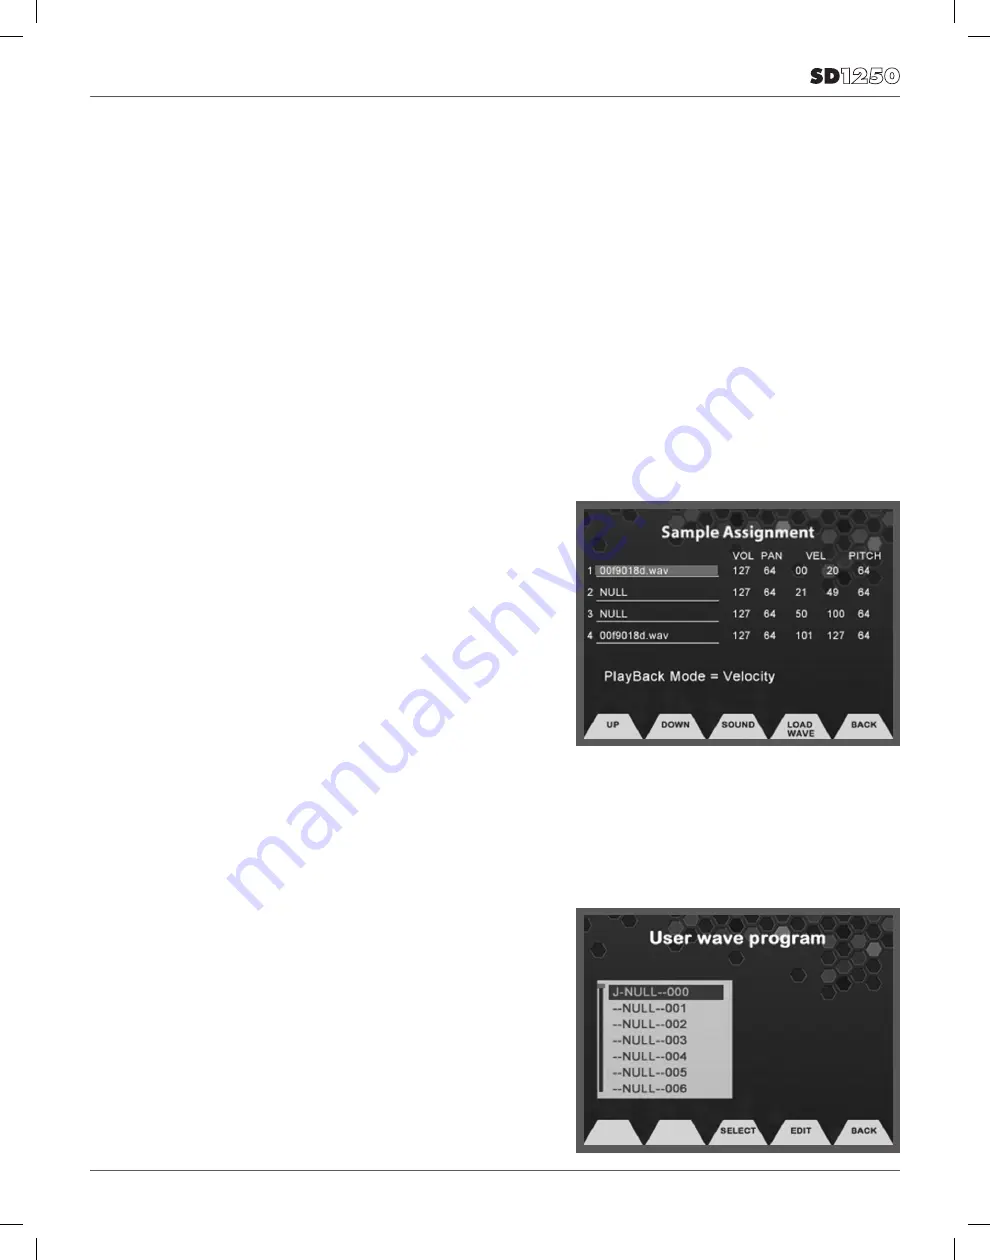
SAMPLE ASSIGNMENT
1. The easiest method to assign a sample to a pad is to press Edit, hit the
pad, change “Category” to “Wave”, and select your sample.
2. If you want to use multiple samples on a pad, select the Drum Function
button. To do this, press Kit then F2 (Drum). Press the User Wave
Function button (F3.)
3. Press the Edit Function button. This will take you to the Sample
Assignment screen. Press Cursor Up and Down to move the cursor to
the sample parameter, press button UP/DOWN to move the cursor
up and down to the Sample position (1-4).
4. Press the Load Wave Function button and select the sample that
you want to assign with the value dial and press the Load Function
button. You will come back to the Sample assignment screen with the
sample assigned to the sample position that you selected.
5. You can modify the settings for Volume, Pan, Velocity cross switching
and Pitch for up to 4 samples per Instrument.
6. After setting these up Press the Save/Enter button to save your User
program. It will now be a User Drum sound.
Playback Mode allows you select between Velocity switching, Sequence
and Random between the samples that are assigned in the User Wave
Instrument.
To see examples of file transfer and use, visit
simmonsdrums.net/videos
.
SAVING YOUR WAVE PROGRAM
1. From the sample assignment page press the Save/Enter button.
2. You come to a screen where you can name your sound.
3. Use the Value dial to change the character and move to the next
character with the cursor buttons.
4. After you complete changing the characters you then should press
the Save/Enter button.
5. You will come back to the User Wave Program screen.
6. You can press Select [F3] to choose a User Wave sound.
SIMMONS ADVANCED FOR iOS
A free iOS app is available for editing your SD1250, called “Simmons
Advanced.” Download it from Apple’s app store. It provides editing
functions, sample recording and editing, and song play-along features.
Please Note: If you delete your samples from the
Utility Restore mode or Transfer more
samples, the samples in the SD1250’s
memory will be overwritten.
Содержание SD1250
Страница 1: ...SimmonsDrums net OWNER S MANUAL ELECTRONIC DRUM KIT WITH MESH HEADS...
Страница 9: ...9 FINAL ASSEMBLED KIT Kick Drum Pedal not included...
Страница 38: ...38 OWNER S MANUAL...
Страница 39: ...39...


