“
∆
p air” ADJUSTMENT
To measure “
∆
p air” simply con-
nect a differential pressure
gauge with a decimal or Pascal
scale to the positive and nega-
tive tap, observing the symbols
(
Drawing 1).
Sequence of operations:
1)
Turn the heating power con-
trol trimmer clockwise as
far as it will go (
B – Drawing
2) with the fan at its top
speed.
2)
Attempt to achieve the “
∆
p
air” values given in the table
by adjusting the MAX trim-
mer on the fan board
(
Drawing 3):
∆
p air max.
3)
Turn the heating power con-
trol trimmer anti-clockwise
as far as it will go (
B –
Drawing 2) with the fan at
its top speed.
4)
Attempt to achieve the “
∆
p
air” values shown in the
table using the “MIN” trim-
mer on the fan board
(
Drawing 3):
∆
p air min.
“
∆
p air-gas” ADJUSTMENT
To measure “
∆
p air-gas”, simply
connect the positive tap of the
differential pressure gauge to
the gas tap and the negative
tap to the corresponding tap on
the boiler (
Drawing 4)
Always adjust gas pressure
with the fan at its top speed.
Sequence of operations:
1)
Turn the heating power con-
trol trimmer anti-clockwise
as far as it will go (
B –
Drawing 5) with the fan at
its top speed.
2)
Open the gas capacity step
(
1 – Drawing 6) all the way
so that the notch is in a hori-
zontal position.
The boiler must always be calibrated while set on heating.
ATTENTION:
– On PROPANE – G31 boilers
it is a good idea to check
that the position of the GPL
bridge on the control board
is correct.
– Diaphragm code 6028640
(
Drawing 7) is assembled
on the
“Dewy 25”
model
functioning on PROPANE –
G31 only.
– If the fan control board code
8260501 is replaced on
“Dewy”
models running on
PROPANE – G31 it is very
important to remember to
cut the specified resistance
(
Drawing 8).
B
2
1
Upon completion of the calibration procedure, check CO
2
values using a combustion analyser. If a difference which is more than 0.2 above
or below the values indicated in the table is found, it will be necessary to correct it:
– Use the OFFSET screw (
2 – Drawing 6) to correct CO
2
at “MIN” output.
– Use the capacity step to correct CO
2
at “MAX” output (
1 – Drawing 6).
Drawing 1
Drawing 2
Drawing 4
Drawing 6
Drawing 7
Drawing 8
Dewy 25
30
Natural gas (G20) 49,5
63,8
Propane (G31)
49,5
68,4
Dewy 25
30
Natural gas (G20)
7,1
8,4
Propane (G31)
7,1
9,2
B
Drawing 5
3)
Adjust the gas valve OFFSET regulation (
2 – Drawing 6), aiming
to achieve the “
∆
p air- gas” shown in the table:
Capacity step open
4)
Using the capacity step (
1 – Drawing 6), attempt to achieve the
“
∆
p air-gas” shown in the table:
Capacity step regulated
Dewy 25
30
Natural gas (G20)
7,3
7,0
Propane (G31)
8,1
10,1
Dewy 25
30
Natural gas (G20)
5,3
6,3
Propane (G31)
4,4
9,0
“Dewy 25”
“Dewy 30”
CO
2
(Natural gas)
CO
2
(Propane)
CO
2
(Natural gas)
CO
2
(Propane)
“MIN” output
9,3
10,2
9,0
10,1
“MAX” output
8,9
10,0
9,1
10,3
Drawing 3
MIN. MAX
“∆p air”
adjustment
4.6
BOILER CALIBRATION
Fig. 24
25
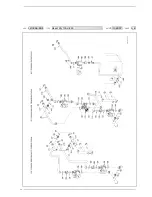
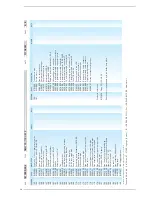
Содержание Dewy 130 HE FS
Страница 3: ......
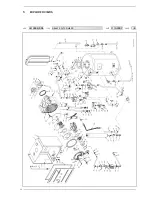
Страница 32: ...32 5 EXPLODED VIEWS COD TYPE DATE PAGE 3810009 505 DEWY 30 130 HE FS 31 10 2007 1 6 ...
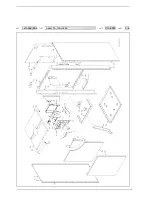
Страница 33: ...COD TYPE DATE PAGE 3810009 505 DEWY 30 130 HE FS 31 10 2007 2 6 33 ...
Страница 34: ...34 COD TYPE DATE PAGE 3810009 505 DEWY 30 130 HE FS 31 10 2007 3 6 ...
Страница 39: ......

