background image

SKF 2800 A1

51

4.8 Handling batteries

Warning!

To prevent a risk of explosion,
normal batteries must not be
charged, heated or disposed of by
burning.

• Never try to open the batteries.

To prevent injury if battery acid has
leaked out, avoid contact with the skin,

eyes and mucous membranes. In the
event of contact with the acid, rinse the
affected areas immediately with plenty
of clean water and contact a doctor at
once.

Caution! 

To avoid damaging the

appliance and to ensure it functions
correctly, please note: 
• Only use type AG13 batteries.

5. Before using for the first time

1. Please clean the individual parts of the

deep-fat fryer thoroughly (see
“9. Cleaning and storing” on page 54).

2. Then carefully dry the individual parts.

6. Before frying

1. Place the deep-fat fryer on a level and

stable surface.

2. Unwind the mains cable completely.

Caution!

 Make sure that the cable does

not come into contact with the hot parts of
the fryer so that it is not damaged.
3. Press the unlock button 

7

 to release the lid.

The lid 

4

 will open.

4. Move up the handle of the frying

basket

1

 until it audibly engages.

5. Remove the frying basket 

14

.

6.1 Add the oil or fat

You should either use liquid frying oil or
solid frying fat. 
You should melt solid frying fat in a frying
pan or saucepan before adding it to the
fryer.

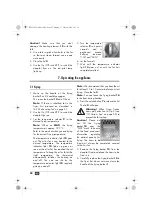
Note:

 Never mix different types of fat or oil!

1. Add oil or melted fat up to the upper

"MAX" marking of the fat container 

13

in the dry and empty fryer.

Note:

 If you only want to fry small

quantities, a bit less oil or fat may well
be enough. However the items to be
fried must always be completely covered
and the fat or oil must reach at least as
far as the lower "MIN" marking of the fat
container 

13

.

2. Insert the plug in a socket.

6.2 Melt existing fat

If the fryer already contains solidified fat
from an earlier frying session, it must be
melted in the fryer. Do this very carefully so
that the melting fat does not start to spit or
the fryer does not overheat.
1. Insert the plug in a socket.

 RP95885 Fritteuse LB2  Seite 51  Montag, 17. Februar 2014  2:35 14

Содержание 95885

Страница 1: ...A1 FRITEUSE À ZONE FROIDE Mode d emploi KALTZONEN FRITTEUSE Bedienungsanleitung KOUDEZONE FRITEUSE Gebruiksaanwijzing COOL ZONE DEEP FAT FRYER Operating instructions IAN 95885 RP95885_Kaltzonenfritteuse_Cover_LB2 indd 2 16 12 13 10 29 ...

Страница 2: ...ies sur le rabat Nederlands 18 Neem a u b ook de uitklappagina in acht Deutsch 32 Bitte beachten Sie die Ausklappseite English 46 Be sure to note the fold out page SKF 2800 A1_14_V1 5_FR_NL_DE_GB RP95885 Fritteuse LB2 Seite 1 Montag 17 Februar 2014 2 35 14 ...

Страница 3: ...1 5 2 10 3 9 11 14 13 4 6 12 15 7 8 16 RP95885 Fritteuse LB2 Seite 1 Montag 17 Februar 2014 2 35 14 ...

Страница 4: ...RP95885 Fritteuse LB2 Seite 2 Montag 17 Februar 2014 2 35 14 ...

Страница 5: ...curité Utilisez le produit uniquement comme décrit et pour les domaines d application indiqués En cas de transfert du produit à un tiers tous les documents qui accompagnent ce produit doivent être remis simultanément 1 Description de l appareil 1 1 Destination La friteuse SilverCrest SKF 2800 A1 est exclusivement conçue pour la préparation d aliments comme les frites les légumes les chicken wings ...

Страница 6: ...ouvercle 8 Corps 9 Sélecteur de températures 10 Voyant de température Vert dès que la température réglée est atteinte 11 Contacteur de marche arrêt et témoin de fonctionnement lumineux rouge dès que la friteuse est en marche 12 Minuteur numérique 13 Bac à huile 14 Panier 15 Elément chauffant 16 Logement pour rouler le câble 3 Caractéristiques techniques Tension nominale 230 240 V 50 Hz Puissance n...

Страница 7: ...moins de 8 ans Le nettoyage et la maintenance par l utilisateur ne doivent pas être effectués par des enfants Les appareils de cuisson doivent être posés avec leurs poignées le cas échéant de manière stable afin déviter que les liquides chauds se renversent Les surfaces de l appareil peuvent devenir chaudes Pendant le fonctionnement ne touchez l appareil que par ses poignées Avant chaque nettoyage...

Страница 8: ...issement Les consignes de sécurité à suivre sont destinées à vous protéger de toute électrocution Si l appareil est endommagé ne l utiliser en aucun cas Faites dans ce cas réparer l appareil par une main d oeuvre qualifiée L adresse de notre service après vente vous est fournie au paragraphe Service après vente à la page 17 Si le câble d alimentation est endommagé il doit être remplacé par le fabr...

Страница 9: ...x autres objets de sorte que ceux ci ne puissent prendre feu Ne mettez la friteuse en marche que si elle contient de l huile ou de la graisse liquide Le niveau de remplissage d huile ou de graisse de la friteuse doit toujours se trouver entre les deux marquages de la partie intérieure du bac à huile 13 marquage inférieur MIN minimum marquage supérieur MAX maximum L appareil ne doit jamais être pla...

Страница 10: ...ur Si la graisse est trop froide elle risque de gicler lorsqu elle sera fondue à nouveau Pour l éviter piquez quelques trous dans la graisse figée avec une fourchette Faites alors attention à ne pas endommager l élément chauffant 15 Si vous voulez transporter l appareil éteignez le débranchez la prise et attendez que l appareil ait refroidi 4 8 Utilisation des piles Avertissement Afin d éviter un ...

Страница 11: ...e d huile ou de graisse L aliment à frire doit cependant toujours être entièrement couvert par la graisse et le bac à huile 13 doit être rempli de graisse ou d huile au moins jusqu au marquage inférieur MIN 2 Enfichez la fiche dans une prise secteur 6 2 Faire fondre la graisse Si la friteuse contient encore de la graisse figée d une précédente utilisation faites la fondre Attention à ce que l huil...

Страница 12: ...e Nous vous recommandons de chauffer l huile durant au moins 10 à 15 minutes avant de commencer à frire Refermez le couvercle 4 Remarque Vous pouvez laisser le panier 14 dans la friteuse durant la phase de chauffe 4 Appuyez sur le déverrouillage du couvercle 7 Le couvercle 4 s ouvre Avertissement Pour frire des aliments congelés observer absolument le conseil 2 voir 10 Conseils divers à la page 14...

Страница 13: ...êt il permet de surveiller le temps de cuisson 1 Démarrez le minuteur 12 en appuyant sur la touche inférieure 2 Réglez le nombre de minutes à l aide des deux touches supérieures 3 Démarrez le minuteur 12 en appuyant sur la touche inférieure L affichage des minutes clignote plusieurs fois et le temps commence à s écouler 4 Dès que le temps réglé est atteint des signaux sonores retentissent 5 Pour l...

Страница 14: ...ilisation Avertissement Afin d éviter tout risque de brûlure attendez que l huile ou la graisse brûlante soit bien refroidie pour la transvaser 8 Sortez l élément chauffant 15 en le tirant vers le haut 9 Retirer le bac à huile 13 de la cuve 8 10 Transvaser l huile ou la graisse voir 9 Nettoyage et entreposage de l appareil à la page 13 Pour éliminer l huile ou la graisse voir 11 3 Huile à la page ...

Страница 15: ...auffant 15 avec un chiffon humide et doux En cas de forte salissure utiliser un peu de nettoyant vaisselle doux et rincer à l eau claire 8 Replacer le bac à huile 13 l élément chauffant 15 et le panier 14 dans la cuve 8 9 Refermer le couvercle 4 10 Enrouler le cordon d alimentation à l arrièrede la cuve 8 Remarque Vous pouvez aisément transporter la friteuse avec les poignéesapposées sur les côtés...

Страница 16: ...ossible l aliment à frire dans la friteuse car l aliment congelé risque de provoquer un bouillon soudain et intensif de l huile ou de la graisse chaude Un aliment à frire congelé de 16 à 18 C refroidit sensiblement l huile ou la graisse il rôtit donc plus lentement et peut de ce fait absorber trop d huile ou de graisse Vous pouvez éviter ceci comme décrit ci après 1 Ne faites pas frire de grandes ...

Страница 17: ...figer la graisse et enveloppez la dans un papier Eliminez les restes d huile ou de graisse dans la poubelle pour déchets résiduels ou conformément aux prescriptions nationales respectives 11 4 Piles accus Les piles ne doivent jamais être jetées aux ordures ménagères Les piles usagées doivent être éliminées conformément aux règlements locaux Des conteneurs adéquats sont mis à disposition chez les v...

Страница 18: ... à une usure normale et considérées comme telles ou aux dommages causés à des pièces fragiles comme les interrupteurs les accumulateurs ou les éléments en verre Cette garantie s annule en cas de détérioration du produit d utilisation ou d entretien inappropriés Afin de s assurer d un usage approprié du produit il convient de respecter toutes les consignes mentionnées dans la notice d utilisation L...

Страница 19: ... logiciels sous www lidl service com Service après vente Service France Tel 0800 919270 E Mail hoyer lidl fr Service Belgique Tel 070 270 171 0 15 EUR Min E Mail hoyer lidl be Service Suisse Tel 0842 665566 0 08 CHF Min mobile max 0 40 CHF Min E Mail hoyer lidl ch IAN 95885 Fournisseur Attention il ne s agit pas de l adresse du service après vente Contactez en premier lieu le service après vente i...

Страница 20: ...oduct alleen op de beschreven wijze en voor de aangegeven toepassingsgebieden Overhandig ook alle documenten wanneer u dit product aan derden doorgeeft 1 Beschrijving van het apparaat 1 1 Toepassingsdoel De friteuse SilverCrest SKF 2800 A1 is uitsluitend voor het bereiden van levensmiddelen zoals patates frites groenten chicken wings etc geconstrueerd Voor andere gebruiksdoelen is hij niet geschik...

Страница 21: ...nster 6 Draaggreep 7 Ontgrendeling van het deksel 8 Behuizing 9 Temperatuurkeuze 10 Temperatuurlampje brandt groen zodra de ingestelde temperatuur is bereikt 11 Aan uitschakelaar en bedrijfscontrolelampje brandt rood zodra de friteuse ingeschakeld is 12 Digitale kooktimer 13 Vetreservoir 14 Frituurmandje 15 Verwarmingselement 16 Snoeropwikkeling 3 Technische gegevens Nominale spanning 230 240 V 50...

Страница 22: ...inderen worden uitgevoerd Kooktoestellen moeten in een stabiele positie met de handgrepen indien aanwezig worden geplaatst om morsen van hete vloeistof te voorkomen De oppervlakken van het apparaat kunnen heet worden Pak het apparaat daarom tijdens de werking uitsluitend aan de hiervoor bestemde handgrepen beet Trek voor elke reiniging de stekker uit het stopcontact Dompel het apparaat nooit in wa...

Страница 23: ...31 Als het netsnoer van dit apparaat wordt beschadigd moet het door de fabrikant of een ander gekwalificeerd persoon worden vervangen om gevaar te voorkomen Er mag in geen geval water of andere vloeistoffen in het apparaat binnendringen Let daarom op het volgende gebruik het apparaat nooit in de open lucht nooit in vloeistof dompelen zet er geen met vloeistof gevulde voorwerpen zoals potten op geb...

Страница 24: ...maximum Het apparaat mag nooit direct onder een wandcontactdoos worden geplaatst omdat de hitte die ontstaat schade aan de elektrische installatie kan veroorzaken Laat het apparaat nooit zonder toezicht werken Schade kondigt zich bijna altijd aan door een sterke geurvorming Trek in dat geval onmiddellijk de stekker uit het stopcontact en laat het apparaat controleren Het serviceadres vindt u in Le...

Страница 25: ... opgeruimd Probeer nooit de batterijen te openen Als er batterijzuur is uitgelopen vermijd dan contact met huid ogen en slijmvliezen om letsel te voorkomen Spoel bij contact met het zuur de betreffende plaatsen onmiddellijk met veel helder water en consulteer onmiddellijk een arts Voorzichtig Let op het volgende om schade te vermijden en de functie te garanderen Gebruik uitsluitend batterijen van ...

Страница 26: ...kan ontsnappen 3 Klap het deksel 4 dicht 4 Schakel de friteuse met de aan uitschakelaar 11 in Het rode bedrijfscontrolelampje brandt 5 Draai de temperatuur keuze 9 omhoog zodat hij ongeveer op de helft tussen 130 en MIN staat 6 Laat het vet smelten 7 Wacht tot het temperatuurlampje 10 gaat branden resp het vet helemaal is gesmolten 7 De friteuse bedienen 7 1 Frituren 1 Klap de handgreep van het fr...

Страница 27: ... Laat het frituurmandje 14 in de hete olie zakken door de ontgrendeling van het frituurmandje 2 omlaag te trekken en daarna de handgreep 1 van het frituurmandje omlaag te klappen 7 2 Frituurtijden De gegevens in de bovenstaande tabel zijn richtwaarden die betrekking hebben op een hoeveelheid van 250 300 g Bij andere hoeveelheden en naar gelang de hoedanigheid van de levensmiddelen kunnen de frituu...

Страница 28: ...n accu s op pagina 29 9 Plaats de nieuwe batterijen Aanwijzing Let bij het plaatsen van de batterijen op de juiste polariteit De juiste polariteit is op het batterijvak ingedrukt De pluspool van de batterijen moet omhoog wijzen 10 Sluit het batterijvak 11 Zet de kooktimer 12 in het verwarmingselement 15 8 Na het frituren 1 Klap de handgreep van het frituurmandje 1 omhoog tot het vastklikt Daarmee ...

Страница 29: ...tgrendeling van het deksel 7 Het deksel 4 gaat open 2 Verwijder het frituurmandje 14 3 Trek het verwarmingselement 15 er naar boven uit Bewaar het verwarmingselement 15 op een veilige en droge plaats 4 Neem het vetreservoir 13 uit de behuizing 8 5 Reinig het frituurmandje 14 en het vetreservoir 13 met een beetje afwasmiddel in heet water of in de vaatwasmachine 6 Daarna met helder water naspoelen ...

Страница 30: ... of hard aanbraden moet u ook vermijden Verbrande levensmiddelen mag u helemaal niet eten Bij het frituren moet u temperaturen van meer dan 170 C vermijden Let erop dat de kleur van het frituursel goudgeel is en niet bruin of donker Het bruinen kan soms heel snel gaan Gebruik het zichtvenster om de bruiningsgraad van het frituursel te bekijken Tip 2 Zo lukken bevroren levensmiddelen altijd perfect...

Страница 31: ...e en elektronische apparaten Recycling helpt het verbruik van grondstoffen te verminderen en het milieu te ontlasten Informatie over de afvalverwijdering en de ligging van het dichtstbijzijnde recyclingbedrijf vindt u bijvoorbeeld bij uw gemeentelijke afvalverwijderingsbedrijf of in de gouden gids 11 2 Verpakking Als u de verpakking wilt wegwerpen let dan op de desbetreffende milieuvoorschriften i...

Страница 32: ...eel al bij de koop aanwezige schade en gebreken moeten direct na het uitpakken worden gemeld Aan reparaties die na afloop van de garantieperiode noodzakelijk worden zijn kosten verbonden Omvang van de garantie Het apparaat werd volgens strenge kwaliteitsrichtlijnen geproduceerd en vóór de levering zorgvuldig gecontroleerd De garantie geldt voor materiaal of fabricagefouten Deze garantie wordt niet...

Страница 33: ...ct kunt u vervolgens onder toevoeging van de kassabon en de beschrijving van het defect en wanneer dit is opgetreden franco aan het u meegedeelde serviceadres opsturen Op www lidl service com kunt u dit handboek en vele andere handboeken productvideo s en software downloaden Service center Service Nederland Tel 0900 0400223 0 10 EUR Min E Mail hoyer lidl nl Service België Tel 070 270 171 0 15 EUR ...

Страница 34: ...ben und für die angegebenen Einsatzbereiche Händigen Sie alle Unterlagen bei Weiter gabe des Geräts an Dritte mit aus 1 Gerätebeschreibung 1 1 Verwendungszweck Die Fritteuse SilverCrest SKF 2800 A1 ist ausschließlich zum Zubereiten von Lebens mitteln wie Pommes Frittes Gemüse Chicken Wings oder ähnlichem konstruiert worden Für andere Verwendungszwecke ist sie nicht geeignet Dieses Gerät darf nur i...

Страница 35: ...riff 7 Entriegelung des Deckels 8 Gehäuse 9 Temperaturwähler 10 Temperatur Leuchte leuchtet grün sobald die eingestellte Temperatur erreicht ist 11 Ein Aus Schalter und Betriebskontrollleuchte leuchtet rot sobald die Fritteuse einge schaltet ist 12 Digitaler Küchentimer 13 Fettbehälter 14 Frittierkorb 15 Heizelement 16 Kabelaufwicklung 3 Technische Daten Nennspannung 230 240 V 50 Hz Nennleistung 2...

Страница 36: ...einer stabilen Lage mit den Handgriffen sofern vorhanden aufgestellt wer den um das Verschütten der heißen Flüssigkeit zu vermeiden Die Oberflächen des Gerätes können heiß wer den Fassen Sie daher das Gerät im Betrieb aus schließlich an den vorgesehen Griffen an Ziehen Sie vor jeder Reinigung den Netzstecker aus der Netzsteckdose Tauchen Sie das Gerät nie in Wasser ein und schützen Sie es vor Spri...

Страница 37: ... 45 Wenn die Netzanschlussleitung dieses Gerätes beschädigt wird muss sie durch den Hersteller oder eine ähnlich qualifi zierte Person ersetzt werden um Gefährdungen zu vermeiden In das Gerät dürfen keinesfalls Wasser oder andere Flüssigkeiten eindringen Daher niemals im Freien einsetzen niemals in Flüssigkeit tauchen keine mit Flüssigkeit gefüllten Gegen stände z B Töpfe darauf stellen niemals in...

Страница 38: ... direkt unter einer Wandsteckdose aufgestellt werden da die entstehende Hitze zu Schäden an der elektrischen Installation führen könnte Lassen Sie das Gerät nie unbeaufsichtigt laufen Schäden kündigen sich fast immer durch intensive Geruchsbildung an Ziehen Sie in diesem Falle sofort den Netzstecker und lassen Sie das Gerät überprüfen Die Service Adresse finden Sie in Service Center auf Seite 45 4...

Страница 39: ...losionsgefahr zu ver meiden dürfen normale Batterien nicht geladen erhitzt oder durch Verbrennen beseitigt werden Versuchen Sie niemals die Batterien zu öffnen Wenn Batteriesäure ausgelaufen ist vermeiden Sie den Kontakt mit Haut Augen und Schleimhäuten um Verletzungen zu verhindern Spülen Sie bei Kontakt mit der Säure die betroffenen Stellen sofort mit reichlich klarem Wasser und suchen Sie umgeh...

Страница 40: ...n Sie dieses in der Fritteuse schmel zen Dabei müssen Sie sehr vorsichtig vorgehen damit das schmelzende Fett nicht anfängt zu spritzen oder die Fritteuse überh itzt 1 Stecken Sie den Netzstecker in eine Netzsteckdose Vorsicht Achten Sie darauf dass Sie mit der Gabel nicht das Heizelement 15 beschädigen 2 Stechen Sie mit einer Gabel ein paar Löcher in das Fett damit entstehender Wasserdampf besser...

Страница 41: ...erkorb 14 beim Aufheizen auch in der Fritteuse lassen 4 Drücken Sie die Entriegelung des Deckels 7 Der Deckel 4 öffnet sich Warnung Achten Sie bei tiefge kühltem Frittiergut unbedingt auf Tipp 2 siehe 10 Diverse Tipps auf Seite 42 um Fettspritzer zu vermeiden Vorsicht Füllen Sie den Frittierkorb 14 nicht über die Markierung MAX Beachten Sie unbedingt die Anga ben des Herstellers des Frittiergutes ...

Страница 42: ...nuten ein 3 Starten Sie den Küchentimer 12 indem Sie die untere Taste drücken Die Minutenanzeige blinkt einige Male und die Zeit beginnt zu laufen 4 Sobald die eingestellte Zeit abgelaufen ist ertönen mehrere Signaltöne 5 Sie können die Signaltöne beenden indem Sie die untere Taste drücken Der Küchentimer 12 wird von 1 Knopfzelle Typ AG13 mit Strom versorgt Um diese zu wechseln 6 Ziehen Sie den Kü...

Страница 43: ...iederverwenden Frittieröl und Frittierfett altern und entwickeln dabei ungesunde Stoffe Beachten Sie daher Gießen Sie das Öl bzw das noch flüss ige Fett durch einen Filter z B Geschirr tuch um Speisereste herauszufiltern Bewahren Sie Öl am besten in einer Öl Flasche im Kühlschrank auf Fett können Sie in die gereinigte Fritteuse zurückschütten erstarren lassen und mit der Fritteuse zusammen bei Zim...

Страница 44: ...tes befin den sich direkt unter den Federn kleine Nasen A Drücken Sie auf diese Nasen und ziehen Sie den Deckel 4 dabei etwas nach oben 3 Ziehen Sie den Deckel 4 ab 4 Reinigen Sie den Deckel 4 mit etwas mil dem Spülmittel in heißem Wasser 5 Anschließend mit klarem Wasser nach spülen und vollständig trocknen lassen 6 Stecken Sie den Deckel 4 wieder in seine Aufnahmen im Gehäuse 8 Achten Sie darauf ...

Страница 45: ...trächtigt so den Geruch und Geschmack des frittierguts Um wieder geschmacklich neutrales Öl oder Fett zu erhalten beachten Sie folgendes 1 Erhitzen Sie das Öl oder Fett auf 160 C 2 Geben Sie zwei dünne Scheiben Brot oder einige Zweige Petersilie in die frit teuse 3 Warten Sie bis das Öl oder Fett nicht mehr sprudelt 4 Entfernen Sie das Brot bzw die Petersilie mit einem Schaumlöffel Das Öl oder Fet...

Страница 46: ...wird als Nachweis für den Kauf benötigt Tritt innerhalb von drei Jahren ab dem Kauf datum dieses Geräts ein Material oder Fab rikationsfehler auf wird das Gerät von uns nach unserer Wahl für Sie kostenlos repa riert oder ersetzt Diese Garantieleistung setzt voraus dass innerhalb der Dreijahres frist das defekte Gerät und der Kaufbeleg Kassenbon vorgelegt und schriftlich kurz beschrieben wird worin...

Страница 47: ...n Kauf bereit Die Artikelnummer entnehmen Sie bitte dem Typenschild einer Gravur auf dem Titelblatt ihrer Bedienungsanleitung unten links oder als Aufkleber auf der Rück oder Unterseite Sollten Funktionsfehler oder sonstige Mängel auftreten kontaktieren Sie zunächst das nachfolgend benannte Service Center telefonisch oder per E Mail Ein als defekt erfasstes Gerät können Sie dann unter Beifügung de...

Страница 48: ...scribed and for the stated spheres of application If you pass the product on to a third party always pass on all the documentation as well 1 Product description 1 1 Intended use The SilverCrest SKF 2800 A1 Deep Fat Fryer has been solely constructed for preparing foodstuffs such as potato chips vegetables chicken wings or similar items It is not suitable for any other purpose This appliance should ...

Страница 49: ...arry handle 7 Unlock button of lid 8 Casing 9 Temperature selector 10 Temperature indicator light lights up green as soon as the temper ature selected is reached 11 On Off switch and pilot lamp lights up red as soon as the deep fat fryer is switched on 12 Digital kitchen timer 13 Fat container 14 Frying basket 15 Heating element 16 Cable store 3 Technical data Rated voltage 230 240 V 50 Hz Rated p...

Страница 50: ... When the appliance is running only hold it by its handles Always remove the plug from the mains socket before starting to clean the appliance Never immerse the appliance in water and protect it from splashes and water droplets Before cleaning allow the appliance to cool down to avoid the risk of burns The appliance should only be set up on a firm dry level inflammable surface to prevent it from t...

Страница 51: ...very humid environments If liquid should enter the appliance unplug the mains plug immediately and have the appliance repaired by a qualified technician You will find the service address in Service Centre on page 58 The appliance must be connected up to a mains socket with earthing contact Avoid using extension cables An extension cable may only be used under very specific conditions the extension...

Страница 52: ...out of the reach of children Ensure that a child cannot pull down or tip the appliance onto himself or herself Ensure that the packing foil does not become a deadly trap for a child Packing film is not a toy 4 7 Protection against scalds and burns Warning As the appliance operates at high temperatures please observe the following safety information so that you do not burn or scald yourself All par...

Страница 53: ...er so that it is not damaged 3 Press the unlock button 7 to release the lid The lid 4 will open 4 Move up the handle of the frying basket 1 until it audibly engages 5 Remove the frying basket 14 6 1 Add the oil or fat You should either use liquid frying oil or solid frying fat You should melt solid frying fat in a frying pan or saucepan before adding it to the fryer Note Never mix different types ...

Страница 54: ...ndicator light 10 goes out The oil or fat is now heated to the desired temperature The temperature indicator light 10 lights up green as soon as the oil or fat has reached the set temperature To keep the oil or fat at the right temperature the thermostat automatically switches the heating on and off You can see this by the temperature indicator light 10 regularly going on and off Note We recommend...

Страница 55: ...15 includes a digital kitchen timer 12 Although it has no switching function it allows you to keep an eye on the frying time 1 Switch on timer 12 by pressing the bottom button 2 Select the desired number of minutes using the two buttons at the top 3 Start the kitchen timer 12 by pressing the button at the bottom The Minutes display flashes a few times and the time starts running 4 As soon as the t...

Страница 56: ...om the casing 8 10 Pour away the oil or fat see 9 Cleaning and storing on page 54 11 If you wish to discard the oil or fat please take note of 11 3 Oil on page 56 8 1 Re use the oil or fat Frying oil and fat age and develop unhealthy substances Please note therefore Pour the oil or the still liquid fat through a filter e g tea towel to filter out food remains The best place to store oil is in an o...

Страница 57: ... 2 Little lugs A can be found on the hinges at the rear of the appliance directly under the springs Press these lugs and pull the lid 4 up slightly 3 Take off the lid 4 4 Clean the lid 4 with a little mild detergent in hot water 5 Then rinse with clean water and allow to dry off 6 Insert the lid 4 back into its locators in the casing 8 Make sure that the hinges engage 9 3 Storing To store the appl...

Страница 58: ...ces of bread or a few sprigs of parsley in the stainless steel fryer 3 Wait until the oil or fat no longer bubbles 4 Remove the bread or the parsley with a slotted spoon The oil or fat has a neutral taste again 11 Disposal 11 1 Appliance The symbol with the crossed out rubbish bin on wheels means that within the European Union the product must be disposed of to a sorted rubbish collection This app...

Страница 59: ...tive product and the proof of purchase till receipt are submitted within the three year period and that a brief description in writing is provided of what the defect is and when it occurred If the defect is covered by our warranty the repaired product or a new one will be sent back to you There is no new warranty period following repair or replacement of the product Warranty period and statutory c...

Страница 60: ...ts should occur in the first instance contact the Service Centre mentioned below by telephone or e mail Once a product has been recorded as defective you can then send it Freepost to the service address you are given enclosing the proof of purchase till receipt and quoting what the defect is and when it occurred You can download these instructions and many other manuals product videos and software...

Страница 61: ...RP95885 Fritteuse LB2 Seite 59 Montag 17 Februar 2014 2 35 14 ...

Страница 62: ...ehöfe 5 22761 Hamburg Germany Version des informations Stand van de informatie Stand der Informationen Status of information 12 2013 Ident Nr SKF 2800 A1 2 IAN 95885 RP95885_Kaltzonenfritteuse_Cover_LB2 indd 1 16 12 13 10 29 ...

Отзывы: