


1-8
18
* If a second degauss cycle is needed, allow a minimum interval of 20 minutes for the best result. A humming noise may be heard, but this is not a
malfunction.
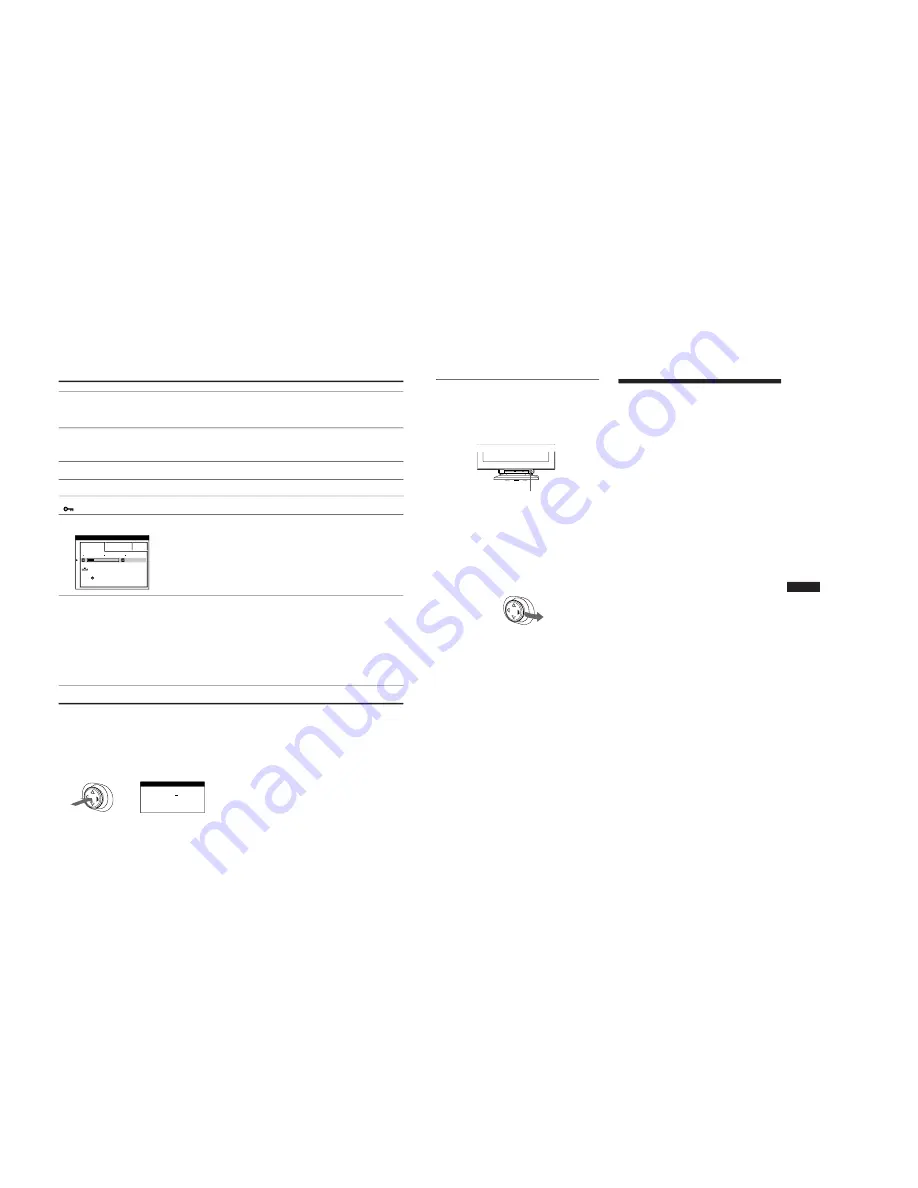
Displaying this monitorís name, serial number,
and date of manufacture.
While the monitor is receiving a video signal, press and hold the
joystick for more than 5 seconds to display this monitorís
information box.
Wavy or elliptical pattern (moire)
is visible
ï Set CANCEL MOIRE to ON and adjust the degree of moire cancellation until the moire is
at a minimum (page 13).
x
Problems caused by the connected computer or other equipment
ï Change your desktop pattern.
Color is not uniform
ï Degauss the monitor* (page 14). If you place equipment that generates a magnetic field,
such as a speaker, near the monitor, or if you change the direction the monitor faces, color
may lose uniformity.
ï Adjust the landing (page 13).
White does not look white
ï Adjust the color temperature (page 11).
ï Check that the five BNC connectors are connected in the correct order (page 6).
Letters and lines show red or blue
shadows at the edges
ï Adjust the convergence (page 14).
Monitor buttons do not operate
(
appears on the screen)
ï If the control lock is set to ON, set it to OFF (page 14).
IMAGE RESTORATION function
does not operate
ï Before using this function, the monitor must be in normal operation mode (green power
indicator on) for at least 30 minutes. For more information on using the IMAGE
RESTORATION function, see page 13.
ï Adjust the computerís power saving settings to keep the monitor in normal operation
mode for more than 30 minutes.
ï The monitor may gradually lose its ability to perform this function due to the natural aging
of the picture tube.
USB peripherals do not function
ï Check that the appropriate USB connectors are securely connected (page 7).
ï Check that the
!
(power) switch is in the ì onî position.
x
Problems caused by the connected computer or other equipment
ï Check that the power of any self-powered USB compliant peripheral devices is ìon .î
ï Install the latest version of the device driver on your computer. Contact your deviceís
manufacturer for information about the appropriate device driver.
ï If your USB compliant keyboard or mouse does not function, connect them directly to
your computer, reboot your computer, and make any necessary adjustments to the USB
settings. Then reconnect the keyboard or mouse to the monitor. If you connect a keyboard
or mouse to the USB connectors and then boot your computer for the first time, the
peripheral devices may not function.
A hum is heard right after the
power is turned on
ï This is the normal sound of the auto-degauss cycle. When the power is turned on, the
monitor is automatically degaussed for 3 seconds.
Symptom
Check these items
EASY
EXPERT
s
B
G
R
5 0 0 0 K
6 5 0 0 K
9 3 0 K
0
5 0
K
0
0
I MAGE
RES TORA T I ON
AVA I L AB L E
A F T ER WARM UP
COLOR
SER NO : 1234567
MODEL : GDM FW9011
MANUFACTURED : 2000-52
INFORMATION
Example
b
19
GB
Self-diagnosis function
This monitor is equipped with a self-diagnosis function. If there is
a problem with your monitor or computer(s), the screen will go
blank and the
!
(power) indicator will either light up green or
flash orange. If the
!
(power) indicator is lit in orange, the
computer is in power saving mode. Try pressing any key on the
keyboard or moving the mouse.
x
x
x
x
If the
!
(power) indicator is green
1 Disconnect any plugs from the video input 1 and 2
connectors, or turn off the connected computer(s).
2 Press the
!
(power) button twice to turn the monitor
off and then on.
3 Move the joystick to the right for 2 seconds before
the monitor enters power saving mode.
If all four color bars appear (white, red, green, blue), the monitor
is working properly. Reconnect the video input cables and check
the condition of your computer(s).
If the color bars do not appear, there is a potential monitor failure.
Inform your service personal of the monitorís condition.
x
x
x
x
If the
!
(power) indicator is flashing orange
Press the
!
(power) button twice to turn the monitor off
and then on.
If the
!
(power) indicator lights up green, the monitor is working
properly.
If the
!
(power) indicator is still flashing, there is a potential
monitor failure. Count the number of seconds between orange
flashes of the
!
(power) indicator and inform your service
personal of the monitorís condition. Be sure to note the model
name and serial number of your monitor. Also note the make and
model of your computer and graphic board.
Specifications
CRT
0.23 ñ 0.27 mm aperture grille pitch
24 inches measured diagonally
90-degree deflection
FD Trinitron
Viewable image size
Approx. 482.1
×
308.2 mm (w/h)
(19
×
12
1
/
4
inches)
22.5" viewing image
Resolution
Maximum (16:10)
Horizontal: 2304 dots
Vertical: 1440 lines
Maximum (4:3)
Horizontal: 2048 dots
Vertical: 1536 lines
Recommended (16:10)
Horizontal: 1920 dots
Vertical: 1200 lines
Input signal levels
Video signal
Analog RGB: 0.700 Vp-p
(positive), 75
Ω
SYNC signal
H/V separate or composite sync:
TTL 2 k
Ω
, Polarity free
Sync on Green: 0.3 Vp-p
(negative)
Standard image area
16:10
Approx. 474
×
296 mm (w/h)
(18
3
/
4
×
11
3
/
4
inches)
4:3
Approx. 395
×
296 mm (w/h)
(15
5
/
8
×
11
3
/
4
inches)
5:4
Approx. 370
×
296 mm (w/h)
(14
5
/
8
×
11
3
/
4
inches)
Deflection frequency*
Horizontal: 30 to 121 kHz
Vertical: 48 to 160 Hz
AC input voltage/current 100 to 240 V, 50/60 Hz, 2.2 ñ 1.2 A
Power consumption
Approx. 170 W (with no USB devices
connected)
Operating temperature
10
∞
C to 40
∞
C
Dimensions
Approx. 571.5
×
500
×
522.5 mm (w/h/
d) (22
1
/
2
×
19
3
/
4
×
20
5
/
8
inches)
Mass
Approx. 42 kg (92 lb 10 oz)
Plug and Play
DDC1/DDC2B/DDC2Bi, GTF**
Supplied accessories
This operating instruction
* Recommended horizontal and vertical timing condition
ï Horizontal sync width duty should be more than 4.8% of
total horizontal time or 0.8
µ
s, whichever is larger.
ï Horizontal blanking width should be more than 2.3
µ
sec.
ï Vertical blanking width should be more than 450
µ
sec.
** If the input signal is Generalized Timing Formula (GTF)
compliant, the GTF feature of the monitor will automatically
provide an optimal image for the screen.
Design and specifications are subject to change without notice.
MENU
INPUT
ASC
RESET
2
1
!
(power) indicator


