Silicon Graphics F181 Скачать руководство пользователя страница 13

English-8

FINE (Analog input only)

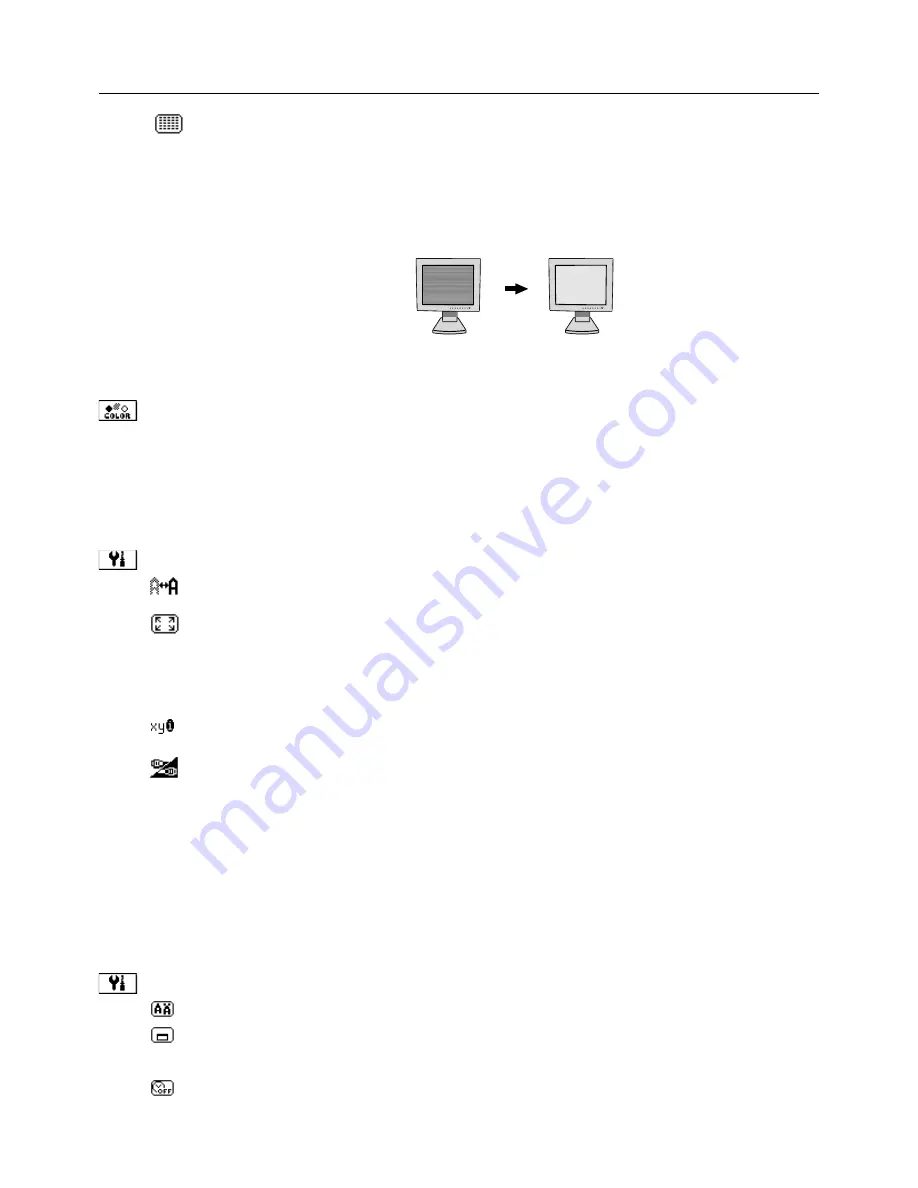
Improves focus, clarity and image stability by increasing or decreasing this setting.

If the “Auto Adjust function” and the “H.Size” function do not give you a satisfactory picture setting, a fine
tuning can be performed manually using the “Fine” function. It improves focus, clearity and image stability
by increasing or decreasing this setting.

For this a Moiré test pattern could be used. If the Fine value is wrongly calibrated, the result would look like
on the left drawing. The image should be homogeneous.

Color Control Systems

Color Control Systems:

 Six color presets select the desired color setting (sRGB and NATIVE color

presets are standard and cannot be changed). Color temperature increases or decreases, in each preset.

R,Y,G,C,B,M,S:

 Increases or decreases Red, Yellow, Green, Cyan, Blue, Magenta and Saturation

depending upon which is selected. The change in color will appear on screen and the direction (increase
or decrease) will be shown by the color bars.

NATIVE: 

Original color presented by the LCD panel that is unadjustable.

Tools 1

SHARPNESS: 

This function is digitally capable to keep crisp image at any timings. It is continuously

adjustable to get distinct image or soft one as you prefer, and set independently by different timings.

EXPANSION MODE: 

Sets the zoom method.

FULL: 

The image is expanded to 1280 x 1024, regardless of the resolution.

ASPECT: 

The image is expanded without changing the aspect ratio.

OFF: 

The image is not expanded.

CUSTOM: 

Select one of the expansion rates from 1.0 to 3.0 times individually at horizontal and

vertical. This mode is for use with special video cards.

RESOLUTION NOTIFIER: 

This optimal resolution is 1280 x 1024. If ON is selected, a message will appear

on the screen after 30 seconds, notifying you that the resolution is not at 1280 x 1024.

VIDEO DETECT: 

Selects the method of video detection when more than one computer is connected.

FIRST DETECT: 

The video input has to be switched to “FIRST DETECT” mode. When current video

input signal is not present, then the display searches for a video signal from the other video input port.
If the video signal is present in the other port, then the display switches the video source input port to
the new found video source automatically. The display will not look for other video signals while the
current video source is present.

LAST DETECT: 

The video input has to be switched to the “LAST DETECT” mode. When the display is

displaying a signal from the current source and a new secondary source is supplied to the display, then
the display will automatically switch to the new video source. When current video input signal is not
present, then the display searches for a video signal from the other video input port. If the video signal
is present in the other port, then the display switches the video source input port to the new found
video source automatically.

NONE: 

The Display will not search the other video input port unless the display is turned on.

Tools 2

LANGUAGE: 

OSD control menus are available in seven languages.

OSD POSITION: 

You can choose where you would like the OSD control image to appear on your screen.

Selecting OSD Location allows you to manually adjust the position of the OSD control menu left, right,
down or up.

OSD TURN OFF: 

The OSD control menu will stay on as long as it is use. In the OSD Turn Off submenu,

you can select how long the display waits after the last touch of a button to shut off the OSD control menu.
The preset choices are 10, 20, 30, 45, 60 and 120 seconds.

When FINE value is

wrong.

When FINE value is

correct.

Controls

 - Continued

Содержание F181

Страница 1: ...Silicon Graphics F181 Flat Panel Display User Guide ...

Страница 2: ...etardants CFCs freons and chlorinated solvents among other things The product must be prepared for recycling and the manufacturer is obliged to have an environmental plan which must be adhered to in each country where the company implements its operational policy The energy requirements include a demand that the computer and or display after a certain period of inactivity shall reduce its power co...

Страница 3: ...e the ozone layer in the stratosphere causing increased reception on Earth of ultraviolet light with consequent increased risks of skin cancer malignant melanoma The relevant TCO 95 requirement Neither CFCs nor HCFCs may be used during the manufacturing of the product or its packaging Bio accumulative is defined as substances which accumulate within living organisms Lead Cadmium and Mercury are he...

Страница 4: ...ruction English 1 Warning English 1 Caution English 1 Contents English 2 Quick Start English 3 Controls English 4 Recommended use English 7 Specifications English 9 Features English 10 Monitor Troubleshooting English 11 ...

Страница 5: ... the flat panel display F181 L182R4 is in compliance with Council Directive 73 23 EEC EN 60950 Council Directive 89 336 EEC EN 55022 EN 61000 3 2 EN 61000 3 3 EN 55024 and marked with Silicon Graphics Inc 1600 Amphitheatre Pkwy Mountain View Ca 94043 U S A ...

Страница 6: ...sonable protection against harmful interference in a residential installation This equipment generates uses and can radiate radio frequency energy and if not installed and used in accordance with the instructions may cause harmful interference to radio communications However there is no guarantee that interference will not occur in a particular installation If this equipment does cause harmful int...

Страница 7: ...splay box should contain the following Display with tilt base User s Manual Video Signal Cable DVI D to DVI D Remember to save your original box and packing material to transport or ship the display User s Manual Video Signal Cable DVI D to DVI D Contents ...

Страница 8: ...end to the power outlet Place the Video Signal Cable and power cord under Cable cover Figure C Replace cable cover Note Adjust position of cable that place under cable cover to avoid damage for cable or display 5 The vacation switch on the left side of the display must be turned on Figure D Turn on the display with the front power button and the computer Note The vacation switch is a true on off s...

Страница 9: ...English 4 Quick Start Continued Figure C Figure D Cable cover Power button Vacation Switch ...

Страница 10: ...r alternate mounting purposes 1 Disconnect all cables 2 Place monitor face down on a non abrasive surface Figure F 3 Remove the hinge cover Figure F 4 Remove the 4 screws connecting the display to the stand and lift off the stand assembly Figure G The display is now ready for mounting in an alternate manner 5 Connect the AC cord and signal cable to the back of the display Figure H 6 Reverse this p...

Страница 11: ...he display must be mounted to an arm which guaranties the necessary stability under consid eration of the weight of the display The LCD display shall only be used with an approved arm e g GS mark Quick Start Continued Thickness of Bracket Arm 2 0 3 2mm Tighten all screws If using other screws check depth of holes Weight of LCD assembly 6 2kg MAX Specifications MAX depth 10mm ...

Страница 12: ...ng this setting Should the AUTO Adjust function do not give you a satisfactory picture setting a further tuning can be performed using the H Size function dot clock For this a Moiré test pattern could be used This function may alter the width of the picture Use left Right Menu to center the image on the screen If the H Size is wrongly calibrated the result would look like on the left drawing The i...

Страница 13: ...ON is selected a message will appear on the screen after 30 seconds notifying you that the resolution is not at 1280 x 1024 VIDEO DETECT Selects the method of video detection when more than one computer is connected FIRST DETECT The video input has to be switched to FIRST DETECT mode When current video input signal is not present then the display searches for a video signal from the other video in...

Страница 14: ...the RESET button Information DISPLAY MODE Provides information about the current resolution display and technical data including the preset timing being used and the horizontal and vertical frequencies Increases or decreases the current resolution MONITOR INFO Indicates the model and serial numbers of your display OSD Warning OSD Warning menus disappear with Exit button NO SIGNAL This function giv...

Страница 15: ... broken do not come in contact with the liquid crystal If glass is broken Handle with care Allow adequate ventilation around the display so that heat can properly dissipate Do not block ventilated openings or place the display near a radiator or other heat sources Do not put anything on top of display The power cable connector is the primary means of detaching the system from the power supply The ...

Страница 16: ...e screen Position whatever you are looking at most of the time the screen or reference material directly in front of you to minimize turning your head while you are typing Avoid displaying fixed patterns on the display for long periods of time to avoid image persistence after image effects Get regular eye checkups Ergonomics To realize the maximum ergonomics benefits we recommend the following Use...

Страница 17: ...r Supply AC100 120 V 220 240 V 50 60Hz Current Rating 0 8 A 100 120 V 0 4A 220 240 V Dimensions 398 mm W x 402 8 mm H x 200 mm D 15 7 inches W x 15 9 inches H x 7 9 inches D Without stand 398 mm W x 342 5 mm H x 73 5 mm D 15 7 inches W x 13 5 inches H x 2 9 inches D Weight 7 3 kg 16 1 lbs Without tilt stand 6 2 kg 13 7 lbs Environmental Considerations Operating Temperature 5 C to 35 C 41 F to 95 F...

Страница 18: ...r and save money Examples include OSD controls for quick and easy image adjustments tilt base for preferred angle of vision small footprint and compliance with MPRII and TCO guidelines for lower emissions Plug and Play The Microsoft solution with the Windows 95 98 Me 2000 XP operating system facilitates setup and installation by allowing the display to send its capabilities such as screen size and...

Страница 19: ...oving screen saver at regular intervals whenever the screen is idle or turning off the monitor when not in use Message OUT OF RANGE is displayed screen is either blank or shows rough images only Image is displayed only roughly pixels are missing and OSD warning OUT OF RANGE is displayed Either signal clock or resolution is too high Choose one of the supported modes OSD warning OUT OF RANGE is disp...

Страница 20: ...860 0358 001 ...

Отзывы: