Silca S.p.A. - OPERA-IV
11
REPLACING THE CUTTING TOOL
The tracer point and cutting tool must always be of the
same thickness.
1) REPLACING A WORN CUTTING TOOL:
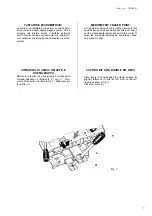
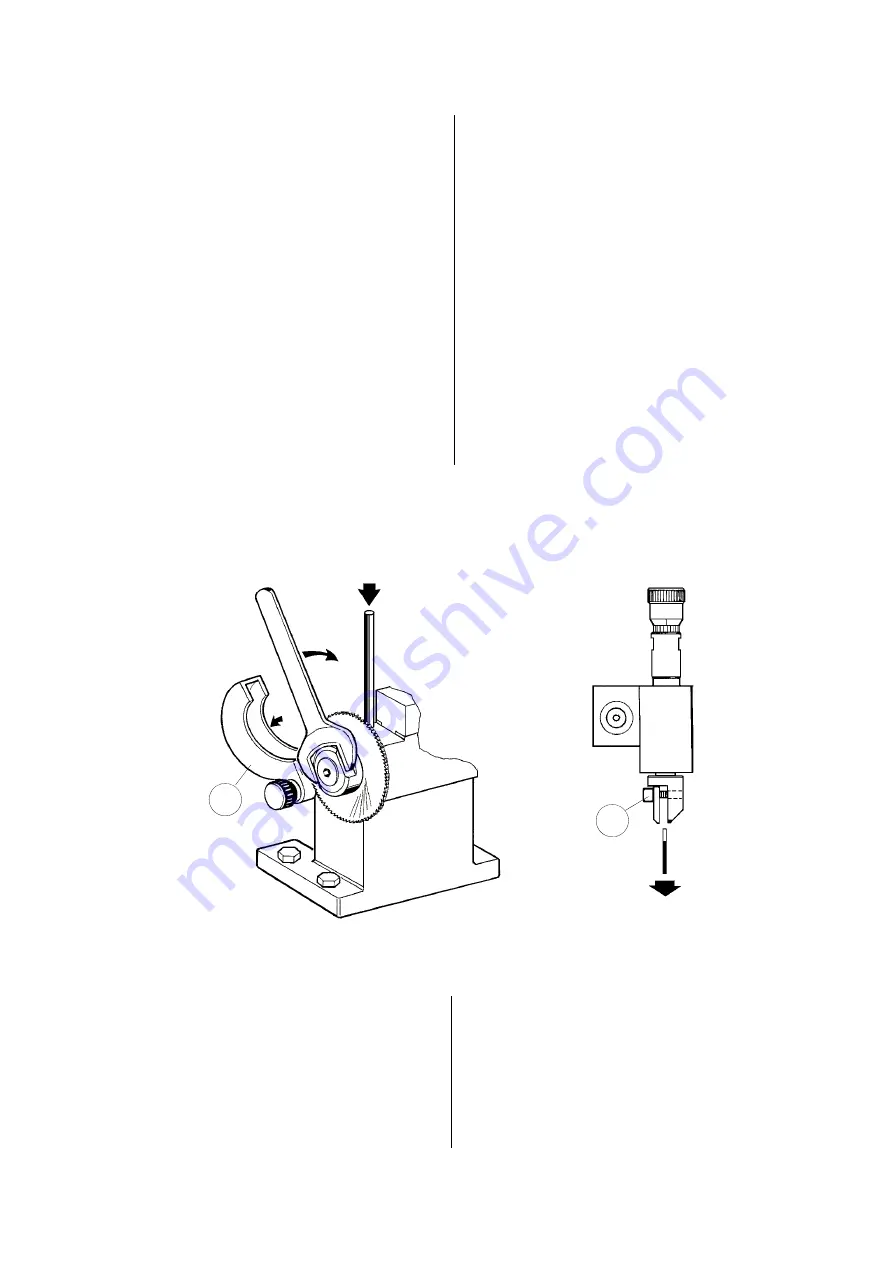
a) Raise the cutter shield (J1), insert the locking bar (“i”
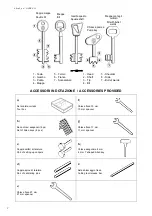
on page 2) into the special hole on the cutter shaft
(Fig.10) and unscrew the nut with the spanner pro-
vided (“e” on page 2).
Attention: the thread is left-handed.
- Replace the cutting tool, observing the direction of
rotation (clockwise).
- Carefully clean the cutting tool hole and its seating
on the shaft.
- Replace the parts in reverse order.
b) Re-set the tracer point following the instructions on
page 6.
2) REPLACING THE CUTTING TOOL WITH ONE OF
DIFFERENT THICKNESS:
Follow the instructions in a) of clause 1 and replace the
cutting tool.
REPLACING THE TRACER POINT
- Unscrew screw (E5) by approximately two turns so
as to release the tracer point (Fig.11).
- Remove by pulling outwards.
- Replace the tracer point by repeating the operation
in reverse order, tighten the screw (E5) holding the
tracer point right up against the end of its seat.
- Re-set the tracer point following the instructions on
page 6.
SOSTITUZIONE DELLA FRESA
Tastatore e fresa devono avere sempre lo stesso
spessore.
1) SOSTITUZIONE DI UNA FRESA USURATA:
a) Alzare il carter fresa (J1), infilare l’asta di sbloccag-
gio ("i" pag.2) nel foro dell’albero fresa (Fig.10) e svi-
tare il dado con la chiave in dotazione ("e" vedi
pag.2).
Attenzione al senso di rotazione.
- Sostituire la fresa facendo attenzione al senso di
rotazione (orario).
- Pulire accuratamente la fresa nel foro e la relativa
sede sull’albero.
- Rimontare i pezzi in senso inverso.
b) Ritarare il tastatore seguendo le indicazioni di
pagina 6.
2) SOSTITUZIONE DELLA FRESA CON UNA DI
SPESSORE DIVERSO:
Seguire il paragrafo a) del punto 1 e procedere alla
sostituzione della fresa.
SOSTITUZIONE DEL TASTATORE
- Svitare di due giri circa la vite (E5) liberando così il
tastatore (Fig.11).
- Sfilare quest’ultimo tirandolo verso l’operatore.
- Sostituire il tastatore, bloccare quindi la vite (E5)
tenendo il tastatore bene appoggiato sul fondo.
- Ritarare il tastatore seguendo le indicazioni di
pagina 6.
E
5
J
1
Fig. 11
Fig. 10
Содержание OPERA IV
Страница 1: ...Operating manual D408570XA vers 2 0...
Страница 2: ......
Страница 8: ......
Страница 12: ......

