background image

7

Software Operation

System Requirement and Precautions

1. 

Whenever power off 4x4 HDMI Video-Wall Processor,    


please stay unpowered at least 5 to 10 seconds to allow power    


capacitors to discharge. 

2.  The 4x4 HDMI Video-Wall Processor provides software   
 

control program which runs under Microsoft Windows XP, 7, 8,    


10 through the interface of RS-232 serial control.

3.  Before you click on the icon of the software, make sure you have  
 

secured the connection between your computer COM port and   


the 4x4 HDMI Video-Wall Processor

Start the software control program

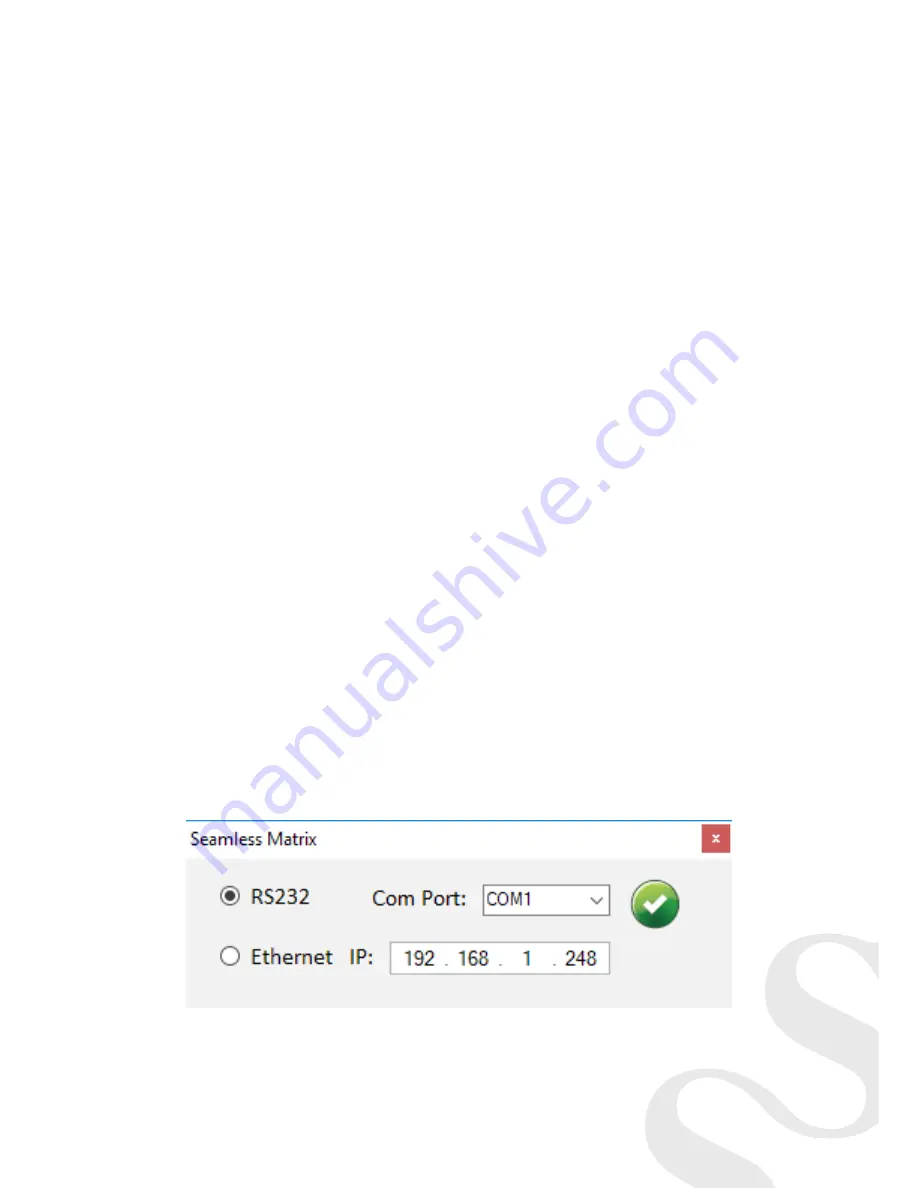
Executing the control software, the following dialog will pop up. It 
has two ways to control the 4x4 HDMI  Video-Wall Processor 
device (under Windows 7, please run as administrator).

1.  RS-232 Connection: Use RS-232 to connect the port on device    
 

and computer. Select correct COM port and click the OK button.

2.  Ethernet Connection: Enter the device IP address and click the    
 

OK button.

Содержание CE-H24C11-S1

Страница 1: ...4x4 HDMI Matrix Video Wall Processor User Manual 04 1169A P N CE H24C11 S1...

Страница 2: ...ze the risk of damage to the unit Follow all instructions and warnings marked on this unit Do not attempt to service this unit yourself except where explained in this manual Provide proper ventilation...

Страница 3: ...ced or progressive Resize position zoom for each HDMI output video Each HDMI output has an independent controllable display area Image parameters and layouts are automatically saved in flash memory of...

Страница 4: ...trol RS 232 Ethernet Front Panel Input TMDS signal 1 2 Volts peak to peak HDMI connector Type A 19 pin female RS 232 connector DE 9 9 pin D sub female RJ 45 connector WE SS 8P8C Mechanical Enclosure M...

Страница 5: ...Button 6 Lock the device s function Button 7 Reset to default 2 Power Status Power LED 3 Lock LED On when user turn on lock function 4 Source LED The LED will show the selected source 5 Source select...

Страница 6: ...6 Application...

Страница 7: ...ore you click on the icon of the software make sure you have secured the connection between your computer COM port and the 4x4 HDMI Matrix Video Wall Processor Start the software control program Execu...

Страница 8: ...Connection Status Show the connect information and status If you use RS 232 control Mode to connect device the graph is For IP control the graph of Ethernet is 2 Matrix You can assign arbitrary video...

Страница 9: ...Vs The information of coordinate shows the position of output TV When setting the different resolution the coordinate of output will also be changed Step 2 Output setting It has three modes to set up...

Страница 10: ...on If you choose the Quick Selection mode in step 2 this window will automatically pop up In this mode you can select default screen split Step 2 2 You can load and read configuration from the existin...

Страница 11: ...n click the SAVE AS button to save the configuration for future usage You can adjust the output position by setting coordinates Step 3 Adjust image Zoom In Out You can change pixel size from the edge...

Страница 12: ...12 4 EDID Extended Display Identification Data 5 Advanced Setting...

Страница 13: ...ecured the Ethernet port connection between your Ethernet and the device 2 Click the Load File button to select the file 3 Click the Start button and the firmware will start to update 4 After updating...

Страница 14: ...network Next you can read the Ethernet setting from your device and manually set to the device After the step of IP configuration please restart the machine This function does not support user use Et...

Страница 15: ...resolutions to be commonly acceptable among all HDMI displays In this case a 720p stereo HDMI signal output would be probably the safest choice Nevertheless the user can force the matrix to learn the...

Страница 16: ...16 Sep 2018 Copyright 2018 by SIIG Inc All rights reserved Support For more info or tech support http www siig com support...

Отзывы: