- 13 -
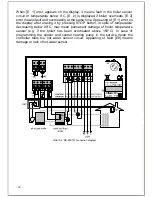
controller. The temperature sensor should be placed in a measurement hole in
the boiler.
CAUTION!
Before plugging in the controller check if the wiring system is properly grounded
and if the terminal screws of the output connector are properly screwed.
CAUTION!
A fan and a central heating pump of maximum power of 450W can be connected
to the controller.
CAUTION!
As additional option you can connect the UM-1 module to the controller that
allows controlling the additional boiler or the mixing valve and the hot water loading pump. It
is necessary to protect the power supply of these devices with suitable cut-outs.
Outputs of the controller that are not used may remain unconnected.
6.2.3)
Operation
After turning the controller on all the elements of the display are lit for a while to
check if they are working properly. The controller, when power appears, returns
to its last state before turning off or power loss.
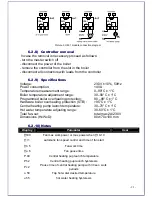
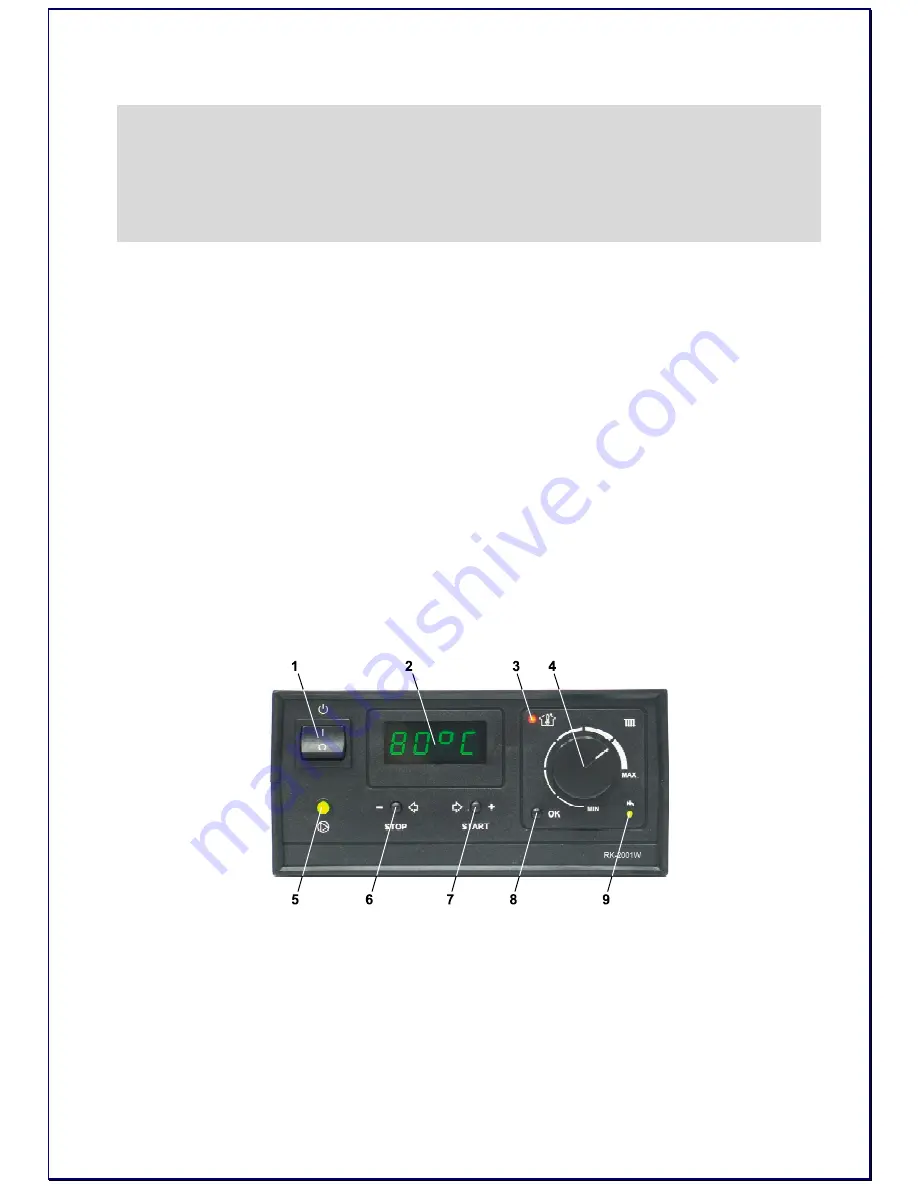
Front panel of the controller (Pic. 1) consists of:
1-Master switch
2-Display, indicating boiler temperature and parameters
3-Room thermostat indicator
4-Boiler thermostat knob
5-Central heating pump work indicator
6-STOP/choose parameters/erase alarms button
7-START/choose parameters button
8-Start programming /confirm parameters settings button
9-Hot water pump work indicator
Picture 1. Front panel of the RK-2001W controller
Basic operation of the controller is carried out by setting the desired
temperature with boiler thermostat knob, other functions are carried out
according to parameters programmed in service mode. The change in the boiler
temperature setting is shown on the display for a few seconds, e.g. [C 55] and
this value means the temperature of the water in the boiler which the controller
will be trying to achieve. You can also check this value by pressing OK button
Содержание Holzgas
Страница 25: ... 25 8 Parts ...
Страница 28: ... 28 ...
Страница 30: ... 30 ...
Страница 31: ... 31 ...
Страница 32: ... 32 ...


