


12
tank and the carburetor. It allows you to pump in fuel without
having to remove the carb line from the engine. We use and
recommend the Du-Bro #334 GLOW Kwik-Fill Fueling Valve, and
the Du-Bro #335 GAS Kwik-Fill Fueling Valve. Locate the fueling
valve in a position where it is easily accesible from outside the
cowling.
❑
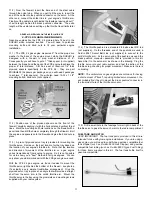
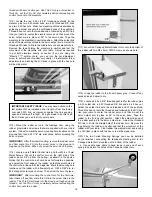
3) Fit the 1/8" x 3-1/2" x 7-1/2" plywood front fuselage hatch
onto the nose of the airplane. Simply set the hatch in place and
drill a 3/64" (or #56) dia. hole through each corner of the hatch
and on through the plywood corner tabs mounted in the fuselage.
Take the hatch off and open up the holes in the hatch to 7/64"
diameter. Screw the hatch in place with the M2.6 X 10mm PWA
screws provided. Trim or sand any overhanging edges of the hatch
flush with the fuselage.
ADDITIONAL FUEL PROOFING: It's a good idea to paint the
hatch, firewall, and bare wood areas of the nose with a fuel-proof
paint such as clear dope, epoxy, enamel, or similar. A light coat of
fuel-proofer has been applied at the factory, but another coat will
increase the life of the model and treat the newly exposed areas
that you have drilled and/or cut out.
MOUNTING THE COWLING
❑
1) Before mounting the cowling, carefully inspect its inside
rear edges. Use sandpaper to smooth the inside rear surface of
the cowl, making it free of any bumps or ragged edges that may
scratch or dent the fuselage when pressed in place. Also make
sure the four mounting holes in the sides of the cowl are open and
free of any debris.
❑
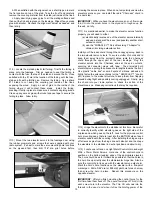
2) Slide the fiberglass cowling over the engine and back onto
the fuselage. Watch carefully to see if the cowling is going to clear
your engine installation. Continue sliding the cowling back onto
the fuselage until the engine's prop drive washer clears the front
of the cowling by at least 1/16" (1/16" to 1/8" is OK). When you've
got the position of the cowl right, use masking tape to secure the
back edge of the cowling firmly to the fuselage. Leave the four
pre-drilled mounting holes along the back edge of the cowling
uncovered for the next step.
NOTE: The SUKHOI has lots of room inside the cowling, and the
engines that we have used fit completely inside - except for the
muffler pipes and the spark plug of the FPE 2.4 gas engine.
❑
3) With the cowl securely taped in place, use a 3/64" (or #56)
dia. bit to drill pilot holes in the fuselage, centered in each of the
four pre-drilled holes in the cowl.
Mount the cowling to the
fuselage with four M2.6 x 10mm PWA screws. Double check your
work one more time to make sure that the cowl is bolted on in the
correct location and alignment. Then remove the cowling from the
fuselage.
❑
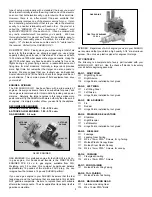
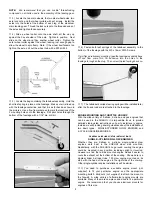
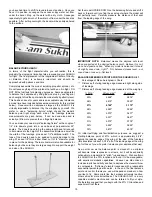
1) Assemble the fuel tank as shown. Be sure to label the
"vent" and "carb" lines for later identification.
❑
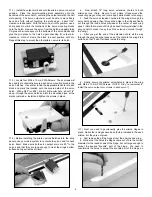
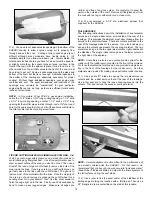
2) Working through the wing opening in the fuselage, slide the
tank into the contoured hole in the front fuselage former. Slide it
forward until the front of the tank is approx. 1" back from the
firewall. This will allow room for your fuel line tubing to be curved
behind the firewall over to the carb side of the engine. Drill a 5/16"
dia. hole in the firewall for the fuel feed tubing to pass through. Drill
a 5/16" dia. hole in the tank compartment floor that will let the fuel
tank vent tubing exit the bottom of the airplane. Be sure that you
don't have any kinks in the fuel line tubes that could restrict the fuel
flow. To keep the tank from moving in flight, run a bead of silicone
seal around the tank body where it contacts the fuselage former.
Another glob of silicone seal at the front of the tank secures it to
the plywood tank floor. If the tank ever has to be removed for
service, you can cut the silicone loose and get the tank out.
NOTE: Now is the time to think about how you are going to fuel
and de-fuel your airplane. With the fuel tank assembled as shown
in the earlier steps, with one carb tube and one vent tube, you will
need to pump fuel into the carb line until it runs out the vent line.
When fuel runs out the vent line, the tank is full. With the cowling
on, it's going to be nearly impossible to reach the lines for fueling.
In this situation, we like to use a remote "fueling valve" (not
supplied). The fueling valve goes in the carb line, between the
Содержание SUKHOI SU-31 ARF
Страница 23: ...23 ...