background image


Español • 

 11

Comenzar

Usar - La Estufa

Cuidado y Limpieza

A

u

toa

yuda

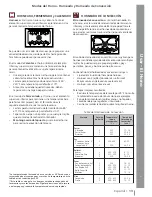
Rejillas del Horno

Su horno tiene dos rejillas planas y una de extensión
completa. Están diseñadas con un tope para detenerse
antes de salir completamente y para no caerse.

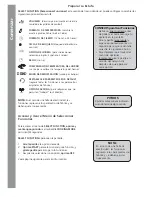
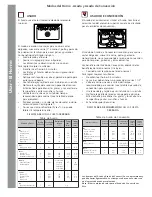
Modos y Características del Horno

Las dos secciones de la rejilla se desarman para facilitar
la limpieza.

  Para hacerlo, coloque la rejilla sobre una

superficie plana en la posición cerrada con el lado
superior hacia arriba. Jale el frente de la rejilla hacia arriba
y gire un lado hacia Ud. hasta que salga del tope (bola).
Jale la rejilla y sáquela con el lado girado primero (Vea
Figura 2).

Para reensamblar la rejilla

, sostenga la rejilla superior

diagonalmente sobre la rejilla inferior. Inserte un lado de
la rejilla superior a la posición cerrada. Gire el otro lado
hacia el fondo de la rejilla hasta que rebase el tope (bola).
Empuje la rejilla completamente (Fig. 3)
Si la rejilla superior no se extiende completamente, no se
instaló correctamente. Vuelva a instalarla de modo que el
tope de ollas quede en el fondo del horno.

Sacar del horno: 

Agarre la rejilla firmemente en ambos lados

y jálela hacia Ud.  Al llegar al tope, incline la rejilla hacia
arriba y jálela completamente

Reemplazar en el horno:  

Agarre la rejilla firmemente en

ambos lados. Incline la rejilla hacia arriba para encajar el
tope en el portarejilla. Cambie la rejilla a una posición
horizontal y empújela completamente. La rejilla debe
estar recta y plana, no torcida.

Nota:

  La rejilla de extensión completa debe estar en la

posición cerrada cuando la quiere quitar o reemplazar.
Agarre toda la rejilla (ambas secciones).

La rejilla de extensión completa

 permite un acceso más

fácil para cocinar alimentos. La sección inferior se
extiende igual que la rejilla plana estándar. Sin embargo,
la sección superior se extiende más allá de la sección
inferior, de este modo acercando los alimentos al usuario.
Para pedir una rejilla de extensión completa, contacte al
Servicio de Siemens: 866-44SIEMENS (447-4363) para
localizar un distribuidor cerca de su casa.

Uso:

  Primero, agarre la sección inferior y jálela hacia Ud.

Una vez que llegue al tope, agarre la sección superior y
jálela hacia Ud. hasta llegar al segundo tope.

Limpiar:

  Limpie la rejilla con agua jabonosa caliente.

Seque bien. Para suciedad persistente, use esponjillas de
fibra metálica con jabón.  

NO limpie la rejilla en el horno

de autolimpieza.

Topes para 

Ollas

Rejilla
Superior

Rejilla
Inferior

Guía de
Rejilla

Descanso
de Rejilla
Superior

Topes

Figura 1 - La rejilla de extensión completa

Fondo de Rejilla

Posición
Cerrada

Fondo de Rejilla

Frente de Rejilla

Fondo de Rejilla

Frente de Rejilla

Figura 3 - Volver a armar la rejilla

Posición
Cerrada

Siempre verifique que se

instale correctamente la rejilla superior después del
reensamblado. Los bordes traseros de la rejilla superior
deben quedar abajo de la guía en la rejilla inferior. NO
descanse simplemente la rejilla superior sobre la inferior.

Fondo de Rejilla

Frente de Rejilla

Insertar rejilla con el

fondo de la rejilla hacia la

pared trasera de la estufa

Figura 1 - La rejilla plana

CUIDADO:

Para evitar posibles quemaduras, coloque las rejillas del
horno en las posiciones deseadas antes de prender el
horno. Siempre use guantes cuando el horno está caliente.
Si debe sacar la rejilla cuando el horno esté caliente, no
toque el elemento calentador con los guantes

CAUTION:

Usar - El Horno

Posición
Cerrada

Rejilla

superior

Rejilla

inferior

Frente de Rejilla

Figura 2 - Desarmar la rejilla

Содержание xTronic HD2416C

Страница 1: ......

Страница 2: ...e cancer birth defects or other reproductive harm and requires businesses to warn customers of potential exposure to such substances The burning of gas cooking fuel and the elimination of soil during self cleaning can generate small amounts of Carbon Monoxide The fiberglass insulation in self clean ovens gives off very small amounts of formaldehyde during the first several cleaning cycles Californ...

Страница 3: ...ktop Operation 10 The Oven Oven Modes and Features 11 Oven Modes and Features Bake and Convection Bake 13 Oven Modes and Features Broil and Convection Broil 14 Oven Modes and Features Convection Roast 15 Oven Modes and Features Dehydrate 16 Selecting the Oven Mode 17 Using the Timer s 18 Using Timed Cook 19 Using the Probe 20 The Warming Drawer 21 Using the Warming Drawer 22 Care and Cleaning Cook...

Страница 4: ...ure that uses our built in heat diffuser to drop output to the equivalent of just 400 btus Convection self cleaning Uses the convection fan for more thorough cleaning and offers variable cleaning times for flexibility Choose five hours for regular cleaning and three hours for quick cleaning Both programs will thoughtfully remind you to remove the oven racks Intelligent product design allows for th...

Страница 5: ...calsthatcould beignitedifbroughtincontactwithhotsurfaceunitsor heatingelementsandmaycausesevereburns In the event that personal clothing or hair catches fire DROP AND ROLL IMMEDIATELY to extinguish flames Do not touch the cooking area s or the immediate surroundingarea s whileusingtherangeorwhileitis cooling Areasadjacenttotheburners ovenandwarming drawermaybecomehotenoughtocauseburnsandmaybe hote...

Страница 6: ...h heat settings with these types of utensils can cause poor combustion Poor combustion results in harmful by products Match pan size to size of burner Undersized pans expose element to direct contact which could result in burn or injury Do not allow flames to spread around or over the rim of a pan that contains grease A grease fire could be ignited Proper pan size also improves efficiency Clean co...

Страница 7: ...en Racks Flat 2 5 Oven Rack Full Extension 6 Probe 7 Warming Drawer Rack Self Cleaning Safety Continued Donotcleantheovengasket Itisessentialfora good seal Careshouldbetakennottorub damage moveor removetheovengasket Do not use commercial oven cleaners or oven liner protective coatings of any kind in or around any part of the oven Clean only oven parts listed in this manual Remove the broiler pan o...

Страница 8: ...rnaltemperatureoffoodwhen probe is in use Probe Indicator Indicates the probe is installed in oven The internal temperature of the meat is displayed in place of the preheat temperature Start Touch pad to complete an entry Temperature Touch pad to select cooking temperature Time Touchpadtoselectclocktimeorcookingtime Other Indicators and Features Beep Signals that more information must be entered o...

Страница 9: ...knobtodisplayclockwhentimerisrunning The oven is preset to a 12 hour clock and indicates AM and PM The clock display can also be turned off See Clock Display Page 7 1 CLOCKwillbedisplayedandthehourdigitswill flash Turn knob to select hour and AM or PM 2 TouchTIME CLOCKwillstillbedisplayedandthe minutedigitswillflash 3 Turn knob Set minutes 4 Touch TIME and the clock is now set Changing the Clock T...

Страница 10: ...a power failure the functions return to the factory settings and will need to be reset DEMO Accessing and Using the Select Functions Menu To access theSELECT FUNCTIONS menu touch and hold COOKING MODE touch pad for five 5 seconds SELECTFUNCTION isdisplayed 1 Turn knob to desired feature 2 Press START to choose any function and turn knobtochooseanysub functions 3 After selecting feature touch OFF S...

Страница 11: ...btoselectvolumelevelLow Medium or High 5 TouchSTART BEEP VOLUME The volume of the control beep can be changedfromLOW softest toHIGH loudest ThecontroldefaultforbeepvolumeisMEDIUM LOCK KEYS The oven keypad can be locked for safety purposes This feature can be used to prevent changes totheovenfunction Locking or Unlocking the Oven Control Panel 1 AccessSELECTFUNCTIONMenu 2 TurnknobclockwiseuntilLOCK...

Страница 12: ...lshow SABBATH and the BAKE icon will be displayed The clock will be off and no temperature will show in the display During the Sabbath mode only the OFF key will operate Press Off at any time during the Sabbath mode to end the mode and turn off the oven At the end of 73 hours the oven will turn OFF automaticallyandthedisplaywillshowSABBATHEND Touch OFF to return to time of day Sabbath Feature Theo...

Страница 13: ... placed correctly the burner may not light or the flamemaynotburncompletelyorcorrectly Burner Grates Your cooktop has two grates one for the left side of the cooktopandonefortherightsideofthecooktop Position them as shown in the figure below Do not operate the burner without a pan on the grate Use this chart as a guide for heat settings Heat Settings Uses Bringingwatertoaboil High Panfrying sautei...

Страница 14: ...ace knob in the OFFposition Pullstraightoutandoff Springandbezel will be loose and can be pulled straight off after the knob isremoved To replace knob spring and bezel Place spring and knob on top of bezel being careful to line up center holes Push down on knob so that spring is tense With knob in off position place center hole around shaft on range and push bezel spring and knob in toward range R...

Страница 15: ...replacing Grasp the entire rack bothsections The Full Extension Rackallowsforeasieraccessto cookingfoods Thebottomsectionextendsasfarasthe standardflatrack However thetopsectionextends beyondthebottomsectionbringingthefoodclosertothe user To order a full extension rack contactSiemens Service 866 44SIEMENS 447 4363 foradealernear you Use First graspthebottomsectionandpullstraightout Once the stop i...

Страница 16: ...an one pan on a rack allow at least 1 to 1 of air space around the pan When baking four cake layers at the same time stagger pans on two racks so that one pan is not directly above the other To allow for best baking results place cakes on back of upper rack and front of lower rack see graphic at right Preheating Preheat the oven if the recipe recommends it Preheatingisnecessaryforgoodresultswhenba...

Страница 17: ...mongotheritems ThebenefitsofConvectionBakinginclude Slightdecreaseincookingtime Three rack cooking more even browning HigherVolume yeastitemsrisehigher Cookmoreitemsatonce ForBestResults Reduce recipe temperature by 25 F Refer to the ConvectionBakingchartforexamples Placefoodinlow sided uncoveredpanssuchas cookiesheetswithoutsides Center baking pans side to side on the oven rack Baking is cooking ...

Страница 18: ...ceto preventsmokingandspattering Saltaftercooking ALWAYS BROIL WITH THE DOOR CLOSED ALWAYS CONVECTION BROIL WITH THE DOOR CLOSED Broiling and Convection broiling times are approximate and may vary slightly Times are based on cooking with a preheated broil element Note The only heat setting for the Convection Broil setting is High ConvectionBroilChart Broil Chart d n a d o o F s s e n k c i h T k c...

Страница 19: ...e m i T r e p n i m b l l a n r e t n I p m e T F f e e B t s a o R b i R t s a o R e y E b i R s s e l e n o b p i T e y E p m u R s s e l e n o b n i o l r i s t s a o R n i o l r e d n e T 6 4 6 4 6 3 3 2 5 2 3 5 2 3 5 2 3 5 2 4 2 3 5 2 2 3 8 2 2 3 4 2 2 3 7 2 0 3 5 2 2 3 8 2 5 2 5 1 e r a r d e m 5 4 1 m u i d e m 0 6 1 e r a r d e m 5 4 1 m u i d e m 0 6 1 e r a r d e m 5 4 1 m u i d e m 0 6 ...

Страница 20: ...t a w s p u c y r d l e w o t d n a h s a W s e i r r e h c h s e r f r o F s t i p e v o m e r e g n a r o f o s e c i l s n i k s f o t r a p e g n a r o m o r f d e l e e p y l n i h t s e g n a r o d e i r d l e w o T y r d l e w o t d n a h s a W n i k s k c i h t d e c i l S n o n w o d e d i s t u o k c a r 5 1 1 1 5 1 0 1 5 1 0 1 4 2 s l e e P 6 1 2 1 s e c i l S 3 1 9 d e n n a C 2 1 8 h ...

Страница 21: ... the knob to select new Temperature andpressSTART 9 Oncecookinghasbeencompleted touchOFF to turnoffoven Note After the oven has been turned off HOT appears in the display where the cooking mode was This is to indicate that the oven is off but still hot When the oven temperature drops below 176 F HOT is no longer seen inthedisplay Oven Operation Time Theovenwillautomaticallyshutoffafter12hours 24 h...

Страница 22: ...ET TIMER 1 2 appears in the display Minutedigitsflash 3 Turn knob to change minutes 4 Touch TIMEagainandhourdigitswillflash 5 Turn knob to change hours 6 Touch TIME and new time is set SET TIMER 2 SET TIMER 2 SET TIMER 2 SET TIMER 2 SET TIMER 2 1 00 00 00 00 00 HR MIN TIMER SET TIMER 2 SET TIMER 2 SET TIMER 2 SET TIMER 2 SET TIMER 2 2 2 2 2 2 02 HR MIN TIMER PM Whenthespecifiedtimehaselapsed theco...

Страница 23: ...rs Touch TIME Set minutes Touch TIME Theclockautomaticallycalculatesthetimeofdayat whichthecookingmodestartsandstops The displayedcookingtimecountsdownbytheminute 7 Attheendoftheprogrammedcookingtime the ovenwillautomaticallyturnoff Displaywillshow TIME COOK END and the oven will beep Note Remove food from oven immediately aftercycle hasfinishedtopreventovercooking Foodleftinthe ovenwillcontinueto...

Страница 24: ... to 200 F Preheating the oven is not recommended when usingtheprobe Ahotovenwillimpairyourability to easily connect the probe to the receptacle and to insert it into the meat Oventemperaturecanbesetfor100 Fupto450 F Inserting the Probe Inserttheprobetipintothefooditem Formeats inserttheprobetipintothethickest part and do not touch bone fat or gristle Forlargepoultryproductsandturkeys insertthe pro...

Страница 25: ...The warming drawer can be used with or without a rack Preheat with rack in place if using this arrangement It fitssidetoside Preheat empty serving dish while preheating drawer if desired Place cooked hot food in warming drawer in its original cooking container or in a heat safe serving dish Aluminumfoilmaybeusedtocoverfood HoweverDO NOTlinethewarmingdrawerwithaluminumfoil DO NOT use the warming dr...

Страница 26: ... Bowls and Plates Useonlyheat safedishes Mayusereversiblerack inlowpositiontoraise utensilfromdirectcontactwithbottomofdrawer Warmonsettingappropriateforutensil Checkdishtemperatureduringwarmingperiod Place empty plates or dishes in a cold warming drawer Do not preheat drawer prior to placing dishes Crisping Stale Items Placefoodinlowsideddishesorpans Preheat on Low Checkcrispnessafter45minutes Ad...

Страница 27: ...brasive cleaners Bon Ami and Soft Scrub Carefully wipe with a cotton swab dampened with water ammonia or Formula 409 Burner Base Aluminum Burner Cap and exterior finish PorcelainEnamel Control Knobs and Bezels Plastic Exterior Finish Stainless Steel Grates Porcelain Enamel on Cast Iron Igniters Ceramic Clean ports with a stiff nylon bristle toothbrush to clean port openings Do not scratch or gouge...

Страница 28: ... clean gasket DO hand clean frame area outside gasket DO hand clean door areaoutside gasket DO hand clean 1 1 2 fromrack guides tofrontofoven cavity WARNING To avoid a burn hazard keeptheovengasket flexible nothard Siemensovensfeatureaself cleaningfunctionthat eliminatesthemanuallaborinvolvedwithcleaningyour oven During self cleaning the oven uses a very high temperaturetoburnawayfoodsoilandgrease...

Страница 29: ...racks 9 TouchSTART ThedisplayshowsDELAYEDCLEAN Theself cleanwillautomaticallystartatthe appropriatetime Note In the Delayed Self Clean mode the door latch isautomaticallyactivated atthebeginningofthecycle Thedoorlocksymbolwillappearinthedisplayatthis point The oven lights do not operate in the Self Clean mode NOTE After Self Cleaning 1 At the end of the programmed cleaning time the ovenwillautomat...

Страница 30: ...with soap and water or glass cleaner Use Fantastik or Formula 409 to remove grease spattersandstubbornstains Painted Clean with hot sudsy water or apply Fantastik or Formula 409 to a clean sponge or paper towel Surfaces and wipe clean Avoid using powdered cleansers steel wool pads and oven cleaners Porcelain Immediatelywipeupacidspillslikefruitjuice milkandtomatoeswithadrytowel Donotusea Surfaces ...

Страница 31: ...dhelpsshortenthecookingtime Forbestresults choosecookwarewiththefollowingcharacteristics Aluminumorcopperbottomedpansconductheatevenly Steelpans ifnotcombinedwithothermetals maycookunevenly Cast ironcookwareabsorbsheatslowlyandcooksmoreevenlyatlow to mediumsettings Flat heavybottompansprovideevenheatandstability DO NOT USE pans that are thin warped dented or ridged as they heat unevenly Usea wokwi...

Страница 32: ... Use a 40 Watt approvedappliancebulb Avoidtouchingthebulb with fingers as oils from hands can damage the bulb whenitbecomeshot 6 Screw the lens back on 7 Turn power back on at the main power supply fuse or breaker box Figure A Make sure the oven and lights are cool and power to the oven has been turned off before replacing thelightbulb s Failuretodosocouldresultin electricalshockorburns The lenses...

Страница 33: ...astiffnylonbristletoothbrushtopushdebristhroughburnerports Misalignedburnercap Verifythatburnercapsareproperlypositionedover burners Ignitor is wet damaged or dirty Check ignitor for moisture If wet allow to air dry before using Check for burned on food or grease See cleaning recommendations page27 Burnerwillnotlightifignitoriswet damagedor dirty Burnerportsareclogged Withthecooktopturnedoffandcoo...

Страница 34: ... breaker and wait 5 minutes Turn breaker back on The oven should reset itselfandwillbeoperable Check the circuit breaker or fuse box to your house Make sure there is proper electrical power to the oven Make sure the oven temperature has been selected Checkovencalibration Adjustcalibrationifnecessary see OvenTemperatureOffset Page7 Refertocookingcharts forrecommendedrackposition Alwaysreducerecipe ...

Страница 35: ...here is no draft in the room 5 Checkthepowersupply Itshouldbeproperlygroundedwiththecorrectpolarity Verifythattheunitispluggedin and the circuit breaker is not tripped Note When the electrical power connection has been activated at the first power up or after an outage the ignitors may spark once or twice even though all burner knobs are in the off position Ifthecooktopisstillnotoperatingproperly ...

Страница 36: ...l surfaces and exposed parts of Range on which the serial numbers have been altered defacedofremoved Totheextentallowedbylaw thiswarrantysetsoutyourexclusiveremedieswithrespecttoproductscoveredbyit whethertheclaimarisesincontractortort includingstrictliabilityandnegligence orotherwise THEFOREGOING REPRESENTS THE TOTAL EXTENT OF BSH S RESPONSIBILITY AND LIABILITY WITH REGARD TO THE PRODUCT IN NO EV...

Страница 37: ......

Страница 38: ...aire fonctionner le four ou les contrôles de la surface de cuisson si le verre est brisé Les éclaboussures ou les produits de nettoyage peuvent pénétrer un panneau de contrôle brisé et causer un risque de choc électrique Communiquer avec un technicien qualifié immédiatement Au moment d utiliser un électroménager les précautions de base doivent être observées incluant ce qui suit aux pages suivante...

Страница 39: ...stiques 11 Mode four et caractéristiques Cuisson et cuisson par convection 13 Mode four et caractéristiques Gril et gril par convection 14 Mode four et caractéristiques Rôtissage par convection 15 Mode four et caractéristiques Déshydratation 16 Sélection du mode four 17 Utilisation de la des minuterie s 18 Utilisation de la cuisson minutée 19 Utilisation de la sonde 20 Tiroir réchaud 21 Utilisatio...

Страница 40: ......

Страница 41: ... ils peuvent s enflammer au contact de la surface chaude et causer des brûlures Dans le cas où les vêtements ou les cheveux d une personne prennent feu SE LAISSER TOMBER ET ROULER IMMÉDIATEMENT pour éteindre les flammes Ne pas toucher aux zones de cuisson environnantes pendant l utilisation de la cuisinière ou lorsqu elle refroidit Les zones adjacentes aux brûleurs four et tiroir réchaud peuvent d...

Страница 42: ... Utiliser seulement les ustensiles appropriés pour la surface de cuisson Voir Guide de cuisson page 27 pour plus de détails D autres types d ustensiles peuvent se briser avec les changements brusques de température Utilise selon les directives du fabricant Utiliser seulement un réglage faible ou moyen lorsque possible particulièrement avec les casseroles plus larges que la grille ou utilisant plus...

Страница 43: ...degarantie enregistrement 4 Grillesdefour plates 2 5 Grilledefourpleinlongueur 6 Sonde 7 Grille de tiroir réchaud 11 Sécurité autonettoyage suite Ne pas nettoyer le joint de la porte Il est essentiel pour une bonne étanchéité Ne pas frotter endommager déplacer ou enlever le joint de la porte NE pas utiliser de produits nettoyants commerciaux ni d enduit protecteur dans ou autour du four Nettoyer s...

Страница 44: ... la température du four pendant le préchauffage et la température interne des alimentslorsquelasondeestutilisée Voyant sonde Indique si la sonde est branchée dans lefour Latempératureinternedesvidandesfigureau lieudelatempératuredepréchauffage Marche Presser pour compléter une entrée Température Presser pour sélectionner une températuredecuisson Temps Presser pour régler la pendule minuterie Autre...

Страница 45: ...lectionnerPENDULE 3 PresserTIMEdenouveau L heureclignote 4 Tourner le bouton pour changer l heure 5 PresserTIMEencore lesminutesclignotent 6 Tourner le bouton pour changer les minutes 7 Presser TIME encore la pendule est réglée Remarque pour passer en mode 24 h voir SELECT FUNCTIONS à la page 7 Réglage de la pendule si alimentation hors circuit à la cuisinière 1 PENDULEfigureetleschiffresdel heure...

Страница 46: ... religions qui exigent le sans travail Accès et utilisation du menu de sélection de fonctions PouraccéderaumenuSELECTFUNCTION presseret maintenir la touche COOKING MODE mode de cuisson pendant5secondes SELECTFUNCTIONfigure 1 Tourner le bouton à la fonction désirée 2 PresserSTARTpourchoisirunefonctionettourner le bouton pour choisir une fonctionsecondaire 3 Aprèsavoirchoisila les caractéristique s ...

Страница 47: ...estl anglais Changementdel afficahgedelangue 1 AccéderaumenuSELECTFUNCTIONS 2 Tournerleboutondanslesenshorairejusqu àce que LANGUAGE OPTION figure 3 PresserSTART 4 Tourner le bouton dans le sens horaire pour sélectionnerlalangue 5 PresserSTARTpouraccepterlasélection TOUCHES VERROUILLAGE Leclavierpeutêtreverrouilléàdesfinsdesécurité Cettecaractéristiquepeutêtreutiliséepouréviterle changementdefonct...

Страница 48: ...meure en ou hors circuit pendant toutleSabbat 7 Presser START Le four se met en circuit après 5 secondes Remarque la sonde NE PEUT PAS être utilisée pendant cemode Pendantlacuissonàcemode l affichageindique SABBATH et l iconeCUISSON s affiche La pendule est hors circuit et il n y a pas de température à l affichage Pendant ce mode seule la touche arrêt est fonctionnelle Presser OFF en tout temps pe...

Страница 49: ... capuchons amovibles Il n y a pas de pièce de brûleur sous la surface de cuisson à nettoyer démonter ou régler Il y a quatre 4 capuchons de format différent Faire correspondre la casserole à la dimension du brûleur Utilisation Réglages Eau à ébulition Élevé Friture sauté brunir la viande Moyen élevé Friture oeufs crêpes mijoter Moyen Terminer la cuisson d aliments couverts cuire à l étuvée Moyen b...

Страница 50: ...urannt le bouton dans le sens horaire jusqu àOFF Pour enlever le bouton ressort et plaque placer le bouton en position OFF Tirer droit Le ressort et la plaque se relâchent et peuvent être enlevés droit Pour remettre le bouton ressort et plaque placer le ressort et le bouton sur le dessus de la plaque en alignantlestrousducentre Poussersurleboutonpour queleressortsetende Leboutonenpositionarrêt pla...

Страница 51: ...emens 866 44SIEMENS 447 4363 pourunmarchand àproximité Utilisation saisir d abord la section inférieure et tirer Unefoislabutéeatteinte saisirlasectionsupérieureet tirerjusqu àcequeladeuxièmebutéesoitatteinte Nettoyage nettoyer la grille à l eau chaude savon neuse asséchercomplètement NEPASnettoyerdansle fourautonettoyant ATTENTION Pour éviter les brûlures placer la grille à la position désirée av...

Страница 52: ...four est préchaufféetlatempératurechoisieestaffichée Moules à cuisson Les plats en verre absorbent la chaleur réduire la température de 25 F avec ce type de plats Le métal brillant et lisse réfléchit la chaleur résultant en unbrunissagepluspâle Lesplatsfoncés rugueuxoumatsabsorbentlachaleur résultantenunecrouteplusfoncée Certainsfabricants recommandentd abaisserlatempératurede25 F Suivrelesinstruc...

Страница 53: ...ératuredufour s t n e m i l A n o i t i s o P e l l i r G e r u t a r é p m e T r u o f F é f f u a h c é r p e d s p m e T n o i t c e v n o c n i m u a e t â G x u a e t â g s t i t e P t d n u B u a e t â G s e g n a s e d u a e t â G s t n e n i l A 3 2 1 5 2 3 5 2 3 5 2 3 9 1 7 1 3 4 7 3 9 3 5 3 s e t r a T o p 9 e h c î a r f s e t û o r c 2 s t i u r f s e t û o r c 2 o p 9 s é l e g r u s ...

Страница 54: ...esexemples Utiliser la rôtissoire et le plateau compris avec le four Nepascouvrirlarôtissoireavecdupapieraluminium Cela est conçu pour drainer le gras de la surface de cuissonetempêcherlafuméeetleséclaboussures Saleraprèslacuisson TOUJOURS GRILLER À CONVECTION LA PORTE FERMÉE Tableau de gril à convection r u e s s i a p é t e t n e m i l A n o i t i s o P l i r g l i o r B g n i t t e S e r u t a ...

Страница 55: ...e r u t a r é p m e T F r u o f e d s p m e T s s i t ô r b l r a p n i m e r u t a r é p m e T F e n r e t n i f u e o B f u e o b e d e t ô C s o s n a s i t ô R s o s n a s e g n o l r u S e t n i o p l i e o t e l i f e d i t ô R 6 4 6 4 6 3 3 2 5 2 3 5 2 3 5 2 3 5 2 4 2 3 5 2 2 3 8 2 2 3 4 2 2 3 7 2 0 3 5 2 2 3 8 2 5 2 5 1 d é m 5 4 1 t n a n g i a s m u i d é m 0 6 1 d é m 5 4 1 t n a n g i ...

Страница 56: ...o p 4 1 e h c n a r t u a e d t 2 t e n o r t i c s e s i r e C e t t e i v r e s a l à r e h c é s r e v a L u a e y o n r e v e l n e s e h c î a r f e r u l e p a l e d e i t r a p o p s e h c n a r T e c n i m e é l e p e t t e i v r e s a l à r e h c é S e t t e i v r e s a l à r e h c é s r e v a L e l l i r g r u s r u e i r é t x e o p s e h c n a r T 5 1 1 1 5 1 0 1 5 1 0 1 4 2 s e r u l ...

Страница 57: ...squ àcequecellerégléesoitatteinte à ce moment le four fait un bip 8 Pour changer la température pendant la cuisson presserTEMPERATURE Tournerlebouton pour choisiruneautretempératureetpresserSTART 9 Unefoislacuissonterminée presserOFF pour mettrelefourhorscircuit Temps de fonctionnement du four Lefoursemetautomatiquementhorscircuitaprès12h 24 h si le format est réglé ainsi à SELECT FUNCTION Remarqu...

Страница 58: ...IME et la nouvelle heure est réglée REG MINUT 2 REG MINUT 2 REG MINUT 2 REG MINUT 2 REG MINUT 2 1 00 00 00 00 00 HR MIN TIMER REG MINUT 2 REG MINUT 2 REG MINUT 2 REG MINUT 2 REG MINUT 2 2 2 2 2 2 02 HR MIN TIMER PM EFF MINUT 1 EFF MINUT 1 EFF MINUT 1 EFF MINUT 1 EFF MINUT 1 0 00 0 00 0 00 0 00 0 00 MINUTERIE 1 MINUTERIE 1 MINUTERIE 1 MINUTERIE 1 MINUTERIE 1 0 00 00 00 00 00 AM 1 PresserTIME unefoi...

Страница 59: ...mplétée FINCUISSONMINUTÉE clignote à l affichage et un bip retentit Marche différée d un mode minuté 1 Suivrelesétapes1à5ci dessus 2 Tournerleboutonjusqu àcequeCUISSON DIFFÉRÉEfigure 3 Presser TIME RÉGLAGE TEMPS CUISSON figure et lesminutesclignotent Réglerlesminutes PresserTIME 4 Heure clignote Régler l heure PresserTIME 5 FINRÉGLAGECUISSON figure PresserTIME 6 Utiliserleboutonpour entrerl heureà...

Страница 60: ...tatteinte FIN figure à l affichage et le four ne met horscircuit Concernant la sonde Lasondepeutêtreutiliséepourdéterminerlacuisson interneoulatempératurearrêtdeplusieursaliments surtoutlaviandeetlavolaille Lagammedetempératuresdelasondeest135à200 F 57 à 93 C Lepréchauffagedufourn estpasrecommandéavecla sonde Un four chaud empêchera de bien brancher la sonde sur la prise et dans la viande Latempér...

Страница 61: ...uncôtéàl autre Préchauffer un plat de service vide pendant le préchauffagedutiroir sidésiré Placer les aliments chauds cuits dans le tiroir dans son contenant ou dans un plat de service résistant à la chaleur Dupapieraluminiumpeutêtreutilisépourcouvrirles aliments Toutefois NEPASdoublerlefonddutiroir NE PAS utiliser le tiroir à des fins de rangement Tiroir réchaud Voirpagesuivantepourplusdedétails...

Страница 62: ...rOFF Si l on utilise le tiroir et le four ou autre mode 1 PresserOFF 2 Tourner le bouton pour choisir ANNULATION TIROIR ANNULATION FOUR ou ANNULATION LES DEUX 3 PresserOFF t n e m i l A p m e T t r e v u o C t r e v u o c n o n n o c a B i H t r e v u o c n o N t i u c n e i b t e m u i d é m f u e o B d e M t r e v u o C t n a g i a s f u e o B w o L t r e v u o C r u d e t û o r c n i a P d e M ...

Страница 63: ... Abrasifs doux Bon Ami et Soft Scrub Essuyer délicatement avec un cureoreille humide d eau ammoniaque ou Formula 409 Gratter doucement avec un curedent Base du brûleur Aluminium Capuchon et fini extérieur en porcelaineémaillée Boutons de contôle et plaque d identification Plastique Fini extérieur Acier inoxydable Grilles Porcelaine émaillée sur fonte Allumeurs Céramique Nettoyer les orifices avec ...

Страница 64: ...n du four pour l autonettoyage 1 Retirer tous les ustensiles et plats 2 Retirer les grilles Si elles demeurent dans le four pendant le cycle autonettoyage elles perdront de façon permanente le fini brillant et deviendront foncées Voir tableau de nettoyage du four 3 Essuyer tout dégât mou et graisse avec des essuie tout L excès de graisse causera des flammes et de la fumée à l intérieur du four pen...

Страница 65: ...nière à la page 5 1 PresserCOOKINGMODE 2 Tourner le bouton jusqu à ce queAUTONETTOYAGE figure 3 Letempsdenettoyagepardéfautest4heures Pour changer l heure tourner le bouton pour changer le nombre d heures sinon passer à l étape 4 4 PresserSTART 5 Tourner le bouton jusqu à ce queNETTOYAGE DIFFEREs affiche PresserSTART 6 FINAUTONETTOYAGEfigure 7 Tourner le bouton pour entrer l heure d arrêt régler h...

Страница 66: ...unappliquerFantastik ouFormula409 suruneépongeouessuie tout etessuyer Éviterd utiliserdesnettoyantsenpoudre tamponsàrécurerenlained acieretnettoyantspour lefour Essuyerimmédiatementlesdéversementsacidescommejusdefruit lait tomateavecunchiffonsec Ne pasutiliserd éponge chiffonhumidesurlaporcelainechaude Lorsquerefroidie nettoyeravecdel eau chaudesavonneuseouappliquerBon Ami ouSoftScrub suruneéponge...

Страница 67: ...n Pourdemeilleursrésultats choisirunebatteriedecuisineayantlescaractéristiquessuivantes Lescasserolesdotéesd unfondenaluminiumouencuivreconduisentlachaleuruniformément Lescasserolesenacier siellesnesontpascombinéesàd autresmétaux necuisentpasuniformément Lescasserolesenfontesabsorbentlachaleuretcuisentplusuniformémentàdesréglagesdechaleurbasà moyen Descasserolesàfondépaisoffrentunechaleuruniformee...

Страница 68: ... la charnière Maintenir fermement la porte est lourde figureB 6 Placer la porte dans un endroit pratique et stable pourlanettoyer AVERTISSEMENT S assurerquelefourestfroidetque l alimentationesthorscircuitavantderetirer la porte Sinon il peut en résulter un choc électriqueoudesbrûlures Laportedufourestlourdeetfragile Utiliser les deux mains pour enlever la porte Le devant de la porte est en verre M...

Страница 69: ...iser une brosse à dent en nylon rigide pour enleverlesdébris Capuchonmalenligné S assurerquelescapuchonssontadéquatement positionnéssurlesbrûleurs Allumeurmouillé endommagéousale Vérifiersil allumeuresthumide sioui laisser sécher à l air avant d utiliser Vérifier s il y a de la graisse ou des aliments VoirNettoyageàlapage27 Lebrûleurnes allumepassil allumeurestmouillé endommagéousale Lesorificesde...

Страница 70: ...le Laisserlefourrefroidiravantl autonettoyage Toujours essuyer les taches et déversement avant de nettoyer Si le four est très sale régler l autonettoyage pendant 5 h Voirpréparationdufourpourl autonettoyage page24 S assurerquel alimentationélectriqueactionnelefour Voirlesrubriquesappropriées pages5et18 Aumomentderetireretreplacerlesgrilles toujours incliner vers le haut et ne pas les forcer pour ...

Страница 71: ...la pièce 5 Vérifier l alimentation électrique Elle doit être mise à la terre adéquatement avec la bonne polarité S assurer que l appareil est bien branché et que le coupe circuit n est pas déclenché Remarque lorsque la connexion électrique a été activée la première fois ou après une panne de courant les allumeurspeuventfaireuneétincelleuneoudeuxfoismêmesilesboutonsdebrûleurssontenpositionarrêt Si ...

Страница 72: ...horsducontrôlede BHS Égalementexclusdecettegarantie leségratignuresetdommagesauxsurfacesexternesetpiècesexposéesdela cuisinière sur laquelle le numéro de série a été modifié effacé ou enlevé Seloncequiestpermisparlaloi cettegarantieétablitdessolutionsexclusivesencequiatraitauxproduitscouverts que la réclamation survient par contrat ou tort incluant stricte responsabilité et négligence ou autres CE...

Страница 73: ......

Страница 74: ... y requiere que las empresas adviertan a sus clientes de la exposición potencial ante tales substancias La combustión de gas como combustible para cocinar y la eliminación de residuos durante la autolimpieza puede generar cantidades pequeñas de Monóxido de Carbono El aislamiento de fibra de vidrio en los hornos de autolimpieza despide una pequeña cantidad de Formaldehído durante los primeros ciclo...

Страница 75: ...e la Estufa 10 El Horno Modos y Características del Horno 11 Modos del Horno Horneado y Horneado de Convección 13 Modos del Horno Asado y Asado de Convección 14 Modos del Horno Tostado de Convección 15 Modos del Horno Deshidratado 16 Seleccionar el Modo del Horno 17 Usando el Reloj es 18 Usando la Opción de Cocinar Cronometrado 19 Usando la Sonda 20 El Cajón Calentador 21 Usando el Cajón Calentado...

Страница 76: ......

Страница 77: ...O Y DÉSE VUELTAS DE INMEDIATO para apagar las llamas No toque el área s de cocinar o el área s alrededor mientras usa la estufa o mientras cocina Se pueden calentar suficientemente las áreas cercanas a los quemadores el horno y el cajón calentador causando quemaduras y pueden estar calientes aunque estén apagadas Nunca permita que la ropa agarraderas de ollas u otros materiales inflamables tengan ...

Страница 78: ...s de vapor cuando limpia una superficie caliente con una esponja húmeda Algunos detergentes pueden producir vapores nocivos cuando son aplicados a una superficie caliente Para un desempeño correcto del encendido de los quemadores mantenga limpios los puertos de ignición Es necesario limpiarlos cuando hay un derrame o cuando no se enciende el quemador aún cuando los encendidos electrónicos hacen cl...

Страница 79: ... de Registro Garantía 4 Rejillas del Horno Planas 2 5 Rejilla del Horno Extensión Completa 6 Sonda 7 Rejilla del cajón calentador Seguridad de la Autolimpieza continuación No limpie el empaque de la puerta Es esencial para un sellado bueno Debe tener cuidado de no frotar dañar mover o quitar el empaque de la puerta No use detergentes comerciales para hornos o recubrimientos de protección de ningún...

Страница 80: ... el modo de precalentar También indica la temperatura de la carne cuando usa la sonda Indicador de la Sonda Indica que la sonda está instalada en el horno La temperatura interna de la carne aparece en lugar de la temperatura de precalentamiento Start Inicio Oprima la almohadilla para completar un comando Otras Indicaciones y Opciones Pitido Señala que se debe ingresar más información o confirmar l...

Страница 81: ...hora y am o pm 2 Oprima TIME Aún aparece RELOJ y los dígitos deminutosparpadearán 3 Gire la perillapara ajustar los minutos 4 Oprima TIME y el reloj queda configurado Cambiar la Hora del Reloj 1 Oprima Time RELOJ MINUTOS 1 parpadeará en la pantalla 2 Gire la perilla para seleccionar RELOJ 3 Oprima TIME nuevamente y parpadearán los dígitosdelahora 4 Gire la perilla para cambiar las horas 5 OprimaTI...

Страница 82: ...CIÓN DE IDIOMA para indicaciones seleccione Inglés Español o Francés RELOJ sí o no COMPENSACIÓN TEMPERATURA DEL HORNO se usa para calibrar la temperatura del horno MODO DE DEMOSTRACIÓN usado por tiendas RESTABLECER PARÁMETROS POR DEFAULT regresa todas las funciones a los parámetros originales de fábrica OPCIÓN SABATINA para religiones que no permiten trabajar los Sábados DEMO NOTA En el caso de un...

Страница 83: ...ota Esta función NO bloquea la puerta del horno NOTA ElmenúSELECTFUNCTIONaparece sóloenIngléssinimportarelidioma seleccionado RELOJ PRENDIDO o APAGADO Se puede apagar el reloj en la pantalla Por default el reloj aparece en la pantalla COMPENSARLATEMPERATURADELHORNO Permite ajustar la temperatura del horno cuando los alimentos salen consistentemente muy dorados o muy poco dorados Cambiar la Compens...

Страница 84: ...rá apagado y no aparece ninguna temperatura en la pantalla Durante el modo Sabatino sólo el botón para cancelar Off funcionará Oprima OFF en cualquier momento durante el modo Sabatino para terminar el modo y apagar el horno Al final de las 73 horas el horno se apagará auto máticamente y la pantalla indicará SABBATH END fin sabatino Oprima OFF para regresar a la hora de día OPCIÓN SABATINA El horno...

Страница 85: ...se del quemador antes de tratar de encenderlo Cuando no se posiciona bien la tapa del quemador éste tal vez no se prende o la llama es incompleta Rejillas de los quemadores Su estufa tiene dos rejillas una para el lado izquierdo y una para el lado derecho de la estufa Colóquelas como se muestra en la figura abajo No opere los quemadores sin tener una olla sobre las rejillas Use esta tabla como guí...

Страница 86: ...girando la perilla de control a la posición OFF Para quitar la perilla resorte y anillo Ponga la perilla en la posición de OFF Sáquela jalándola El resorte y el anillo están sueltos y se pueden quitar fácilmente una vez que se haya quitado la perilla Para reemplazar la perilla resorte y anillo Coloque el resorte y la perilla encima del anillo alineando los orificios centrales Empuje sobre la peril...

Страница 87: ...ompleta permite un acceso más fácil para cocinar alimentos La sección inferior se extiende igual que la rejilla plana estándar Sin embargo la sección superior se extiende más allá de la sección inferior de este modo acercando los alimentos al usuario Para pedir una rejilla de extensión completa contacte al Servicio de Siemens 866 44SIEMENS 447 4363 para localizar un distribuidor cerca de su casa U...

Страница 88: ...ún molde quede directamente encima de otro Para lograr mejores resultados al hornear coloque los pasteles en la parte trasera de la rejilla superior o la parte delantera de la rejilla inferior Vea el dibujo a la derecha Precalentar Precaliente el horno si la receta lo recomienda Es necesario precalentar el horno para lograr buenos resultados cuando quiere hornear pasteles galletas pastelitos y pan...

Страница 89: ...earcantidadesgrandesdealimentossobremúltiples rejillas Se puede usar para preparar galletas pays pastelitos panes y botanas entre otras cosas Losbeneficiosdelhorneadodeconvecciónincluyen Ligeradisminucióndeltiempodehornear Hornearcon3rejillas doradomásuniforme Mayor volumen la levadura se eleva más Hornear más alimentos a la vez Paralograrmejoresresultados Reduzcalatemperaturadelarecetapor25 F Con...

Страница 90: ...os aceites de la superficie y evitar manchas y humos Eche sal después de cocinar SIEMPRE ASE CON LA PUERTA CERRADA SIEMPRE ASE DE CONVECCIÓN CON LA PUERTA CERRADA Los tiempos del Asado y Asado de Convección son aproximados y pueden variar ligeramente Los tiempos se basan en cocinar con un elemento de asado precalentado Nota El único ajuste de calor para el Asado de Convección es Alto Tabla de Asad...

Страница 91: ...ión Tabla del Tostado de Convección Los tiempos del tostado son aproximados y pueden variar dependiendo de la forma de la carne Se basan en carne descongelada Pavo relleno requiere de un tiempo adicional de tostado La mínima temperatura segura para el relleno en pavo es 165 F Usar El Horno s e n r a C o s e P s a r b i l a r u t a r e p m e T F o n r o H l e d e d o p m e i T n i m o d a s A a r b...

Страница 92: ...a u g a n o c n o c o s a v n e o d i g r e m u S s o s a v 2 y n ó m i l e d o g e u j e d s a d a n a b e r a u g a n o c a l l a o t n o c r a c e s y r a v a L s a c s e r f s a z e r e c a r a P s o s e u h s o l r a c a s e d a j n a r a n e d s o z o r T á t s e a r a c s á c a l e d e t r a p a l a l e d a d a l e p e t n e m a r e g i l a j n a r a n a l l a o t n o c o d a c e S a l l a ...

Страница 93: ...RE Gire la perilla para seleccionar una temperatura nueva y oprima START 9 Una vez que haya terminado el horneado oprima OFF para apagar el horno Nota Después de apagar el horno la pantalla muestra HOT en lugar del modo de cocinar Se hace esto para indicar que el horno está apagado pero aún está caliente Cuando la temperatura del horno cae abajo de 176 F 80 C desaparece HOT de la pantalla Tiempo d...

Страница 94: ...a RESET TIMER 1 2 Los dígitos de minutos parpadean 3 Gire la perilla para cambiar los minutos 4 Oprima TIME nuevamente y parpadean los dígitos de las horas 5 Gire la perilla para cambiar las horas 6 Oprima TIME y el tiempo nuevo está configurado FIJAR RELOJ 2 FIJAR RELOJ 2 FIJAR RELOJ 2 FIJAR RELOJ 2 FIJAR RELOJ 2 1 00 00 00 00 00 HR MIN RELOJ FIJAR RELOJ 2 FIJAR RELOJ 2 FIJAR RELOJ 2 FIJAR RELOJ ...

Страница 95: ...jar horas Oprima TIME Fijar minutos Oprima TIME El reloj calcula automáticamente la hora del día cuando el modo comienza y termina El tiempo de cocinar que aparece cuenta regresivo por minuto 7 Al final del tiempo programado de cocinar el horno se apaga automáticamente La pantalla indicará FIN TIEMPO COCINAR y el horno emitirá pitidos Oprima OFF para borrarlo Nota Saque los alimentos del horno de ...

Страница 96: ...a sonda es de 135 F a 200 F 57 Ca93 C Noserecomiendaprecalentarelhornocuandousala sonda Unhornocalienteleimpediráconectarla sonda al receptáculo y de insertarla en la carne Se puede ajustar la temperatura del horno desde 100 Fhasta450 F 38 Ca232 C Insertar la Sonda Inserte la punta de la sonda en el alimento Para carnes inserte la punta de la sonda en la parte más gruesa sin tocar huesos grasa o c...

Страница 97: ...latillos Se puede usar el cajón calentador con o sin una rejilla Precaliente con la rejilla en su lugar si la usa Cabe de lado a lado Precaliente el plato vacío mientras precalienta el cajón Coloque alimentos calientes cocidos en el cajón calentador dentro de su contenedor original o en un plato de servir resistente al calor Se pueden tapar los alimentos con papel de aluminio Sin embargo NO forre ...

Страница 98: ...START Cuando se usa también el horno u otro modo 1 Oprima COOKING MODE 2 Oprima START para seleccionar WARMING DRAWER cajón calentador 3 Gire la perilla para seleccionar el calor deseado 4 Oprima START Apagar el Cajón Calentador Cuando usa sólo el cajón calentador 1 Oprima OFF Cuando se usa el cajón calentador y el horno u otro modo 1 Oprima OFF 2 Gire la perilla to select CANCEL DRWR CANCEL OVEN ...

Страница 99: ...or de la estufa Las rejillas son pesadas tenga cuidado al levantarlas Póngalas sobre una superficie protegida Ampollas grietas astillas son comunes debido a las temperaturas extremas en los dedos de las rejillas y los cambios rápidos de temperaturas Los derrames ácidos o de azúcar deterioran el esmalte Quite la mugre de inmediato El uso excesivo de detergentes abrasivos puede con el tiempo manchar...

Страница 100: ...ano LIMPIE el área del bastidor fuera del empaque a mano LIMPIE el área de la puerta fuera del empaque a mano LIMPIE a mano a una distancia de 1 1 2 de las guías de rejillas hasta el frente de la cavidad del horno ADVERTENCIA Se necesita un empaque flexible de la puerta para un buen sellado Los hornos de Siemens vienen con una función de autolimpieza que elimina el trabajo difícil y tardío de freg...

Страница 101: ... indicará LIMPIEZA RETRASADA La autolimpieza se iniciará automáticamente a la hora correcta Nota En el Modo de Autolimpieza se activa automática mente el pestillo de la puerta al comienzodel ciclo El símbolo de la puerta cerrada aparece en la pantalla en este momento Las lámparas del horno no funcionan en el modo de Autolimpieza NOTA Después de la Autolimpieza 1 Al final del tiempo programado de l...

Страница 102: ...n una cantidad pequeña de aceite vegetal luego limpie el exceso NO SE DEBE LIMPIAR EL EMPAQUE Lave con jabón y agua o un limpiador para vidrio Use Fantastik o Formula 409 para quitar salpicaduras grasosas y manchas duras Limpie con agua jabonosa caliente o aplique Fantastik o Formula 409 primero a una esponja limpia o una toalla de papel y limpie Evite el uso de limpiadores en polvo y esponjillas ...

Страница 103: ...dos escoja ollas con las siguientes características Ollas de aluminio o cobre conducen el calor uniformemente Ollas de acero si no se combinan con otros metales pueden cocinar poco uniformemente Ollas de hierro fundido absorben el calor lentamente y cocinan uniformemente con un calor bajo a mediano Ollas planas pesadas con fondo proporcionan un calor uniforme y estabilidad NO USE ollas delgadas to...

Страница 104: ...ratos electrodomésticos Evite tocar el foco con los dedos ya que la grasa de las manos puede dañar el foco cuando éste se calienta 6 Vuelva a atornillar el lente 7 Prenda la corriente en la principal fuente de alimentación caja de fusibles o interruptor Figura A Asegúrese que el horno y las lámparas estén fríos y de haber desconectado el horno antes de reemplazar los focos En caso contrario puede ...

Страница 105: ...osdelosquemadores Tapadequemadormalalineada Verifiquequelastapasdelosquemadoresestén colocadascorrectamentesobrelosquemadores Elignitorestámojado dañadoosucio Revisesielignitorestámojado Encasóquesí permitaquesesequeenelaireantesdeusarlo Revisesihaygrasaoalimentos quemados Vealasrecomendacionesdelimpieza página27 Elquemadornose enciendecuandoelignitorestámojado dañadoosucio Lospuertosdelosquemador...

Страница 106: ...El horno debe reiniciarse y se podrá operar Revise el cortacircuito o la caja de fusibles en su casa Asegúrese que hay una alimentación eléctrica correcta para el horno Asegúrese de haber seleccionado la temperatura del horno Revise la calibración del horno Ajuste la calibración si es necesario vea Compensación de la Temperatura del Horno Pág 7 Consulte las tablas de cocinar para las posiciones re...

Страница 107: ...l cuarto 5 Revise la fuente de alimentación Debe estar puesto a tierra con la polaridad correcta Verifique que la unidad esté enchufada y que no se haya bajado el cortacircuito Nota Cuando se activa la conexión eléctrica por primera vez o después de una falla de electricidad es posible que los encendedores echen chispas una o dos veces a pesar de que todos los quemadores están en la posición de ap...

Страница 108: ...ía establece sus remedios exclusivos con respecto a los productos cubiertos por ésta sin importar si la reclamación surge en contrato o agravio incluyendo la responsabilidad estricta y negligencia etc Al grado permitido por la ley esta garantía establece sus remedios exclusivos con respecto a los productos cubiertos por ésta sin importar si la reclamación surge en contrato o agravio incluyendo la ...

Страница 109: ......

Страница 110: ... or design without notice Some models are certified for use in Canada BSH is not responsible for products which are transported from the United States for use in Canada Check with your local Canadian distributor or dealer BSH Home Appliances Corporation 5551 McFadden Avenue Huntington Beach CA 92649 For the most up to date critical installation dimensions by fax use your fax handset and call 702 8...

Отзывы: