A5E02834306C
Seite 4 von 4
Page 4 of 4
DS01
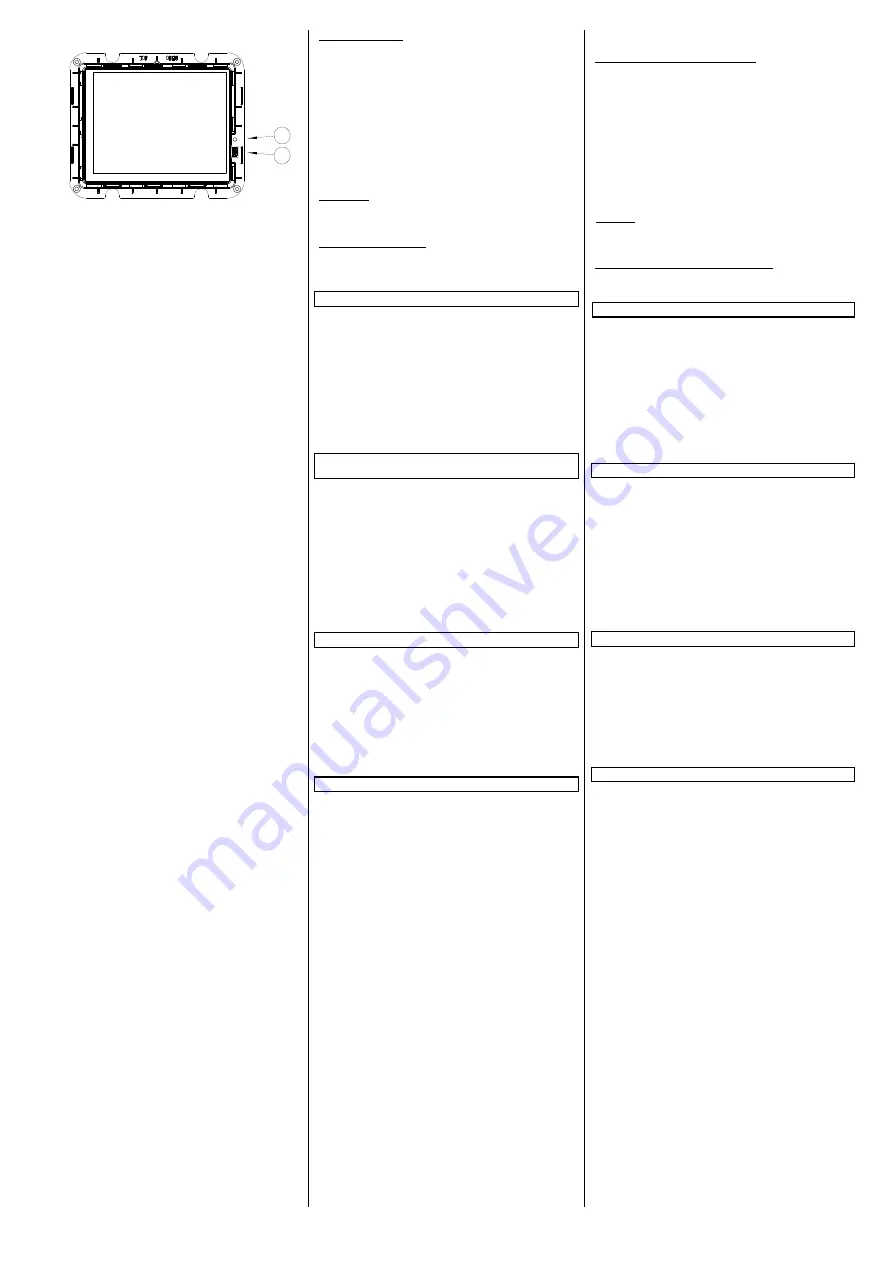
Bild 5: Resettaste und USB-Anschluss
Figure 5: reset button and USB port
Busklemme abziehen (Bild 4 “A“)
- Die Busklemme (C3) befindet sich im linken Klemmenan-
schlussraum. Sie besteht aus zwei Teilen (C3.2 und C3.3) mit
je vier Klemmkontakten. Es ist darauf zu achten, dass die bei-
den Prüfbuchsen (C3.1) weder mit dem Busleiter (versehent-
licher Steckversuch), noch mit dem Schraubendreher (z.B.
beim Versuch, die Busklemme zu entfernen) beschädigt wer-
den.
- Den Schraubendreher vorsichtig in den Drahteinführungs-
schlitz des grauen Teils der Busklemme (C3.3) einführen und
die Busklemme (C3) aus dem Einbaugerät herausziehen.
Beim Herausziehen des roten Teils der Busklemme bleibt der
graue Teil stecken.
Achtung
:
Busklemme nicht von unten heraushebeln!
Kurzschlussgefahr!
Abklemmen der Busleitung (Bild 4 “A“)
Die Busklemme (C3) abziehen und den Leiter (C3.4) der Buslei-
tung, bei gleichzeitigem Hin- und Herdrehen, herausziehen.
Rücksetzen des Gerätes im Fehlerfall
Das Touch-Panel kann über eine Resettaste im Fehlerfall zurück-
gesetzt werden. Die Resettaste
F
(siehe Bild 5) ist zugänglich
nach der Demontage des Designrahmens (s.o.). Sie kann mit ei-
nem Werkzeug bedient werden. Sollte in seltenen Einzelfällen
aufgrund einer Störung in der Software oder während eines La-
devorgangs die Funktion des Displays nicht mehr gegeben sein,
betätigen Sie bitte kurzzeitig die Resettaste. Danach läuft das
Gerät innerhalb einiger Sekunden erneut an und der Design-
rahmen kann wie oben beschrieben wieder montiert werden.
Erfolgt trotz des Resets kein Geräteanlauf, kontaktieren Sie bitte
den Hersteller.
Erweiterte Programmierung über frontseitigen USB-
Anschluß
Das Übertragen von kundenspezifischen Bildern und Symbolen
(siehe dazu das Benutzerhandbuch) erfolgt über die frontseitige
Mini-USB-Buchse
E (siehe Bild 5).
Nach der Demontage des De-
signrahmens (s.o.) ist die USB-Buchse zugänglich. Bitte verbin-
den Sie über ein USB-Kabel mit Typ B Mini-USB-Steckverbinder
das Display mit einem beliebigen PC mit USB-Schnittstelle Typ A.
Das USB-Kabel gehört zum Lieferumfang und liegt dem Touch-
Panel bei.
Es hat eine Länge von 1 m und besitzt eine Transferrate von
480 MBit/sec.
Nach Abschluss der Übertragung entfernen Sie bitte das Kabel
und montieren den Designrahmen wie oben beschrieben.
Pfegehinweise
Die Reinigung des Designrahmens und der Kunststoff-
oberfläche des Displays kann mit handelsüblichen, lösungsmit-
telfreien Reinigungsmitteln erfolgen. Die Displayoberfläche
selbst darf nur mit einem feuchten, weichen Tuch (z.B. Brillen-
putztuch) und ggf. einem milden Glasreiniger gesäubert wer-
den.
Bitte keine mechanischen Hilfsmittel (rauher Schwamm oder
Ähnliches) zur Reinigung einsetzen. Die Touchscreen-
Oberfläche ist kratzempfindlich.
Allgemeine Hinweise
•
Ein defektes Gerät ist an die zuständige Geschäftsstelle der
Siemens AG zu senden.
•
Ein defektes Gerät ist mit einem Rücklieferschein der zustän-
digen Vertriebsniederlassung an folgende Adresse zu sen-
den:
SIEMENS AG, Siemensstr. 10, D-93055 Regensburg
•
Bei zusätzlichen Fragen zum Produkt wenden Sie sich bitte
an unseren Technical Support:
+49 (911) 895 - 7222
+49 (911) 895 - 7223
http://support.automation.siemens.com
Removing the bus terminal (figure 4 "A")
- The bus terminal (C3) is in the left slot. It consists of two
parts (C3.2 and C3.3), each with four terminal contacts. You
must take care that both test sockets (C3.1) are not dam-
aged, either with the bus conductor (accidental attempt to
plug in) or with the screwdriver (e.g. when trying to remove
the bus terminal).
- Push the screwdriver carefully into the wire connection slot
of the grey part of the bus terminal (C3.3) and then pull the
bus terminal (C3) out of the device. When pulling out the red
part of the bus terminal, the grey part remains plugged in.
Notice
:
Do not lever the bus terminal outwards from
below! Danger of short circuit!
Disconnecting the bus terminal (figure 4 "A")
Pull off the bus terminal (C3) and pull out its conductor (C3.4)
by turning it alternately backwards and forwards.
Resetting the device if there is an error
You reset the touch panel in the event of an error with the reset
button. The reset button
F
(see figure 5) is accessible after dis-
mounting the design frame (see above). This is done with the
special tool. Should the display fail in rare cases owing to a
fault in the software or during the loading process, tap the reset
button. The device then restarts within a few seconds and the
design frame can be remounted as described above. If the de-
vice will not start, despite a reset, contact the manufacturer.
Extended programming via the front USB port
Pictures and symbols to order (see the user manual for this) are
transferred via the front mini-USB socket
E
(see figure 5). The
USB socket is accessible after dismounting the design frame
(see above). Connect the display to any PC with a USB interface
type A via a USB cable with a type B mini-USB plug.
The USB cable is part of the shipment and is enclosed in the
touch panel.
It has a length of 1 m and have a transfer rate of 480 MBit/sec.
After completing the transfer, remove the cable and mount the
design frame as described above.
Care instructions
The display's design frame and plastic surface can be cleaned
with off-the-shelf, solvent-free cleaning agents. The display sur-
face itself should be cleaned with a soft, damp cloth (e.g. spec-
tacles cloth) and, if necessary, a mild glass cleaner.
Do not use any mechanical aids (rough sponge or similar mate-
rials) for cleaning. The touch screen surface is easy to scratch.
General notes
•
Any faulty device should be returned to the local Siemens of-
fice.
•
A faulty device shall be sent with a Return Good Note for Ser-
vice provided by the appropriate Siemens sales office to the
following address:
SIEMENS AG, Siemensstr. 10, D-93055 Regensburg
•
If you have further questions concerning the product, please
contact our Technical Support:
+49 (0911) 895 - 7222
+49 (0911) 895 - 7223
http://support.automation.siemens.com
E
F


