Document No. 129-102
Installation Instructions
March 6, 2018
Page 2 of 3
Siemens Industry, Inc.
Installation, Continued
I
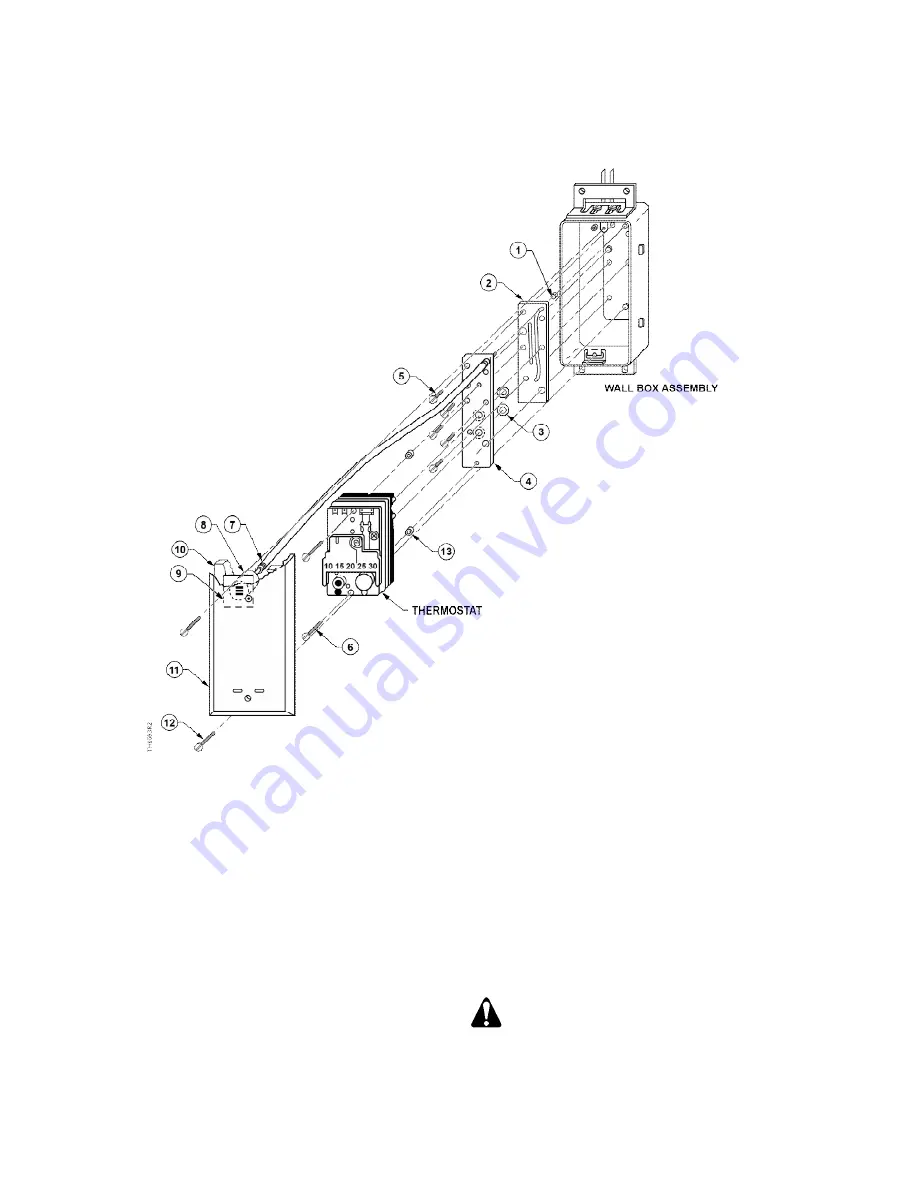
Figure 1. TH19X and Aspirator Wall Box
3. Make sure the two O-rings (3) have been placed
into the circular recesses located in the back of
the new terminal plate (4). Place the terminal
plate over the gasket (2) and fasten it securely
to the wall box with the five screws (5) provided.
The new plate is slightly longer than the old. Do
not cut the insulation; it will compress when the
plate is fastened.
4. The wall plate provided with the thermostat is
not used in this installation.
5. Carefully plug the thermostat into the terminal
plate (4). Wet or moisten the thermostat supply
and return ports to faciliate plugging the
thermostat into the O-rings located in the
terminal plate. This will lubricate the O-rings and
allow the thermostat ports to slip through them
more easily.
6. Insert two screws (6) through the thermostat.
Place two spacers (13) over the ends of the
screws (6). Seat the spacers into the recesses
located in the base of the thermostat. Secure the
thermostat to the wall box. When tightening the
screws, make sure the lock washers are not fully
compressed.
CAUTION:
Over-tightening the screws can cause a
shift in the calibration.
7. Set the thermostat to the desired setting.


