background image


 English  


Installation Instruction 


Before starting to install and work with this 
device, please read the Safety Instructions. 

Scope of delivery  

 ISRW6-12 wireless outdoor siren 
 Non-rechargeable 3.6 V battery 

Description 

The wireless outdoor siren is an external warning 
device for outdoor use, which is controlled by a 
Si2Way wireless module (e.g. IRFW6-12), gateway 
(e.g. IEGW6-12) or panel. 
It indicates alarms using PIEZO siren and/or power 
LED. It can also be configured to signal arming and 
disarming by flashing and/or beeping. 

Installation 

Opening the unit 


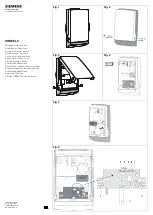
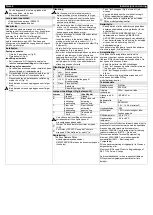
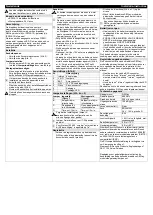
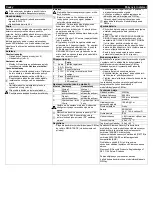
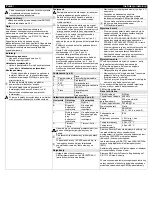
Remove the 2 pivot screws (Fig. 2). 


Remove the cover (Fig. 3). 

Setting the jumpers 


Set the jumpers A-D to the desired position (see 

table 

Jumper settings

 for explanations). 

Mounting the base 


Choose a suitable location for the installation. 

Make sure that this location is within the radio 
coverage of the respective Si2Way radio 
device. 


It is recommended that the siren unit is 
installed on a flat surface in a prominent 
location. 


Place the unit on the installation surface and 

mark 4 holes (Fig. 4). 


Mount the unit onto the installation surface. 


  Use only the screws and plugs supplied. 

Connecting  


  Risk of explosion if battery is replaced by an 

incorrect type. 


It is necessary to insert the battery in any case, 
even if the siren is powered thanks to the 
external power source. 


Upon battery connection, the battery will beep 
and flash for about 30 sec. This behaviour is 
normal, and the siren will go into normal mode 
after this warm-up phase is over. 


Ensure that the siren is connected to the Piezo 

connector (Fig. 6 item 5). 


Insert the battery in the battery holder (Fig. 5) 

making sure the polarity is correct (+) (-). 


Connect the battery cable into the battery 

connector (Fig. 6 item 3). 


Optional: Connect the +12 V external power 

cable (Fig. 6 item 4). 


Replace the white plastic cover on the base and 

secure it with the 2 pivot screws. This will push 
down the tamper switch (Fig.6, item 6). Be 
careful NOT to lift up the plastic cover once it 
has been put in place, otherwise a tamper will 
be triggered and the siren will go on. 

Connections (Fig. 6) 

No.   

Description 

Learn  Learn button 

J A-D  Jumpers 

BAT  Battery connector 

+12V-  12 V DC power supply terminal input 

Piezo  Piezo connector 


Tamper 


Power LED 

Jumper settings (Fig. 6 item 2) 

Jumper  Set 

Not set 

Output 2 

Output 1 

Flashes upon 
Arm/Disarm 

Does not flash upon 
Arm/Disarm 

Beeps with 
Arm/Disarm 

Does not beep upon 
Arm/Disarm 

Time out: 15 min. 

Time out: 2 min. 


Make sure that Jumper A setting corresponds 
to the siren output configuration on the panel. 

  Jumper A is used for IC 60 panels only 


For Sintony 100-400: make sure that "external 
bell at RF confirmation" is set to “yes” 

Enrollment 


Put the Si2Way wireless module/gateway/panel 
into ENROL mode (refer to the device 
documentation). 


Press the learn button (Fig. 6 item 1) on the 
siren. 


Wait for indication of a successful learning on the 
Si2Way radio module/gateway/panel. 


A siren can be enrolled with one Si2Way radio 
wireless module/gateway/panel only. 

Battery exchange 


To change the battery, make sure to cut off the 

power supply on the external power cable first (if 
applicable).  


AS YOU OPEN THE SIREN HOUSING, a 

tamper alarm will be triggered and THE SIREN 
WILL BE ACTIVATED (use ear plugs if needed). 


To stop the siren, remove the battery cable from 

its connector. Then change the battery and 
reconnect the battery cable.  


Close the housing and do not forget to reset the 

external power supply (if applicable). 

Unenrollment 

If you would like to unenrol a siren from the system, 
please refer to the Si2Way wireless module/ 
gateway/panel documentation. You should then 
erase the siren’s memory: 


Disconnect the battery from the BAT connector. 


Press the “Learn” button and reconnect the 
battery while keeping the “Learn” button pressed. 


Keep the “learn” button pressed until the LED 
flashes. 

Only then will it be possible to re-enrol the siren with 
another Si2Way wireless module/gateway/panel. 

Technical Data 

Radio protocol 

Si2Way 

Radio frequency 

868 MHz 

Wireless range 

300 m in open space 

Siren output level 

100 dB @ 1 m 

Battery lifetime 

3 years 

Battery 

ER34615M 
3.6 V, 14 Ah, D size 

Housing protection 

IP54 

Air humidity 

< 95% rH, non-condensing 

Operating temperature  -20 to +70°C 
Storage temperature 

-20 to +80°C 

Siemens Security Products hereby declares that this 
product is in compliance with the essential 
requirements and other relevant provisions of 
Directive 1999/5/EC on Radio and 
Telecommunications Terminal Equipment (R&TTE) 
and 2004/108/EC on Electromagnetic Compatibility 
(EMC). 
The EC Declaration of Conformity is available from 
your Siemens sales office or: 
Siemens AB, Security Products, Englundavägen 7, 
SE-171 24 Solna, Sweden 
 
For more detailed instructions please refer to the 
manual of the respective Si2Way wireless module/ 
gateway/panel. 

Содержание ISRW6-12

Страница 1: ...a radio Sirena wireless da esterno Sirene Exterior Sem Fios Trådløs utendørssirene Draadloze buitensirene Bezdrátový venkovní varovný signál Bezprzewodowa syrena zewn trzna Draadloze buitensirene Kablosuz D Siren Trådlös ISRW6 12 sirén utomhus STEP A6V10234986_c Edition 2013 01 28 CADIM A5Q00053233 P N 7121866 Rev B Fig 1 Fig 2 Fig 3 Fig 4 Fig 5 Fig 6 ...

Страница 2: ...A Output 2 Output 1 B Flashes upon Arm Disarm Does not flash upon Arm Disarm C Beeps with Arm Disarm Does not beep upon Arm Disarm D Time out 15 min Time out 2 min Make sure that Jumper A setting corresponds to the siren output configuration on the panel Jumper A is used for IC 60 panels only For Sintony 100 400 make sure that external bell at RF confirmation is set to yes Enrollment Put the Si2Wa...

Страница 3: ...ang 2 Ausgang 1 B Blinkt bei Scharf Unscharf Blinkt nicht bei Scharf Unscharf C Signaltöne bei Scharf Unscharf Keine Signaltöne bei Scharf Unscharf D Zeitsperre 15 Min Zeitsperre 2 Min Stellen Sie sicher dass die Einstellung von Jumper A der Ausgangskonfiguration der Sirene in der Zentrale entspricht Jumper A wird nur für IC 60 Zentralen verwendet Bei Sintony 100 400 Stellen Sie sicher dass Aussen...

Страница 4: ...l armement désarmement Ne clignote pas après l armement désarmement C Emet un beep sonore pendant l armement désarmement Pas de beep après l armement désarmement D Délai d attente 15 min Délai d attente 2 min Assurez vous que la position du cavalier A corresponde à la sortie de la sirène configurée sur le circuit Le cavalier A est utilisé uniquement pour les unités IC 60 Pour Sintony 100 400 assur...

Страница 5: ... 2 J A D Puentes 3 BAT Conector de batería 4 12V Alimentación 12 V c c 5 Piezo Conector Piezo 6 Tamper 7 LED de alimentación Configuración de puentes Fig 6 elemento 2 Puente Colocado No colocado A Salida 2 Salida 1 B Parpadea con Armado Desarmado No parpadea con Armado Desarmado C Emite un pitido con Armado Desarmado No emite un pitido con Armado Desarmado D Tiempo espera 15 min Tiempo espera 2 mi...

Страница 6: ...zione Non lampeggia in casi di attivazione disattivazione C Emette bip in caso di attivazione disattivazione Non emette bip in casi di attivazione disattivazione D Timeout 15 min Timeout 2 min Accertarsi che l impostazione del jumper A corrisponda con la configurazione sul pannello dell uscita sirena Lo jumper A è usato solo per i pannelli IC 60 Per Sintony 100 400 accertatevi che il campanello es...

Страница 7: ...ido A Saída n º 2 Saída 1 B Pisca ao Armar Desarmar Não pisca ao Armar Desarmar C Apita ao Armar Desarmar Não apita ao Armar Desarmar D Desligamento automático 15 min Desligamento automático 2 min Assegure se de que a definição da Ligação de ponte A corresponda à configuração da saída da sirene no painel O fio de ponte A é usado somente para os painéis IC 60 Para o Sintony 100 400 assegure se de q...

Страница 8: ...ering deaktivering Blinker ikke ved aktivering deaktivering C Piper ved aktivering deaktivering Piper ikke ved aktivering deaktivering D Tidsavbrudd 15 min Tidsavbrudd 2 min Vær sikker på at innstillingen til Jumper A korresponderer til konfigurasjonen til sireneutgangen på sentralen Jumper A brukes bare for sentraler av typen IC 60 For Sintony 100 400 Pass på at ekstern sirene på RF bekreftelse e...

Страница 9: ...schakelen Knippert niet bij in uitschakelen C Piepsignaal bij in uitschakelen Geen piepsignaal bij in uitschakelen D Time out 15 min Time out 2 min Zorg dat de instelling van jumper A overeenkomt met de configuratie van de sirene uitgang op het paneel Jumper A wordt alleen voor IC 60 panelen gebruikt Voor Sintony 100 400 zorg dat externe sirene bij RF bevestiging is ingesteld op ja Registratie Act...

Страница 10: ...5 min Vypršení as limitu 2 min Ujist te se že nastavení m stku A odpovídá konfiguraci výstupu varovného signálu na panelu stek A se používá pouze pro panely IC 60 Pro Sintony 100 400 zkontrolujte zda je externí zvonek jako potvrzení RF nastaven na ano Registrace epn te bezdrátový modul bránu panel Si2Way do režimu REGISTRACE viz dokumentace k ístroji Stiskn te tla ítko registrace obr 6 položka 1 n...

Страница 11: ...zbrojeniu C Wydaje sygna wi kowy przy uzbrojeniu rozbrojeniu Nie wydaje sygna u wi kowego przy uzbrojeniu rozbrojeniu D Timeout 15 min Timeout 2 min Upewni si e ustawienie prze cznika A jest zgodne z konfiguracj wyj cia syreny na panelu Prze cznik A jest stosowany tylko w panelach IC 60 W panelach Sintony 100 400 upewni si e zewn trzny dzwonek dla potwierdzania cz stotliwo ci radiowej jest ustawio...

Страница 12: ...ert niet bij in uitschakelen C Piepsignaal bij in uitschakelen Geen piepsignaal bij in uitschakelen D Time out 15 min Time out 2 min Zorg dat de instelling van jumper A overeenkomt met de configuratie van de sirene uitgang op het paneel Prze cznik A jest stosowany tylko w panelach IC 60 W panelach Sintony 100 400 upewni si e zewn trzny dzwonek dla potwierdzania cz stotliwo ci radiowej jest ustawio...

Страница 13: ...u yan p söner Devrede Devre d sonucu yan p sönmez C Devrede Devre sonucu sa sinyal verir Devrede Devre d sonucu k sa sinyal vermez D Zaman a 15 dak Zaman a 2 dak Jumper A ayar n panel üzerindeki siren ç yap land rmas na kar k geldi inden emin olun Jumper A sadece IC 60 paneller için kullan r Sintony 100 400 için RF do rulamas nda harici zilin evet olarak ayarland ndan emin olun Kay t Si2Way kablos...

Страница 14: ...ställd A Utgång 2 Utgång 1 B Blinkar vid Armera Desarmera Blinkar inte vid Armera Desarmera C Signalerar vid Armera Desarmera Signalerar inte vid Armera Desarmera D Avbrott 15 min Avbrott 2 min Kontrollera att bygling A inställningen motsvarar konfigurationen av sirénutgången på panelen Bygel A används endast till IC 60 paneler För Sintony 100 400 kontrollera att extern ringklocka vid RF bekräftel...

Отзывы: