• The surfaces may be treated to retain their
shine once they have been cleaned. Only
use products which are specifically formu-
lated for stainless steel.
• Acidic substances (vinegar, lemon juice,
abrasive cleaning agents etc.) should be
removed from enamelled or varnished
parts immediately.
• The removable gas burner rings should be
cleaned regularly with warm water and
washing-up liquid to remove any dried-on
food residues. Check that the gas outlets
have not become blocked. Dry the burners
carefully before using them again.
• The tips of the gas igniter should be
cleaned regularly.
• Do not use steam cleaners to clean your
oven.
Replacing the oven light
First ensure that the cooker is not connected
to the electricity mains.
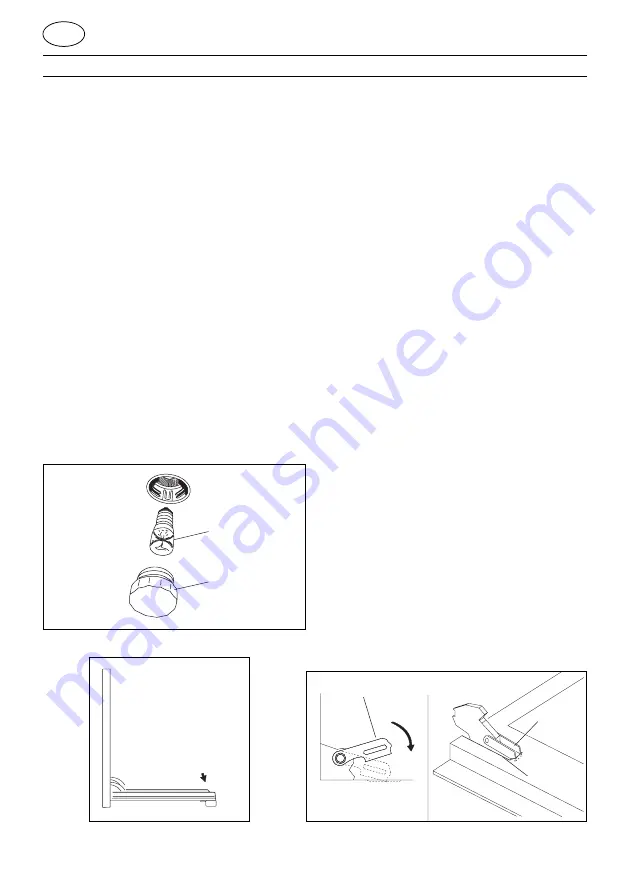
Unscrew the glass protection cap from inside
the oven (fig. 5), then unscrew the bulb and
replace it with a heat-resistant (300 °C) bulb
with the following specifications: Voltage
230V – Power 15 or 25 watts – Thread E 14.
Disassembling/assembling the oven door
In-depth cleaning of the oven becomes more
convenient if the door is removed following
the instructions below: Completely open the
door and press it down gently (fig. 6 ) to
allow the hooks
"A"
of the hinge to locate
inside the cavity
"B"
(fig. 7). Using both
hands, pull the door towards you until it
comes off the oven (weight of the oven door
kg. 13.920). To reassemble the door, reverse
the above procedure.
Advice on baking and roasting
The cooking times can vary depending on
the type of food, whether it must be evenly
cooked, and its size.
You should initially select the shorter cook-
ing time of those listed below, and extend it
if necessary.
GB
36
36
Operating instructions
B
A
A
Fig. 5
E 14
15 or 25 W -
230 V~
A
Fig. 6
Fig. 7


