background image

12

Setting the oven

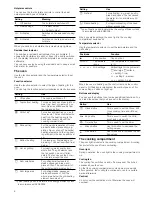
There are various ways in which you can set your oven. Here 

we will explain how you can select the desired type of heating 

and temperature or grill setting. You can select the cooking 

time and end time for your dish on the oven. 

Type of heating and temperature

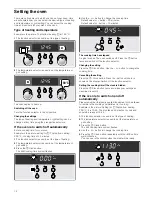
Example in the picture: Top/bottom heating 

%

 at 190 °C.

1.

The function selector is used to set the type of heating.

2.

The temperature selector is used to set the temperature or 

grill setting.

The oven begins to heat up.

Switching off the oven

Turn the function selector to the off position.

Changing the settings

The type of heating and temperature or grill setting can be 

changed at any time using their respective selectors.

If the oven is to switch off automatically

Enter a cooking time for your dish.
Example in the picture: setting for 

%

 Top/bottom heating, 

200 °C, cooking time of 45 minutes.

1.

The function selector is used to set the type of heating.

2.

The temperature selector is used to set the temperature or 

grill setting.

3.

Press the 

0

 Clock button.  

The 

x

 Cooking time symbol flashes.

4.

Use the - or + button to change the cooking time.  

Default value for + button = 30 minutes  

Default value for - button = 10 minutes

The cooking time has elapsed

A signal sounds. The oven switches off. Press the 

0

 button 

twice and switch off the function selector.

Changing the setting

Press the 

0

 Clock button. Use the + or - button to change the 

cooking time.

Cancelling the setting

Press the 

 Clock button. Press the - button until zero is 

shown on the display. Switch off the function selector.

Setting the cooking time if the clock is hidden

Press the 

0

 Clock button twice and make your settings as 

described in point 4.

If the oven is to switch on and off 

automatically

Please remember that easily spoiled foods must not be allowed 

to remain in the cooking compartment for too long.
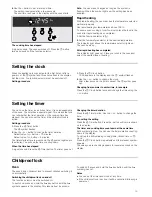
Example in the picture: Setting for 

%

 Top/bottom heating, 

200 °C. It is 10:45. The dish takes 45 minutes to cook and 

should be ready at 12:45.

1.

The function selector is used to set the type of heating.

2.

The temperature selector is used to set the temperature or 

grill setting.

3.

Press the 

0

 Clock button. 

The 

 x

 Cooking time symbol flashes.

4.

Use the - or + button to change the cooking time.

5.

Press the 

0

 Clock button repeatedly until the 

y

 End time 

symbol flashes.  

You can see in the display when the meal will be ready.

K

PLQ

ƒ&

K

PLQ

ƒ&

ƒ&

NJ

3

FOHDQ

PLQ

K

NJ

3

FOHDQ

PLQ

K

NJ

3

FOHDQ

PLQ

K

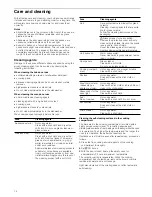
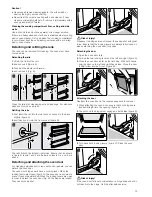
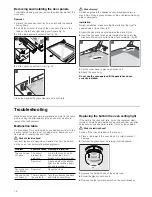
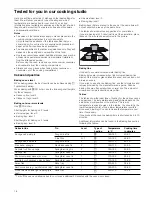
Содержание HC744.40

Страница 1: ...Register your product online siemens home com welcome en Instruction manual Free standing cooker HC744 40 ...

Страница 2: ......

Страница 3: ...Rapid heating 13 Setting the clock 13 Setting the timer 13 Childproof lock 13 Oven 13 Care and cleaning 14 Cleaning agents 14 Detaching and refitting the rails 15 Detaching and attaching the oven door 15 Removing and installing the door panels 16 Troubleshooting 16 Malfunction table 16 Replacing the bulb in the oven ceiling light 16 Glass cover 17 After sales service 17 E number and FD number 17 E...

Страница 4: ...ustible items in the cooking compartment Never open the appliance door if there is smoke inside Switch off the appliance and unplug it from the mains or switch off the circuit breaker in the fuse box Risk of fire A draught is created when the appliance door is opened Greaseproof paper may come into contact with the heating element and catch fire Do not place greaseproof paper loosely over accessor...

Страница 5: ...gerous Repairs may only be carried out by one of our trained after sales engineers If the appliance is faulty unplug the mains plug or switch off the fuse in the fuse box Contact the after sales service Risk of electric shock and serious injury The cable insulation on electrical appliances may melt when touching hot parts of the appliance Never bring electrical appliance cables into contact with h...

Страница 6: ... Even if the appliance door is only open a little front panels of adjacent units could be damaged over time Very dirty door seal If the door seal is very dirty the appliance door will no longer close properly when the appliance is in use The fronts of adjacent units could be damaged Always keep the door seal clean Appliance door as a seat shelf or worktop Do not sit on the appliance door or place ...

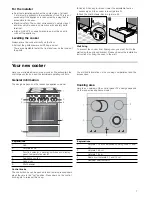
Страница 7: ...ver you must fix it to the wall using the enclosed bracket Please observe the installation instructions for fixing the oven to the wall Your new cooker Here you will learn about your new cooker We will explain the control panel the hob and the individual operating controls You will find information on the cooking compartment and the accessories General information The design depends on the respect...

Страница 8: ... ð Activation Switches on the large dual circuit hotplate Setting Use ý Off position The oven is switched off Top bottom heating For cakes bakes and lean joints of meat e g beef or game on one level Heat is emitted evenly from the top and bottom 3D hot air For cakes and pastries on one to three levels The fan distributes the heat from the heating ring in the back panel evenly around the cooking co...

Страница 9: ... the country Information on purchasing accessories can be found in the sales documents Not every optional accessory is suitable for every appliance When purchasing always quote the complete identification number E no of your appliance Wire rack For ovenware cake tins joints grilled items and frozen meals Insert the wire rack with the open side facing the oven door and the curvature pointing downwa...

Страница 10: ...niversal pan with non stick coating HZ332011 This universal pan is ideal for moist cakes pastries frozen meals and large roasts Place the universal pan in the oven with the sloping edge towards the oven door Lid for the Profi extra deep pan HZ333001 The lid converts the Profi extra deep pan into the Profi roasting dish Profi extra deep pan with insert wire rack HZ333003 Particularly suitable for p...

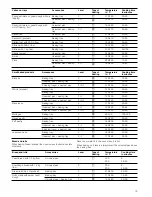
Страница 11: ...s Cooking times and heat settings may vary depending on the type of food its weight and quality Deviations are therefore possible When heating thick liquids stir regularly For bringing liquids to the boil use heat setting 9 Ongoing cooking setting Ongoing cooking time in minutes Melting Chocolate cooking chocolate gelatine Butter 1 1 2 Heating and keeping warm Stew e g lentil stew Milk 1 2 1 2 Poa...

Страница 12: ...oking time Default value for button 30 minutes Default value for button 10 minutes The cooking time has elapsed A signal sounds The oven switches off Press the 0 button twice and switch off the function selector Changing the setting Press the 0 Clock button Use the or button to change the cooking time Cancelling the setting Press the 0 Clock button Press the button until zero is shown on the displ...

Страница 13: ...an use the timer as a kitchen timer It runs independently of the oven The timer has a special signal This means that you can tell whether the timer duration or the cooking time has elapsed You can also set the timer if the childproof lock is active Setting procedure 1 Press the S Timer button The S symbol flashes 2 Use the or button to change the timer duration Default value for button 10 minutes ...

Страница 14: ...d side panels of the cooking compartment thoroughly 2 Set 3D hot air 3 With the door closed heat up the empty oven for approximately 2 hours at maximum temperature The ceramic coating is regenerated When the cooking compartment has cooled down remove the brown or white residue with water and a soft sponge Light discolouration of the coating does not affect automatic self cleaning Area Cleaning age...

Страница 15: ...e B levels 1 and 2 are below and levels 3 4 and 5 are above Detaching and attaching the oven door For cleaning purposes and to remove the door panels you can detach the oven door The oven door hinges each have a locking lever When the locking levers are closed figure A the oven door is secured in place It cannot be detached When the locking levers are open in order to detach the oven door Fig B th...

Страница 16: ...vice as you may be able to remedy the fault yourself Malfunction table If a dish doesn t turn out as well as you had hoped refer to the section Tested for you in our cooking studio where you will find plenty of cooking tips and tricks Risk of electric shock Incorrect repairs are dangerous Repairs may only be carried out by one of our trained after sales engineers Replacing the bulb in the oven cei...

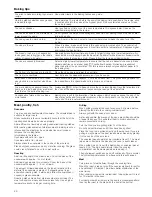
Страница 17: ...icularly well Open the oven door as infrequently as possible while cooking baking or roasting It is best to bake more than one cake one after the other The oven is still warm This reduces the baking time for the second cake You can also place two loaf tins next to each other For longer cooking times you can switch the oven off 10 minutes before the end of the cooking time and use the residual heat...

Страница 18: ...ons for your dishes If you are baking with 3 cake loaf tins at the same time place these on the wire racks as indicated in the picture Baking tins It is best to use dark coloured metal baking tins Baking times are increased when light coloured baking tins made of thin metal or glass dishes are used and cakes do not brown so evenly If you wish to use silicone baking tins use the information and rec...

Страница 19: ...cts Accessories Level Type of heating Temperature in C Cooking time in minutes Biscuits Baking tray 3 140 160 15 25 Universal pan baking tray 3 1 130 150 25 35 2 baking trays universal pan 5 3 1 130 150 30 40 Whirls preheat Baking tray 3 140 150 30 40 Baking tray 3 140 150 30 40 Universal pan baking tray 3 1 140 150 30 45 2 baking trays universal pan 5 3 1 130 140 40 55 Macaroons Baking tray 2 110...

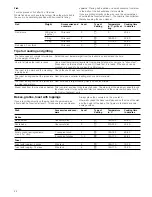
Страница 20: ... rest for 10 minutes in the oven For roast pork with a rind score the rind in a crossways pattern then lay the roast in the dish with the rind at the bottom You wish to bake according to your own recipe Use similar items in the baking tables as a guide How to establish whether sponge cake is baked through Approximately 10 minutes before the end of the baking time specified in the recipe stick a co...

Страница 21: ...210 230 50 Steaks medium 3 cm thick Wire rack 5 3 15 Veal Joint of veal 1 0 kg Uncovered 2 190 210 100 2 0 kg 2 170 190 120 Pork Joint without rind e g neck 1 0 kg Uncovered 1 4 200 220 100 1 5 kg 1 4 190 210 140 2 0 kg 1 4 180 200 160 Joint with rind e g shoulder 1 0 kg Uncovered 1 4 200 220 120 1 5 kg 1 4 190 210 150 2 0 kg 1 4 180 200 180 Smoked pork on the bone 1 0 kg Covered 2 210 230 70 Lamb...

Страница 22: ...for the weight of the joint Select the next lowest weight from the instructions and extend the time How to tell when the roast is ready Use a meat thermometer available from specialist shops or carry out a spoon test Press down on the roast with a spoon If it feels firm it is ready If the spoon can be pressed in it needs to be cooked for a little longer The roast is too dark and the crackling is p...

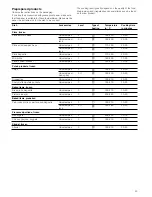
Страница 23: ... 190 20 30 Universal pan rack 3 1 170 190 25 35 Pizza baguette Universal pan 3 170 190 20 30 Mini pizza Universal pan 3 180 200 10 20 Pizza chilled preheat Universal pan 1 180 200 10 15 Potato products frozen Chips Universal pan 3 190 210 20 30 Universal pan baking tray 3 1 180 200 30 40 Croquettes Universal pan 3 190 210 20 25 Rösti stuffed potato pockets Universal pan 3 190 210 15 25 Baked items...

Страница 24: ...h 3D hot air you can dry foods brilliantly Use unblemished fruit and vegetables only and wash them thoroughly Drain off the excess water then dry them Line the universal pan and the wire rack with greaseproof or parchment paper Turn very juicy fruit or vegetables several times Remove fruit and vegetables from the paper as soon as they have dried Dish Ovenware Type of heating Temperature Cooking ti...

Страница 25: ...rm in the jars set the temperature back to between 120 and 140 C Depending on the type of vegetable heat for approx 35 to 70 minutes Switch off the oven after this time and use the residual heat Taking out the jars After preserving remove the jars from the cooking compartment Caution Do not place the hot jars on a cold or wet surface They could suddenly burst Acrylamide in foodstuffs Acrylamide is...

Страница 26: ... directly on the wire rack the universal pan should also be inserted at level 1 The liquid is then collected keeping the oven cleaner Dish Accessories and oven ware Level Type of heating Temperature in C Cooking time in minutes Whirls preheat Baking tray 3 140 150 30 40 Baking tray 3 140 150 30 40 Baking tray universal pan 1 3 140 150 30 45 2 baking trays universal pan 1 3 5 130 140 40 55 Small ca...

Страница 27: ......

Страница 28: ...BSH Hausgeräte GmbH Carl Wery Straße 34 81739 München GERMANY 9000762250 9000762250 03 020396 siemens home com BOVGBDUVSFE CZ 4 BVTHFS UF NC VOEFS 5SBEFNBSL JDFOTF PG 4JFNFOT ...

Отзывы: