background image

Setup 

26 

Building Technologies


Fire Safety & Security Products 


11.2008 


7. 

Connect the client PC to the power supply. 

8. 

Start the client PC. 

9. 

Set the IP address of the client PC. See Section 9.7: Setting the IP address of 
the client PC. 

10. 

Install the software and configure it. See Section 10: Software and 
Section 11: Configuration. 

11. 

Connect the Video Fire Controller to the FDnet (

9

). 

12. 

Configure the device on the fire control panel. See Section 12: Configuring 
FDV241 on the fire control panel. 


More detailed information on the configuration and setup of the fire control panel can be found in the 
configuration and user manual for the fire control panel. 


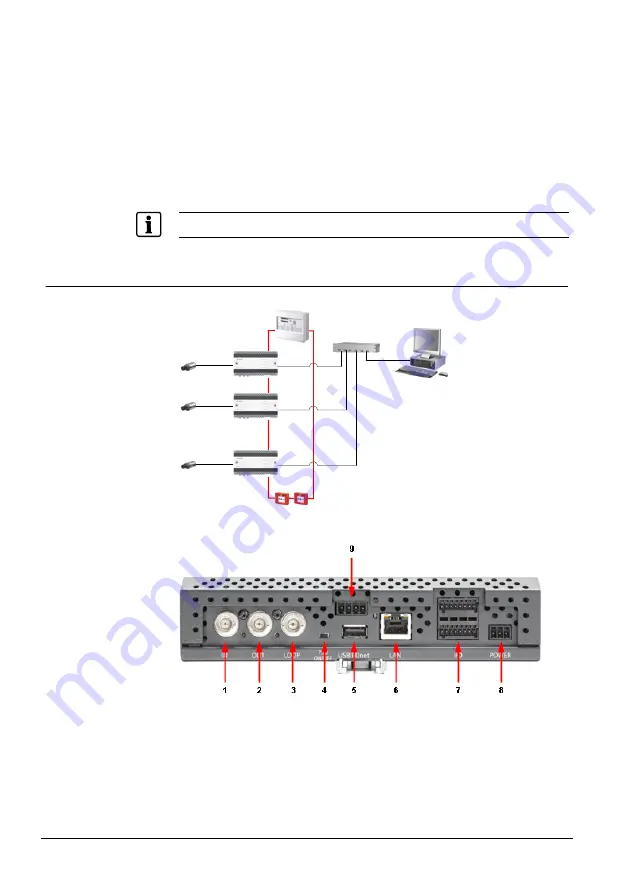
9.5.2 Multiple-device 

system 


1 c amera

FDV241

FDV241

FDV241

Client PC

1 c amera

1 camera

Network switch

FDnet


Fig. 11 

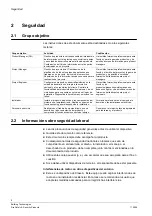
Multiple-device system 


Fig. 12 

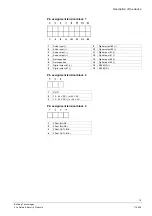
Connections on the Video Fire Controller 

Содержание FDV241

Страница 1: ...chnologies Fire Safety and Security Products FDV241 Video Fire Controller Inbetriebnahmeanleitung DE Startup Manual EN Manual de inicio ES Manuel de mise en service FR Manuale di messa in servizio IT SISTORE V3 5 ...

Страница 2: ...document and in the subject thereof By acceptance of the document the recipient acknowledges these rights and undertakes not to publish the document nor the subject thereof in full or in part nor to make them available to any third party without our prior express written authorization nor to use it for any purpose other than for which it was delivered to him ...

Страница 3: ...Building Technologies Fire Safety and Security Products FDV241 Video Fire Controller Inbetriebnahmeanleitung SISTORE V3 5 ...

Страница 4: ...n uns alle Rechte an diesem Dokument und an dem in ihm dargestellten Gegenstand vor Der Empfänger erkennt diese Rechte an und wird dieses Dokument nicht ohne unsere vorgängige schriftliche Ermächtigung ganz oder teilweise Dritten zugänglich machen oder außerhalb des Zweckes verwenden zu dem es ihm übergeben worden ist ...

Страница 5: ...241 16 7 3 2 Diagnosestufen im FDnet 17 7 3 3 Notlauf im FDnet 17 8 Wandmontage 18 9 Inbetriebnahme 19 9 1 Gerät öffnen oder schließen 19 9 2 Gerät hoch oder herunterfahren 20 9 3 Compact Flash Karte ein und ausbauen 21 9 4 Video Fire Controller FDV241 an FDnet anschließen ohne CCTV Anbindung 23 9 5 Video Fire Controller FDV241 an FDnet und CCTV System anschließen 25 9 5 1 Anlagenbetrieb mit einem...

Страница 6: ......

Страница 7: ...le Produkte oder Firmennamen die namentlich in diesem Handbuch erwähnt werden dienen nur zum Zwecke der Identifikation oder der Beschreibung und können Warenzeichen oder eingetragene Warenzeichen der jeweiligen Eigentümer sein SISTORE ist ein Warenzeichen der Siemens Building Technologies Fire Security Products GmbH Co oHG Microsoft ist ein eingetragenes Warenzeichen und Windows ist ein Warenzeich...

Страница 8: ... eine zur Funktion und eine zu den zu parametrisierenden Produkten bzw Geräten bzw Systemen passende Fachausbildung und hat die technischen Ausbildungskurse für den Projekt Ingenieur beim Lieferwerk besucht Installations Personal Installiert und montiert die Produkt bzw Geräte bzw Systemkomponenten am Einsatzort Führt nach der Installation eine generelle Funktionskontrolle zum Überprüfen der Insta...

Страница 9: ...l nicht belastet geknickt oder beschädigt werden 2 2 3 Inbetriebnahme Schäden an Anlagenteilen durch Brandfallsteuerungen z Achten Sie darauf dass das Aktivieren von Brandfallsteuerungen für Testzwecke keine Schäden an Anlageteilen verursacht z Schalten Sie Brandfallsteuerungen erst frei wenn die Prüfung abgeschlossen ist und die Anlage definitiv dem Kunden übergeben wird Geräteschaden durch den f...

Страница 10: ... 4 Installation Datenverlust bei Aktualisierung der Software z Sichern Sie alle Daten bevor Sie die Software auf dem Gerät aktualisieren 2 3 Bedeutung von Signalwörtern Auf die Schwere der Gefahr wird mit Signalworten hingewiesen WICHTIG Gefahr von Funktionsstörungen VORSICHT Gefahr von leichter bzw geringer Körperverletzung oder Sachschaden 2 4 Bedeutung von Gefahrensymbolen Warnung vor einer Gef...

Страница 11: ...ügung gestellt bei Siemens Building Technologies Fire Security Products GmbH Co oHG 76181 Karlsruhe Deutschland EG Richtlinie 2004 108 EC Elektromagnetische Verträglichkeit Die Konformität wird mit der EG Richtlinie 2004 108 EC nachgewiesen durch die Einhaltung folgender Normen Störaussendung EN 61000 6 4 EN 55022 Klasse A Störfestigkeit EN 50130 4 EG Richtlinie 89 106 EG Bauproduktenrichtlinie Di...

Страница 12: ...xtra Low Voltage und LPS Limited Power Source der Norm EN 60950 1 entsprechen Leistungsaufnahme max 15 W Ein und Ausgänge Ausführung Steckeranschluss Querschnitt 0 2 1 5 mm2 Compact Flash Slot CF Typ I 42 8 x 36 4 x 3 3 mm Compact Flash Karte Zulässiger Temperaturbereich 0 70 C Minimale Übertragungsgeschwindigkeit 1 MB s r w Minimale Speicherkapazität 4 GB Batterietyp Varta 6032 Hutschiene Tragsch...

Страница 13: ...strom Ruhe 0 6 0 75 mA Betriebstemperatur 10 bis 55 C Relative Luftfeuchtigkeit 95 rel bei T 25 3 C 93 rel bei T 40 2 C kurzzeitige Betauung erlaubt Maximalstrom Kennzahl 3 Ruhestrom Kennzahl 3 Adress Kennzahl 1 Trenner Kennzahl 1 Protokoll FDnet Kompatibilität Details siehe Dok Nr 008331 List of compatibility Externer Alarmindikator anschliessbare ext Alarmind Keine Normen und Standards CPD EN 54...

Страница 14: ...P Switch Camera 480 TVL PAL 12 V DC 24 V AC 0 45 kg CLVD1314 3 5 8 2GF1667 8AJ 3 5 8 mm F1 4 1 3 CS 0 0766 kg CAB1420 2GF1710 8BD Universal Camera Mount 140 mm 0 25 kg CFVC1317 LP S54561 C61 A1 1 3 CCD 3 7 12 mm Colour Varifocal Dome 540 TVL PAL 12 V DC 24 V AC 3 5 W 0 29 kg 6 Lieferumfang z Video Fire Controller z Software CD mit Konfigurationshandbuch und Benutzerhandbuch z Inbetriebnahmeanleitu...

Страница 15: ...fehlerhafte FDnet Anbindung Grün leuchtend FDnet Anbindung Normalbetrieb 2 FDnet Activity Grün blinkend Lokalisierung Anzeige aus Keine Videoaufzeichnung auf Compact Flash oder kein Compact Flash vorhanden 3 Storage Grün blinkend Speicherzugriffe auf Compact Flash z B bei Videoaufzeichnung Anzeige aus Gerät ist heruntergefahren 4 Power Grün leuchtend Gerät ist betriebsbereit oder startet oder fähr...

Страница 16: ...durchschleifen Off Videosignal zu anderem Videoeingang durchschleifen 5 USB 2 0 max 500 mA 6 LAN RJ45 10 100 Mbit Netzwerkanschluss I O Anschluss 2 Digitale Eingänge Schalten durch Relaiskontakte 2 Digitale Ausgänge Potential getrennt Open Collector Ausgänge 5 24 V max 50 mA RS485 Transparenter Datenkanal PTZ Steuerung 7 Audio Eingänge Ausgänge Nicht unterstützt 8 Stromversorgungsanschluss 12 24 V...

Страница 17: ...gang 11 Digitaler Eingang 1 4 Audio Ausgang 12 Digitaler Eingang 1 5 Nicht unterstützt 13 Digitaler Eingang 2 6 Nicht unterstützt 14 Digitaler Eingang 2 7 Digitaler Ausgang 1 15 RS485 D 8 Digitaler Ausgang 1 16 RS485 D Pinbelegung Anschlussblock 8 1 GND 2 12 24 V DC oder 24 V AC 3 12 24 V DC oder 24 V AC Pinbelegung Anschlussblock 9 1 FDnet IN LINE 2 FDnet IN LINE 3 FDnet OUT LINE 4 FDnet OUT LINE...

Страница 18: ...dmeldezentrale übermittelt Vergleichen Sie hierzu Kap 13 Störungsabhilfe 7 3 1 Beispiel zur Anwendung des Video Fire Controllers FDV241 Acknowl edge Re set Opt ion a l U ser 1 U ser 2 U ser 3 U ser 4 More Alarms ALARM User 5 Pr emi ses Ma nne d User 6 Al ar m de lay Of f F AULT ISO LATIO N T EST Active F ault Of f Act ive Fault Of f Remot e al ar m Ala rm D ev ic e Act iv e Fa ult Off Cont rol Fa ...

Страница 19: ...Tausch empfohlen z Tausch notwendig z Störung Vergleichen Sie hierzu Kap 13 Störungsabhilfe Statusabfrage Der Video Fire Controller ist mit einem MC Link Maintenance and Commissioning Link ausgerüstet Über diesen Link können Sie mit dem Prüfpflücker FDUD29x folgende Daten abfragen z Unzulässige Konfiguration z Fehlerliste z Statusregister Funktionskontrolle Durch den Selbsttest wird der Video Fire...

Страница 20: ...chen Sie hierzu Kap 4 Technische Daten VORSICHT Geräte Anlagen oder Personenschäden durch falsche Montage Bei falscher Montage besteht die Gefahr dass das Gerät herunterfällt 1 Achten Sie bei der Montage darauf dass das Gerät an der Hutschiene richtig einrastet 2 Sichern Sie das Gerät mit Hilfe von Hutschienen Endhaltern auf beiden Seiten gegen seitliches Verschieben 2 Hängen Sie das Gerät von obe...

Страница 21: ... der Gerätevorderseite 2 Ziehen Sie den Gehäusedeckel vom Gerät Gerät schließen WICHTIG Beschädigung des Gerätes Gefahr einer Beschädigung beim Schließen des Gerätes Achten Sie beim Schließen des Gerätes darauf dass die Lichtleiter im Gehäusedeckel bzw die elektronischen Komponenten im Inneren des Gerätes nicht beschädigt werden 1 Stecken Sie den Gehäusedeckel auf das Gerät 2 Ziehen Sie die Schrau...

Страница 22: ...t öffnen oder schließen 2 Halten Sie zum Herunterfahren des Gerätes den ON OFF Schalter 1 ca zwei Sekunden gedrückt Î Das Gerät fährt herunter dies kann einige Sekunden dauern Î Die Power LED 2 leuchtet nicht mehr wenn das Gerät heruntergefahren ist 3 Drücken Sie den ON OFF Schalter 1 Î Das Gerät fährt hoch Î Die Power LED 2 leuchtet 4 Schließen Sie das Gerät Vergleichen Sie hierzu 9 1 Gerät öffne...

Страница 23: ... kann der Video Stream ca 2 5 Stunden aufgezeichnet werden WICHTIG Aufzeichnungsfehler bei falscher Compact Flash Karte Bei nicht geeigneter Compact Flash Karte kann es zu Fehlern bei der Aufzeichnung von Videodaten kommen z Achten Sie auf den zulässigen Temperaturbereich von 0 70 C auf die minimal notwendige Übertragungsgeschwindigkeit von 1 MB s und die minimale Speicherkapazität von 4 GB Vergle...

Страница 24: ...vieren Sie die Compact Flash Karte Informationen hierzu finden Sie im SISTORE SX CX Konfigurationshandbuch 8 Formatieren Sie die Compact Flash Karte Informationen hierzu finden Sie im SISTORE SX CX Konfigurationshandbuch Compact Flash Karte ausbauen 1 Deaktivieren Sie die Compact Flash Karte Informationen hierzu finden Sie im SISTORE SX CX Konfigurationshandbuch 2 Öffnen Sie das Gerät Vergleichen ...

Страница 25: ...ich ist stellen Sie den Abschlusswiderstand 4 auf Off und schließen Sie weiterführende Videokabel an der Videoschleife 3 an 3 Schließen Sie einen analogen Monitor an das Gerät 2 an 4 Schließen Sie den Client PC mit einem gekreuzten Netzwerkkabel Patch Kabel an das Gerät 6 an 5 Schließen Sie das Spannungsversorgungskabel zuerst an das Gerät 8 und danach an die Spannungsversorgung an 6 Schalten Sie ...

Страница 26: ...gurieren Weitere Informationen zur Konfiguration und Inbetriebnahme der Brandmeldezentrale finden Sie im Konfigurations und Benutzerhandbuch der Brandmeldezentrale Aufnahmen wiedergeben oder auslagern Um Aufnahmen beispielsweise wiederzugeben oder auszulagern muss der Client PC wieder mit dem Video Fire Controller verbunden werden 1 Schließen Sie den Client PC mit einem gekreuzten Netzwerkkabel Pa...

Страница 27: ...trale FDV241 1 Kamera Netzwerk Switch Client PC Abb 9 Anlagenbetrieb mit einem Gerät Abb 10 Anschlüsse Video Fire Controller 1 Betreiben Sie das Gerät an der Hutschiene Vergleichen Sie hierzu Kap 8 Wandmontage 2 Schließen Sie eine Kamera an den Videoeingang 1 an Falls Durchschleifen erforderlich ist stellen Sie den Abschlusswiderstand 4 auf Off und schließen Sie weiterführende Videokabel an der Vi...

Страница 28: ...ftware Vergleichen Sie hierzu Kap 10 Software und Kap 11 Konfiguration 11 Schließen Sie den Video Fire Controller an das FDnet an 9 12 Konfigurieren Sie das Gerät an der Brandmeldezentrale Vergleichen Sie hierzu Kap 12 FDV241 an der Brandmeldezentrale konfigurieren Weitere Informationen zur Konfiguration und Inbetriebnahme der Brandmeldezentrale finden Sie im Konfigurations und Benutzerhandbuch de...

Страница 29: ...n die Spannungsversorgungen an 7 Schalten Sie den analogen Monitor ein Î Es erscheint nach kurzer Zeit die IP Adresse des Geräts 8 Wiederholen Sie die Schritte 5 bis 7 für jedes Gerät 9 Schließen Sie den Client PC an die Spannungsversorgung an 10 Starten Sie den Client PC 11 Stellen Sie die IP Adresse des Client PCs ein Vergleichen Sie hierzu Kap 9 7 IP Adresse des Client PCs einstellen 12 Install...

Страница 30: ...rth ist im Lieferumfang enthalten WICHTIG z Der Abstand zwischen Ferritkern und Gerät darf max 100 mm betragen z Falls das verwendete I O Kabel nicht in den mitgelieferten Klappferritkern passt verwenden Sie einen anderen Ferritkern mit den entsprechenden elektrischen Eigenschaften 1 Schließen Sie das I O Kabel am I O Anschluss an Abb 13 Ferritkern um I O Kabel 1 I O Anschluss 2 I O Kabel 3 Ferrit...

Страница 31: ...schaften Î Das Dialogfenster Eigenschaften von Local Area Connection öffnet sich 4 Wählen Sie ein Internetprotokoll TCP IP aus 5 Klicken Sie auf die Schaltfläche Eigenschaften Î Das Dialogfenster Eigenschaften von Internetprotokoll TCP IP öffnet sich 6 Aktivieren Sie das Optionsfeld Folgende IP Adresse verwenden 7 Geben Sie IP Adresse 169 254 xxx xxx und Subnetzmaske 255 255 0 0 ein 8 Klicken Sie ...

Страница 32: ...tützung für DirectX 8 oder höher Getestete Grafikkarten ATI Radeon 9200 128 MB NVIDIA GeForce FX 5200 256 MB Matrox G450 Matrox G550 Bildschirmauflösung min 1024 x 768 Pixel Farbtiefe 16 Bit oder 32 Bit 24 Bit nicht unterstützt 10 2 Software installieren 1 Legen Sie die mitgelieferte CD in das CD Laufwerk des Client PCs ein Î Das Installationsprogramm wird automatisch gestartet 2 Folgen Sie den An...

Страница 33: ... Sie auf die Desktop Verknüpfungen SISTORE SX CX Config Abb 15 SISTORE SX CX Config Desktop Verknüpfung 2 Melden Sie sich folgendermaßen an Benutzername admin Kennwort admin Î Die Software SISTORE SX CX Config ist aufgerufen 11 2 SISTORE SX CX Konfigurationshandbuch aufrufen Weitere Anweisungen zur Konfiguration finden Sie im SISTORE SX CX Konfigurationshandbuch Informationen zur Kamerainstallatio...

Страница 34: ... mit Vor und Nachlauf triggern Ausgang OUT B steuert Video Aufzeichnung Start Stopp Ausgang OUT C steuert Nicht verwendet Ausgang OUT D steuert Nicht verwendet Eingänge Parameter Wert IN 1 IN 2 IN 3 IN 4 Gefahreneingang Statuseingang x Eingangstyp Abgeschaltet x x x Unterbruchsüberwachung x Eingangsbeschaltung Kurzschluss und Unterbruchsüberwachung offen Eingang aktiv wenn Kontakt geschlossen x Fi...

Страница 35: ...ung vor 1 Überprüfen Sie die Melderlinienspannung 2 Tauschen Sie das Gerät Es liegt ein Software Fehler Watchdog Fehler vor Tauschen Sie das Gerät Es liegt ein Speicherfehler vor Tauschen Sie das Gerät Störung Es liegt ein Kommunikations Fehler zwischen Melder und Zentrale vor Beheben Sie die Ursache 14 Entsorgung Alle Elektro und Elektronikgeräte sind getrennt vom allgemeinen Hausmüll über dafür ...

Страница 36: ...re Safety Security Products Gubelstrasse 22 CH 6301 Zug Tel 41 41 724 24 24 Fax 41 41 724 35 22 www sbt siemens com 2008 Copyright by Siemens Schweiz AG Liefermöglichkeiten und technische Änderungen vorbehalten Dokument Nr A6V10092464 Handbuch FD20 Ausgabe 14 11 2008 Register 3 ...

Страница 37: ...Building Technologies Fire Safety and Security Products FDV241 Video Fire Controller Startup Manual SISTORE V3 5 ...

Страница 38: ...document and in the subject thereof By acceptance of the document the recipient acknowledges these rights and undertakes not to publish the document nor the subject thereof in full or in part nor to make them available to any third party without our prior express written authorization nor to use it for any purpose other than for which it was delivered to him ...

Страница 39: ...Diagnosis levels in FDnet 17 7 3 3 Degraded mode in FDnet 17 8 Wall mounting 18 9 Setup 19 9 1 Opening closing the device 19 9 2 Switching the device on or off 20 9 3 Inserting and removing the compact flash card 21 9 4 Connecting the Video Fire Controller FDV241 to the FDnet without connection to the CCTV system 23 9 5 Connecting the Video Fire Controller FDV241 to the FDnet and to the CCTV syste...

Страница 40: ......

Страница 41: ...emarks All products or company names referred to explicitly in this manual are mentioned only for purposes of identification or description and may be trademarks or registered trademarks of their respective owners SISTORE is a trademark of Siemens Building Technologies Fire Security Products GmbH Co oHG Microsoft is a registered trademark and Windows a trademark of Microsoft Corporation Training c...

Страница 42: ...n Performs troubleshooting and eliminates faults Has appropriate professional training with regard to his function and the products devices systems to be configured and has attended the manufacturer s training courses for project engineers Installer Installs the product device or system components at the site Performs a general function check following installation Professional training in the fie...

Страница 43: ...e not under stress kinked or damaged 2 2 3 Setup Damage to equipment due to fire controls z When fire controls are activated for test purposes any damage to system parts must be ruled out z Fire control installations must only be activated after the test has been completed and the system has been definitely handed over to the customer Damage due to unsuitable mounting location z Observe the enviro...

Страница 44: ... label 2 2 4 Installation Data loss after software update z Make sure to backup all data before updating the software 2 3 Meaning of the written warning notices The severity of a hazard is indicated by the following written warning notices IMPORTANT Malfunctioning may result CAUTION There is a risk of minor injuries or damage to property 2 4 Meaning of the hazard symbols Caution Dangerous area Cau...

Страница 45: ...conformity is available from Siemens Building Technologies Fire Security Products GmbH Co oHG 76181 Karlsruhe Germany European Directive 2004 108 EC Electromagnetic Compatibility Compliance with the European Directive 2004 108 EC has been proven by testing according to the following standards Emitted interference EN 61000 6 4 EN 55022 Class A Interference resistance EN 50130 4 European Directive 8...

Страница 46: ... LPS Limited Power Source requirements and with the EN 60950 1 standard Power consumption Max 15 W Inputs and outputs Design plug type connection Cross section 0 2 1 5 mm2 Compact flash slot CF type I 42 8 x 36 4 x 3 3 mm Compact flash card Permissible temperature range 0 70 C Min transmission speed 1 MB s r w Min storage capacity 4 GB Battery Varta 6032 Top hat rail Mounting rail to DIN EN 50022 ...

Страница 47: ...6 0 75 mA Operating temperature 10 to 55 C Relative humidity 95 rel at T 25 3 C 93 rel at T 40 2 C temporary condensation permissible Maximum current connection factor 3 Quiescent current connection factor 3 Address connection factor 1 Separator connection factor 1 Protocol FDnet Compatibility For details see doc no 008331 List of compatibility External alarm indicator Connector for external alarm...

Страница 48: ...P colour DIP switch camera 480 TVL PAL 12 V DC 24 V AC 0 45 kg CLVD1314 3 5 8 2GF1667 8AJ 3 5 8 mm F1 4 1 3 CS 0 0766 kg CAB1420 2GF1710 8BD Universal camera mount 140 mm 0 25 kg CFVC1317 LP S54561 C61 A1 1 3 CCD 3 7 12 mm Colour Varifocal Dome 540 TVL PAL 12 V DC 24 V AC 3 5 W 0 29 kg 6 Scope of delivery z Video Fire Controller z Software CD with configuration manual and user manual z Startup man...

Страница 49: ...utting down No indicator FDnet is not connected Lit green FDnet is connected and working properly 2 FDnet activity Blinking green Locating No indicator No video recording on compact flash or No compact flash present 3 Storage Blinking green Memory access to compact flash e g while recording is in progress No indicator Device is switched off 4 Power Lit green Device is ready for operation or starti...

Страница 50: ... no video signal loop through Off video signal loops through to another video input 5 USB 2 0 max 500 mA 6 LAN RJ45 10 100 Mbit network connection I O connector 2 digital inputs Switch via relay contacts 2 digital outputs Electrically isolated Open Collector outputs 5 24 V max 50 mA RS485 Transparent data channel PTZ control 7 Audio inputs outputs Not supported 8 Power supply 12 24 V DC or 24 V AC...

Страница 51: ...t 2 3 Audio output 11 Digital input 1 4 Audio output 12 Digital input 1 5 Not supported 13 Digital input 2 6 Not supported 14 Digital input 2 7 Digital output 1 15 RS485 D 8 Digital output 1 16 RS485 D Pin assignment terminal block 8 1 GND 2 12 24 V DC or 24 V AC 3 12 24 V DC or 24 V AC Pin assignment terminal block 9 1 FDnet IN LINE 2 FDnet IN LINE 3 FDnet OUT LINE 4 FDnet OUT LINE ...

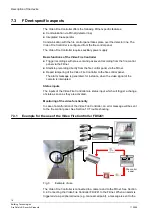
Страница 52: ... will be sent to the fire control panel See Section 13 Trouble shooting 7 3 1 Example for the use of the Video Fire Controller FDV241 Fire control panel Acknowledge Reset Optional User 1 User 2 User 3 User 4 More Alarms ALARM User 5 Premises Manned User 6 Alarm delay Off FAULT ISOLATION TEST Active Fault Off Active Fault Off Remote alarm Alarm Device Active Fault Off Control Fault System On FC20xx...

Страница 53: ...s equipped with an MC link maintenance and commissioning link With the detector exchanger and tester FDUD29x the following data can be displayed z Inadmissible configuration z Error list z Status register Functional check The self test function ensures that the Video Fire Controller is checked automatically It is nevertheless advisable to check the devices at regular intervals on site z Check the ...

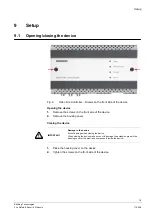
Страница 54: ...commended top hat rail to the wall See Section 4 Technical data CAUTION Risk of bodily injury or damage to the device system due to incorrect installation If the device is not mounted correctly there is a risk that it will fall down 1 Make sure that the device properly engages into the top hat rail 2 Secure the device against lateral displacement using rail stoppers on both sides 2 Hang the device...

Страница 55: ...1 Remove the screws on the front side of the device 2 Remove the housing cover Closing the device IMPORTANT Damage to the device Risk of damage when closing the device When closing the device make sure not to damage the extension pipes in the housing cover or the electronic components inside the device 1 Place the housing cover on the device 2 Tighten the screws on the front side of the device ...

Страница 56: ...on 9 1 Opening closing the device 2 To shut down the device press the ON OFF switch 1 for approx 2 seconds Î The device switches off which can take several seconds Î Once the device is switched off the Power LED 2 will no longer be lit 3 Press the ON OFF switch 1 Î The device boots up Î The Power LED 2 lights up 4 Close the device See Section 9 1 Opening closing the device ...

Страница 57: ...then the video stream can be recorded for approx 2 5 hours IMPORTANT Recording errors when using the wrong Compact Flash card Using an improper Compact Flash card can cause errors upon recording video data z Make sure the card meets the requirements for the permissible temperature range of 0 70 C the minimum required transfer rate of 1 MB s and the minimum storage capacity of 4 GB See Section 4 Te...

Страница 58: ... flash card Further information on this can be found in the SISTORE SX CX Configuration Manual 8 Format the compact flash card Further information on this can be found in the SISTORE SX CX Configuration Manual Removing the compact flash card 1 Deactivate the compact flash card Further information on this can be found in the SISTORE SX CX Configuration Manual 2 Open the device See Section 9 1 Openi...

Страница 59: ...f and connect the video cable extension to the video loop 3 3 Connect an analogue monitor to the device 2 4 Connect the client PC to the device 6 using a patch cable 5 Connect the power supply cable to the device 8 first and then to the power source 6 Switch on the analogue monitor Î After a short wait the IP address of the device will appear on the screen 7 Connect the client PC to the power supp...

Страница 60: ...ation and user manual for the fire control panel Replaying or archiving recordings If you want to play or export recorded sequences the client PC must be connected to the Video Fire Controller again 1 Connect the client PC to the Video Fire Controller 6 using a patch cable 2 Play the recorded sequences using the SISTORE SX CX Client software or archive them Further information on this can be found...

Страница 61: ...tch Client PC Fig 9 Single device system Fig 10 Connections on the Video Fire Controller 1 Operate the device on the top hat rail See Section 8 Wall mounting 2 Connect a camera to the video input 1 If loop through is necessary set the terminating resistor 4 to Off and connect the video cable extension to the video loop 3 3 Connect an analogue monitor to the device 2 4 Connect the client PC to the ...
Страница 62: ...guration 11 Connect the Video Fire Controller to the FDnet 9 12 Configure the device on the fire control panel See Section 12 Configuring FDV241 on the fire control panel More detailed information on the configuration and setup of the fire control panel can be found in the configuration and user manual for the fire control panel 9 5 2 Multiple device system 1c amera FDV241 FDV241 FDV241 Client PC ...
Страница 63: ...then to the power source 7 Switch on the analogue monitor Î After a short wait the IP address of the device will appear on the screen 8 Repeat steps 5 to 7 for each device 9 Connect the client PC to the power supply 10 Start the client PC 11 Set the IP address of the client PC See Section 9 7 Setting the IP address of the client PC 12 Install the software and configure it See Section 10 Software a...

Страница 64: ... type 74271132 manufacturer Würth is included in the delivery IMPORTANT z The distance between the ferrite core and the device must not exceed 100 mm z In case the I O cable used should not fit into the snap on ferrite core supplied another ferrite core with the same electrical properties has to be used 1 Connect the I O cable to the I O port Fig 13 Ferrite core snapped onto the I O cable 1 I O co...

Страница 65: ...ct Properties in the context menu Î The Local Area Connection Properties dialog box appears 4 Select an Internet protocol TCP IP 5 Click on Properties Î The Internet Protocol TCP IP Properties dialog box appears 6 Activate the option Use the following IP address 7 Enter 169 254 xxx xxx for the IP address and 255 255 0 0 for the subnet mask 8 Click OK 9 Restart your client PC Î The device is now re...

Страница 66: ...P Graphics card With support for DirectX 8 or later version Graphics cards tested ATI Radeon 9200 128 MB NVIDIA GeForce FX 5200 256 MB Matrox G450 Matrox G550 Screen resolution Min 1024 x 768 pixels Colour depth 16 bit or 32 bit 24 bit not supported 10 2 Installing the software 1 Place the CD in the CD drive of the client PC Î The installation program is started automatically 2 Follow the instruct...

Страница 67: ...STORE SX CX Config Fig 15 SISTORE SX CX Config desktop shortcut 2 Log on to the server using the following user name and password User name admin Password admin Î The SISTORE SX CX Config software has been started 11 2 Opening the SISTORE SX CX Configuration Manual For further information on configuration please refer to the SISTORE SX CX Configuration Manual For information on the installation an...

Страница 68: ... video recording with pre event recording and post event times Output OUT B controls Start stop video recording Output OUT C controls Not used Output OUT D controls Not used Inputs Parameter Value IN 1 IN 2 IN 3 IN 4 Danger input Status input x Input type Switched off x x x Open line monitoring x Input circuit Short circuit and open line monitoring open Input active when contact is closed x Filter...

Страница 69: ...1 Check the detector line voltage 2 Exchange the device There is a software error watchdog error Exchange the device There is a storage error Exchange the device Error There is a communication error between a detector and the fire control panel Eliminate the cause of the fault 14 Disposal All electrical and electronic products should be disposed of separately from the municipal waste stream via de...

Страница 70: ...Security Products Gubelstrasse 22 CH 6301 Zug Tel 41 41 724 24 24 Fax 41 41 724 35 22 www sbt siemens com 2008 Copyright by Siemens Schweiz AG Data and design subject to change without notice Supply subject to availability Document No A6V10092464 Manual FD20 Edition 14 11 2008 Section 3 ...

Страница 71: ...Building Technologies Fire Safety and Security Products FDV241 Video Fire Controller Manual de inicio SISTORE V3 5 ...

Страница 72: ...sobre este documento y el asunto en él tratado Al aceptar este documento el receptor reconoce estos derechos y se compromete a no publicar el documento ni el asunto en él tratado ya sea total o parcialmente y a no ponerlo a disposición de terceros sin la previa autorización por escrito del fabricante ni a usarlo para otros fines que no sean los establecidos al entregarle el documento ...

Страница 73: ...co en FDnet 17 7 3 3 Modo degradado en FDnet 17 8 Montaje en pared 18 9 Preparación 19 9 1 Apertura cierre del dispositivo 19 9 2 Encender o apagar el dispositivo 20 9 3 Inserción y extracción de la tarjeta Compact Flash 21 9 4 Conexión del Video Fire Controller FDV241 a FDnet sin conexión al sistema CCTV 23 9 5 Conexión del Video Fire Controller FDV241 a FDnet y al sistema CCTV 25 9 5 1 Sistema d...

Страница 74: ......

Страница 75: ...os los nombres de productos o empresas mencionados de forma explícita en este manual sólo aparecen a efectos de identificación o descripción y pueden ser marcas comerciales o registradas de sus respectivos propietarios SISTORE es una marca comercial de Siemens Building Technologies Fire Security Products GmbH Co oHG Microsoft es una marca comercial registrada y Windows es una marca comercial de Mi...

Страница 76: ...fallos Ha recibido formación profesional para esta función y los productos dispositivos sistemas que se deben configurar y ha asistido a cursos de formación del fabricante para project engineers Instalador Instala el producto dispositivo o los componentes del sistema en el emplazamiento Realiza un examen de funcionamiento general después de la instalación Formación profesional en el campo de la do...

Страница 77: ...Preparación Daños al equipo en modo control de incendio z Si se activan controles de incendio para fines de prueba esto no debe ser la causa de daños en partes de la instalación z Sólo se liberarán los controles de incendio una vez concluida la comprobación y después de que la instalación se haya entregado definitivamente al cliente Daños por una ubicación de instalación inadecuada z Observe los r...

Страница 78: ...nstalación Pérdida de datos tras la actualización del software z Asegúrese de realizar copias de seguridad de todos los datos antes de actualizar el software 2 3 Significado de los avisos escritos Los siguientes avisos escritos indican la gravedad de un peligro IMPORTANTE Puede producir un mal funcionamiento PRECAUCIÓN Existe un riesgo de daños físicos menores o daños materiales 2 4 Significado de...

Страница 79: ...de la UE de conformidad se encuentra disponible en Siemens Building Technologies Fire Security Products GmbH Co oHG 76181 Karlsruhe Alemania Directiva europea 2004 108 EC Compatibilidad electromagnética La conformidad con la directiva europea 2004 108 EC ha sido probada según las normas siguientes Interferencia emitida EN 61000 6 4 EN 55022 Clase A Resistencia de la interferencia EN 50130 4 Direct...

Страница 80: ...ridad y LPS Fuente de alimentación limitada y con la norma EN 60950 1 Consumo de energía Máx 15 W Entradas y salidas Diseño conexión tipo clavija Sección transversal 0 2 1 5 mm2 Ranura Compact Flash CF tipo I 42 8 x 36 4 x 3 3 mm Tarjeta Compact Flash Rango de temperaturas permisibles 0 70 C Velocidad de transmisión mín 1 MB s l e Capacidad de almacenamiento mínima 4 GB Batería Varta 6032 Raíl sim...

Страница 81: ... mA Temperatura de funcionamiento de 10 a 55 C Humedad relativa 95 rel a T 25 3 C 93 rel a T 40 2 C condensación temporal permisible Factor de máxima conexión de corriente 3 Factor de conexión quiescente 3 Factor de conexión de dirección 1 Factor de conexión de separador 1 Protocolo FDnet Compatibilidad Para más información ver doc núm 008331 Lista de compatibilidad Indicador de alarma externa Con...

Страница 82: ... 1 3 con interruptor DIP 480 TVL PAL 12 V CC 24 V CA 0 45 kg CLVD1314 3 5 8 2GF1667 8AJ 3 5 8 mm F1 4 1 3 CS 0 0766 kg CAB1420 2GF1710 8BD Montaje de cámara universal 140 mm 0 25 kg CFVC1317 LP S54561 C61 A1 1 3 CCD 3 7 12 mm Colour Varifocal Dome 540 TVL PAL 12 V DC 24 V AC 3 5 W 0 29 kg 6 Componentes z Video Fire Controller z CD de software con manual de configuración y manual de usuario z Manua...

Страница 83: ...e o apagándose Sin indicador FDnet no conectado Verde fijo FDnet está conectado y funciona correctamente 2 Actividad FDnet Verde intermitente Localizando Sin indicador No hay grabación de vídeo en Compact Flash o No hay Compact Flash 3 Almacenamiento Verde intermitente Acceso de memoria a Compact Flash p ej durante la grabación Sin indicador Dispositivo apagado 4 Alimentación Verde fijo Dispositiv...

Страница 84: ...l de vídeo Desact hay interconexión de la señal de vídeo a otra entrada de vídeo 5 USB 2 0 máx 500 mA 6 LAN RJ45 Conexión de red de 10 100 Mbits Conector de E S 2 entradas digitales Conmutación mediante contactos de relé 2 salidas digitales Salidas de colector abierto aisladas eléctricamente 5 24 V máx 50 mA RS485 Canal de datos transparente control PTZ 7 Entradas salidas de audio No se admite 8 F...

Страница 85: ...da de audio 11 Entrada digital nº 1 4 Salida de audio 12 Entrada digital nº 1 5 No se admite 13 Entrada digital nº 2 6 No se admite 14 Entrada digital nº 2 7 Salida digital nº 1 15 RS485 D 8 Salida digital nº 1 16 RS485 D Asignación de contactos bloque terminal 8 1 Masa 2 12 24 V CC o 24 V CA 3 12 24 V CC o 24 V CA Asignación de contactos bloque terminal 9 1 FDnet IN LINE 2 FDnet IN LINE 3 FDnet O...

Страница 86: ... función de vídeo En caso de fallo en el Video Fire Controller se envía un mensaje de error a la unidad de control de detección de incendios Consulte la sección 13 Solución de problemas 7 3 1 Ejemplo de uso del Video Fire Controller FDV241 Acknowledge Reset Optional User 1 User 2 User 3 User 4 More Alarms ALARM User5 Premises Manned User6 Alarm delay Off FAULT ISOLATION TEST Active Fault Off Activ...

Страница 87: ...tado El Video Fire Controller está equipado con un enlace MC mantenimiento y puesta en servicio Con el extractor probador de detectores FDUD29x se pueden extraer los siguientes datos mediante este enlace z Configuración inadmisible z Lista de errores z Registro de estado Revisión funcional La función de autoprueba realiza una comprobación automática del Video Fire Controller No obstante se recomie...

Страница 88: ...trico recomendado a la pared Véase la sección 4 Datos técnicos PRECAUCIÓN Existe riesgo de lesiones corporales o daños en el dispositivo sistema si no se instala correctamente Si el dispositivo no se instala correctamente existe el riesgo de que caiga 1 Asegúrese de que el dispositivo está correctamente fijado al raíl simétrico 2 Coloque topes a ambos lados del dispositivo para evitar que se despl...

Страница 89: ...illos de la parte delantera del dispositivo 2 Quite la cubierta de la carcasa Cierre del dispositivo IMPORTANTE Daños al dispositivo Riesgo de daños al cerrar el dispositivo Cuando cierre el dispositivo asegúrese de no dañar los tubos de extensión en la cubierta de la carcasa o los componentes electrónicos dentro del dispositivo 1 Coloque la cubierta de la carcasa del dispositivo 2 Apriete los tor...

Страница 90: ...9 1 Apertura cierre del dispositivo 2 Para apagar el dispositivo pulse el interruptor ACT DES 1 durante unos 2 segundos Î El dispositivo se apaga transcurridos unos segundos Î Una vez apagado el dispositivo el LED Power 2 estará apagado 3 Pulse el interruptor ACT DES 1 Î El dispositivo se inicia Î El LED Power 2 se ilumina 4 Cierre el dispositivo Consulte la sección 9 1 Apertura cierre del disposi...

Страница 91: ...e vídeo se puede grabar en aprox 2 5 horas IMPORTANTE Errores de grabación al usar una tarjeta Compact Flash incorrecta El uso de una tarjeta Compact Flash inadecuada puede producir errores en la grabación de vídeo z Asegúrese de que la tarjeta cumple los requisitos de rango de temperaturas permisibles 0 70 C velocidad de transferencia mínima de 1 MB s y capacidad de almacenamiento mínima de 4 GB ...

Страница 92: ...la tarjeta Compact Flash En el manual de configuración de SISTORE SX CX puede encontrar más información 8 Formatee la tarjeta Compact Flash En el manual de configuración de SISTORE SX CX puede encontrar más información Extracción de la tarjeta Compact Flash 1 Desactive la tarjeta Compact Flash En el manual de configuración de SISTORE SX CX puede encontrar más información 2 Abra el dispositivo Cons...

Страница 93: ...na interconexión coloque el resistor de terminación 4 en la posición Desact y conecte la extensión del cable de vídeo a la interconexión de vídeo 3 3 Conecte un monitor analógico al dispositivo 2 4 Conecte el PC al dispositivo 6 mediante un cable conector 5 Conecte el cable de alimentación primero al dispositivo 8 y luego al enchufe de alimentación 6 Encienda el monitor analógico Î En breves momen...

Страница 94: ...stalación y configuración de la unidad de control de detección de incendios en el manual de configuración y del usuario de la unidad de control de detección de incendios Reproducir o archivar grabaciones Si desea reproducir o exportar secuencias grabadas debe conectar de nuevo el PC cliente al Video Fire Controller 1 Conecte el PC cliente al Video Fire Controller 6 mediante un cable conector 2 Rep...

Страница 95: ...onmutador de la red Client PC Fig 9 Sistema de dispositivo único Fig 10 Conexiones en el Video Fire Controller 1 Funcionamiento del dispositivo montado en el raíl simétrico Consulte la sección 8 Montaje en pared 2 Conecte una cámara a la entrada de vídeo 1 Si es necesario realizar alguna interconexión coloque el resistor de terminación 4 en la posición Desact y conecte la extensión del cable de ví...

Страница 96: ...nfiguración 11 Conecte el Video Fire Controller a FDnet 9 12 Configure el dispositivo en la unidad de control de detección de incendios Consulte la sección 12 Configuración de FDV241 en la unidad de control de detección de incendios Dispone de más información sobre la instalación y configuración de la unidad de control de detección de incendios en el manual de configuración y del usuario de la uni...

Страница 97: ... de alimentación 7 Encienda el monitor analógico Î En breves momentos la dirección IP del dispositivo aparecerá en la pantalla 8 Repita los pasos 5 a 7 para cada dispositivo 9 Conecte el PC cliente a la corriente 10 Inicie el PC cliente 11 Establezca la dirección IP del PC cliente Consulte la sección 9 7 Establecer la dirección IP del PC cliente 12 Instale el software y configúrelo Consulte la sec...

Страница 98: ...arandela 74271132 fabricante Würth se incluye en la entrega IMPORTANTE z La distancia entre el núcleo de ferrita y el dispositivo no debe superar los 100 mm z En caso de que el cable de E S no encaje en el núcleo de ferrita suministrado debe utilizar otro núcleo con las mismas propiedades eléctricas 1 Conecte el cable de E S al puerto de E S Fig 13 Núcleo de ferrita instalado en el cable de E S 1 ...

Страница 99: ...s en el menú contextual Î Aparece el cuadro de diálogo Propiedades de Conexión de área local 4 Seleccione el protocolo Internet TCP IP 5 Haga clic en Propiedades Î Aparece el cuadro de diálogo Propiedades de protocolo Internet TCP IP 6 Active la opción Utilizar la siguiente dirección IP 7 Introduzca 169 254 xxx xxx para la dirección IP y 255 255 0 0 para la máscara de subred 8 Haga clic en Aceptar...

Страница 100: ...ta gráfica Compatible con DirectX 8 o posterior Tarjetas gráficas probadas ATI Radeon 9200 128 MB NVIDIA GeForce FX 5200 256 MB Matrox G450 Matrox G550 Resolución de pantalla Mín 1024 x 768 píxeles Profundidad de color 16 bits o 32 bits no se admiten 24 bits 10 2 Instalación del software 1 Inserte el CD en la unidad de CD del PC cliente Î El programa de instalación se inicia automáticamente 2 Siga...

Страница 101: ...cceso directo a SISTORE SX CX Config 2 Inicie sesión en el servidor usando el nombre de usuario y la contraseña siguientes User name admin Password admin Î El software SISTORE SX CX Config se ha iniciado 11 2 Apertura del manual de configuración de SISTORE SX CX Para obtener información adicional sobre configuración consulte el manual de configuración de SISTORE SX CX Para obtener información sobr...

Страница 102: ... señal de vídeo Salida OUT A controla Activar grabaciones de vídeo previas y posteriores a evento Salida OUT B controla Inicio parada de grabación de vídeo Salida OUT C controla No utilizado Salida OUT D controla No utilizado Entradas Parámetro Valor IN 1 IN 2 IN 3 IN 4 Entrada de peligro Entrada de estado x Tipo de entrada Apagado x x x Control de línea abierta x Circuito de entrada Control de co...

Страница 103: ...ión de la linea de detectores 2 Cambie el dispositivo Error de software error de watchdog Cambie el dispositivo Error de almacenamiento Cambie el dispositivo Error Error de comunicación entre un detector y la unidad de control de detección de incendios Elimine la causa del fallo 14 Eliminación Todos los productos eléctricos y electrónicos deben ser desechados por separado de la red de recogida de ...

Страница 104: ...ity Products Gubelstrasse 22 CH 6301 Zug Tel 41 41 724 24 24 Fax 41 41 724 35 22 www sbt siemens com 2008 Copyright by Siemens Schweiz AG Datos y diseño sujetos a modificación sin previo aviso Suministro sujeto a existencias Documento nº A6V10092464 Manual FD20 Edición 14 11 7 2008 Registro 3 ...

Страница 105: ...Building Technologies Fire Safety and Security Products FDV241 Video Fire Controller Manuel de mise en service SISTORE V3 5 ...

Страница 106: ...roits sur ce document et le sujet traité dans ce dernier En acceptant le document l utilisateur reconnaît ces droits et accepte de ne pas publier le document ni de divulguer le sujet dont il traite en tout ou partie de ne pas le remettre à une tierce partie quelle qu elle soit sans notre accord préalable écrit et de ne pas l utiliser à d autres fins que celles pour lesquelles il lui a été fourni ...

Страница 107: ...ux de diagnostic sur le réseau FDnet 17 7 3 3 Mode dégradé sur la ligne FDnet 17 8 Montage mural 18 9 Montage 19 9 1 Ouverture fermeture de l appareil 19 9 2 Mise sous ou hors tension de l appareil 20 9 3 Insertion et retrait de la carte Compact Flash 21 9 4 Connexion du Video Fire Controller FDV241 à la ligne FDnet sans connexion au système de vidéosurveillance 23 9 5 Connexion du Video Fire Cont...

Страница 108: ......

Страница 109: ... l accompagne Marques commerciales Tous les noms de produit ou de société explicitement mentionnés dans ce manuel ne sont utilisés qu à des fins d identification ou des fins descriptives et peuvent être les marques commerciales ou déposées de leurs détenteurs respectifs SISTORE est une marque commerciale de Siemens Building Technologies Fire Security Products GmbH Co oHG Microsoft est une marque d...

Страница 110: ...duits resp appareils resp systèmes à paramétrer et a suivi des cours de formation technique pour les ingénieurs projets à l usine du fournisseur Personnel d installation Monte et installe les composants du produit resp de l appareil resp du système sur le site d exploitation Procède après l installation à un contrôle général du bon fonctionnement de l installation A suivi une formation spécialisée...

Страница 111: ...s que les câbles ne font l objet d aucune contrainte et ne sont ni entortillés ni endommagés 2 2 3 Montage Détérioration de l équipement en mode asservissement incendie z Une activation des commandes relatives à l incendie ne doit entraîner aucun endommagement des composants de l installation z N activer les commandes relatives à l incendie que lorsque le contrôle est terminé et quand l installati...

Страница 112: ...tension requise est indiquée sur l étiquette signalétique 2 2 4 Installation Perte de données après une mise à jour du logiciel z Veillez à sauvegarder toutes les données avant de mettre à jour le logiciel 2 3 Signification des avertissements écrits La gravité d un danger est indiquée par les avertissements écrits suivants IMPORTANT Peut entraîner un dysfonctionnement ATTENTION Peut provoquer des ...

Страница 113: ...nible auprès de Siemens Building Technologies Fire Security Products GmbH Co oHG 76181 Karlsruhe Allemagne Directive européenne 2004 108 EC sur la compatibilité électromagnétique Le produit a été testé conformément aux normes suivantes afin de démontrer sa conformité aux exigences de la directive européenne 2004 108 EC Interférences émises EN 61000 6 4 EN 55022 classe A Résistance aux interférence...

Страница 114: ...a norme EN 60950 1 Consommation électrique 15 W max Entrées et sorties Conception raccord enfichable Section 0 2 à 1 5 mm2 Connecteur Compact Flash CF de type I 42 8 x 36 4 x 3 3 mm Carte Compact Flash Plage de températures autorisées 0 à 70 C Vitesse de transmission min 1 Mo s en lecture écriture Capacité de stockage min 4 Go Pile Varta 6032 Profilé Barre de montage conforme à la norme DIN EN 500...

Страница 115: ...ure d exploitation 10 à 55 C Humidité relative 95 rel à T 25 3 C 93 rel à T 40 2 C condensation temporaire permise Facteur de raccordement courant maximum 3 Facteur de raccordement du courant de repos 3 Facteur de connexion d adresse 1 Facteur de raccordement isolateur 1 Protocole FDnet Compatibilité Pour les détails voir le doc n 008331 List of compatibility Indicateur d alarme externe Connecteur...

Страница 116: ...IPswitch couleur 1 3 480 lignes TV PAL 12 Vcc 24 Vca 450 g CLVD1314 3 5 8 2GF1667 8AJ 3 5 8 mm F1 4 1 3 CS 76 6 g CAB1420 2GF1710 8BD Support caméra universel 140 mm 250 g CFVC1317 LP S54561 C61 A1 1 3 CCD 3 7 12 mm Colour Varifocal Dome 540 TVL PAL 12 V DC 24 V AC 3 5 W 290 g 6 Contenu de l emballage z Video Fire Controller z CD des logiciels avec manuel de configuration et manuel de l utilisateu...

Страница 117: ...eint FDnet n est pas connecté Vert FDnet est connecté et fonctionne correctement 2 FDnet activity Vert et clignotant Localisation Éteint Pas d enregistrement vidéo sur la carte Compact Flash ou Aucune carte Compact Flash n est présente 3 Storage Vert et clignotant Accès mémoire à la carte Compact Flash pendant qu un enregistrement est en cours par ex Éteint Périphérique hors tension 4 Power Vert L...

Страница 118: ...le de signal vidéo Off boucles de signal vidéo vers une autre entrée vidéo 5 USB 2 0 max 500 mA 6 LAN RJ45 Connexion réseau 10 100 Mbits Connecteur d E S 2 entrées numériques Commutation via contacts relais 2 sorties numériques Sorties à collecteur ouvert isolées électriquement 5 24 V max 50 mA RS485 Canal de données transparent commande PIZ 7 Entrées sorties audio Non prises en charge 8 Alimentat...

Страница 119: ...que 1 4 Sortie audio 12 Entrée numérique 1 5 Non pris en charge 13 Entrée numérique 2 6 Non pris en charge 14 Entrée numérique 2 7 Sortie numérique 1 15 RS485 D 8 Sortie numérique 1 16 RS485 D Affectation des broches de la plaquette de connexions 8 1 TERRE 2 12 24 Vcc ou 24 Vca 3 12 24 Vcc ou 24 Vca Affectation des broches de la plaquette de connexions 9 1 Ligne d entrée FDnet 2 Ligne d entrée FDn...

Страница 120: ...es Surveillance de la fonction vidéo En cas de dysfonctionnement du Video Fire Controller un message d erreur est envoyé à l équipement de contrôle et signalisation Reportez vous à la section 13 Dépannage 7 3 1 Exemple d utilisation du Video Fire Controller FDV241 Acknowledge Reset Optional User 1 User 2 User 3 User 4 More Alarms ALARM User5 Premises Manned User6 Alarm delay Off FAULT ISOLATION TE...

Страница 121: ...o Fire Controller est équipé du MC link Maintenance and Commissioning Link Via ce lien vous pouvez interroger les données suivantes avec le vérificateur échangeur des détecteurs FDUD29x z configuration non autorisée z liste d erreurs z registre d état Contrôle de fonctionnement La fonction d autotest permet un contrôle automatique du Video Fire Controller Il est néanmoins conseillé de contrôler le...

Страница 122: ...n 4 Caractéristiques techniques ATTENTION Risque de blessures corporelles ou d endommagement de l appareil système résultant d une installation inappropriée Si l appareil n est pas correctement monté il risque de tomber 1 Assurez vous que l appareil s engage correctement dans le rail oméga supérieur 2 Installez des butées de rail de chaque côté de l appareil afin d empêcher tout déplacement latéra...

Страница 123: ... avant de l appareil 2 Retirez le couvercle du boîtier Fermeture de l appareil IMPORTANT Détérioration de l appareil Risque d endommagement lors de fermeture de l appareil Lors de la fermeture de l appareil veillez à ne pas endommager les tiges d extension sur le couvercle du boîtier ou les composants électroniques situés à l intérieur de l appareil 1 Placez le couvercle du boîtier sur l appareil ...

Страница 124: ...ermeture de l appareil 2 Pour éteindre l appareil appuyez sur le bouton ON OFF 1 pendant environ 2 secondes Î L appareil s éteint ce qui peut prendre plusieurs secondes Î Une fois l appareil éteint le témoin d alimentation 2 s éteint également 3 Appuyez sur le bouton ON OFF 1 Î L appareil s amorce Î Le témoin d alimentation 2 s allume 4 Fermez l appareil Reportez vous à la section 9 1 Ouverture fe...

Страница 125: ...istré pendant environ 2 5 heures IMPORTANT Erreurs d enregistrement dues à l utilisation d une mauvaise carte Compact Flash L utilisation d une carte Compact Flash inappropriée peut provoquer des erreurs lors de l enregistrement de données vidéo z Assurez vous que la carte répond aux exigences en matière de plage de températures autorisées 0 70 C de taux de transfert minimum requis 1 Mo s et de ca...

Страница 126: ...de plus amples informations en la matière consultez le manuel de configuration de SISTORE SX CX 8 Formatez la carte Compact Flash Pour de plus amples informations en la matière consultez le manuel de configuration de SISTORE SX CX Retrait de la carte Compact Flash 1 Désactivez la carte Compact Flash Pour de plus amples informations en la matière consultez le manuel de configuration de SISTORE SX C...

Страница 127: ...vidéo 1 Si un bouclage s avère nécessaire réglez la résistance de terminaison 4 sur Off et branchez la rallonge de câble vidéo sur la boucle vidéo 3 3 Branchez un moniteur analogique sur l appareil 2 4 Raccordez le PC client à l appareil 6 à l aide d un câble droit 5 Branchez d abord le câble d alimentation sur l appareil 8 puis sur la source d alimentation 6 Mettez le moniteur analogique sous ten...

Страница 128: ...nfiguration de l équipement de contrôle et signalisation consultez le manuel de configuration et de l utilisateur de la centrale Lecture ou archivage des enregistrements Pour lire ou exporter des séquences enregistrées le PC client doit être à nouveau connecté au Video Fire Controller 1 Raccordez le PC client au Video Fire Controller 6 à l aide d un câble droit 2 Lisez les séquences enregistrées à...

Страница 129: ... périphérique FDnet Centrale de détection d incendie FDV241 1 Caméra Commutateur réseau Client PC Fig 9 Système mono périphérique Fig 10 Branchements sur le Video Fire Controller 1 L appareil est installé sur le rail oméga supérieur Reportez vous à la section 8 Montage mural 2 Branchez une caméra sur l entrée vidéo 1 Si un bouclage s avère nécessaire réglez la résistance de terminaison 4 sur Off e...

Страница 130: ... Logiciels et à la section 11 Configuration 11 Raccordez le Video Fire Controller à la ligne FDnet 9 12 Configurez l appareil sur l équipement de contrôle et signalisation Reportez vous à la section 12 Configuration du FDV241 sur l équipement de contrôle et signalisation Pour plus de détails sur la configuration de l équipement de contrôle et signalisation consultez le manuel de configuration et d...

Страница 131: ...on 7 Mettez le moniteur analogique sous tension Î Peu après l adresse IP de l appareil s affiche sur l écran 8 Répétez les étapes 5 à 7 pour chaque appareil 9 Branchez le PC client sur l alimentation 10 Démarrez le PC client 11 Configurez l adresse IP du PC client Reportez vous à la section 9 7 Configuration de l adresse IP du PC client 12 Installez le logiciel et configurez le Reportez vous à la ...

Страница 132: ...2 fabricant Würth est fourni dans l emballage IMPORTANT z La distance entre le tore magnétique et le périphérique ne doit pas excéder 100 mm z Si le câble d E S utilisé n est pas compatible avec le tore magnétique encliquetable fourni un autre tore magnétique présentant les mêmes propriétés électriques doit être utilisé 1 Branchez le câble d E S sur le port d E S Fig 13 Tore magnétique encliquetab...

Страница 133: ...priétés dans le menu contextuel qui s affiche Î La boîte de dialogue Propriétés de Connexion au réseau local s ouvre 4 Sélectionnez un protocole Internet TCP IP 5 Cliquez sur Propriétés Î La boîte de dialogue Propriétés de Protocole Internet TPC IP s ouvre 6 Sélectionnez l option Utiliser l adresse IP suivante 7 Entrez 169 254 xxx xxx pour l adresse IP et 255 255 0 0 pour le masque de sous réseau ...

Страница 134: ... Carte graphique Avec prise en charge de DirectX version 8 ou ultérieure Cartes graphiques testées ATI Radeon 9200 128 Mo NVIDIA GeForce FX 5200 256 Mo Matrox G450 Matrox G550 Résolution de l écran 1024 x 768 pixels minimum Profondeur des couleurs 16 ou 32 bits profondeur de 24 bits non prise en charge 10 2 Installation des logiciels 1 Insérez le CD dans le lecteur de CD du PC client Î Le programm...

Страница 135: ...Config situé sur le bureau Fig 15 Raccourci SISTORE SX CX Config du bureau 2 Connectez vous au serveur avec le nom d utilisateur et le mot de passe suivants Nom d utilisateur admin Mot de passe admin Î Le logiciel SISTORE SX CX Config démarre 11 2 Ouverture du manuel de configuration de SISTORE SX CX Veuillez vous reporter au manuel de configuration de SISTORE SX CX pour de plus amples information...

Страница 136: ...es enregistrements vidéo avec enregistrement pré et post événement Sortie OUT B commande Démarrage arrêt de l enregistrement vidéo Sortie OUT C commande Non utilisée Sortie OUT D commande Non utilisée Entrées Paramètre Valeur IN 1 IN 2 IN 3 IN 4 Entrée de danger Entrée de statut x Type d entrée Événement désactivé x x x Contrôle d interruption x Circuit d entrée Court circuit et contrôle d interru...

Страница 137: ...rreur logicielle erreur de surveillance Remplacez l appareil Erreur de mémoire Remplacez l appareil Erreur Erreur de communication entre un détecteur et l équipement de contrôle et signalisation Supprimez la cause de l incident 14 Mise au rebut Tous les produits électriques et électroniques doivent être détruits séparément des ordures ménagères par le biais d entreprises de collecte désignées par ...

Страница 138: ...belstrasse 22 CH 6301 Zug Tél 41 41 724 24 24 Fax 41 41 724 35 22 www sbt siemens com 2008 Copyright par Siemens Schweiz AG Les données et la conception peuvent être modifiées sans préavis La fourniture du produit dépend de sa disponibilité Document n A6V10092464 Manuel FD20 Édition 14 11 2008 Répertoire 3 ...

Страница 139: ...Building Technologies Fire Safety and Security Products FDV241 Video Fire Controller Manuale di messa in servizio SISTORE V3 5 ...
Страница 140: ...ati Accettando la presente documentazione l utente riconosce e prende atto di tali diritti e si impegna a non pubblicare in toto o in parte questo documento né gli argomenti ivi trattati né di renderli disponibili a terze parti senza previa autorizzazione esplicita in forma scritta né di utilizzare tale documentazione per altri scopi che esulano dai fini secondo i quali la documentazione è stata c...

Страница 141: ... 2 Livelli di diagnosi in FDnet 17 7 3 3 Modalità degradata nel FDnet 17 8 Installazione a parete 18 9 Messa in opera 19 9 1 Aprire chiudere il dispositivo 19 9 2 Accendere e spegnere il dispositivo 20 9 3 Inserire e rimuovere la scheda Compact Flash 21 9 4 Collegare il Video Fire Controller FDV241 alla FDnet senza connessione al sistema TVCC 23 9 5 Collegare il Video Fire Controller FDV241 alla F...
Страница 142: ......

Страница 143: ...CD a corredo Marchi Tutti i nomi di aziende o prodotti indicati esplicitamente in questo manuale di prodotto sono menzionati solo a scopo identificativo o descrittivo e potrebbero essere marchi di fabbrica o marchi registrati dei rispettivi depositari SISTORE è un marchio di Siemens Building Technologies Fire Security Products GmbH Co oHG Microsoft è un marchio registrato e Windows è un marchio di...

Страница 144: ...ie ed errori di funzionamento Ha una conoscenza tecnica specialistica idonea alla funzione ricoperta e ai prodotti dispositivi sistemi da configurare ha frequentato corsi di formazione riservati ai project engineer erogati dal produttore Personale addetto all installazione Installa il prodotto dispositivo o i componenti di sistema presso la sede d utilizzo Svolge un controllo di funzionamento gene...

Страница 145: ...ne non venga piegato attorcigliato o danneggiato 2 2 3 Messa in opera Danni alle apparecchiature in modalità del comando incendio z In caso di attivazione del comando incendio a scopi di prova è necessario non causare danni a parti dell impianto z Abilitare il comando incendio solo a collaudo terminato e una volta consegnato definitivamente l impianto al cliente Danni derivanti dal montaggio in un...

Страница 146: ...ello 2 2 4 Installazione Perdita di dati a seguito di un aggiornamento del software z Realizzare un backup di tutti i dati prima di aggiornare il software 2 3 Significato degli avvisi e avvertenze scritte La severità del pericolo è indicata dai seguenti avvisi scritti IMPORTANTE Rischio di mal funzionamento CAUTELA Rischio di lesioni minori o danni agli oggetti 2 4 Significato dei simboli di peric...

Страница 147: ...formità UE è disponibile presso Siemens Building Technologies Fire Security Products GmbH Co oHG 76181 Karlsruhe Germania Direttiva europea 2004 108 CE Compatibilità elettromagnetica La conformità con la Direttiva europea 2004 108 CE è stata convalidata e verificata in base ai seguenti standard Interferenza emessa EN 61000 6 4 EN 55022 Classe A Resistenza alle interferenze EN 50130 4 Direttiva eur...

Страница 148: ...ra Low Voltage e LPS Limited Power Source e allo standard EN 60950 1 Consumo Max 15 W Ingressi ed uscite Design connessione a spinotto Diametro 0 2 1 5 mm2 Slot Compact Flash CF Tipo I 42 8 x 36 4 x 3 3 mm Scheda Compact Flash Gamma temperature ammesse 0 70 C Velocità di trasmissione min 1 MB s l s Capacità di archiviazione min 4 GB Batteria Varta 6032 Guida a cappello Guida di montaggio DIN EN 50...

Страница 149: ...5 mA Temperatura di esercizio da 10 a 55 C Umidità relativa 95 rel a T 25 3 C 93 rel a T 40 2 C condensa temporanea ammessa Fattore di carico max corrente 3 Fattore di carico a riposo corrente 3 Fattore di indirizzamento 1 Fattore connessione separatore 1 Protocollo FDnet Compatibilità Per i dettagli consultare il doc no 008331 Elenco compatibilità Indicatore di allarme esterno Connettore indicato...

Страница 150: ... di pollice 480 TVL PAL 12 V CC 24 V CA 0 45 kg CLVD1314 3 5 8 2GF1667 8AJ 3 5 8 mm F1 4 1 3 CS 0 0766 kg CAB1420 2GF1710 8BD Staffa porta telecamera universale 140 mm 0 25 kg CFVC1317 LP S54561 C61 A1 1 3 CCD 3 7 12 mm Colour Varifocal Dome 540 TVL PAL 12 V DC 24 V AC 3 5 W 0 29 kg 6 Fornitura z Video Fire Controller z CD del software con manuale utente e di configurazione z Manuale di messa in s...

Страница 151: ...nsione o arresto Spento FDnet non collegata Verde fisso FDnet collegata e correttamente funzionante 2 Attività FDnet Verde lampeggiante Localizzare Spento Nessuna registrazione video sulla compact flash o Compact Flash non presente 3 Archiviazione Verde lampeggiante Accesso alla memoria della compact flash p e durante una registrazione corso Spento Dispositivo spento 4 Alimentazione Verde fisso Di...

Страница 152: ... non passante Off Segnale video collegato in modo passante loop through 5 USB 2 0 max 500 mA 6 LAN RJ45 Connessione di rete a 10 100 Mbit Connettore I O 2 ingressi digitali Commutazione via contatti a relè 2 uscite digitali Uscite a collettore aperto isolamento elettrico 5 24 V max 50 mA RS485 Canale dati trasparente Controllo PTZ 7 Ingressi Uscite audio Non supportato 8 Alimentazione 12 24 V CC o...

Страница 153: ...Uscita audio 11 Ingresso digitale 1 4 Uscita audio 12 Ingresso digitale 1 5 Non supportato 13 Ingresso digitale 2 6 Non supportato 14 Ingresso digitale 2 7 Uscita digitale 1 15 RS485 D 8 Uscita digitale 1 16 RS485 D Piedinatura blocco terminali a 8 pin 1 GND 2 12 24 V CC o 24 V CA 3 12 24 V CC o 24 V CA Piedinatura blocco terminali a 9 pin 1 FDnet IN LINE 2 FDnet IN LINE 3 FDnet OUT LINE 4 FDnet O...

Страница 154: ...l Video Fire Controller alla centrale verrà inviato un messaggio di errore Vedi sezione 13 Risoluzione di problemi 7 3 1 Esempio di impiego del Video Fire Controller FDV241 Acknowledge Reset Optional User 1 User 2 User 3 User 4 More Alarms ALARM User 5 Premises Manned User 6 Alarm delay Off FAULT ISOLATION TEST Active Fault Off Active Fault Off Remote alarm Alarm Device Active Fault Off Control Fa...
Страница 155: ...servizio interfaccia dell estrattore e tester Con l estrattore e tester FDUD29x è possibile interrogare questa connessione per ottenere le informazioni seguenti z Configurazione non autorizzata z Elenco degli errori z Registro di stato Controllo funzionale Grazie alla funzione di auto test il Video Fire Controller viene controllato automaticamente E tuttavia raccomandabile controllare periodicamen...

Страница 156: ...ulla guida a cappello 1 Fissare la guida a cappello alla parete Vedi sezione 4 Specifiche tecniche CAUTELA Rischio di lesioni alla persona o danni al dispositivo sistema in caso di installazione incorretta Si il dispositivo non viene montato correttamente rischia di cadere 1 Verificare che il dispositivo sia correttamente agganciato alla guida a cappello 2 Fissare il dispositivo sulla guida serran...

Страница 157: ...ello frontale del dispositivo 2 Rimuovere il coperchio della custodia Chiudere il dispositivo IMPORTANTE Danni al dispositivo Rischio di danni durante la chiusura del dispositivo Durante la chiusura del dispositivo accertarsi di non danneggiare i manicotti all interno del coperchio o i componenti elettronici all interno del dispositivo 1 Collocare il coperchio della custodia sul dispositivo 2 Stri...

Страница 158: ... il dispositivo 2 Per spegnere il dispositivo premere l interruttore ON OFF 1 per circa 2 secondi Î Il dispositivo si spegne l operazione potrebbe richiedere svariati secondi Î Quando il dispositivo è spento il LED di alimentazione 2 non è più acceso 3 Premere l interruttore ON OFF 1 Î Il dispositivo si avvia Î Il LED di alimentazione 2 si illumina 4 Chiudere il dispositivo Vedi sezione 9 1 Aprire...

Страница 159: ... MB s lo stream video può essere registrato per circa 2 5 ore IMPORTANTE Errori di registrazione se si utilizza una scheda Compact Flash sbagliata Utilizzando un modello di scheda Compact Flash non corretto è possibile incorrere in errori nel corso della registrazione dei dati video z Verificare che la scheda soddisfi le specifiche di temperatura 0 70 C velocità di trasferimento minima 1 MB s e ca...

Страница 160: ...informazioni su questi aspetti sono disponibili nel manuale di configurazione di SISTORE SX CX 8 Formattare la scheda Compact Flash Maggiori informazioni su questi aspetti sono disponibili nel manuale di configurazione di SISTORE SX CX Rimuovere la scheda Compact Flash 1 Disattivare la scheda Compact Flash Maggiori informazioni su questi aspetti sono disponibili nel manuale di configurazione di SI...

Страница 161: ...e sono necessarie delle connessioni passanti loop through impostare il resistore di terminazione 4 su Off e collegare la prolunga video alla connessione video loop 3 3 Collegare un monitor analogico al dispositivo 2 4 Collegare il PC client PC al dispositivo 6 tramite un cavo patch 5 Collegare il cavo di alimentazione al dispositivo 8 poi ad una presa elettrica 6 Accendere il monitor analogico Î D...

Страница 162: ...one e della centrale rivelazione incendio sono disponibili nel manuale utente di configurazione della centrale Replay o archiviazione di registrazioni Per prendere visione o esportare le sequenze registrate è necessario ricollegare il PC client al Video Fire Controller 1 Collegare il PC client PC al Video Fire Controller 6 tramite un cavo patch 2 Riprodurre le sequenze registrate con il software S...
Страница 163: ...V241 1 Telecamere Switch di rete Client PC Fig 9 Sistema mono dispositivo Fig 10 Connessioni del Video Fire Controller 1 Agire sul dispositivo sulla guida a cappello Vedi sezione 8 Installazione a parete 2 Collegare una telecamera all ingresso video 1 Se sono necessarie delle connessioni passanti loop through impostare il resistore di terminazione 4 su Off e collegare la prolunga video alla connes...

Страница 164: ...di sezione 10 Software e sezione 11 Configurazione 11 Collegare il Video Fire Controller alla FDnet 9 12 Configurare il dispositivo nella centrale rivelazione incendio Vedi sezione 12 Configurare FDV241 nella centrale rivelazione incendio Maggiori informazioni sulla configurazione e della centrale rivelazione incendio sono disponibili nel manuale utente di di configurazione della centrale 9 5 2 Si...
Страница 165: ...ntazione al dispositivo 8 poi ad una presa elettrica 7 Accendere il monitor analogico Î Dopo alcuni istanti sullo schermo compare l indirizzo IP del dispositivo 8 Ripetere i passaggi 5 7 per ciascun dispositivo 9 Collegare il PC client all alimentatore 10 Avviare il PC client 11 Impostare l indirizzo IP del PC client Vedi sezione 9 7 Impostare l indirizzo IP del PC client 12 Installare il software...

Страница 166: ...on guscio a scatto codice 74271132 produttore Würth è incluso nella fornitura IMPORTANTE z La distanza tra il nucleo di ferrite e il dispositivo non deve eccedere i 100 mm z Se il cavo I O utilizzato non è adatto all anello di ferrite fornito utilizzare un altro anello in ferrite con le medesime proprietà elettriche 1 Collegare il cavo di I O alla porta I O Fig 13 Richiudere il nucleo di ferrite s...

Страница 167: ... menu contestuale Î Compare la finestra di dialogo Proprietà della connessione di rete locale 4 Selezionare un Protocollo Internet TCP IP 5 Fare clic su Proprietà Î Compare la finestra di dialogo Proprietà protocollo Internet TCP IP 6 Attivare l opzione Utilizza il seguente indirizzo IP 7 Inserire 169 254 xxx xxx come indirizzo IP e 255 255 0 0 come subnet mask 8 Fare clic su OK 9 Riavviare il PC ...

Страница 168: ...ndows 2000 o Windows XP Scheda grafica Con supporto per DirectX 8 o versione successiva Schede grafiche certificate ATI Radeon 9200 128 MB NVIDIA GeForce FX 5200 256 MB Matrox G450 Matrox G550 Risoluzione schermo Min 1024 x 768 pixel Profondità colore 16 bit o 32 bit 24 bit non supportati 10 2 Installare il software 1 Inserire il CD nell unità CD del PC client Î Il programma d installazione si avv...

Страница 169: ... Fig 15 Icona di SISTORE SX CX Config sul desktop 2 Accedere al server utilizzando il nome utente e la password indicati di seguito Nome utente admin Password admin Î Il software SISTORE SX CX Config viene aperto 11 2 Consultare il manuale di configurazione di SISTORE SX CX Per maggiori informazioni sulle procedure di configurazione consultare il Manuale di configurazione di SISTORE SX CX Per magg...

Страница 170: ...istrazioni video con sequenze pre e post evento Uscita OUT B controlla Avvio Arresto videoregistrazione Uscita OUT C controlla Non utilizzato Uscita OUT D controlla Non utilizzato Ingressi Parametro Valore IN 1 IN 2 IN 3 IN 4 Ingresso di pericolo Ingresso di stato x Tipo ingresso Spento x x x Monitoraggio linea aperta x Circuito ingresso Monitoraggio linea aperta e cortocircuito aperto Ingresso at...

Страница 171: ... alimentazione 1 Controllare la tensione della linea di rivelazione 2 Sostituire il dispositivo Errore software errore watchdog Sostituire il dispositivo Errore di archiviazione Sostituire il dispositivo Error Errore Errore di comunicazione tra un rilevatore e la centrale rivelazione incendio Eliminare la causa del guasto 14 Smaltimento Tutti i prodotti elettrici ed elettronici devono essere smalt...

Страница 172: ...oducts Gubelstrasse 22 CH 6301 Zug Tel 41 41 724 24 24 Fax 41 41 724 35 22 www sbt siemens com 2008 Copyright Siemens Schweiz AG Dati e design soggetti a modifiche senza preavviso Fornitura soggetta alla disponibilità del prodotto Documento Nr A6V10092464 Manuale FD20 Edizione 14 11 2008 Registro 3 ...

Страница 173: ......

Страница 174: ...Security Products Gubelstrasse 22 CH 6301 Zug Tel 41 41 724 24 24 Fax 41 41 724 35 22 www sbt siemens com 2008 Copyright by Siemens Schweiz AG Data and design subject to change without notice Supply subject to availability Document No A6V10092464 Manual FD20 Edition 14 11 2008 Section 3 ...

Отзывы: